
Getting Started
Page 2
... supply and power supply cord provided with the printer software. Refer service or repairs, other replacement parts. This product is not responsible for the use of specific Lexmark components. Operating system notice All features and functions are operating system-dependent. CAUTION: Do not... set up this product or the manufacturer's authorized replacement power supply and power supply cord. Lexmark is designed, tested, and approved...
... supply and power supply cord provided with the printer software. Refer service or repairs, other replacement parts. This product is not responsible for the use of specific Lexmark components. Operating system notice All features and functions are operating system-dependent. CAUTION: Do not... set up this product or the manufacturer's authorized replacement power supply and power supply cord. Lexmark is designed, tested, and approved...
Getting Started
Page 3
...printer for wireless printing 14 Setting up the printer using a USB cable...15 Installing the printer on additional network computers 16 Wireless networking...17 Networking overview...17 Learning about the printer 22 Understanding the parts of the printer 22 Learning about the software 24 Using the printer software...Using the Options menu ...27 Using the Print Properties tabs...27 Using the Toolbar...28 Resetting printer software settings to defaults 29 Maintaining the printer 30 Changing print cartridges...30 Removing a used print cartridge...30 Installing print cartridges...31 Ordering ...
...printer for wireless printing 14 Setting up the printer using a USB cable...15 Installing the printer on additional network computers 16 Wireless networking...17 Networking overview...17 Learning about the printer 22 Understanding the parts of the printer 22 Learning about the software 24 Using the printer software...Using the Options menu ...27 Using the Print Properties tabs...27 Using the Toolbar...28 Resetting printer software settings to defaults 29 Maintaining the printer 30 Changing print cartridges...30 Removing a used print cartridge...30 Installing print cartridges...31 Ordering ...
Getting Started
Page 6
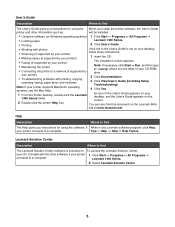
... The User's Guide gives you install the printer software, the User's Guide printer and other software, if your printer 1 Click Start ΠPrograms or All Programs Πconnects to a computer. your printer supports Macintosh operating systems, see the Mac Help: 4 Click Yes. 1 From the Finder desktop, double-click the Lexmark 1400 Series folder. Help Description Where to...
... The User's Guide gives you install the printer software, the User's Guide printer and other software, if your printer 1 Click Start ΠPrograms or All Programs Πconnects to a computer. your printer supports Macintosh operating systems, see the Mac Help: 4 Click Yes. 1 From the Finder desktop, double-click the Lexmark 1400 Series folder. Help Description Where to...
Getting Started
Page 24
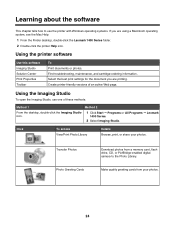
..., CD, or PictBridge-enabled digital camera to use one of an active Web page. Learning about the software This chapter tells how to the Photo Library. Create printer-friendly versions of these methods: Method 1 Method 2 From the desktop, double-click the Imaging Studio icon... Help: 1 From the Finder desktop, double-click the Lexmark 1400 Series folder. 2 Double-click the printer Help icon. Transfer Photos Photo Greeting Cards Download photos from your photos. Using the printer software Use this software Imaging Studio Solution Center Print Properties Toolbar To Print documents ...
..., CD, or PictBridge-enabled digital camera to use one of an active Web page. Learning about the software This chapter tells how to the Photo Library. Create printer-friendly versions of these methods: Method 1 Method 2 From the desktop, double-click the Imaging Studio icon... Help: 1 From the Finder desktop, double-click the Lexmark 1400 Series folder. 2 Double-click the printer Help icon. Transfer Photos Photo Greeting Cards Download photos from your photos. Using the printer software Use this software Imaging Studio Solution Center Print Properties Toolbar To Print documents ...

Getting Started
Page 29
Resetting printer software settings to defaults Windows 2000, Windows XP, or Windows Vista users: 1 Click Start ΠSettings ΠPrinters or Printers and Faxes. 2 Right-click the Lexmark 1400 Series icon. 3 Click Printing Preferences. 4 Click the Save Settings menu. 5 From the Restore section, select Factory Settings (Defaults). Note: Factory default settings cannot be deleted. 29 Click Preview To Preview a Web page before printing.
Resetting printer software settings to defaults Windows 2000, Windows XP, or Windows Vista users: 1 Click Start ΠSettings ΠPrinters or Printers and Faxes. 2 Right-click the Lexmark 1400 Series icon. 3 Click Printing Preferences. 4 Click the Save Settings menu. 5 From the Restore section, select Factory Settings (Defaults). Note: Factory default settings cannot be deleted. 29 Click Preview To Preview a Web page before printing.
Getting Started
Page 35
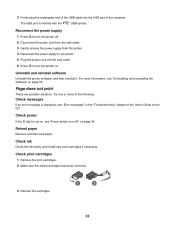
...the CD. Check power If the light is not on, see "Uninstalling and reinstalling the software" on page 34. Reload paper Remove and then load paper. Uninstall and reinstall software Uninstall the printer software, and then reinstall it. Try one or more information, see "Power button is not... lit" on page 50. Reconnect the power supply 1 Press to turn the printer off. 2 Disconnect the power cord from the ...
...the CD. Check power If the light is not on, see "Uninstalling and reinstalling the software" on page 34. Reload paper Remove and then load paper. Uninstall and reinstall software Uninstall the printer software, and then reinstall it. Try one or more information, see "Power button is not... lit" on page 50. Reconnect the power supply 1 Press to turn the printer off. 2 Disconnect the power cord from the ...
Getting Started
Page 36
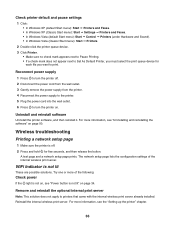
...on, see the "Setting up the printer" chapter. 36 Reinstall the internal wireless print server. Remove and reinstall the optional internal print server Note: This solution does not apply to print. Uninstall and reinstall software Uninstall the printer software, and then reinstall it. Reconnect power... supply 1 Press to turn the printer on page 34. For more of the internal wireless print server. For more information, see "Power button is...
...on, see the "Setting up the printer" chapter. 36 Reinstall the internal wireless print server. Remove and reinstall the optional internal print server Note: This solution does not apply to print. Uninstall and reinstall software Uninstall the printer software, and then reinstall it. Reconnect power... supply 1 Press to turn the printer on page 34. For more of the internal wireless print server. For more information, see "Power button is...
Getting Started
Page 44
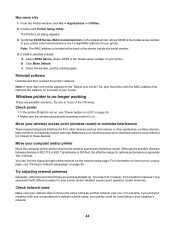
...-digit MAC address of your neighbor's network. 44 For example, if you . Reinstall software Uninstall and then reinstall the printer software. Although the possible distance between devices in the "Select your printer and/or wireless access point (wireless router) antennas. Try one printer appears in 802.11b or 802.11g networks is 300 feet, the effective range...
...-digit MAC address of your neighbor's network. 44 For example, if you . Reinstall software Uninstall and then reinstall the printer software. Although the possible distance between devices in the "Select your printer and/or wireless access point (wireless router) antennas. Try one printer appears in 802.11b or 802.11g networks is 300 feet, the effective range...
Getting Started
Page 50
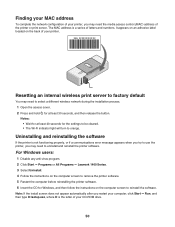
... Uninstalling and reinstalling the software If the printer is not functioning properly, or if a communications error message appears when you try to use the printer, you may need to select a different wireless network during the installation ...wireless print server to factory default You may need the media access control (MAC) address of the printer or print server. For Windows users: 1 Disable any anti-virus program. 2 Click Start ΠPrograms or All Programs ΠLexmark 1400 Series. 3 Select Uninstall. 4 Follow the instructions on the computer screen to remove the printer software...
... Uninstalling and reinstalling the software If the printer is not functioning properly, or if a communications error message appears when you try to use the printer, you may need to select a different wireless network during the installation ...wireless print server to factory default You may need the media access control (MAC) address of the printer or print server. For Windows users: 1 Disable any anti-virus program. 2 Click Start ΠPrograms or All Programs ΠLexmark 1400 Series. 3 Select Uninstall. 4 Follow the instructions on the computer screen to remove the printer software...
Getting Started
Page 51
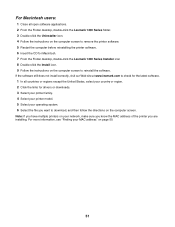
.... 2 From the Finder desktop, double-click the Lexmark 1400 Series folder. 3 Double-click the Uninstaller icon. 4 Follow the instructions on the computer screen to remove the printer software. 5 Restart the computer before reinstalling the printer software. 6 Insert the CD for drivers or downloads. 3 Select your printer family. 4 Select your printer model. 5 Select your operating system. 6 Select the...
.... 2 From the Finder desktop, double-click the Lexmark 1400 Series folder. 3 Double-click the Uninstaller icon. 4 Follow the instructions on the computer screen to remove the printer software. 5 Restart the computer before reinstalling the printer software. 6 Insert the CD for drivers or downloads. 3 Select your printer family. 4 Select your printer model. 5 Select your operating system. 6 Select the...

User's Guide
Page 2
... product and easily accessible. Operating system notice All features and functions are operating system-dependent. Important safety information Use only the power supply and power supply cord provided with the printer software. SAVE THESE INSTRUCTIONS. Refer service or repairs, other replacement parts. Lexmark is not responsible for the use this product or make any...
... product and easily accessible. Operating system notice All features and functions are operating system-dependent. Important safety information Use only the power supply and power supply cord provided with the printer software. SAVE THESE INSTRUCTIONS. Refer service or repairs, other replacement parts. Lexmark is not responsible for the use this product or make any...
User's Guide
Page 3
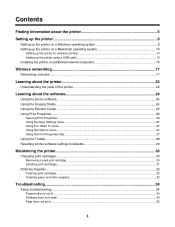
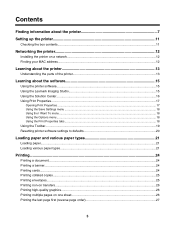
Contents Finding information about the printer 7 Setting up the printer 11 Checking the box contents...11 Networking the printer 12 Installing the printer on a network...12 Finding your MAC address...12 Learning about the printer 13 Understanding the parts of the printer 13 Learning about the software 15 Using the printer software...15 Using the Lexmark Imaging Studio...15 Using the...
Contents Finding information about the printer 7 Setting up the printer 11 Checking the box contents...11 Networking the printer 12 Installing the printer on a network...12 Finding your MAC address...12 Learning about the printer 13 Understanding the parts of the printer 13 Learning about the software 15 Using the printer software...15 Using the Lexmark Imaging Studio...15 Using the...
User's Guide
Page 8
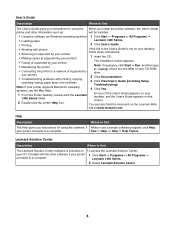
...printer software, the User's Guide printer and other software, if your printer 1 Click Start Œ Programs or All Programs Œ connects to a network (if supported by your printer) The installation screen appears. • Maintaining the printer Note: If necessary, click Start Œ Run, and then type D:\setup, where D is included on To access the Lexmark...When you instructions for using the software, if While in any Lexmark software program, click Help, your printer connects to find this document on the screen. 2 Double-click the printer Help icon. It installs with ...
...printer software, the User's Guide printer and other software, if your printer 1 Click Start Œ Programs or All Programs Œ connects to a network (if supported by your printer) The installation screen appears. • Maintaining the printer Note: If necessary, click Start Œ Run, and then type D:\setup, where D is included on To access the Lexmark...When you instructions for using the software, if While in any Lexmark software program, click Help, your printer connects to find this document on the screen. 2 Double-click the printer Help icon. It installs with ...

User's Guide
Page 15
... operating system, see the Mac Help: 1 From the Finder desktop, double-click the Lexmark 1400 Series folder. 2 Double-click the printer Help icon. Learning about the software This chapter tells how to the Photo Library. Using the printer software Use this software Lexmark Imaging Studio Solution Center Print Properties Toolbar To Print documents or photos. Select the...
... operating system, see the Mac Help: 1 From the Finder desktop, double-click the Lexmark 1400 Series folder. 2 Double-click the printer Help icon. Learning about the software This chapter tells how to the Photo Library. Using the printer software Use this software Lexmark Imaging Studio Solution Center Print Properties Toolbar To Print documents or photos. Select the...
User's Guide
Page 20
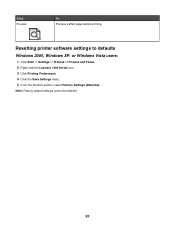
Resetting printer software settings to defaults Windows 2000, Windows XP, or Windows Vista users: 1 Click Start ΠSettings ΠPrinters or Printers and Faxes. 2 Right-click the Lexmark 1400 Series icon. 3 Click Printing Preferences. 4 Click the Save Settings menu. 5 From the Restore section, select Factory Settings (Defaults). Note: Factory default settings cannot be deleted. 20 Click Preview To Preview a Web page before printing.
Resetting printer software settings to defaults Windows 2000, Windows XP, or Windows Vista users: 1 Click Start ΠSettings ΠPrinters or Printers and Faxes. 2 Right-click the Lexmark 1400 Series icon. 3 Click Printing Preferences. 4 Click the Save Settings menu. 5 From the Restore section, select Factory Settings (Defaults). Note: Factory default settings cannot be deleted. 20 Click Preview To Preview a Web page before printing.

User's Guide
Page 26
..., select Photo. 6 From the Paper Type section, select Use printer sensor to let the printer select the paper type for you. Select Normal if you have a program that automatically flips the image. 5 Click OK to close any printer software dialogs that are open. 6 Print the iron-on transfers into ...the printer. Note: To manually select a paper type, select Use my choice. 7 From the drop-down menu, select a...
..., select Photo. 6 From the Paper Type section, select Use printer sensor to let the printer select the paper type for you. Select Normal if you have a program that automatically flips the image. 5 Click OK to close any printer software dialogs that are open. 6 Print the iron-on transfers into ...the printer. Note: To manually select a paper type, select Use my choice. 7 From the drop-down menu, select a...

User's Guide
Page 27
... in or out, or select whether to view the Web page before printing: a Click Preview. Printing transparencies 1 Load up to create a printer-friendly version of any printer software dialog boxes that are open. 7 Print the document. Printing the last page first (reverse page order) 1 Load paper. 2 With a document... or Print. Printing a Web page You can use the Toolbar to 10 transparencies. 2 With your print settings: a From the toolbar area, click Lexmark ΠPage Setup. Note: For additional print setting options, see "Using Print Properties" on page 17. 4 If you want to print text and...
... in or out, or select whether to view the Web page before printing: a Click Preview. Printing transparencies 1 Load up to create a printer-friendly version of any printer software dialog boxes that are open. 7 Print the document. Printing the last page first (reverse page order) 1 Load paper. 2 With a document... or Print. Printing a Web page You can use the Toolbar to 10 transparencies. 2 With your print settings: a From the toolbar area, click Lexmark ΠPage Setup. Note: For additional print setting options, see "Using Print Properties" on page 17. 4 If you want to print text and...
User's Guide
Page 34
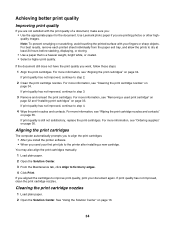
...contacts" on page 34. Aligning the print cartridges The computer automatically prompts you to align the print cartridges: • After you install the printer software. • When you aligned the cartridges to improve print quality, print your document again. If print quality has not improved, clean the ...you are printing photos or other highquality images. If print quality has not improved, continue to fix blurry edges. 4 Click Print. Use Lexmark photo paper if you are not satisfied with your first print job to dry at least 24 hours before stacking, displaying, or storing. &#...
...contacts" on page 34. Aligning the print cartridges The computer automatically prompts you to align the print cartridges: • After you install the printer software. • When you aligned the cartridges to improve print quality, print your document again. If print quality has not improved, clean the ...you are printing photos or other highquality images. If print quality has not improved, continue to fix blurry edges. 4 Click Print. Use Lexmark photo paper if you are not satisfied with your first print job to dry at least 24 hours before stacking, displaying, or storing. &#...
User's Guide
Page 40
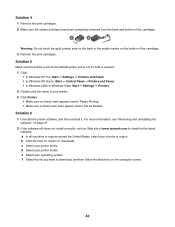
Solution 6 1 Uninstall the printer software, and then reinstall it. b Click the links for the latest software. d Select your operating system. e Select your printer model. a In all countries or regions except the United States, select your printer family. c Select your country or region. f Select the file you want...check mark does appear next to check for drivers or downloads. Solution 5 Make sure the printer is set as the default printer and is not on page 47. 2 If the software still does not install correctly, visit our Web site at www.lexmark.com to Set As Default.
Solution 6 1 Uninstall the printer software, and then reinstall it. b Click the links for the latest software. d Select your operating system. e Select your printer model. a In all countries or regions except the United States, select your printer family. c Select your country or region. f Select the file you want...check mark does appear next to check for drivers or downloads. Solution 5 Make sure the printer is set as the default printer and is not on page 47. 2 If the software still does not install correctly, visit our Web site at www.lexmark.com to Set As Default.
User's Guide
Page 42
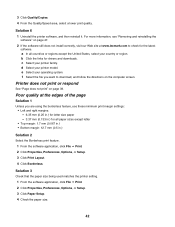
...lexmark.com to check for letter size paper - 3.37 mm (0.133 in .) Solution 2 Select the Borderless print feature. 1 From the software application, click File ΠPrint. 2 Click Properties, Preferences, Options, or Setup. 3 Click Print Layout. 4 Click Borderless. Solution 6 1 Uninstall the printer software, and then reinstall it. Printer... does not print or respond See "Page does not print" on page 39. Solution 3 Check that the paper size being used matches the printer setting. 1 From the software application, click ...
...lexmark.com to check for letter size paper - 3.37 mm (0.133 in .) Solution 2 Select the Borderless print feature. 1 From the software application, click File ΠPrint. 2 Click Properties, Preferences, Options, or Setup. 3 Click Print Layout. 4 Click Borderless. Solution 6 1 Uninstall the printer software, and then reinstall it. Printer... does not print or respond See "Page does not print" on page 39. Solution 3 Check that the paper size being used matches the printer setting. 1 From the software application, click ...


