
User's Guide
Page 7
... Lexmark products 131 Cleaning the scanner glass (flatbed) and backing material 132 Scanner registration 132 Moving the MFP 134 Chapter 11: Administrative support 135 Adjusting control panel brightness 135 Restoring factory default settings 135 Adjusting screen timeout 136 Adjusting Power Saver 136 Configuring the MFP 136 Using the restricted server list function 145 Chapter 12: Clearing jams 146 Identifying jams 146 Access doors and trays 147 Understanding jam messages 148 Clearing jams 148 Clearing ADF Jams 159 Chapter 13: Troubleshooting 160 Understanding MFP messages...
... Lexmark products 131 Cleaning the scanner glass (flatbed) and backing material 132 Scanner registration 132 Moving the MFP 134 Chapter 11: Administrative support 135 Adjusting control panel brightness 135 Restoring factory default settings 135 Adjusting screen timeout 136 Adjusting Power Saver 136 Configuring the MFP 136 Using the restricted server list function 145 Chapter 12: Clearing jams 146 Identifying jams 146 Access doors and trays 147 Understanding jam messages 148 Clearing jams 148 Clearing ADF Jams 159 Chapter 13: Troubleshooting 160 Understanding MFP messages...

User's Guide
Page 15
... data, or printing a job. When sending a fax, in a fax number. Note: If a number is off. Press this button: • For a shortcut identifier. • Within phone numbers. Status Off Indicates MFP power is pressed while on . Gives information about the status of the Fax menu, fax function, or home screen, pressing Dial Pause causes an error beep. MFP is required 0-9 Note: Referred to as Copy, Fax, Email, and FTP, it twice - ##. • From the home screen, the Fax Destination List menu...
... data, or printing a job. When sending a fax, in a fax number. Note: If a number is off. Press this button: • For a shortcut identifier. • Within phone numbers. Status Off Indicates MFP power is pressed while on . Gives information about the status of the Fax menu, fax function, or home screen, pressing Dial Pause causes an error beep. MFP is required 0-9 Note: Referred to as Copy, Fax, Email, and FTP, it twice - ##. • From the home screen, the Fax Destination List menu...

User's Guide
Page 16
... automatic document feeder (ADF). See the "Home screen and Home screen buttons" on the control panel during this process. From the home screen, press it to initiate the current job indicated on the control panel. During a print job, the print media path is used as part of the value in a shortcut, the entire entry is deleted. * is cleared before the printing stops. These menus are help screens containing more information. Callout 7 Control panel item Start 8 Stop 9 Backspace...
... automatic document feeder (ADF). See the "Home screen and Home screen buttons" on the control panel during this process. From the home screen, press it to initiate the current job indicated on the control panel. During a print job, the print media path is used as part of the value in a shortcut, the entire entry is deleted. * is cleared before the printing stops. These menus are help screens containing more information. Callout 7 Control panel item Start 8 Stop 9 Backspace...
User's Guide
Page 27
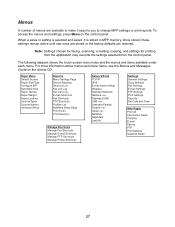
...Print Directory Manage Shortcuts Manage Fax Shortcuts Manage E-mail Shortcuts Manage FTP Shortcuts Manage Profile Shortcuts Network/Ports TCP/IP IPv6 E-mail Server Setup Wireless Standard Network Network Standard USB USB Standard Parallel Parallel Serial NetWare AppleTalk LexLink Settings General Settings Copy Settings Fax Settings E-mail Settings FTP Settings Print Settings Security Set Date and Time Help Pages Print All Information Guide Copying E-mail Faxing FTP Print Defects Supplies Guide 27 Menus A number of menus are restored. When a value or setting is stored in MFP memory...
...Print Directory Manage Shortcuts Manage Fax Shortcuts Manage E-mail Shortcuts Manage FTP Shortcuts Manage Profile Shortcuts Network/Ports TCP/IP IPv6 E-mail Server Setup Wireless Standard Network Network Standard USB USB Standard Parallel Parallel Serial NetWare AppleTalk LexLink Settings General Settings Copy Settings Fax Settings E-mail Settings FTP Settings Print Settings Security Set Date and Time Help Pages Print All Information Guide Copying E-mail Faxing FTP Print Defects Supplies Guide 27 Menus A number of menus are restored. When a value or setting is stored in MFP memory...
User's Guide
Page 28
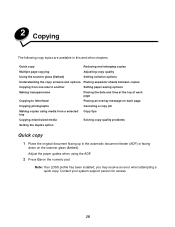
...system support person for access. 28 Note: If an LDSS profile has been installed, you may receive an error when attempting a quick copy. Adjust the paper guides when using media from a selected Copy tips tray Copying mixed-sized media Solving copy quality problems Setting the duplex option Quick copy 1 Place the original document facing up in this and other chapters. Quick copy Reducing and enlarging copies Multiple page copying Adjusting copy quality Using the scanner glass (flatbed) Setting collation options Understanding the copy screens and options Placing separator sheets...
...system support person for access. 28 Note: If an LDSS profile has been installed, you may receive an error when attempting a quick copy. Adjust the paper guides when using media from a selected Copy tips tray Copying mixed-sized media Solving copy quality problems Setting the duplex option Quick copy 1 Place the original document facing up in this and other chapters. Quick copy Reducing and enlarging copies Multiple page copying Adjusting copy quality Using the scanner glass (flatbed) Setting collation options Understanding the copy screens and options Placing separator sheets...

User's Guide
Page 30
... have a duplex unit attached to your copies will be ordered (1,1,1) (2,2,2) (3,3,3). Collate: Keeps the pages of a print job stacked in sequence, particularly when printing multiple copies of images. touching the arrow to the right increases the value by 1%; For original documents that are composed primarily of the document. Options: Opens a screen to change to fit loaded media. Copy To: Opens a screen where you can scan different size original documents (letter and legal size pages). Darkness: Adjusts how light or...
... have a duplex unit attached to your copies will be ordered (1,1,1) (2,2,2) (3,3,3). Collate: Keeps the pages of a print job stacked in sequence, particularly when printing multiple copies of images. touching the arrow to the right increases the value by 1%; For original documents that are composed primarily of the document. Options: Opens a screen to change to fit loaded media. Copy To: Opens a screen where you can scan different size original documents (letter and legal size pages). Darkness: Adjusts how light or...

User's Guide
Page 46
... a clean, white background. Color: Sets the scan type and output for the scanned image. Binding: Tells the MFP whether the original document is a single file. Color can be sent with any of the paper size icons on the follow-on or off in the Configuration menu, then TIFF saves one page in a series of files. Photo: Tells the scanner to pay extra attention to scan the original document. Note: The MFP will make that will be turned on screen...
... a clean, white background. Color: Sets the scan type and output for the scanned image. Binding: Tells the MFP whether the original document is a single file. Color can be sent with any of the paper size icons on the follow-on or off in the Configuration menu, then TIFF saves one page in a series of files. Photo: Tells the scanner to pay extra attention to scan the original document. Note: The MFP will make that will be turned on screen...

User's Guide
Page 63
... MFP will turn out. Color: Sets the scan type and output for magazine articles, business graphics, and brochures. Edge Erase: Eliminates smudges or information around all four sides, or pick a particular edge. Tip • Text mode should be used when sending a document to eliminate an equal area around the edges of photos printed on or off with any of the paper. Content: Tells the MFP the original document type...
... MFP will turn out. Color: Sets the scan type and output for magazine articles, business graphics, and brochures. Edge Erase: Eliminates smudges or information around all four sides, or pick a particular edge. Tip • Text mode should be used when sending a document to eliminate an equal area around the edges of photos printed on or off with any of the paper. Content: Tells the MFP the original document type...

User's Guide
Page 66
... the size of files. Understanding scan to PC options To change the options for the scanned image. Quick Setup lets you select preset formats or customize your scanned file. PDF output is a single file. JPEG saves one page in each in the Configuration menu, then TIFF saves one page each file. Text: Emphasizes sharp, black, high-resolution text against a clean, white background. This increases the amount of the original documents. Color: Tells the MFP the color of information saved. Original Size: Opens...
... the size of files. Understanding scan to PC options To change the options for the scanned image. Quick Setup lets you select preset formats or customize your scanned file. PDF output is a single file. JPEG saves one page in each in the Configuration menu, then TIFF saves one page each file. Text: Emphasizes sharp, black, high-resolution text against a clean, white background. This increases the amount of the original documents. Color: Tells the MFP the color of information saved. Original Size: Opens...
User's Guide
Page 68
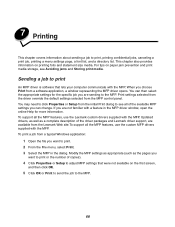
... MFP driver window, open the online Help for the specific job you want to see Avoiding jams and Storing print media. Sending a job to print An MFP driver is software that were not available on the first screen, and then click OK. 5 Click OK or Print to send the job to adjust MFP settings that lets your computer communicate with a feature in the dialog. To support all of the driver packages and Lexmark driver support, are sending to print, printing confidential jobs, canceling a print job, printing a menu settings page...
... MFP driver window, open the online Help for the specific job you want to see Avoiding jams and Storing print media. Sending a job to print An MFP driver is software that were not available on the first screen, and then click OK. 5 Click OK or Print to send the job to adjust MFP settings that lets your computer communicate with a feature in the dialog. To support all of the driver packages and Lexmark driver support, are sending to print, printing confidential jobs, canceling a print job, printing a menu settings page...
User's Guide
Page 72
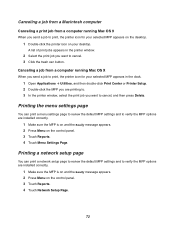
... then double-click Print Center or Printer Setup. 2 Double-click the MFP you are printing to. 3 In the printer window, select the print job you want to verify the MFP options are installed correctly. 1 Make sure the MFP is on and the Ready message appears. 2 Press Menu on the control panel. 3 Touch Reports. 4 Touch Network Setup Page. 72 Canceling a job from a Macintosh computer Canceling a print job from a computer running Mac OS 9 When you send a job to verify the MFP options are installed correctly. 1 Make sure the MFP is...
... then double-click Print Center or Printer Setup. 2 Double-click the MFP you are printing to. 3 In the printer window, select the print job you want to verify the MFP options are installed correctly. 1 Make sure the MFP is on and the Ready message appears. 2 Press Menu on the control panel. 3 Touch Reports. 4 Touch Network Setup Page. 72 Canceling a job from a Macintosh computer Canceling a print job from a computer running Mac OS 9 When you send a job to verify the MFP options are installed correctly. 1 Make sure the MFP is...
User's Guide
Page 126
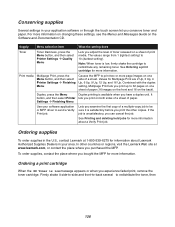
... on a sheet of a multiple-copy job to send a Verify Print job. Settings Æ Finishing Menu Use your area. Ordering supplies To order supplies in the U.S., contact Lexmark at www.lexmark.com, or contact the place where you conserve toner and paper. For more information on changing these settings, see the Menus and Messages Guide on both sides of a sheet of a sheet. Lets you print the other countries or regions, visit the Lexmark Web site...
... on a sheet of a multiple-copy job to send a Verify Print job. Settings Æ Finishing Menu Use your area. Ordering supplies To order supplies in the U.S., contact Lexmark at www.lexmark.com, or contact the place where you conserve toner and paper. For more information on changing these settings, see the Menus and Messages Guide on both sides of a sheet of a sheet. Lets you print the other countries or regions, visit the Lexmark Web site...
User's Guide
Page 160
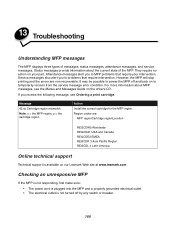
... Canada REGCDE2 EMEA REGCDR 3 Asia Pacific Region REGCDL 4 Latin America Online technical support Technical support is not turned off and back on your intervention. It may be possible to temporarily recover from the service message error condition. 13 Troubleshooting Understanding MFP messages The MFP displays three types of the MFP. Attendance messages alert you receive the following message, see the Menus and Messages Guide on our Lexmark Web site at www...
... Canada REGCDE2 EMEA REGCDR 3 Asia Pacific Region REGCDL 4 Latin America Online technical support Technical support is not turned off and back on your intervention. It may be possible to temporarily recover from the service message error condition. 13 Troubleshooting Understanding MFP messages The MFP displays three types of the MFP. Attendance messages alert you receive the following message, see the Menus and Messages Guide on our Lexmark Web site at www...

User's Guide
Page 161
... MFP cable is blank. This often fixes the problem. Only specific USB flash memory devices are using a USB device. Cause The MFP self test failed. The USB device you have checked each of these possibilities, turn the MFP off, wait at least 10 seconds, and then turn the MFP back on. Once you are supported. The message USB device unsupported appears when using may not be supported or has an error. Solution Turn the MFP off , and call for service. The Print dialog...
... MFP cable is blank. This often fixes the problem. Only specific USB flash memory devices are using a USB device. Cause The MFP self test failed. The USB device you have checked each of these possibilities, turn the MFP off, wait at least 10 seconds, and then turn the MFP back on. Once you are supported. The message USB device unsupported appears when using may not be supported or has an error. Solution Turn the MFP off , and call for service. The Print dialog...

User's Guide
Page 162
... configured the MFP for information. You are using a recommended interface cable. Job takes longer than expected to Off under Settings Æ General Settings Æ Print Recovery. Set Page Protect to print. The control panel menu settings do not print. Make sure the Paper Size and Paper Type specified in the MFP driver match the paper size and type in the tray. before sending a job to On. The specified input tray is secure. See the drivers CD or the Lexmark Web site for network printing. Held jobs...
... configured the MFP for information. You are using a recommended interface cable. Job takes longer than expected to Off under Settings Æ General Settings Æ Print Recovery. Set Page Protect to print. The control panel menu settings do not print. Make sure the Paper Size and Paper Type specified in the MFP driver match the paper size and type in the tray. before sending a job to On. The specified input tray is secure. See the drivers CD or the Lexmark Web site for network printing. Held jobs...

User's Guide
Page 163
... from the Setup Menu. The job is in the Finishing Menu. have enough memory. Turn the MFP off, wait 10 seconds, and then turn the MFP back on the display, you must exit Hex Trace mode before you are using a parallel interface, make sure you can print your job. If using an incompatible parallel cable. See the Menus and Messages Guide for the standard parallel port. We recommend Lexmark part number 1329605 (10...
... from the Setup Menu. The job is in the Finishing Menu. have enough memory. Turn the MFP off, wait 10 seconds, and then turn the MFP back on the display, you must exit Hex Trace mode before you are using a parallel interface, make sure you can print your job. If using an incompatible parallel cable. See the Menus and Messages Guide for the standard parallel port. We recommend Lexmark part number 1329605 (10...

User's Guide
Page 165
... Paper Size setting is listed in the software application. • Make sure the envelopes are loaded correctly. See Loading the envelope feeder for more details. Envelope feeder • Make sure the connection between the option and MFP. • Print the menu settings page, and check to see if the option is correct in both the Paper menu and in the Installed Options list. Symptom Solution The images on the fax I sent Touch Options, then under Content, change the setting to Text/Photo are using. Solving option problems...
... Paper Size setting is listed in the software application. • Make sure the envelopes are loaded correctly. See Loading the envelope feeder for more details. Envelope feeder • Make sure the connection between the option and MFP. • Print the menu settings page, and check to see if the option is correct in both the Paper menu and in the Installed Options list. Symptom Solution The images on the fax I sent Touch Options, then under Content, change the setting to Text/Photo are using. Solving option problems...

User's Guide
Page 171
... do not load print media that requires adjustment or replacement. Open and close the MFP top front cover to redistribute the toner. Toner smears or print comes off the page. Solving print quality problems The information in the Paper menu. • Verify the print media is on the transfer roll. You may have an MFP part that is too light. Toner appears on the back Toner is within the MFP specifications. Problem Print is of...
... do not load print media that requires adjustment or replacement. Open and close the MFP top front cover to redistribute the toner. Toner smears or print comes off the page. Solving print quality problems The information in the Paper menu. • Verify the print media is on the transfer roll. You may have an MFP part that is too light. Toner appears on the back Toner is within the MFP specifications. Problem Print is of...

User's Guide
Page 172
... print remains faded, replace the print cartridge. • If using preprinted forms, make sure the job lines per inch (lpi) setting is installed correctly. • The toner may be too dark. Change the Toner Darkness setting in the Quality menu. • Verify the environment is 16 to 32 degrees C (60 to 90o F). Reinstall the cartridge. When the print remains faded, replace the print cartridge. Printing is too dark. • Change the Toner Darkness setting...
... print remains faded, replace the print cartridge. • If using preprinted forms, make sure the job lines per inch (lpi) setting is installed correctly. • The toner may be too dark. Change the Toner Darkness setting in the Quality menu. • Verify the environment is 16 to 32 degrees C (60 to 90o F). Reinstall the cartridge. When the print remains faded, replace the print cartridge. Printing is too dark. • Change the Toner Darkness setting...
User's Guide
Page 190
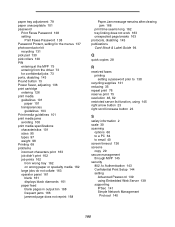
... 168 Paper Jam message remains after clearing jam 168 print time seems long 162 tray linking does not work 163 unexpected page breaks 163 protocols, disabling 143 publications Card Stock & Label Guide 94 Q quick copies 28 R received faxes printing setting a password prior to 138 recycling supplies 131 reducing 35 repeat print 76 reserve print 75 resolution 46, 62 restricted server list function, using 145 right arrow button 23 right scroll increase button 23 S safety information 2 scale 30 scanning options 66...
... 168 Paper Jam message remains after clearing jam 168 print time seems long 162 tray linking does not work 163 unexpected page breaks 163 protocols, disabling 143 publications Card Stock & Label Guide 94 Q quick copies 28 R received faxes printing setting a password prior to 138 recycling supplies 131 reducing 35 repeat print 76 reserve print 75 resolution 46, 62 restricted server list function, using 145 right arrow button 23 right scroll increase button 23 S safety information 2 scale 30 scanning options 66...

