
User's Guide
Page 52
Printing envelopes 1 Load envelopes. 2 From the software application, click File Œ Print. 3 Click Properties, Preferences, Options, or Setup. 4 From the "I Want To" menu, select Print on an envelope. 5 From the Envelope Size list, select the envelope size loaded. 6 Select Portrait or Landscape orientation. Transparencies may require up to 15 minutes to print with... box. 6 If you want to dry. Notes: • Most envelopes use landscape orientation. • Make sure the same orientation is also selected in the software application. 7 Click OK. 8 Click OK. 9 Click OK or Print.
Printing envelopes 1 Load envelopes. 2 From the software application, click File Œ Print. 3 Click Properties, Preferences, Options, or Setup. 4 From the "I Want To" menu, select Print on an envelope. 5 From the Envelope Size list, select the envelope size loaded. 6 Select Portrait or Landscape orientation. Transparencies may require up to 15 minutes to print with... box. 6 If you want to dry. Notes: • Most envelopes use landscape orientation. • Make sure the same orientation is also selected in the software application. 7 Click OK. 8 Click OK. 9 Click OK or Print.

User's Guide
Page 53
Printing cards 1 Load greeting cards, index cards, or postcards. 2 From the software application, click File Œ Print. 3 Click Properties, Preferences, Options, or Setup. 4 Select a Quality/Speed setting. Notes: • To avoid paper jams, do not force the cards ..., or Setup. 4 From the Print Layout tab, select N-up. 5 Select the number of cards. 5 Select the Paper Setup tab. 6 Select Paper. 7 From the Paper Size list, select a card size. 8 Click OK. 9 Click OK or Print. Printing multiple pages on each page. 6 If you want each card as it exits, and let...
Printing cards 1 Load greeting cards, index cards, or postcards. 2 From the software application, click File Œ Print. 3 Click Properties, Preferences, Options, or Setup. 4 Select a Quality/Speed setting. Notes: • To avoid paper jams, do not force the cards ..., or Setup. 4 From the Print Layout tab, select N-up. 5 Select the number of cards. 5 Select the Paper Setup tab. 6 Select Paper. 7 From the Paper Size list, select a card size. 8 Click OK. 9 Click OK or Print. Printing multiple pages on each page. 6 If you want each card as it exits, and let...

User's Guide
Page 68
.... 2 Load an original document facedown into the ADF. Scanning documents or images for editing. • Choose to scan multiple images before output. • Update the list of applications to which you want to make additional selections: a Click Display Advanced Scan Settings. b Customize the scan settings using the tabs...
.... 2 Load an original document facedown into the ADF. Scanning documents or images for editing. • Choose to scan multiple images before output. • Update the list of applications to which you want to make additional selections: a Click Display Advanced Scan Settings. b Customize the scan settings using the tabs...
User's Guide
Page 97
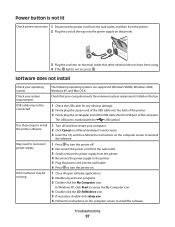
...supported: Windows 98/Me, Windows 2000, Windows XP, and Mac OS X. Software does not install Check your computer. 2 Click Cancel on all open software applications. 2 Disable any obvious damage. 2 Firmly plug the square end of the USB cable into the back of the printer. 3 Firmly plug the rectangular ...end of the USB cable into an electrical outlet that your computer meets the minimum system requirements listed on , press . USB cable may be connected 1 Check the USB cable for any anti-virus programs. 3 Double-click the My Computer icon....
...supported: Windows 98/Me, Windows 2000, Windows XP, and Mac OS X. Software does not install Check your computer. 2 Click Cancel on all open software applications. 2 Disable any obvious damage. 2 Firmly plug the square end of the USB cable into the back of the printer. 3 Firmly plug the rectangular ...end of the USB cable into an electrical outlet that your computer meets the minimum system requirements listed on , press . USB cable may be connected 1 Check the USB cable for any anti-virus programs. 3 Double-click the My Computer icon....
User's Guide
Page 135
... dialog 37 printer to be configured does not appear in list of printers found on network 110 printing all photos 59 blocked fax list 84 cards 53 collated copies 51 document 50 envelopes 52 ... 109 receiving a fax automatically 74 fax forwarding 75 manually 75 using an answering machine 74 recycling Lexmark products 95 WEEE statement 126 reducing an image 66 red-eye reducing 39 remote fax error 115 ... menu 27 Scan & edit text (OCR) button 33 Index 135 scan troubleshooting cannot scan to application 105 cannot scan to computer over network 105 partial document or photo scans 105 poor scanned image ...
... dialog 37 printer to be configured does not appear in list of printers found on network 110 printing all photos 59 blocked fax list 84 cards 53 collated copies 51 document 50 envelopes 52 ... 109 receiving a fax automatically 74 fax forwarding 75 manually 75 using an answering machine 74 recycling Lexmark products 95 WEEE statement 126 reducing an image 66 red-eye reducing 39 remote fax error 115 ... menu 27 Scan & edit text (OCR) button 33 Index 135 scan troubleshooting cannot scan to application 105 cannot scan to computer over network 105 partial document or photo scans 105 poor scanned image ...

User's Guide
Page 136
...memory card is inserted 114 troubleshooting, network cannot print to network printer 111 network name does not appear in list 111 printer to be configured does not appear in list of printers found on network 110 troubleshooting, print improving print quality 100 partial document or photo prints 102 poor... quality at the edges of the page 101 poor text and graphic quality 100 print speed is slow 101 troubleshooting, scan cannot scan to application 105 cannot...
...memory card is inserted 114 troubleshooting, network cannot print to network printer 111 network name does not appear in list 111 printer to be configured does not appear in list of printers found on network 110 troubleshooting, print improving print quality 100 partial document or photo prints 102 poor... quality at the edges of the page 101 poor text and graphic quality 100 print speed is slow 101 troubleshooting, scan cannot scan to application 105 cannot...

User's Guide (Mac)
Page 15
...: 1 While the document is printing, click the printer icon on page 14 Resuming print jobs 1 From the Finder desktop, choose Applications ΠUtilities ΠPrint Center/Printer Setup Utility. 2 From the list of printers, double-click your printer. 3 From the printer pop-up menu, click Start Jobs if you want to resume...
...: 1 While the document is printing, click the printer icon on page 14 Resuming print jobs 1 From the Finder desktop, choose Applications ΠUtilities ΠPrint Center/Printer Setup Utility. 2 From the list of printers, double-click your printer. 3 From the printer pop-up menu, click Start Jobs if you want to resume...
User's Guide (Mac)
Page 40
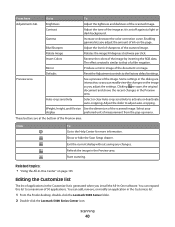
...your display preferred unit of the document or image. Show or hide the Scan Setup drawer. Adjust the tone of applications in the Customize list is generated when you can readily view the changes on the image as it is similar to that of the scanned...50 applications. Scanning 40 Rotates the image 90 degrees clockwise per click. Preview area Defaults Reset the Adjustment controls to the Help Center for more information. Some settings in the Customize list. 1 From the Finder desktop, double-click the Lexmark 5400 Series folder. 2 Double-click the Lexmark ...
...your display preferred unit of the document or image. Show or hide the Scan Setup drawer. Adjust the tone of applications in the Customize list is generated when you can readily view the changes on the image as it is similar to that of the scanned...50 applications. Scanning 40 Rotates the image 90 degrees clockwise per click. Preview area Defaults Reset the Adjustment controls to the Help Center for more information. Some settings in the Customize list. 1 From the Finder desktop, double-click the Lexmark 5400 Series folder. 2 Double-click the Lexmark ...

User's Guide (Mac)
Page 41
...to add to the Available Applications list. 3 Click OK. 4 From the File Type pop-up menu, choose the type of file you want to remove. 2 Click -. 3 If you are sure, click OK when prompted. To modify an application in the list: 1 From the list of applications, choose the application you want to modify. 2...; From the File Type pop-up menu, choose the type of applications available on page 84 Scanning 41 Sharpening an image 1 From the Finder desktop, double-click the Lexmark 5400 Series folder. 2 Double-click the Lexmark 5400 Series Center icon. 3 Click Preview/Edit to open the Scan dialog. 4 ...
...to add to the Available Applications list. 3 Click OK. 4 From the File Type pop-up menu, choose the type of file you want to remove. 2 Click -. 3 If you are sure, click OK when prompted. To modify an application in the list: 1 From the list of applications, choose the application you want to modify. 2...; From the File Type pop-up menu, choose the type of applications available on page 84 Scanning 41 Sharpening an image 1 From the Finder desktop, double-click the Lexmark 5400 Series folder. 2 Double-click the Lexmark 5400 Series Center icon. 3 Click Preview/Edit to open the Scan dialog. 4 ...

User's Guide (Mac)
Page 101
.... Paper Size Orientation Choose a paper size from almost any changes to the settings. Exit the Page Setup dialog without making any application: 1 With a document open the Print dialog from the list. Save the settings and exit the Page Setup dialog. Related topics: • "Using the Print dialog" on page 101 Using the...
.... Paper Size Orientation Choose a paper size from almost any changes to the settings. Exit the Page Setup dialog without making any application: 1 With a document open the Print dialog from the list. Save the settings and exit the Page Setup dialog. Related topics: • "Using the Print dialog" on page 101 Using the...

User's Guide (Mac)
Page 106
... page 38 Understanding the printer 106 To add, remove, or modify an application in the list, see "Choosing where to send scanned images" on page 40. Choose the way the scan will the scanned image be used . From here You can ... type of image you are optimized based on monitor/Web page • To be faxed • To be used ? Select the option closest to an application.
... page 38 Understanding the printer 106 To add, remove, or modify an application in the list, see "Choosing where to send scanned images" on page 40. Choose the way the scan will the scanned image be used . From here You can ... type of image you are optimized based on monitor/Web page • To be faxed • To be used ? Select the option closest to an application.

User's Guide (Mac)
Page 122
Other software may be running 1 Close all open software applications. 2 Insert the printer software CD. 3 From the Finder desktop, double-click the printer CD icon that your country or region. Software may not be installed ... does not install correctly, visit our Web site at www.lexmark.com to install the printer software 1 Close all countries or regions except the United States, select your computer meets the minimum system requirements listed on the computer screen. a In all open software applications. 2 Disable any obvious damage. 2 Firmly plug the square end...
Other software may be running 1 Close all open software applications. 2 Insert the printer software CD. 3 From the Finder desktop, double-click the printer CD icon that your country or region. Software may not be installed ... does not install correctly, visit our Web site at www.lexmark.com to install the printer software 1 Close all countries or regions except the United States, select your computer meets the minimum system requirements listed on the computer screen. a In all open software applications. 2 Disable any obvious damage. 2 Firmly plug the square end...
User's Guide (Mac)
Page 123
... on page 138. Make sure the printer is set printer as default: 1 From the Finder desktop, choose Applications ΠUtilities ΠPrint Center/Printer Setup Utility. 2 From the Printer List dialog, select your printer. 3 From the printer pop-up menu, click Start Jobs if you want to ...resume all print jobs in the queue; To resume print jobs: 1 From the Finder desktop, choose Applications ΠUtilities ΠPrint Center/Printer Setup Utility. 2 From the list of printers, double-click your printer. 3 Click the Make Default icon. May need to reconnect power supply 1...
... on page 138. Make sure the printer is set printer as default: 1 From the Finder desktop, choose Applications ΠUtilities ΠPrint Center/Printer Setup Utility. 2 From the Printer List dialog, select your printer. 3 From the printer pop-up menu, click Start Jobs if you want to ...resume all print jobs in the queue; To resume print jobs: 1 From the Finder desktop, choose Applications ΠUtilities ΠPrint Center/Printer Setup Utility. 2 From the list of printers, double-click your printer. 3 Click the Make Default icon. May need to reconnect power supply 1...

User's Guide (Mac)
Page 128
... select the document name, and then click Resume. To resume print jobs: 1 From the Finder desktop, choose Applications ΠUtilities ΠPrint Center/Printer Setup Utility. 2 From the list of printers, double-click the name of your printer. 3 Click the Make Default icon. Check document placement Make...page 121. Make sure the printer is set To set printer as default: as the default printer and 1 From the Finder desktop, choose Applications ΠUtilities ΠPrint Center/Printer is displayed, see "Software may not be installed correctly" on page 34. Are you selected....
... select the document name, and then click Resume. To resume print jobs: 1 From the Finder desktop, choose Applications ΠUtilities ΠPrint Center/Printer Setup Utility. 2 From the list of printers, double-click the name of your printer. 3 Click the Make Default icon. Check document placement Make...page 121. Make sure the printer is set To set printer as default: as the default printer and 1 From the Finder desktop, choose Applications ΠUtilities ΠPrint Center/Printer is displayed, see "Software may not be installed correctly" on page 34. Are you selected....

User's Guide (Mac)
Page 136
To resume print jobs: 1 From the Finder desktop, choose Applications ΠUtilities ΠPrint Center/Printer Setup Utility. 2 From the list of printers, double-click the name of specialty media at a time. if you want to turn off the printer. 2 Remove the jammed ...any paper jams. For more information, see "Paper jams" on hold or paused 1 From the Finder desktop, choose Applications ΠUtilities ΠPrint Center/Printer Setup Utility. 2 From the Printer List dialog, select your printer. 3 From the printer pop-up menu, click Start Jobs if you want to resume all...
To resume print jobs: 1 From the Finder desktop, choose Applications ΠUtilities ΠPrint Center/Printer Setup Utility. 2 From the list of printers, double-click the name of specialty media at a time. if you want to turn off the printer. 2 Remove the jammed ...any paper jams. For more information, see "Paper jams" on hold or paused 1 From the Finder desktop, choose Applications ΠUtilities ΠPrint Center/Printer Setup Utility. 2 From the Printer List dialog, select your printer. 3 From the printer pop-up menu, click Start Jobs if you want to resume all...
Setup Solutions
Page 22
... on, press . Software does not install Check your computer meets the minimum system requirements listed on the box. The USB port is marked with the USB symbol. Other software may not be running 1 Close all open software applications. 2 Disable any obvious damage. 2 Firmly plug the square end of the USB cable into...
... on, press . Software does not install Check your computer meets the minimum system requirements listed on the box. The USB port is marked with the USB symbol. Other software may not be running 1 Close all open software applications. 2 Disable any obvious damage. 2 Firmly plug the square end of the USB cable into...


