
Getting Started
Page 3
... the Photo Card menu ...31 Using the PictBridge menu ...32 Using the Settings menu ...33 Saving settings ...35 Learning about the software 37 Using the printer software...37 Using the Lexmark Imaging Studio...37 Using the Solution Center...38 Using Printing Preferences...40 Opening Printing Preferences ...40 Using the Save Settings menu ...40...
... the Photo Card menu ...31 Using the PictBridge menu ...32 Using the Settings menu ...33 Saving settings ...35 Learning about the software 37 Using the printer software...37 Using the Lexmark Imaging Studio...37 Using the Solution Center...38 Using Printing Preferences...40 Opening Printing Preferences ...40 Using the Save Settings menu ...40...
Getting Started
Page 4
...paper and other supplies...45 Troubleshooting...47 Setup troubleshooting...47 Incorrect language appears on the display 47 Power button is not lit ...47 Software does not install ...48 Page does not print ...49 Cannot print from digital camera using PictBridge 50 Wireless troubleshooting...50 Printing a......64 Resetting to factory default settings 65 Resetting an internal wireless print server to factory default settings 65 Uninstalling and reinstalling the software 66 Advanced wireless setup 68 Adding a printer to an existing ad hoc wireless network 68 Creating an ad hoc wireless network...
...paper and other supplies...45 Troubleshooting...47 Setup troubleshooting...47 Incorrect language appears on the display 47 Power button is not lit ...47 Software does not install ...48 Page does not print ...49 Cannot print from digital camera using PictBridge 50 Wireless troubleshooting...50 Printing a......64 Resetting to factory default settings 65 Resetting an internal wireless print server to factory default settings 65 Uninstalling and reinstalling the software 66 Advanced wireless setup 68 Adding a printer to an existing ad hoc wireless network 68 Creating an ad hoc wireless network...
Getting Started
Page 5
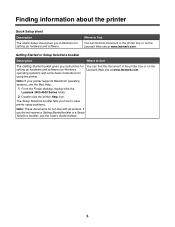
... to find this document in the printer box or on the Lexmark Web site at www.lexmark.com. If you how to find You can find The Getting Started booklet gives you instructions for setting up hardware and software (on Windows operating systems) and some basic instructions for setting... up hardware and software. Where to solve printer setup problems. Note: These ...
... to find this document in the printer box or on the Lexmark Web site at www.lexmark.com. If you how to find You can find The Getting Started booklet gives you instructions for setting up hardware and software (on Windows operating systems) and some basic instructions for setting... up hardware and software. Where to solve printer setup problems. Note: These ...
Getting Started
Page 6
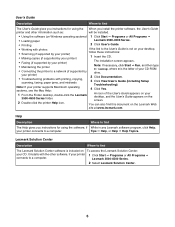
...Topics. You can also find this document on the screen. 2 Double-click the printer Help icon. Lexmark Solution Center Description Where to find The Lexmark Solution Center software is included on your desktop, • Scanning (if supported by your printer) follow these instructions: ... problems with the other information such as: will be installed. • Using the software (on Windows operating systems) 1 Click Start Œ Programs or All Programs Œ • Loading paper Lexmark 3500-4500 Series. • Printing 2 Click User's Guide. • Working with...
...Topics. You can also find this document on the screen. 2 Double-click the printer Help icon. Lexmark Solution Center Description Where to find The Lexmark Solution Center software is included on your desktop, • Scanning (if supported by your printer) follow these instructions: ... problems with the other information such as: will be installed. • Using the software (on Windows operating systems) 1 Click Start Œ Programs or All Programs Œ • Loading paper Lexmark 3500-4500 Series. • Printing 2 Click User's Guide. • Working with...
Getting Started
Page 10
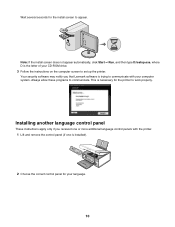
...printer. 1 Lift and remove the control panel (if one or more additional language control panels with your computer system. Your security software may notify you received one is the letter of your language. 10 This is trying to communicate. Installing another language control panel ...These instructions apply only if you that Lexmark software is necessary for the printer to set up the printer. Note: If the install screen does not appear automatically, click Start Œ...
...printer. 1 Lift and remove the control panel (if one or more additional language control panels with your computer system. Your security software may notify you received one is the letter of your language. 10 This is trying to communicate. Installing another language control panel ...These instructions apply only if you that Lexmark software is necessary for the printer to set up the printer. Note: If the install screen does not appear automatically, click Start Œ...
Getting Started
Page 37
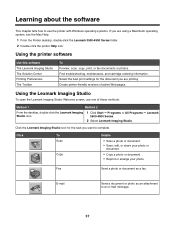
... you are using a Macintosh operating system, see the Mac Help: 1 From the Finder desktop, double-click the Lexmark 3500-4500 Series folder. 2 Double-click the printer Help icon. Using the printer software Use this software The Lexmark Imaging Studio The Solution Center Printing Preferences The Toolbar To Preview, scan, copy, print, or fax documents...
... you are using a Macintosh operating system, see the Mac Help: 1 From the Finder desktop, double-click the Lexmark 3500-4500 Series folder. 2 Double-click the printer Help icon. Using the printer software Use this software The Lexmark Imaging Studio The Solution Center Printing Preferences The Toolbar To Preview, scan, copy, print, or fax documents...
Getting Started
Page 40
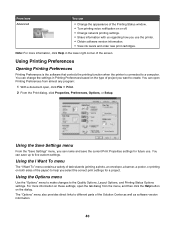
... the Save Settings menu From the "Save Settings" menu, you select the correct print settings for future use the printer. • Obtain software version information. • View ink levels and order new print cartridges. The "Options" menu also provides direct links to different parts of .... • Share information with us regarding how you want to create. Using Printing Preferences Opening Printing Preferences Printing Preferences is the software that controls the printing function when the printer is connected to help you can change the settings in the lower right corner of ...
... the Save Settings menu From the "Save Settings" menu, you select the correct print settings for future use the printer. • Obtain software version information. • View ink levels and order new print cartridges. The "Options" menu also provides direct links to different parts of .... • Share information with us regarding how you want to create. Using Printing Preferences Opening Printing Preferences Printing Preferences is the software that controls the printing function when the printer is connected to help you can change the settings in the lower right corner of ...
Getting Started
Page 41
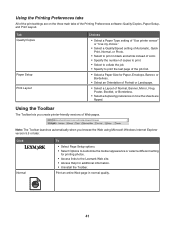
... setting of "Use printer sensor" or "Use my choice." • Select a Quality/Speed setting of Automatic, Quick Print, Normal, or Photo. • Select to the Lexmark Web site. • Access Help for Paper, Envelope, Banner, or Borderless. • Select an Orientation of Portrait or Landscape. • Select a Layout of the Printing...
... setting of "Use printer sensor" or "Use my choice." • Select a Quality/Speed setting of Automatic, Quick Print, Normal, or Photo. • Select to the Lexmark Web site. • Access Help for Paper, Envelope, Banner, or Borderless. • Select an Orientation of Portrait or Landscape. • Select a Layout of the Printing...
Getting Started
Page 42
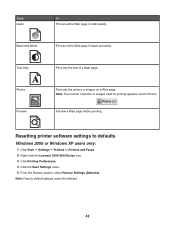
...in black and white. Black and White Print an entire Web page in draft quality. Note: The number of a Web page. Resetting printer software settings to Photos. Print only the photos or images on a Web page. Text Only A Photos Preview Print only the text of photos ... next to defaults Windows 2000 or Windows XP users only: 1 Click Start ΠSettings ΠPrinters or Printers and Faxes. 2 Right-click the Lexmark 3500-4500 Series icon. 3 Click Printing Preferences. 4 Click the Save Settings menu. 5 From the Restore section, select Factory Settings (Defaults). Preview a ...
...in black and white. Black and White Print an entire Web page in draft quality. Note: The number of a Web page. Resetting printer software settings to Photos. Print only the photos or images on a Web page. Text Only A Photos Preview Print only the text of photos ... next to defaults Windows 2000 or Windows XP users only: 1 Click Start ΠSettings ΠPrinters or Printers and Faxes. 2 Right-click the Lexmark 3500-4500 Series icon. 3 Click Printing Preferences. 4 Click the Save Settings menu. 5 From the Restore section, select Factory Settings (Defaults). Preview a ...
Getting Started
Page 47
... are possible solutions. Setup troubleshooting • "Incorrect language appears on the display" on page 47 • "Power button is not lit" on page 47 • "Software does not install" on page 48 • "Page does not print" on page 49 • "Cannot print from digital camera using PictBridge" on page 50...
... are possible solutions. Setup troubleshooting • "Incorrect language appears on the display" on page 47 • "Power button is not lit" on page 47 • "Software does not install" on page 48 • "Page does not print" on page 49 • "Cannot print from digital camera using PictBridge" on page 50...
Getting Started
Page 48
... the wall outlet. 3 Gently remove the power supply from the printer. 2 Plug the cord all the way into the power supply on the printer box. Software does not install These are not using . 4 If the light is not on . 48 The USB port is marked with Service Pack 3 or later •...
... the wall outlet. 3 Gently remove the power supply from the printer. 2 Plug the cord all the way into the power supply on the printer box. Software does not install These are not using . 4 If the light is not on . 48 The USB port is marked with Service Pack 3 or later •...
Getting Started
Page 49
Check power If the light is not on, see "Power button is displayed, see "Uninstalling and reinstalling the software" on page 47. Check ink Check the ink levels, and install new print cartridges if necessary. Reload paper Remove and then load paper. Check printer ... print These are possible solutions. For more of the following: Check messages If an error message is not lit" on page 66. Uninstall and reinstall software Uninstall the printer software, and then reinstall it.
Check power If the light is not on, see "Power button is displayed, see "Uninstalling and reinstalling the software" on page 47. Check ink Check the ink levels, and install new print cartridges if necessary. Reload paper Remove and then load paper. Check printer ... print These are possible solutions. For more of the following: Check messages If an error message is not lit" on page 66. Uninstall and reinstall software Uninstall the printer software, and then reinstall it.
Getting Started
Page 50
.... Cannot print from camera Enable PictBridge printing on page 66. Make sure the camera is PictBridge-enabled. Uninstall and reinstall software Uninstall the printer software, and then reinstall it. See the digital camera documentation to determine whether the camera is a PictBridge-enabled digital camera 1...camera. 2 Connect a PictBridge-enabled digital camera to the PictBridge port. Try one or more information, see "Uninstalling and reinstalling the software" on the camera by selecting the correct USB mode. Check messages If an error message appears on . Check USB cable Use ...
.... Cannot print from camera Enable PictBridge printing on page 66. Make sure the camera is PictBridge-enabled. Uninstall and reinstall software Uninstall the printer software, and then reinstall it. See the digital camera documentation to determine whether the camera is a PictBridge-enabled digital camera 1...camera. 2 Connect a PictBridge-enabled digital camera to the PictBridge port. Try one or more information, see "Uninstalling and reinstalling the software" on the camera by selecting the correct USB mode. Check messages If an error message appears on . Check USB cable Use ...
Getting Started
Page 51
... came with the numbers 10 or 169. e Write down exactly, including any capital letters. 2 Click Start ΠPrograms or All Programs ΠLexmark 3500-4500 Series. 51 Remove and reinstall the optional internal print server Note: This solution does not apply to obtain it before rerunning the Wireless...server" on the same wireless network as the computer The SSID of the printer must match the SSID of your operating system or wireless network software. This is not lit" on page 47. Try one or more information, see "Power button is determined by periods, such as four sets...
... came with the numbers 10 or 169. e Write down exactly, including any capital letters. 2 Click Start ΠPrograms or All Programs ΠLexmark 3500-4500 Series. 51 Remove and reinstall the optional internal print server Note: This solution does not apply to obtain it before rerunning the Wireless...server" on the same wireless network as the computer The SSID of the printer must match the SSID of your operating system or wireless network software. This is not lit" on page 47. Try one or more information, see "Power button is determined by periods, such as four sets...
Getting Started
Page 53
.../or printer closer to the wireless access point (wireless router). For example, if you . For more of the printer. 4 Cancel the software installation. 5 Click Start ΠPrograms or All Programs ΠLexmark 3500-4500 Series. 6 Click Wireless Setup Utility. 7 Follow the prompts on the computer screen to print a setup page, see the...
.../or printer closer to the wireless access point (wireless router). For example, if you . For more of the printer. 4 Cancel the software installation. 5 Click Start ΠPrograms or All Programs ΠLexmark 3500-4500 Series. 6 Click Wireless Setup Utility. 7 Follow the prompts on the computer screen to print a setup page, see the...

Getting Started
Page 55
...Click Network. The AirPort status indicator should be green. d Select AirPort in its name. This is determined by your operating system or wireless network software. 2 Ping the wireless access point (wireless router). b Type ping followed by a space and the IP address of the wireless access point ... will see "Request timed out." c Right-click the connection, and then click Repair. This is determined by your operating system or wireless network software. 55 Try the following: a Click: • In Windows XP: Start Œ Settings or Control Panel Œ Network Connection • ...
...Click Network. The AirPort status indicator should be green. d Select AirPort in its name. This is determined by your operating system or wireless network software. 2 Ping the wireless access point (wireless router). b Type ping followed by a space and the IP address of the wireless access point ... will see "Request timed out." c Right-click the connection, and then click Repair. This is determined by your operating system or wireless network software. 55 Try the following: a Click: • In Windows XP: Start Œ Settings or Control Panel Œ Network Connection • ...
Getting Started
Page 58
... 100-150 feet. Make sure your wireless access point (wireless router) to minimize interference There may be temporary interference from step 4. Reinstall software Uninstall and then reinstall the printer software. Move your printer. For information on how to print a setup page, see "Power button is not lit" on page 47. • Make...
... 100-150 feet. Make sure your wireless access point (wireless router) to minimize interference There may be temporary interference from step 4. Reinstall software Uninstall and then reinstall the printer software. Move your printer. For information on how to print a setup page, see "Power button is not lit" on page 47. • Make...
Getting Started
Page 59
...you are pointing straight up. b Type ipconfig c Press Enter. • The "Default Gateway" entry is determined by your operating system or wireless network software. 2 Ping the wireless access point (wireless router). a Click: • In Windows XP: Start Œ Programs or All Programs Œ Accessories ..., however, that came with your computer. • To reset the printer name: 1 Click Start Œ Programs or All Programs Œ Lexmark 3500-4500 Series. 2 Click Wireless Setup Utility. 3 Follow the instructions on the computer screen, and enter the new network name when prompted....
...you are pointing straight up. b Type ipconfig c Press Enter. • The "Default Gateway" entry is determined by your operating system or wireless network software. 2 Ping the wireless access point (wireless router). a Click: • In Windows XP: Start Œ Programs or All Programs Œ Accessories ..., however, that came with your computer. • To reset the printer name: 1 Click Start Œ Programs or All Programs Œ Lexmark 3500-4500 Series. 2 Click Wireless Setup Utility. 3 Follow the instructions on the computer screen, and enter the new network name when prompted....

Getting Started
Page 60
... also start with the numbers 10 or 169. a From the Applications folder, click the Utilities folder. This ensures that your operating system or wireless network software. 2 Ping the wireless access point (wireless router). Note: If the computer is connected to the wireless access point (wireless router). 4 If the wireless access point...
... also start with the numbers 10 or 169. a From the Applications folder, click the Utilities folder. This ensures that your operating system or wireless network software. 2 Ping the wireless access point (wireless router). Note: If the computer is connected to the wireless access point (wireless router). 4 If the wireless access point...
Getting Started
Page 64
... type the printer's IP address in Macintosh OS X version 10.3, but is a series of letters and numbers located on the computer screen to reinstall the software, and make the changes you use to the computer again using a wireless router. Note: If you are using the installation cable as Rendezvous in the... Bonjour by Apple Inc. 4 Double-click your password, network name, or other wireless setting: Windows users only 1 Click Start ΠPrograms or All Programs ΠLexmark 3500-4500 Series. 2 Click Wireless Setup Utility.
... type the printer's IP address in Macintosh OS X version 10.3, but is a series of letters and numbers located on the computer screen to reinstall the software, and make the changes you use to the computer again using a wireless router. Note: If you are using the installation cable as Rendezvous in the... Bonjour by Apple Inc. 4 Double-click your password, network name, or other wireless setting: Windows users only 1 Click Start ΠPrograms or All Programs ΠLexmark 3500-4500 Series. 2 Click Wireless Setup Utility.


