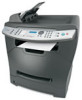
User's Guide
Page 66
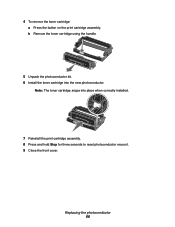
Replacing the photoconductor 66 Note: The toner cartridge snaps into the new photoconductor. 4 To remove the toner cartridge: a Press the button on the print cartridge assembly. b Remove the toner cartridge using the handle. 5 Unpack the photoconductor kit. 6 Install the toner cartridge into place when correctly installed. 7 Reinstall the print cartridge assembly. 8 Press and hold Stop for three seconds to reset photoconductor recount. 9 Close the front cover.
Replacing the photoconductor 66 Note: The toner cartridge snaps into the new photoconductor. 4 To remove the toner cartridge: a Press the button on the print cartridge assembly. b Remove the toner cartridge using the handle. 5 Unpack the photoconductor kit. 6 Install the toner cartridge into place when correctly installed. 7 Reinstall the print cartridge assembly. 8 Press and hold Stop for three seconds to reset photoconductor recount. 9 Close the front cover.
Quick Reference
Page 3
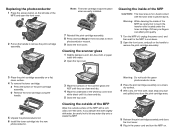
...remove the toner cartridge: a Press the button on the handle to remove the print cartridge assembly. Note: The toner cartridge snaps into the new photoconductor. 3 Wipe the surfaces of the scanner glass and ADF until they are clean and dry. 4 Wipe the underside of the white top cover ... MFP. Cleaning the outside of the MFP Wipe the outside surface of the MFP with water, be careful not to reset photoconductor recount. 9 Close the front cover. Warning: Do not touch the green photoconductor drum. 3 Place the print cartridge assembly on a clean, dry surface. 4 With a dry, lint-free cloth,...
...remove the toner cartridge: a Press the button on the handle to remove the print cartridge assembly. Note: The toner cartridge snaps into the new photoconductor. 3 Wipe the surfaces of the scanner glass and ADF until they are clean and dry. 4 Wipe the underside of the white top cover ... MFP. Cleaning the outside of the MFP Wipe the outside surface of the MFP with water, be careful not to reset photoconductor recount. 9 Close the front cover. Warning: Do not touch the green photoconductor drum. 3 Place the print cartridge assembly on a clean, dry surface. 4 With a dry, lint-free cloth,...

