User's Guide
Page 66
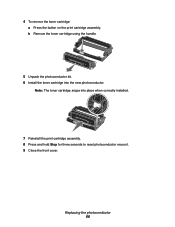
b Remove the toner cartridge using the handle. 5 Unpack the photoconductor kit. 6 Install the toner cartridge into place when correctly installed. 7 Reinstall the print cartridge assembly. 8 Press and hold Stop for three seconds to reset photoconductor recount. 9 Close the front cover. Note: The toner cartridge snaps into the new photoconductor. 4 To remove the toner cartridge: a Press the button on the print cartridge assembly. Replacing the photoconductor 66
b Remove the toner cartridge using the handle. 5 Unpack the photoconductor kit. 6 Install the toner cartridge into place when correctly installed. 7 Reinstall the print cartridge assembly. 8 Press and hold Stop for three seconds to reset photoconductor recount. 9 Close the front cover. Note: The toner cartridge snaps into the new photoconductor. 4 To remove the toner cartridge: a Press the button on the print cartridge assembly. Replacing the photoconductor 66
User's Guide
Page 70
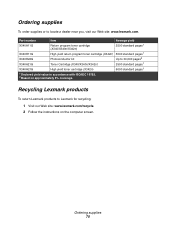
...cartridge (X340/X340n/X342n) 2500 standard pages1 X340H11G High yield return program toner cartridge (X342n) 6000 standard pages1 X340H22G Photoconductor kit Up to locate a dealer near you, visit our Web site: www.lexmark.com. Recycling Lexmark products To return Lexmark products to Lexmark for ...recycling: 1 Visit our Web site: www.lexmark.com/recycle. 2 Follow the instructions on...
...cartridge (X340/X340n/X342n) 2500 standard pages1 X340H11G High yield return program toner cartridge (X342n) 6000 standard pages1 X340H22G Photoconductor kit Up to locate a dealer near you, visit our Web site: www.lexmark.com. Recycling Lexmark products To return Lexmark products to Lexmark for ...recycling: 1 Visit our Web site: www.lexmark.com/recycle. 2 Follow the instructions on...
Quick Reference
Page 3
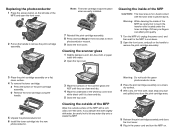
...from your fingers can affect print quality. 1 Turn the MFP off, unplug the power cord, and then wait for three seconds to reset photoconductor recount. 9 Close the front cover. Warning: While cleaning the inside the MFP. Cleaning the scanner glass 1 Slightly dampen a soft, lint... 5 Close the top cover. Avoid contact with a soft, clean, lint-free cloth. b Remove the toner cartridge using the handle. 5 Unpack the photoconductor kit. 6 Install the toner cartridge into place when correctly installed. 7 Reinstall the print cartridge assembly. 8 Press and hold Stop for the MFP to cool ...
...from your fingers can affect print quality. 1 Turn the MFP off, unplug the power cord, and then wait for three seconds to reset photoconductor recount. 9 Close the front cover. Warning: While cleaning the inside the MFP. Cleaning the scanner glass 1 Slightly dampen a soft, lint... 5 Close the top cover. Avoid contact with a soft, clean, lint-free cloth. b Remove the toner cartridge using the handle. 5 Unpack the photoconductor kit. 6 Install the toner cartridge into place when correctly installed. 7 Reinstall the print cartridge assembly. 8 Press and hold Stop for the MFP to cool ...


