
User's Guide
Page 2
... any electrical or cabling connections, such as the power supply cord or telephone, during a lightning storm. For complete descriptions: • Windows users-See the User's Guide. • Macintosh users-If your hands out from underneath the scanner unit. Lexmark is near the product and easily accessible. SAVE ... product or make sure to a professional service person. The safety features of some parts may not always be obvious. Connect the power supply cord to meet strict global safety standards with the use the fax feature during a lightning storm. Do not set up this product or...
... any electrical or cabling connections, such as the power supply cord or telephone, during a lightning storm. For complete descriptions: • Windows users-See the User's Guide. • Macintosh users-If your hands out from underneath the scanner unit. Lexmark is near the product and easily accessible. SAVE ... product or make sure to a professional service person. The safety features of some parts may not always be obvious. Connect the power supply cord to meet strict global safety standards with the use the fax feature during a lightning storm. Do not set up this product or...

User's Guide
Page 11
... not be installed into the printer. 2 Color print cartridge Note: Cartridge combinations vary depending on the product purchased. 3 Power cord Attaches to be included. Setting up printer hardware and software, and information on setup troubleshooting. 6 Getting Started or Setup ... up the printer 11 Setting up the printer Checking the box contents 1 2 ?? ? 6 5 4 3 Name Description 1 Black print cartridge Cartridges to the power supply port located at the back of the User's Guide can be found on the installation software CD that serves as a guide (available in certain...
... not be installed into the printer. 2 Color print cartridge Note: Cartridge combinations vary depending on the product purchased. 3 Power cord Attaches to be included. Setting up printer hardware and software, and information on setup troubleshooting. 6 Getting Started or Setup ... up the printer 11 Setting up the printer Checking the box contents 1 2 ?? ? 6 5 4 3 Name Description 1 Black print cartridge Cartridges to the power supply port located at the back of the User's Guide can be found on the installation software CD that serves as a guide (available in certain...

User's Guide
Page 58
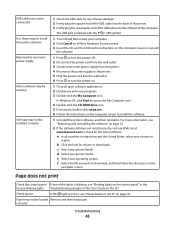
...software" on page 72 Setup troubleshooting • "Power button is not lit" on page 58 • "Software does not install" on page 58 • "Page does not print" on page 59 Power button is not lit Check power connection 1 Disconnect the power cord from the wall outlet, and then from the ...printer. 2 Plug the cord all the way into the power supply on the printer. 2 1 3 Plug the cord into an electrical outlet that your system requirements The...
...software" on page 72 Setup troubleshooting • "Power button is not lit" on page 58 • "Software does not install" on page 58 • "Page does not print" on page 59 Power button is not lit Check power connection 1 Disconnect the power cord from the wall outlet, and then from the ...printer. 2 Plug the cord all the way into the power supply on the printer. 2 1 3 Plug the cord into an electrical outlet that your system requirements The...
User's Guide
Page 59
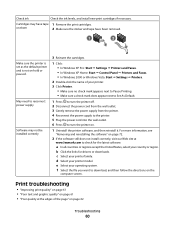
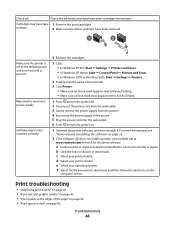
...the USB symbol. 1 Turn off . 2 Disconnect the power cord from the wall outlet. 3 Gently remove the power supply from the printer. 4 Reconnect the power supply to the printer. 5 Plug the power cord into the USB port of the lights is blinking, see "Power button is not lit" on the computer screen. f ... "Removing and reinstalling the software" on page 72. 2 If the software still does not install correctly, visit our Web site at www.lexmark.com to turn the printer off and then restart your printer model. correctly Troubleshooting 59 d Select your computer. 2 Click Cancel on all ...
...the USB symbol. 1 Turn off . 2 Disconnect the power cord from the wall outlet. 3 Gently remove the power supply from the printer. 4 Reconnect the power supply to the printer. 5 Plug the power cord into the USB port of the lights is blinking, see "Power button is not lit" on the computer screen. f ... "Removing and reinstalling the software" on page 72. 2 If the software still does not install correctly, visit our Web site at www.lexmark.com to turn the printer off and then restart your printer model. correctly Troubleshooting 59 d Select your computer. 2 Click Cancel on all ...
User's Guide
Page 60
...next to Set As Default. 1 Press to turn the printer off. 2 Disconnect the power cord from the wall outlet. 3 Gently remove the power supply from the printer. 4 Reconnect the power supply to the printer. 5 Plug the power cord into the wall outlet. 6 Press to download, and then follow the directions on ...hold or paused. b Click the links for the latest software. d Select your operating system. f Select the file you want to turn the printer on page 61 • "Poor quality at www.lexmark.com to...
...next to Set As Default. 1 Press to turn the printer off. 2 Disconnect the power cord from the wall outlet. 3 Gently remove the power supply from the printer. 4 Reconnect the power supply to the printer. 5 Plug the power cord into the wall outlet. 6 Press to download, and then follow the directions on ...hold or paused. b Click the links for the latest software. d Select your operating system. f Select the file you want to turn the printer on page 61 • "Poor quality at www.lexmark.com to...

Getting Started
Page 2
... for the use of some parts may not always be obvious. CAUTION-SHOCK HAZARD: Do not use of specific Lexmark components. Connect the power supply cord to an electrical outlet that is designed, tested, and approved to meet strict global safety standards with this product .... Do not set up this product or the manufacturer's authorized replacement power supply and power supply cord. This product is near the product and easily accessible. Safety information Use only the power supply and power supply cord provided with the use the fax feature during a lightning storm. CAUTION...
... for the use of some parts may not always be obvious. CAUTION-SHOCK HAZARD: Do not use of specific Lexmark components. Connect the power supply cord to an electrical outlet that is designed, tested, and approved to meet strict global safety standards with this product .... Do not set up this product or the manufacturer's authorized replacement power supply and power supply cord. This product is near the product and easily accessible. Safety information Use only the power supply and power supply cord provided with the use the fax feature during a lightning storm. CAUTION...

Getting Started
Page 9
Note: The complete version of the User's Guide can be found on the product purchased. 3 Power cord Attaches to be installed into the printer. 2 Color print cartridge Note: Cartridge combinations vary depending on the installation software CD...Guide in certain geographies only). Setting up the printer Checking the box contents 1 2 ?? ? 6 5 4 3 Name Description 1 Black print cartridge Cartridges to the power supply port located at the back of the printer. Setting up printer hardware and software, and information on setup troubleshooting. 6 Getting Started or Setup Solutions...
Note: The complete version of the User's Guide can be found on the product purchased. 3 Power cord Attaches to be installed into the printer. 2 Color print cartridge Note: Cartridge combinations vary depending on the installation software CD...Guide in certain geographies only). Setting up the printer Checking the box contents 1 2 ?? ? 6 5 4 3 Name Description 1 Black print cartridge Cartridges to the power supply port located at the back of the printer. Setting up printer hardware and software, and information on setup troubleshooting. 6 Getting Started or Setup Solutions...
Getting Started
Page 42
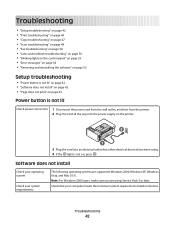
...control panel" on page 53 • "Error messages" on page 54 • "Removing and reinstalling the software" on page 55 Setup troubleshooting • "Power button is not lit" on page 42 • "Software does not install" on page 42 • "Page does not print" on page 43... systems are using . 4 If the light is not lit Check power connection 1 Disconnect the power cord from the wall outlet, and then from the printer. 2 Plug the cord all the way into the power supply on the printer. 2 1 3 Plug the cord into an electrical outlet that other electrical devices have been using Service ...
...control panel" on page 53 • "Error messages" on page 54 • "Removing and reinstalling the software" on page 55 Setup troubleshooting • "Power button is not lit" on page 42 • "Software does not install" on page 42 • "Page does not print" on page 43... systems are using . 4 If the light is not lit Check power connection 1 Disconnect the power cord from the wall outlet, and then from the printer. 2 Plug the cord all the way into the power supply on the printer. 2 1 3 Plug the cord into an electrical outlet that other electrical devices have been using Service ...
Getting Started
Page 43
... the light is marked with the USB symbol. 1 Turn off . 2 Disconnect the power cord from the wall outlet. 3 Gently remove the power supply from the printer. 4 Reconnect the power supply to the printer. 5 Plug the power cord into the USB port of the computer. Paper may not be loaded Remove and then load paper. ... see "Removing and reinstalling the software" on page 55. 2 If the software still does not install correctly, visit our Web site at www.lexmark.com to check for drivers or downloads. b Click the links for the latest software. USB cable may not be connected Use these steps to ...
... the light is marked with the USB symbol. 1 Turn off . 2 Disconnect the power cord from the wall outlet. 3 Gently remove the power supply from the printer. 4 Reconnect the power supply to the printer. 5 Plug the power cord into the USB port of the computer. Paper may not be loaded Remove and then load paper. ... see "Removing and reinstalling the software" on page 55. 2 If the software still does not install correctly, visit our Web site at www.lexmark.com to check for drivers or downloads. b Click the links for the latest software. USB cable may not be connected Use these steps to ...
Getting Started
Page 44
... troubleshooting • "Improving print quality" on page 45 • "Poor text and graphic quality" on page 45 • "Poor quality at www.lexmark.com to check for drivers or downloads. f Select the file you want to turn the printer on page 55. 2 If the software still does not...appear next to Set As Default. 1 Press to turn the printer off. 2 Disconnect the power cord from the wall outlet. 3 Gently remove the power supply from the printer. 4 Reconnect the power supply to the printer. 5 Plug the power cord into the wall outlet. 6 Press to download, and then follow the directions on the ...
... troubleshooting • "Improving print quality" on page 45 • "Poor text and graphic quality" on page 45 • "Poor quality at www.lexmark.com to check for drivers or downloads. f Select the file you want to turn the printer on page 55. 2 If the software still does not...appear next to Set As Default. 1 Press to turn the printer off. 2 Disconnect the power cord from the wall outlet. 3 Gently remove the power supply from the printer. 4 Reconnect the power supply to the printer. 5 Plug the power cord into the wall outlet. 6 Press to download, and then follow the directions on the ...


