User's Guide
Page 3
... the parts of the printer...12 Using the control panel buttons...14 Learning about the software 15 Using the printer software...15 Using the Lexmark Imaging Studio...15 Using the Solution Center...17 Using Print Properties...18 Opening Print Properties ...18 Using the Save Settings menu ...18 Using the I...24 Printing 26 Changing the paper type...26 Printing a document...26 Printing a Web page...26 Printing high-quality graphics...27 Printing photos or images from a Web page...27 Printing collated copies...28 Printing the last page first (reverse page order)...28 Printing on both sides of the ...
... the parts of the printer...12 Using the control panel buttons...14 Learning about the software 15 Using the printer software...15 Using the Lexmark Imaging Studio...15 Using the Solution Center...17 Using Print Properties...18 Opening Print Properties ...18 Using the Save Settings menu ...18 Using the I...24 Printing 26 Changing the paper type...26 Printing a document...26 Printing a Web page...26 Printing high-quality graphics...27 Printing photos or images from a Web page...27 Printing collated copies...28 Printing the last page first (reverse page order)...28 Printing on both sides of the ...
User's Guide
Page 15
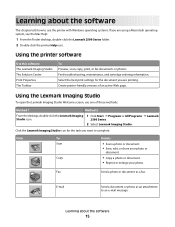
... complete. Create printer-friendly versions of these methods: Method 1 Method 2 From the desktop, double-click the Lexmark Imaging 1 Click Start ΠPrograms or All Programs ΠLexmark Studio icon. 2500 Series. 2 Select Lexmark Imaging Studio. Using the Lexmark Imaging Studio To open the Lexmark Imaging Studio Welcome screen, use the printer with Windows operating systems. If you are printing. Fax Send a photo or...
... complete. Create printer-friendly versions of these methods: Method 1 Method 2 From the desktop, double-click the Lexmark Imaging 1 Click Start ΠPrograms or All Programs ΠLexmark Studio icon. 2500 Series. 2 Select Lexmark Imaging Studio. Using the Lexmark Imaging Studio To open the Lexmark Imaging Studio Welcome screen, use the printer with Windows operating systems. If you are printing. Fax Send a photo or...
User's Guide
Page 17
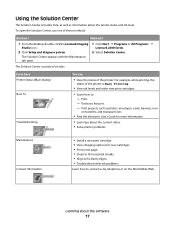
... tab open the Solution Center, use one of these methods: Method 1 Method 2 1 From the desktop, double-click the Lexmark Imaging Studio icon. 2 Click Setup and diagnose printer. 1 Click Start ΠPrograms or All Programs ΠLexmark 2500 Series. 2 Select Solution Center. For example, while printing, the status of the printer. Using the Solution Center...
... tab open the Solution Center, use one of these methods: Method 1 Method 2 1 From the desktop, double-click the Lexmark Imaging Studio icon. 2 Click Setup and diagnose printer. 1 Click Start ΠPrograms or All Programs ΠLexmark 2500 Series. 2 Select Solution Center. For example, while printing, the status of the printer. Using the Solution Center...
User's Guide
Page 32
... exit tray, and allow the prints to dry 24 hours before stacking, displaying, or storing. Click Transfer Photos to your computer using the Lexmark Imaging Studio. 3 Click Select photos to save. 4 Click Deselect All. 5 Click to select the photo(s) you want to transfer. 6 If you... the computer 1 Insert your transferred photos in the Photo Library. For best results, remove each printed sheet individually from a media device using the Lexmark Imaging Studio. 3 Click Automatically save the photos in the Photo Library. screen will appear. b Select the folder you want . c Click OK. 8 If...
... exit tray, and allow the prints to dry 24 hours before stacking, displaying, or storing. Click Transfer Photos to your computer using the Lexmark Imaging Studio. 3 Click Select photos to save. 4 Click Deselect All. 5 Click to select the photo(s) you want to transfer. 6 If you... the computer 1 Insert your transferred photos in the Photo Library. For best results, remove each printed sheet individually from a media device using the Lexmark Imaging Studio. 3 Click Automatically save the photos in the Photo Library. screen will appear. b Select the folder you want . c Click OK. 8 If...
User's Guide
Page 33
... a Web page" on page 27. Printing photos from the Photo Library 1 Load paper. 2 From the desktop, double-click the Lexmark Imaging Studio icon. 3 Click View / Print Photo Library. 4 Click the photos you want to your CD. Use the drop-down list in the table. screen ... multiple prints of a photo, or to select photo sizes other photo sizes, and print multiple copies of the screen. 10 Remove your computer using the Lexmark Imaging Studio. 4 Click Select photos to print. 5 Click Print. 6 From the Quality drop-down list, select a copy quality. 7 From the Paper Size in Printer drop...
... a Web page" on page 27. Printing photos from the Photo Library 1 Load paper. 2 From the desktop, double-click the Lexmark Imaging Studio icon. 3 Click View / Print Photo Library. 4 Click the photos you want to your CD. Use the drop-down list in the table. screen ... multiple prints of a photo, or to select photo sizes other photo sizes, and print multiple copies of the screen. 10 Remove your computer using the Lexmark Imaging Studio. 4 Click Select photos to print. 5 Click Print. 6 From the Quality drop-down list, select a copy quality. 7 From the Paper Size in Printer drop...
User's Guide
Page 34
...drop-down list, select a copy quality. 6 From the Paper Size in the table. Printing Photo Packages 1 From the desktop, double-click the Lexmark Imaging Studio icon. 2 Click Photo Packages. 3 Click to select the photos you want to include in your photo package. 4 Click Next. 5 From the...copy quality. 9 From the Paper Size in the table. screen appears. Creating photo projects Creating Photo Greeting Cards 1 From the desktop, double-click the Lexmark Imaging Studio icon. 2 Click Photo Greeting Cards. 3 From the Style tab, click to select a style for your greeting card. 4 From the Photo tab, ...
...drop-down list, select a copy quality. 6 From the Paper Size in the table. Printing Photo Packages 1 From the desktop, double-click the Lexmark Imaging Studio icon. 2 Click Photo Packages. 3 Click to select the photos you want to include in your photo package. 4 Click Next. 5 From the...copy quality. 9 From the Paper Size in the table. screen appears. Creating photo projects Creating Photo Greeting Cards 1 From the desktop, double-click the Lexmark Imaging Studio icon. 2 Click Photo Greeting Cards. 3 From the Style tab, click to select a style for your greeting card. 4 From the Photo tab, ...
User's Guide
Page 35
...in the order you want them to the "Photos in Your Slideshow" area. Creating and viewing a slideshow 1 From the desktop, double-click the Lexmark Imaging Studio icon. 2 Click Slideshow. 3 Click and drag the photos you want to include in Printer drop-down list. b Click File ΠAdd ...not scanning a new item, open the folder that contains your photo greeting card(s) attached. Printing an image as a multiple-page poster 1 Load paper. 2 From the desktop, double-click the Lexmark Imaging Studio icon. 3 From the Printing Creative Tasks area of the Welcome screen, click Poster. 4 If you...
...in the order you want them to the "Photos in Your Slideshow" area. Creating and viewing a slideshow 1 From the desktop, double-click the Lexmark Imaging Studio icon. 2 Click Slideshow. 3 Click and drag the photos you want to include in Printer drop-down list. b Click File ΠAdd ...not scanning a new item, open the folder that contains your photo greeting card(s) attached. Printing an image as a multiple-page poster 1 Load paper. 2 From the desktop, double-click the Lexmark Imaging Studio icon. 3 From the Printing Creative Tasks area of the Welcome screen, click Poster. 4 If you...
User's Guide
Page 38
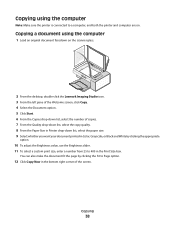
...: Make sure the printer is connected to a computer, and both the printer and computer are on the scanner glass. 2 From the desktop, double-click the Lexmark Imaging Studio icon. 3 From the left pane of the Welcome screen, click Copy. 4 Select the Document option. 5 Click Start. 6 From the Copies drop-down list, select the...
...: Make sure the printer is connected to a computer, and both the printer and computer are on the scanner glass. 2 From the desktop, double-click the Lexmark Imaging Studio icon. 3 From the left pane of the Welcome screen, click Copy. 4 Select the Document option. 5 Click Start. 6 From the Copies drop-down list, select the...
User's Guide
Page 39
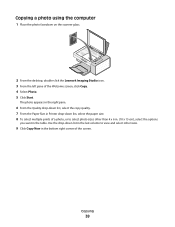
.... 9 Click Copy Now in the table. Copying a photo using the computer 1 Place the photo facedown on the scanner glass. 2 From the desktop, double-click the Lexmark Imaging Studio icon. 3 From the left pane of the screen. Use the drop-down list, select the paper size. 8 To select multiple prints of a photo, or to...
.... 9 Click Copy Now in the table. Copying a photo using the computer 1 Place the photo facedown on the scanner glass. 2 From the desktop, double-click the Lexmark Imaging Studio icon. 3 From the left pane of the screen. Use the drop-down list, select the paper size. 8 To select multiple prints of a photo, or to...
User's Guide
Page 41
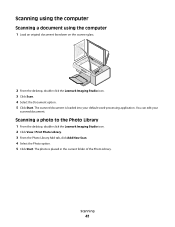
... document is placed in the current folder of the Photo Library. Scanning 41 Scanning a photo to the Photo Library 1 From the desktop, double-click the Lexmark Imaging Studio icon. 2 Click View / Print Photo Library. 3 From the Photo Library Add tab, click Add New Scan. 4 Select the Photo option. 5 Click Start. You can edit... application. Scanning using the computer Scanning a document using the computer 1 Load an original document facedown on the scanner glass. 2 From the desktop, double-click the Lexmark Imaging Studio icon. 3 Click Scan. 4 Select the Document option. 5 Click Start.
... document is placed in the current folder of the Photo Library. Scanning 41 Scanning a photo to the Photo Library 1 From the desktop, double-click the Lexmark Imaging Studio icon. 2 Click View / Print Photo Library. 3 From the Photo Library Add tab, click Add New Scan. 4 Select the Photo option. 5 Click Start. You can edit... application. Scanning using the computer Scanning a document using the computer 1 Load an original document facedown on the scanner glass. 2 From the desktop, double-click the Lexmark Imaging Studio icon. 3 Click Scan. 4 Select the Document option. 5 Click Start.
User's Guide
Page 42
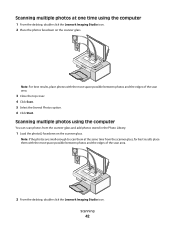
... the most space possible between photos and the edges of the scan area. 2 From the desktop, double-click the Lexmark Imaging Studio icon. Scanning multiple photos using the computer 1 From the desktop, double-click the Lexmark Imaging Studio icon. 2 Place the photos facedown on the scanner glass. Scanning 42 Note: For best results, place photos with...
... the most space possible between photos and the edges of the scan area. 2 From the desktop, double-click the Lexmark Imaging Studio icon. Scanning multiple photos using the computer 1 From the desktop, double-click the Lexmark Imaging Studio icon. 2 Place the photos facedown on the scanner glass. Scanning 42 Note: For best results, place photos with...
User's Guide
Page 43
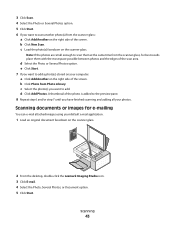
...8 Repeat step 6 and/or step 7 until you want to add. c Load the photo(s) facedown on the scanner glass. 2 From the desktop, double-click the Lexmark Imaging Studio icon. 3 Click E-mail. 4 Select the Photo, Several Photos, or Document option. 5 Click Start. Scanning 43 e Click Start. 7 If you want to scan...Add Another on the right side of the screen. d Select the Photo or Several Photos option. d Click Add Photos. Scanning documents or images for best results place them at the same time from Photo Library. b Click Photo from the scanner glass, for e-mailing You can e-mail ...
...8 Repeat step 6 and/or step 7 until you want to add. c Load the photo(s) facedown on the scanner glass. 2 From the desktop, double-click the Lexmark Imaging Studio icon. 3 Click E-mail. 4 Select the Photo, Several Photos, or Document option. 5 Click Start. Scanning 43 e Click Start. 7 If you want to scan...Add Another on the right side of the screen. d Select the Photo or Several Photos option. d Click Add Photos. Scanning documents or images for best results place them at the same time from Photo Library. b Click Photo from the scanner glass, for e-mailing You can e-mail ...
User's Guide
Page 44
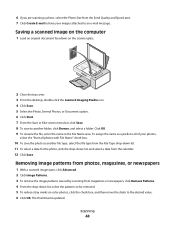
... to have your photos, select the "Start all photos with File Name" check box. 10 To save the photo as a prefix to all of your images attached to another file type, select the file type from the File Type drop-down list. 11 To select a date for the photo, click the... list, select the patterns to be removed. 5 To reduce stray marks on the scanner glass. 2 Close the top cover. 3 From the desktop, double-click the Lexmark Imaging Studio icon. 4 Click Scan. 5 Select the Photo, Several Photos, or Document option. 6 Click Start. 7 From the Save or Edit screen menu bar, click Save. 8 To save...
... to have your photos, select the "Start all photos with File Name" check box. 10 To save the photo as a prefix to all of your images attached to another file type, select the file type from the File Type drop-down list. 11 To select a date for the photo, click the... list, select the patterns to be removed. 5 To reduce stray marks on the scanner glass. 2 Close the top cover. 3 From the desktop, double-click the Lexmark Imaging Studio icon. 4 Click Scan. 5 Select the Photo, Several Photos, or Document option. 6 Click Start. 7 From the Save or Edit screen menu bar, click Save. 8 To save...

User's Guide
Page 45
Size • You can select the area to be scanned. Convert the image to text with OCR Select this to convert your selections permanent by choosing a paper.... Move the slider to move the program higher in the Scan Application list 1 From the desktop, double-click the Lexmark Imaging Studio icon. 2 Click View / Print Photo Library. 3 From the program taskbar at the bottom of programs in the ...check box. Customizing scan settings using the computer 1 From the desktop, double-click the Lexmark Imaging Studio icon. 2 Click Scan. 3 Click Custom Settings. 4 Change the settings as needed.
Size • You can select the area to be scanned. Convert the image to text with OCR Select this to convert your selections permanent by choosing a paper.... Move the slider to move the program higher in the Scan Application list 1 From the desktop, double-click the Lexmark Imaging Studio icon. 2 Click View / Print Photo Library. 3 From the program taskbar at the bottom of programs in the ...check box. Customizing scan settings using the computer 1 From the desktop, double-click the Lexmark Imaging Studio icon. 2 Click Scan. 3 Click Custom Settings. 4 Change the settings as needed.
User's Guide
Page 46
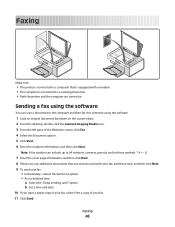
... these symbols 7 Enter the cover page information, and then click Next. 8 If there are turned on the scanner glass. 2 From the desktop, double-click the Lexmark Imaging Studio icon. 3 From the left pane of your fax: • Immediately-Select the Send now option. • At a scheduled time: a Select the "Delay sending until" option...
... these symbols 7 Enter the cover page information, and then click Next. 8 If there are turned on the scanner glass. 2 From the desktop, double-click the Lexmark Imaging Studio icon. 3 From the left pane of your fax: • Immediately-Select the Send now option. • At a scheduled time: a Select the "Delay sending until" option...
User's Guide
Page 47
.... 7 Click OK to 64 numbers, commas, periods, and/or these symbols Printing fax activity reports 1 From the desktop, double-click the Lexmark Imaging Studio icon. 2 From the left pane of the Welcome screen, click Fax. To access a Phone Book entry: 1 From the desktop, double-click the... Lexmark Imaging Studio icon. 2 From the left pane of telephone rings before the printer automatically receives faxes, select a setting from your operating system appear as part...
.... 7 Click OK to 64 numbers, commas, periods, and/or these symbols Printing fax activity reports 1 From the desktop, double-click the Lexmark Imaging Studio icon. 2 From the left pane of the Welcome screen, click Fax. To access a Phone Book entry: 1 From the desktop, double-click the... Lexmark Imaging Studio icon. 2 From the left pane of telephone rings before the printer automatically receives faxes, select a setting from your operating system appear as part...

User's Guide
Page 48
..."Block Junk Faxes" area, select the check box beside Enable Fax Blocking. 6 If you send or receive. 1 From the desktop, double-click the Lexmark Imaging Studio icon. 2 From the left pane of the fax number. • A fax number can include up to 64 numbers, commas, periods, and/or ...the Notes field. Faxing 48 b Click New. 5 Choose a date range. 6 Click Print. Blocking junk faxes 1 From the desktop, double-click the Lexmark Imaging Studio icon. 2 From the left pane of the current modem. • Change modem. • Choose whether to save the setting. Customizing fax settings Customizing ...
..."Block Junk Faxes" area, select the check box beside Enable Fax Blocking. 6 If you send or receive. 1 From the desktop, double-click the Lexmark Imaging Studio icon. 2 From the left pane of the fax number. • A fax number can include up to 64 numbers, commas, periods, and/or ...the Notes field. Faxing 48 b Click New. 5 Choose a date range. 6 Click Print. Blocking junk faxes 1 From the desktop, double-click the Lexmark Imaging Studio icon. 2 From the left pane of the current modem. • Change modem. • Choose whether to save the setting. Customizing fax settings Customizing ...

User's Guide
Page 49
.... 4 Click the Receiving Faxes tab. 5 From the "Incoming Calls" area, select Automatically. 6 From the "Rings before receiving a fax automatically 1 From the desktop, double-click the Lexmark Imaging Studio icon. 2 From the left pane of the Welcome screen, click Fax.
.... 4 Click the Receiving Faxes tab. 5 From the "Incoming Calls" area, select Automatically. 6 From the "Rings before receiving a fax automatically 1 From the desktop, double-click the Lexmark Imaging Studio icon. 2 From the left pane of the Welcome screen, click Fax.
User's Guide
Page 65
... 65 Make sure the printer is set as the default printer and is not lit" on the scanner glass. 2 From the desktop, double-click the Lexmark Imaging Studio icon. 3 From the left pane of your computer. Scanning takes too long or freezes the computer Other software may not be running Change the scanning...
... 65 Make sure the printer is set as the default printer and is not lit" on the scanner glass. 2 From the desktop, double-click the Lexmark Imaging Studio icon. 3 From the left pane of your computer. Scanning takes too long or freezes the computer Other software may not be running Change the scanning...
User's Guide
Page 66
...or newspapers" on the scanner glass in the lower right corner. Check document placement Make sure the document or photo is blinking, see "Removing image patterns from photo or glossy paper, a magazine, or a newspaper? Partial document or photo scans Check document placement Check paper size Make sure... 66 Adjust the quality of the scan 1 Load an original document facedown on the scanner glass. 2 From the desktop, double-click the Lexmark Imaging Studio icon. 3 From the left pane of the lights is loaded facedown on page 68 Cannot send or receive a fax Check the control If...
...or newspapers" on the scanner glass in the lower right corner. Check document placement Make sure the document or photo is blinking, see "Removing image patterns from photo or glossy paper, a magazine, or a newspaper? Partial document or photo scans Check document placement Check paper size Make sure... 66 Adjust the quality of the scan 1 Load an original document facedown on the scanner glass. 2 From the desktop, double-click the Lexmark Imaging Studio icon. 3 From the left pane of the lights is loaded facedown on page 68 Cannot send or receive a fax Check the control If...


