User's Guide
Page 8
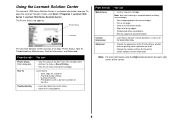
Learn how to contact Lexmark by phone, e-mail, or on the World Wide Web. • Change the appearance of the Printing Status window and turn printing voice notification on or off. • Change the network settings for new cartridges. • Print a test page. &#... : • View the status of the All-In-One. Using the Lexmark Solution Center The Lexmark 1200 Series Solution Center is Busy Printing. • View the ink levels of the print cartridges. The Printer Status tab appears. Printer Status Ink levels The Lexmark Solution Center consists of the screen. 8 Note: Wait...
Learn how to contact Lexmark by phone, e-mail, or on the World Wide Web. • Change the appearance of the Printing Status window and turn printing voice notification on or off. • Change the network settings for new cartridges. • Print a test page. &#... : • View the status of the All-In-One. Using the Lexmark Solution Center The Lexmark 1200 Series Solution Center is Busy Printing. • View the ink levels of the print cartridges. The Printer Status tab appears. Printer Status Ink levels The Lexmark Solution Center consists of the screen. 8 Note: Wait...
User's Guide
Page 15
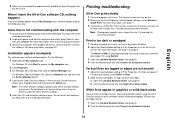
...the setup documentation. 2 Unplug the power cord from the electrical wall outlet, plug it exits. White lines appear in Print Properties. All-In-One is too dark or smudged 1 Remove the paper as it back in, and then press Power. Do not restart the computer. For best ... cable. Try the following: 1 Right-click the My computer icon. Going long periods without using Normal. 3 Open the Lexmark Solution Center (see page 7 or page 6. For Windows 2000 or Windows XP, select the Hardware tab, and then click the Device Manager button. 4 Look for the Other Devices category. If ...
...the setup documentation. 2 Unplug the power cord from the electrical wall outlet, plug it exits. White lines appear in Print Properties. All-In-One is too dark or smudged 1 Remove the paper as it back in, and then press Power. Do not restart the computer. For best ... cable. Try the following: 1 Right-click the My computer icon. Going long periods without using Normal. 3 Open the Lexmark Solution Center (see page 7 or page 6. For Windows 2000 or Windows XP, select the Hardware tab, and then click the Device Manager button. 4 Look for the Other Devices category. If ...
User's Guide
Page 20
...scanning problems 16 troubleshooting checklist 14 Troubleshooting tab 8 V View Saved Images page 6 Open with... parts of your All-In-One 4 photo paper 9 photos printing 7 scanning 11 poor quality printing 15 posters printing 7 Preview Now button 11 Preview section ... Setup tab 7 Print Layout tab 7 Quality/Copies tab 7 Save Settings menu 7 tabs 7 printing 9 banners 7 envelopes 7 photos 7 posters 7 Printing Status window changing appearance of 8 Q Quality/Copies tab 7 R reinstalling software 16 removing software 16 replacing print cartridges 13 S Save Settings menu 7 saved images viewing 6 ...
...scanning problems 16 troubleshooting checklist 14 Troubleshooting tab 8 V View Saved Images page 6 Open with... parts of your All-In-One 4 photo paper 9 photos printing 7 scanning 11 poor quality printing 15 posters printing 7 Preview Now button 11 Preview section ... Setup tab 7 Print Layout tab 7 Quality/Copies tab 7 Save Settings menu 7 tabs 7 printing 9 banners 7 envelopes 7 photos 7 posters 7 Printing Status window changing appearance of 8 Q Quality/Copies tab 7 R reinstalling software 16 removing software 16 replacing print cartridges 13 S Save Settings menu 7 saved images viewing 6 ...


