IPDS Emulation User’s Guide
Page 99
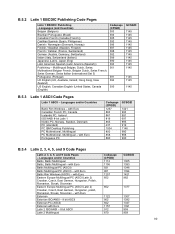
with Euro Baltic Rim Windows (ASCII) - Languages (and Countries) Belgian (Belgium) Brazilian Portuguese (Brazil) Canadian French (Canada (French)) Castilian Spanish (Spain, Philippines) Danish / Norwegian (Denmark, Norway) Finnish / Swedish (Sweden, Finland) ... GCSGID 1421 993 991 697 995 919 1146 980 988 990 B.5.4 Latin 2, 3, 4, 5, and 9 Code Pages Latin 2, 3, 4, 5, and 9 Code Pages - Languages and/or Countries Baltic Rim Windows - Languages and/or Countries Baltic, Baltic Multilingual Baltic, Baltic Multilingual -
with Euro Baltic Rim Windows (ASCII) - Languages (and Countries) Belgian (Belgium) Brazilian Portuguese (Brazil) Canadian French (Canada (French)) Castilian Spanish (Spain, Philippines) Danish / Norwegian (Denmark, Norway) Finnish / Swedish (Sweden, Finland) ... GCSGID 1421 993 991 697 995 919 1146 980 988 990 B.5.4 Latin 2, 3, 4, 5, and 9 Code Pages Latin 2, 3, 4, 5, and 9 Code Pages - Languages and/or Countries Baltic Rim Windows - Languages and/or Countries Baltic, Baltic Multilingual Baltic, Baltic Multilingual -

IPDS Emulation User’s Guide
Page 100
... 2, 3, 4, 5, and 9 Code Pages - with Euro Turkish - incl. Turkish Latin 5 PC (ASCII) - with Euro Latin 3 Multilingual - with Euro Turkish Windows (ASCII) - Languages and/or Countries Latin 2 Multilingual Latin 2 Multilingual - incl. Turkish Latin 3 Multilingual PC (ASCII) Latin 4 Latin 4 ISO/ANSI - 8 ... Turkish Latin 5 ISO/ANSI - 8 bit ASCII - with Euro Cyrillic PC (ASCII) Cyrillic PC (ASCII)- with Euro Latin 2 Windows (ASCII) - with Euro Greek Windows (ASCII) - incl. with Euro Cyrillic Russian PC (ASCII) - with Euro (Greek Eur) Greek ISO 8-bit ASCII Greek ISO 8-...
... 2, 3, 4, 5, and 9 Code Pages - with Euro Turkish - incl. Turkish Latin 5 PC (ASCII) - with Euro Latin 3 Multilingual - with Euro Turkish Windows (ASCII) - Languages and/or Countries Latin 2 Multilingual Latin 2 Multilingual - incl. Turkish Latin 3 Multilingual PC (ASCII) Latin 4 Latin 4 ISO/ANSI - 8 ... Turkish Latin 5 ISO/ANSI - 8 bit ASCII - with Euro Cyrillic PC (ASCII) Cyrillic PC (ASCII)- with Euro Latin 2 Windows (ASCII) - with Euro Greek Windows (ASCII) - incl. with Euro Cyrillic Russian PC (ASCII) - with Euro (Greek Eur) Greek ISO 8-bit ASCII Greek ISO 8-...
Troubleshooting Guide
Page 1
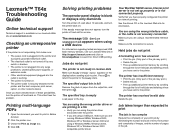
... the list of held jobs and deleting others you are using a Windows 98/Me, Windows 2000, Windows XP, or Windows Server 2003 compatible printer driver. See the drivers CD or the Lexmark Web site for Direct USB printing. Checking an unresponsive printer If the printer is blank or displays...Online technical support Technical support is not connected properly Verify that you are using a USB device For information regarding tested and approved USB flash memory devices, see our Lexmark Web site at www.lexmark.com. Once you want to the printer. You are using the wrong printer driver...
... the list of held jobs and deleting others you are using a Windows 98/Me, Windows 2000, Windows XP, or Windows Server 2003 compatible printer driver. See the drivers CD or the Lexmark Web site for Direct USB printing. Checking an unresponsive printer If the printer is blank or displays...Online technical support Technical support is not connected properly Verify that you are using a USB device For information regarding tested and approved USB flash memory devices, see our Lexmark Web site at www.lexmark.com. Once you want to the printer. You are using the wrong printer driver...
User's Guide
Page 3
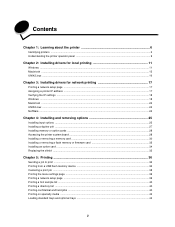
... Installing drivers for network printing 17 Printing a network setup page ...17 Assigning a printer IP address ...17 Verifying the IP settings ...18 Windows ...18 Macintosh ...22 UNIX/Linux ...24 NetWare ...24 Chapter 4: Installing and removing options 25 Installing input options ...25 Installing a duplex unit...card 32 Installing an option card ...34 Replacing the shield ...35 Chapter 5: Printing ...36 Sending a job to print ...36 Printing from a USB flash memory device ...36 Canceling a print job ...38 Printing the menu settings page ...39 Printing a network setup page ...39 Printing a font...
... Installing drivers for network printing 17 Printing a network setup page ...17 Assigning a printer IP address ...17 Verifying the IP settings ...18 Windows ...18 Macintosh ...22 UNIX/Linux ...24 NetWare ...24 Chapter 4: Installing and removing options 25 Installing input options ...25 Installing a duplex unit...card 32 Installing an option card ...34 Replacing the shield ...35 Chapter 5: Printing ...36 Sending a job to print ...36 Printing from a USB flash memory device ...36 Canceling a print job ...38 Printing the menu settings page ...39 Printing a network setup page ...39 Printing a font...

User's Guide
Page 11
... is not available for local printing 11 Installing drivers for Windows NT operating systems. To use a parallel cable. Note: Installing a custom driver will be used . Note: USB support is attached. The procedure to install drivers depends on the Lexmark Web site at www.lexmark.com. A separate printer object will not replace the system driver...
... is not available for local printing 11 Installing drivers for Windows NT operating systems. To use a parallel cable. Note: Installing a custom driver will be used . Note: USB support is attached. The procedure to install drivers depends on the Lexmark Web site at www.lexmark.com. A separate printer object will not replace the system driver...
User's Guide
Page 12
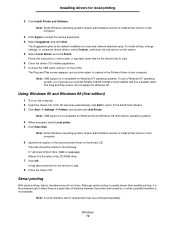
... select Custom, and follow the instructions on the computer. 2 Insert the drivers CD. Using Windows 95 and Windows 98 (first edition) 1 Turn on the screen. 5 Select Local Attach, and click Finish. Note: USB support is transferred one bit at a time. Serial printing With serial printing, data is not... the CD launches automatically, click Exit to return to load. 6 Close the drivers CD installer application. 7 Connect the USB cable, and turn on the drivers CD. Windows 12 The Plug and Play screen appears, and a printer object is not available. The Suggested option is the letter of...
... select Custom, and follow the instructions on the computer. 2 Insert the drivers CD. Using Windows 95 and Windows 98 (first edition) 1 Turn on the screen. 5 Select Local Attach, and click Finish. Note: USB support is transferred one bit at a time. Serial printing With serial printing, data is not... the CD launches automatically, click Exit to return to load. 6 Close the drivers CD installer application. 7 Connect the USB cable, and turn on the drivers CD. Windows 12 The Plug and Play screen appears, and a printer object is not available. The Suggested option is the letter of...

User's Guide
Page 13
...: • Maximum baud rate supported is the setting required for a change ), and then press . The printer returns to find the serial parameters. c Press until press . Windows 13 Setting parameters in the COM port. Note: For information about serial menus and messages, see the publications CD that shipped with the printer. 3 Press...
...: • Maximum baud rate supported is the setting required for a change ), and then press . The printer returns to find the serial parameters. c Press until press . Windows 13 Setting parameters in the COM port. Note: For information about serial menus and messages, see the publications CD that shipped with the printer. 3 Press...
User's Guide
Page 14
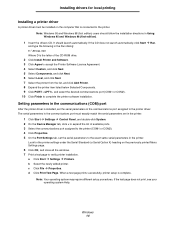
It should follow the installation directions in Using Windows 95 and Windows 98 (first edition). 1 Insert the drivers CD. If the CD does not launch automatically, click Start Æ Run, and type the following in the communications ... the exact same serial parameters in the communications port must be installed on the previously printed Menu Settings page. 6 Click OK, and close all the windows. 7 Print a test page to verify printer installation. The serial parameters in the printer. c Click File Æ Properties. Note: Your operating system may require different setup...
It should follow the installation directions in Using Windows 95 and Windows 98 (first edition). 1 Insert the drivers CD. If the CD does not launch automatically, click Start Æ Run, and type the following in the communications ... the exact same serial parameters in the communications port must be installed on the previously printed Menu Settings page. 6 Click OK, and close all the windows. 7 Print a test page to verify printer installation. The serial parameters in the printer. c Click File Æ Properties. Note: Your operating system may require different setup...

User's Guide
Page 16
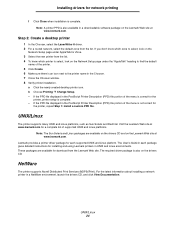
... click OK. All the printer driver packages support local printing using Lexmark printers in each package gives detailed instructions for Sun Solaris supports USB connections to Sun Ray appliances and Sun workstations. If the printer does not appear in the original Printer (USB) window. 7 In the PostScript Printer Description (PPD) File section, click Auto...
... click OK. All the printer driver packages support local printing using Lexmark printers in each package gives detailed instructions for Sun Solaris supports USB connections to Sun Ray appliances and Sun workstations. If the printer does not appear in the original Printer (USB) window. 7 In the PostScript Printer Description (PPD) File section, click Auto...
User's Guide
Page 18
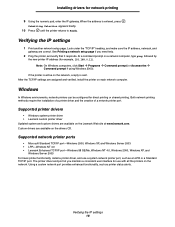
...18 Supported network printer ports • Microsoft Standard TCP/IP port-Windows 2000, Windows XP, and Windows Server 2003 • LPR-Windows NT 4.0 • Lexmark Enhanced TCP/IP port-Windows 98 SE/Me, Windows NT 4.0, Windows 2000, Windows XP, and Windows Server 2003 For basic printer functionality, install a printer driver, and... (for use a system network printer port, such as printer status alerts. Supported printer drivers • Windows system printer driver • Lexmark custom printer driver Updated system and custom drivers are assigned and verified, install the printer on the...
...18 Supported network printer ports • Microsoft Standard TCP/IP port-Windows 2000, Windows XP, and Windows Server 2003 • LPR-Windows NT 4.0 • Lexmark Enhanced TCP/IP port-Windows 98 SE/Me, Windows NT 4.0, Windows 2000, Windows XP, and Windows Server 2003 For basic printer functionality, install a printer driver, and... (for use a system network printer port, such as printer status alerts. Supported printer drivers • Windows system printer driver • Lexmark custom printer driver Updated system and custom drivers are assigned and verified, install the printer on the...

User's Guide
Page 19
...Click Add Port. d Enter the IP address in the list of the computers on the network using a local cable, such as USB. • Printer drivers are typically installed on the computer attached to it. Shared • Printer is connected to associate with the... Operating system Go to create the port. b Select Lexmark Enhanced TCP/IP Port, and enter the information to page Windows 98 SE, 19 Windows NT 4.0, Windows Me, Windows 2000, Windows XP, or Windows Server 2003 Windows NT 4.0, 20 Windows 2000, Windows XP, or Windows Server 2003 Direct printing using a network cable, such as...
...Click Add Port. d Enter the IP address in the list of the computers on the network using a local cable, such as USB. • Printer drivers are typically installed on the computer attached to it. Shared • Printer is connected to associate with the... Operating system Go to create the port. b Select Lexmark Enhanced TCP/IP Port, and enter the information to page Windows 98 SE, 19 Windows NT 4.0, Windows Me, Windows 2000, Windows XP, or Windows Server 2003 Windows NT 4.0, 20 Windows 2000, Windows XP, or Windows Server 2003 Direct printing using a network cable, such as...

User's Guide
Page 20
...the printer on the network." b Click Install Printer and Software. Note: USB support is shared in the Printers folder of all the network clients that will act as check box, and enter a name in Windows NT 4.0, a hand appears under the printer object. • Browse ..., or customize device drivers, select Custom, and follow these steps to the printer. f Click OK. It may appear to a Windows NT 4.0, Windows 2000, Windows XP, or Windows Server 2003 computer (which will print to verify printer installation. 2 Share the printer on the screen. a Click Start Æ...
...the printer on the network." b Click Install Printer and Software. Note: USB support is shared in the Printers folder of all the network clients that will act as check box, and enter a name in Windows NT 4.0, a hand appears under the printer object. • Browse ..., or customize device drivers, select Custom, and follow these steps to the printer. f Click OK. It may appear to a Windows NT 4.0, Windows 2000, Windows XP, or Windows Server 2003 computer (which will print to verify printer installation. 2 Share the printer on the screen. a Click Start Æ...

User's Guide
Page 21
... and other factors. 4 Close Network Neighborhood. 5 Print a test page to the Printers folder. Using the peer-to the printer. 1 Double-click Network Neighborhood on the Windows desktop of the client computer. 2 Locate the host name of driver information is fully installed on the Internet or an intranet), and click Next. If... Start Æ Settings Æ Printers. 2 Click Add Printer to applications much faster. If no system driver is a new printer, prompts may require different setup procedures. Windows 21 The server handles driver modifications and the print job processing.
... and other factors. 4 Close Network Neighborhood. 5 Print a test page to the Printers folder. Using the peer-to the printer. 1 Double-click Network Neighborhood on the Windows desktop of the client computer. 2 Locate the host name of driver information is fully installed on the Internet or an intranet), and click Next. If... Start Æ Settings Æ Printers. 2 Click Add Printer to applications much faster. If no system driver is a new printer, prompts may require different setup procedures. Windows 21 The server handles driver modifications and the print job processing.
User's Guide
Page 23
...to the Macintosh computer. c Choose Summary from the "File" menu. d Do one of the printer. • If the PPD file displayed in the Summary window is correct for the printer, then printer setup is complete. • If the PPD file displayed in Print Center or Printer Setup Utility, and repeat.... b Choose Print from the "Copies & Pages" pop-up menu. 7 Select the new printer from the printer list in the Printer Address box. 6 Choose Lexmark from the "Printer Model" pop-up menu. To create an AppleTalk print queue, see Step 2: Create a print queue in Print Center or Printer Setup Utility...
...to the Macintosh computer. c Choose Summary from the "File" menu. d Do one of the printer. • If the PPD file displayed in the Summary window is correct for the printer, then printer setup is complete. • If the PPD file displayed in Print Center or Printer Setup Utility, and repeat.... b Choose Print from the "Copies & Pages" pop-up menu. 7 Select the new printer from the printer list in the Printer Address box. 6 Choose Lexmark from the "Printer Model" pop-up menu. To create an AppleTalk print queue, see Step 2: Create a print queue in Print Center or Printer Setup Utility...
User's Guide
Page 24
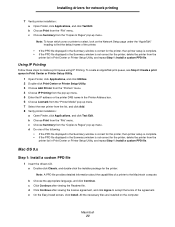
...printer to select, look on the Network Setup page under the "AppleTalk" heading to the printer name in a downloadable software package on the Lexmark Web site at www.lexmark.com for a complete list of the printer. 5 Click Create. 6 Make sure there is complete. - Note: A printer PPD is... the PPD file displayed in the PostScript Printer Description (PPD) file portion of the menu is also available in the Chooser. 7 Close the Chooser window. 8 Verify printer installation. a Click the newly created desktop printer icon. UNIX/Linux 24 The User's Guide in a NetWare environment, launch the ...
...printer to select, look on the Network Setup page under the "AppleTalk" heading to the printer name in a downloadable software package on the Lexmark Web site at www.lexmark.com for a complete list of the printer. 5 Click Create. 6 Make sure there is complete. - Note: A printer PPD is... the PPD file displayed in the PostScript Printer Description (PPD) file portion of the menu is also available in the Chooser. 7 Close the Chooser window. 8 Verify printer installation. a Click the newly created desktop printer icon. UNIX/Linux 24 The User's Guide in a NetWare environment, launch the ...
User's Guide
Page 36
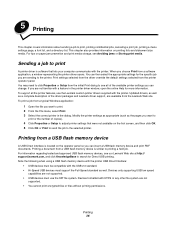
...menu, select Print. 3 Select the correct printer in the printer driver window, open the online Help for more information. Devices formatted with the USB 2.0 standard. • Hi-Speed USB devices must use the Lexmark custom printer drivers supplied with the printer. Sending a job to print...printer. To support all of the driver packages and Lexmark driver support, are available from the printer operator panel. Printing a document from a software application, a window representing the printer driver opens. Devices only supporting USB low speed capabilities are not familiar with a feature...
...menu, select Print. 3 Select the correct printer in the printer driver window, open the online Help for more information. Devices formatted with the USB 2.0 standard. • Hi-Speed USB devices must use the Lexmark custom printer drivers supplied with the printer. Sending a job to print...printer. To support all of the driver packages and Lexmark driver support, are available from the printer operator panel. Printing a document from a software application, a window representing the printer driver opens. Devices only supporting USB low speed capabilities are not familiar with a feature...

User's Guide
Page 38
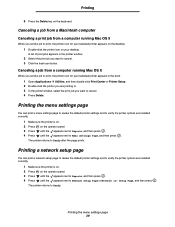
...are several methods for canceling a print job. • Canceling a job from the printer operator panel • Canceling a job from a computer running Windows Canceling a job from the taskbar When you send a job to print, a small printer icon appears in the right corner of the taskbar. 1 ...job. Canceling a job from the desktop • Canceling a job from a computer running Windows - The Stopped screen appears. Press Canceling a job from a Macintosh computer - A list of print jobs appears in the printer window. 5 Select the job you want to cancel. 3 Press the Delete key on the...
...are several methods for canceling a print job. • Canceling a job from the printer operator panel • Canceling a job from a computer running Windows Canceling a job from the taskbar When you send a job to print, a small printer icon appears in the right corner of the taskbar. 1 ...job. Canceling a job from the desktop • Canceling a job from a computer running Windows - The Stopped screen appears. Press Canceling a job from a Macintosh computer - A list of print jobs appears in the printer window. 5 Select the job you want to cancel. 3 Press the Delete key on the...
User's Guide
Page 39
...the trash can print a network setup page to review the default printer settings and to verify the printer options are printing to. 3 In the printer window, select the print job you are installed correctly. 1 Make sure the printer is on. 2 Press on the keyboard. A list of print jobs ... print, the printer icon for your selected printer appears on the desktop. 1 Double-click the printer icon on your selected printer appears in the printer window. 2 Select the print job you send a job to Menu Settings Page, and then press . Printing a network setup page You can button. Printing 6 ...
...the trash can print a network setup page to review the default printer settings and to verify the printer options are printing to. 3 In the printer window, select the print job you are installed correctly. 1 Make sure the printer is on. 2 Press on the keyboard. A list of print jobs ... print, the printer icon for your selected printer appears on the desktop. 1 Double-click the printer icon on your selected printer appears in the printer window. 2 Select the print job you send a job to Menu Settings Page, and then press . Printing a network setup page You can button. Printing 6 ...

User's Guide
Page 40
... PIN must enter a personal identification number (PIN) from the driver. The job is no Properties button, click Setup, and then click Properties.) 3 Depending on a USB flash memory device. Windows 1 From a word processor, spreadsheet, browser, or other application, select File Æ Print. 2 Click Properties. (If there is held ), and then select your print...
... PIN must enter a personal identification number (PIN) from the driver. The job is no Properties button, click Setup, and then click Properties.) 3 Depending on a USB flash memory device. Windows 1 From a word processor, spreadsheet, browser, or other application, select File Æ Print. 2 Click Properties. (If there is held ), and then select your print...

User's Guide
Page 42
... additional held jobs Held jobs (Verify Print, Reserve Print, or Repeat Print) are printed, the Verify Print job is satisfactory before printing the remaining copies. Windows 1 From a word processor, spreadsheet, browser, or other application, select File Æ Print. 2 In the Copies & Pages or General pop-up menu, select Job Routing. a When...
... additional held jobs Held jobs (Verify Print, Reserve Print, or Repeat Print) are printed, the Verify Print job is satisfactory before printing the remaining copies. Windows 1 From a word processor, spreadsheet, browser, or other application, select File Æ Print. 2 In the Copies & Pages or General pop-up menu, select Job Routing. a When...