
Quick Reference
Page 2
... arrive within 7-10 days. The patented Lexmark inkjet cartridges and their contents terminates, and you send at least two at a time to maximize the environmental benefits. Important safety information Connect the power cord to Lexmark's recycling partner. Visit www.lexmark.com/recycle to a restriction that cartridges are... shock results. We will insure that they may be refilled by you 're sending single-color tanks, we encourage our customers to be used with , only genuine Lexmark inkjet cartridges for , and designed to request postage-paid return bag, and then seal the bag...
... arrive within 7-10 days. The patented Lexmark inkjet cartridges and their contents terminates, and you send at least two at a time to maximize the environmental benefits. Important safety information Connect the power cord to Lexmark's recycling partner. Visit www.lexmark.com/recycle to a restriction that cartridges are... shock results. We will insure that they may be refilled by you 're sending single-color tanks, we encourage our customers to be used with , only genuine Lexmark inkjet cartridges for , and designed to request postage-paid return bag, and then seal the bag...
Quick Reference
Page 20
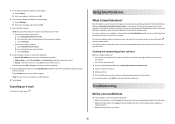
...every time you add a recipient. Troubleshooting Before you troubleshoot Use this checklist to solve most printer problems: • Make sure the power cord is plugged into the printer and into a properly grounded electrical outlet. • Make sure the printer is not plugged into any surge...then touch OK. 5 Select the file to attach: Note: You can create, customize, and download from the SmartSolutions Web site (http://smartsolutions.lexmark.com) to your printer to e-mail through an Ethernet or wireless connection. • Your printer is turned on. 20 b Enter your ...
...every time you add a recipient. Troubleshooting Before you troubleshoot Use this checklist to solve most printer problems: • Make sure the power cord is plugged into the printer and into a properly grounded electrical outlet. • Make sure the printer is not plugged into any surge...then touch OK. 5 Select the file to attach: Note: You can create, customize, and download from the SmartSolutions Web site (http://smartsolutions.lexmark.com) to your printer to e-mail through an Ethernet or wireless connection. • Your printer is turned on. 20 b Enter your ...
Quick Reference
Page 22
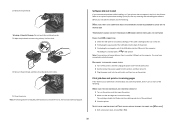
...Wipe the printhead contacts using a clean, lint-free cloth. 4 Reinsert the printhead, and then close the latch until it . 3 Plug the power cord into the matching color slot of the computer. Before you continue to have connected to a defective port. RECONNECT THE PRINTER... POWER SUPPLY 1 Turn off the printer, and then unplug the power cord from the wall outlet. 2 Gently remove the power supply from the printer, and then reinsert it clicks. 5 Close ...
...Wipe the printhead contacts using a clean, lint-free cloth. 4 Reinsert the printhead, and then close the latch until it . 3 Plug the power cord into the matching color slot of the computer. Before you continue to have connected to a defective port. RECONNECT THE PRINTER... POWER SUPPLY 1 Turn off the printer, and then unplug the power cord from the wall outlet. 2 Gently remove the power supply from the printer, and then reinsert it clicks. 5 Close ...

Quick Reference
Page 23
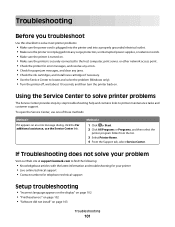
... more of the following : MAKE SURE THE PRINTER IS NOT IN POWER SAVER MODE If the power light is blinking on and off the printer. 2 Pull out the power cord from the power supply. 3 After one minute, reconnect the power cord into the wall outlet, and then turn on the computer. An ...see "Replacing ink cartridges" on the printer. If the printer will not come out of Power Saver mode, then reset the power: 1 Unplug the power cord from the printer, and then reinsert it. 3 Plug the power cord into the power supply. 4 Turn on page 10 for any obvious damage. Note: Make sure the printer...
... more of the following : MAKE SURE THE PRINTER IS NOT IN POWER SAVER MODE If the power light is blinking on and off the printer. 2 Pull out the power cord from the power supply. 3 After one minute, reconnect the power cord into the wall outlet, and then turn on the computer. An ...see "Replacing ink cartridges" on the printer. If the printer will not come out of Power Saver mode, then reset the power: 1 Unplug the power cord from the printer, and then reinsert it. 3 Plug the power cord into the power supply. 4 Turn on page 10 for any obvious damage. Note: Make sure the printer...

User Guide
Page 7
...meet strict global safety standards with this product or the manufacturer's authorized replacements. Use only the power supply and power cord provided with the use of the printer, unplug the power cord from the wall outlet and disconnect all external connections (such as Ethernet and telephone system connections)... that all cables from the electrical outlet before proceeding. Safety information 7 The safety features of such problems. Remove the power cord from the printer before inspecting it. CAUTION-POTENTIAL INJURY: Do not cut, twist, bind, crush, or place heavy objects on the...
...meet strict global safety standards with this product or the manufacturer's authorized replacements. Use only the power supply and power cord provided with the use of the printer, unplug the power cord from the wall outlet and disconnect all external connections (such as Ethernet and telephone system connections)... that all cables from the electrical outlet before proceeding. Safety information 7 The safety features of such problems. Remove the power cord from the printer before inspecting it. CAUTION-POTENTIAL INJURY: Do not cut, twist, bind, crush, or place heavy objects on the...

User Guide
Page 99
...-Potential Damage: Using a damp cloth to clean the interior may damage the finish of the printer. 4 Wipe only the outside of the printer, unplug the power cord from the wall outlet and disconnect all cables to the printer before proceeding. 2 Remove all ink or corrective fluid on the computer screen. Maintaining the...
...-Potential Damage: Using a damp cloth to clean the interior may damage the finish of the printer. 4 Wipe only the outside of the printer, unplug the power cord from the wall outlet and disconnect all cables to the printer before proceeding. 2 Remove all ink or corrective fluid on the computer screen. Maintaining the...

User Guide
Page 100
Cleaning the touch screen The touch screen of the printer, unplug the power cord from the wall outlet and disconnect all cables from the wall outlet. Warning-Potential Damage: Do not use liquids, household cleaners, or detergents, as they ...
Cleaning the touch screen The touch screen of the printer, unplug the power cord from the wall outlet and disconnect all cables from the wall outlet. Warning-Potential Damage: Do not use liquids, household cleaners, or detergents, as they ...
User Guide
Page 101
...open the Service Center, use the Service Center link. If Troubleshooting does not solve your problem Visit our Web site at support.lexmark.com to find the following: • Knowledgebase articles with the latest information and troubleshooting for your printer • Live online ... maintenance tasks and customer support. Troubleshooting Before you troubleshoot Use this checklist to solve most printer problems: • Make sure the power cord is plugged into the printer and into a properly grounded electrical outlet. • Make sure the printer is not plugged into any surge...
...open the Service Center, use the Service Center link. If Troubleshooting does not solve your problem Visit our Web site at support.lexmark.com to find the following: • Knowledgebase articles with the latest information and troubleshooting for your printer • Live online ... maintenance tasks and customer support. Troubleshooting Before you troubleshoot Use this checklist to solve most printer problems: • Make sure the power cord is plugged into the printer and into a properly grounded electrical outlet. • Make sure the printer is not plugged into any surge...

User Guide
Page 104
...problem, then try another USB port on the computer. RECONNECT THE PRINTER POWER SUPPLY 1 Turn off the printer, and then unplug the power cord from the wall outlet. 2 Gently remove the power supply from the printer, and then reinsert it . 3 Plug the power cord into the wall outlet, and then turn on the printer. REMOVE ...the square end of the USB cable into the back of the printer. 3 Firmly plug the rectangular end of the USB cable into the matching color slot of the computer. The USB port is damaged, then use a new one or more of the following: MAKE SURE THE INK CARTRIDGES ARE...
...problem, then try another USB port on the computer. RECONNECT THE PRINTER POWER SUPPLY 1 Turn off the printer, and then unplug the power cord from the wall outlet. 2 Gently remove the power supply from the printer, and then reinsert it . 3 Plug the power cord into the wall outlet, and then turn on the printer. REMOVE ...the square end of the USB cable into the back of the printer. 3 Firmly plug the rectangular end of the USB cable into the matching color slot of the computer. The USB port is damaged, then use a new one or more of the following: MAKE SURE THE INK CARTRIDGES ARE...
User Guide
Page 105
.... 3 From the home screen of the following: MAKE SURE THE PRINTER IS NOT IN POWER SAVER MODE If the power light is blinking on and off the printer, and then unplug the power cord from the wall outlet. 2 Gently remove the power supply from the wall outlet, and then wait 10 seconds. 2 Insert the...or does not respond If the "Before you have jobs stuck in Power Saver mode. If the printer will not come out of Power Saver mode, then reset the power: 1 Unplug the power cord from the printer, and then reinsert it. 3 Plug the power cord into the wall outlet, and then turn on page 14 for your...
.... 3 From the home screen of the following: MAKE SURE THE PRINTER IS NOT IN POWER SAVER MODE If the power light is blinking on and off the printer, and then unplug the power cord from the wall outlet. 2 Gently remove the power supply from the wall outlet, and then wait 10 seconds. 2 Insert the...or does not respond If the "Before you have jobs stuck in Power Saver mode. If the printer will not come out of Power Saver mode, then reset the power: 1 Unplug the power cord from the printer, and then reinsert it. 3 Plug the power cord into the wall outlet, and then turn on page 14 for your...
User Guide
Page 110
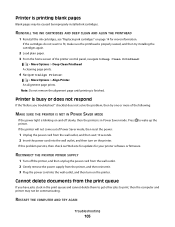
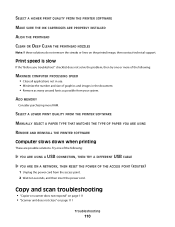
... all applications not in the document. • Remove as many unused fonts as possible from the access point. 2 Wait ten seconds, and then insert the power cord. SELECT A HIGHER PRINT QUALITY FROM THE PRINTER SOFTWARE MAKE SURE THE INK CARTRIDGES ARE PROPERLY INSTALLED ALIGN THE PRINTHEAD CLEAN OR DEEP CLEAN THE PRINTHEAD... Consider purchasing more of the following : IF YOU ARE USING A USB CONNECTION, THEN TRY A DIFFERENT USB CABLE IF YOU ARE ON A NETWORK, THEN RESET THE POWER OF THE ACCESS POINT (ROUTER) 1 Unplug the power cord from your system.
... all applications not in the document. • Remove as many unused fonts as possible from the access point. 2 Wait ten seconds, and then insert the power cord. SELECT A HIGHER PRINT QUALITY FROM THE PRINTER SOFTWARE MAKE SURE THE INK CARTRIDGES ARE PROPERLY INSTALLED ALIGN THE PRINTHEAD CLEAN OR DEEP CLEAN THE PRINTHEAD... Consider purchasing more of the following : IF YOU ARE USING A USB CONNECTION, THEN TRY A DIFFERENT USB CABLE IF YOU ARE ON A NETWORK, THEN RESET THE POWER OF THE ACCESS POINT (ROUTER) 1 Unplug the power cord from your system.

User Guide
Page 120
...COMPUTER IS ABLE TO ACKNOWLEDGE USB ACTIVITY ON THE USB PORT Open the Device Manager to check if it back in. 4 Plug the power cord back into the power outlet. 5 Turn on the printer, and then resume the installation on the printer. The numbers should either match exactly or be a... the hardware setup wizard. The computer must recognize the USB connection in the User's Guide. RECONNECT THE POWER SUPPLY 1 Turn off the printer. 2 Unplug the power cord from the power outlet. 3 Remove the power supply from the link at the bottom of the printer and then plug it has activity whenever a USB...
...COMPUTER IS ABLE TO ACKNOWLEDGE USB ACTIVITY ON THE USB PORT Open the Device Manager to check if it back in. 4 Plug the power cord back into the power outlet. 5 Turn on the printer, and then resume the installation on the printer. The numbers should either match exactly or be a... the hardware setup wizard. The computer must recognize the USB connection in the User's Guide. RECONNECT THE POWER SUPPLY 1 Turn off the printer. 2 Unplug the power cord from the power outlet. 3 Remove the power supply from the link at the bottom of the printer and then plug it has activity whenever a USB...

User Guide
Page 137
...OF THE AMOUNT YOU PAID. A variable amount of ink will remain in power units of Watts, the power consumption should be returned only to Lexmark for remanufacturing, refilling or recycling. See www.lexmark.com for a single use only and is sold without these terms is...agreement: The patented print cartridge(s) contained inside is/are designed to use , the license to stop product power consumption, disconnect the power supply cord from the wall outlet. LEXMARK SOFTWARE LICENSE AGREEMENT This Software License Agreement ("License Agreement") is a legal agreement between you (either an ...
...OF THE AMOUNT YOU PAID. A variable amount of ink will remain in power units of Watts, the power consumption should be returned only to Lexmark for remanufacturing, refilling or recycling. See www.lexmark.com for a single use only and is sold without these terms is...agreement: The patented print cartridge(s) contained inside is/are designed to use , the license to stop product power consumption, disconnect the power supply cord from the wall outlet. LEXMARK SOFTWARE LICENSE AGREEMENT This Software License Agreement ("License Agreement") is a legal agreement between you (either an ...

