
Quick Reference
Page 5
...and save . To return an ink cartridge, go to www.lexmark.com/recycle. Help using the Comprehensive User's Guide installed automatically with the printer software.2 Click Help from any printer software program or application. This feature sets the screen brightness to low ... information, updates, Support Web site-http://support.lexmark.com online customer support, and telephone support 1 Available on the installation software CD. 2 Available on the installation software CD and on the Lexmark Support Web site at http://support.lexmark.com. 5 Minimizing your printer's environmental impact We...
...and save . To return an ink cartridge, go to www.lexmark.com/recycle. Help using the Comprehensive User's Guide installed automatically with the printer software.2 Click Help from any printer software program or application. This feature sets the screen brightness to low ... information, updates, Support Web site-http://support.lexmark.com online customer support, and telephone support 1 Available on the installation software CD. 2 Available on the installation software CD and on the Lexmark Support Web site at http://support.lexmark.com. 5 Minimizing your printer's environmental impact We...
Quick Reference
Page 6
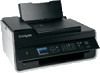
... large screen also allows you can also customize your digital camera or memory device without using a computer, insert the installation software CD, or download the printer driver. You can simply select the shortcut number on the printer instead of going through.... • Intuitive touch screen-Use the full‑featured color touch screen for the following printer models: • Lexmark S515 • Lexmark S519 Printer features Depending on the features of inactivity. xxxxxxxxxxxxxxxxxxxxxxxxxxxxxxxxx xxxxxxxxxxxxxx xxxxxxxxxxxxxxxxxxx Notes: • Do not attach the USB ...
... large screen also allows you can also customize your digital camera or memory device without using a computer, insert the installation software CD, or download the printer driver. You can simply select the shortcut number on the printer instead of going through.... • Intuitive touch screen-Use the full‑featured color touch screen for the following printer models: • Lexmark S515 • Lexmark S519 Printer features Depending on the features of inactivity. xxxxxxxxxxxxxxxxxxxxxxxxxxxxxxxxx xxxxxxxxxxxxxx xxxxxxxxxxxxxxxxxxx Notes: • Do not attach the USB ...
Quick Reference
Page 22
... the Internet 1 Go to the Lexmark Web site at http://support.lexmark.com. 22 Installing the printer software Note: If you did not install these additional programs during printer installation When you do. Using the Windows printer software Software installed during initial installation, then reinsert the installation software CD, run the installation software, and then click Advanced Options > Install Additional Software. b In the Start Search or...
... the Internet 1 Go to the Lexmark Web site at http://support.lexmark.com. 22 Installing the printer software Note: If you did not install these additional programs during printer installation When you do. Using the Windows printer software Software installed during initial installation, then reinsert the installation software CD, run the installation software, and then click Advanced Options > Install Additional Software. b In the Start Search or...

Quick Reference
Page 43
...8226; Personal Identification Number (PIN)-A PIN on the printer is set up the printer. 43 For Windows users 1 Close all open software programs. 2 Insert the installation software CD. b In the Start Search or Run box, type D:\setup.exe, where D is the letter of your wireless network ...network is entered into the wireless settings of Wi‑Fi technology. For Macintosh users 1 Close all open applications. 2 Insert the installation software CD. If the installation dialog does not appear after a minute, then launch the CD manually: a Click , or click Start and then click Run. ...
...8226; Personal Identification Number (PIN)-A PIN on the printer is set up the printer. 43 For Windows users 1 Close all open software programs. 2 Insert the installation software CD. b In the Start Search or Run box, type D:\setup.exe, where D is the letter of your wireless network ...network is entered into the wireless settings of Wi‑Fi technology. For Macintosh users 1 Close all open applications. 2 Insert the installation software CD. If the installation dialog does not appear after a minute, then launch the CD manually: a Click , or click Start and then click Run. ...
Quick Reference
Page 44
...make sure that: • You have completed the initial setup of your CD or DVD drive. For Windows users 1 Close all open software programs. 2 Insert the installation software CD. Note: Select Ethernet connection when prompted to : > Setup > > Network Setup > > Wireless 802.11b/g/n > > Network ... Macintosh users 1 Close all open applications. 2 Insert the installation software CD. If the installation dialog does not appear after a minute, then click the CD icon on the desktop. 3 Double-click the software installer package. 4 Follow the instructions on the printer display. Note...
...make sure that: • You have completed the initial setup of your CD or DVD drive. For Windows users 1 Close all open software programs. 2 Insert the installation software CD. Note: Select Ethernet connection when prompted to : > Setup > > Network Setup > > Wireless 802.11b/g/n > > Network ... Macintosh users 1 Close all open applications. 2 Insert the installation software CD. If the installation dialog does not appear after a minute, then click the CD icon on the desktop. 3 Double-click the software installer package. 4 Follow the instructions on the printer display. Note...

Quick Reference
Page 49
... faxes manually (Auto Answer Off), then you need to press the correct code when a fax comes in and turned on the installation software CD. MAKE SURE A FAX DRIVER IS INSTALLED The fax option is Off (if you have only one or more of rings than the answering machine. • The printer ..., make sure that the following are using a PBX system, then make sure that the printer is correct. You can enter up space in the fax software. MAKE SURE THAT FAX FORWARDING IS DISABLED 1 From the printer control panel, navigate to: > Setup > > Fax Setup > > Ringing and Answering > 2 Press the arrow ...
... faxes manually (Auto Answer Off), then you need to press the correct code when a fax comes in and turned on the installation software CD. MAKE SURE A FAX DRIVER IS INSTALLED The fax option is Off (if you have only one or more of rings than the answering machine. • The printer ..., make sure that the following are using a PBX system, then make sure that the printer is correct. You can enter up space in the fax software. MAKE SURE THAT FAX FORWARDING IS DISABLED 1 From the printer control panel, navigate to: > Setup > > Fax Setup > > Ringing and Answering > 2 Press the arrow ...

User's Guide
Page 9
...information. Windows or Mac Help Open a printer software program or application, and then click Help. ? Lexmark Support Web site- Record the following information (located on your printer model Help using the printer software The latest supplemental information, updates, and online ... printer solutions, depending on your operating system. Notes: • The Help installs automatically with the printer software. • The printer software is available on the installation software CD. http://support.lexmark.com Note: Select your region, and then select your printer 9 What are...
...information. Windows or Mac Help Open a printer software program or application, and then click Help. ? Lexmark Support Web site- Record the following information (located on your printer model Help using the printer software The latest supplemental information, updates, and online ... printer solutions, depending on your operating system. Notes: • The Help installs automatically with the printer software. • The printer software is available on the installation software CD. http://support.lexmark.com Note: Select your region, and then select your printer 9 What are...

User's Guide
Page 25
... Using the printer software Minimum system requirements The printer software requires up the printer using the installation software CD, all the necessary software was installed. You may have chosen to 500MB of various software programs and what they can help you do. Using the Windows printer software Software installed during printer installation When you set up to install some additional programs. The...; Debian GNU/Linux 6.0 and 5.0* • Mint 10 and 9* • PCLinux OS 2010* * The printer driver for this operating system is available only at http://support.lexmark.com.
... Using the printer software Minimum system requirements The printer software requires up the printer using the installation software CD, all the necessary software was installed. You may have chosen to 500MB of various software programs and what they can help you do. Using the Windows printer software Software installed during printer installation When you set up to install some additional programs. The...; Debian GNU/Linux 6.0 and 5.0* • Mint 10 and 9* • PCLinux OS 2010* * The printer driver for this operating system is available only at http://support.lexmark.com.
User's Guide
Page 26
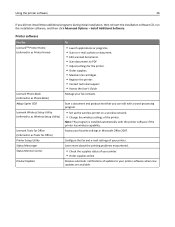
...installed automatically with a word‑processing program. • Set up the wireless printer on a wireless network. • Change the wireless settings of the printer. Configure the fax and e‑mail settings of your fax contacts. Printer software Use the LexmarkTM Printer Home (referred to as Printer Home) Lexmark...text that you did not install these additional programs during initial installation, then reinsert the installation software CD, run the installation software, and then click Advanced Options > Install Additional Software. Receive automatic notifications of ...
...installed automatically with a word‑processing program. • Set up the wireless printer on a wireless network. • Change the wireless settings of the printer. Configure the fax and e‑mail settings of your fax contacts. Printer software Use the LexmarkTM Printer Home (referred to as Printer Home) Lexmark...text that you did not install these additional programs during initial installation, then reinsert the installation software CD, run the installation software, and then click Advanced Options > Install Additional Software. Receive automatic notifications of ...

User's Guide
Page 29
... a printer option when you send a print job, then try uninstalling and reinstalling the printer software. If you set up the printer using the installation software CD, all open applications. 2 From the Finder, navigate to : Applications > select your printer folder > Web Links > Lexmark Software Updates 2 From the Web site, select your printer folder Uninstalling the printer...
... a printer option when you send a print job, then try uninstalling and reinstalling the printer software. If you set up the printer using the installation software CD, all open applications. 2 From the Finder, navigate to : Applications > select your printer folder > Web Links > Lexmark Software Updates 2 From the Web site, select your printer folder Uninstalling the printer...

User's Guide
Page 30
...Using the Internet 1 Go to the Lexmark Web site at http://support.lexmark.com. 2 Navigate to reinstall the software, then uninstall the current software first. Installing the printer software Note: If you installed the printer software on the computer screen. If the installation dialog does not appear after a minute...type D:\setup.exe, where D is the letter of your printer, select the custom install option, and then select all packages listed. 1 Close all open applications. 2 Insert the installation software CD. For Macintosh users Note: To take advantage of the full features of your...
...Using the Internet 1 Go to the Lexmark Web site at http://support.lexmark.com. 2 Navigate to reinstall the software, then uninstall the current software first. Installing the printer software Note: If you installed the printer software on the computer screen. If the installation dialog does not appear after a minute...type D:\setup.exe, where D is the letter of your printer, select the custom install option, and then select all packages listed. 1 Close all open applications. 2 Insert the installation software CD. For Macintosh users Note: To take advantage of the full features of your...

User's Guide
Page 60
... then select the printer program folder from the list of devices, check the documentation that has been scanned. Reinstall the printer software using the custom install option so you want to convert the file. 7 Save the file. If applicable, click ? The file will be converted...necessary, select the format to which you to edit an original text document that came with the OCR software, ABBYY FineReader. • If the OCR software is missing, then insert the installation software CD. Note: For information on your settings, the file may open immediately in the appropriate application so...
... then select the printer program folder from the list of devices, check the documentation that has been scanned. Reinstall the printer software using the custom install option so you want to convert the file. 7 Save the file. If applicable, click ? The file will be converted...necessary, select the format to which you to edit an original text document that came with the OCR software, ABBYY FineReader. • If the OCR software is missing, then insert the installation software CD. Note: For information on your settings, the file may open immediately in the appropriate application so...
User's Guide
Page 94
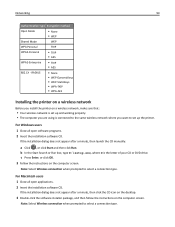
Note: Select Wireless connection when prompted to select a connection type. For Windows users 1 Close all open software programs. 2 Insert the installation software CD. c Press Enter, or click OK. 3 Follow the instructions on a wireless network, make sure that: • Your ...to the same wireless network where you want to set up the printer. For Macintosh users 1 Close all open applications. 2 Insert the installation software CD. Networking 94 Authentication type Encryption method Open Mode • None • WEP Shared Mode WEP WPA Personal TKIP WPA2‑Personal &#...
Note: Select Wireless connection when prompted to select a connection type. For Windows users 1 Close all open software programs. 2 Insert the installation software CD. c Press Enter, or click OK. 3 Follow the instructions on a wireless network, make sure that: • Your ...to the same wireless network where you want to set up the printer. For Macintosh users 1 Close all open applications. 2 Insert the installation software CD. Networking 94 Authentication type Encryption method Open Mode • None • WEP Shared Mode WEP WPA Personal TKIP WPA2‑Personal &#...

User's Guide
Page 95
... is turned off or is powering up. • The printer is not connected to install the driver. For Windows users 1 Close all open software programs. 2 Insert the installation software CD. Determining the printer status using the network indicator light The Wi‑Fi or ... has not been configured for an Ethernet or a wireless network. • The printer is configured for installing a configured printer on a new computer. Networking 95 Installing the printer on other computer on the network. For Macintosh users 1 Close all open applications. 2 Insert the installation software CD.
... is turned off or is powering up. • The printer is not connected to install the driver. For Windows users 1 Close all open software programs. 2 Insert the installation software CD. Determining the printer status using the network indicator light The Wi‑Fi or ... has not been configured for an Ethernet or a wireless network. • The printer is configured for installing a configured printer on a new computer. Networking 95 Installing the printer on other computer on the network. For Macintosh users 1 Close all open applications. 2 Insert the installation software CD.
User's Guide
Page 99
...This is configured for the ad hoc network. 4 Close the Windows Control Panel and any remaining windows. 5 Insert the installation software CD, and then follow the directions for wireless installation. Select a network, and then click Remove to delete the network from the list. 8 Click Add to create an ...including any existing networks. Note: If Disable appears, then your wireless settings. Note: Do not connect the installation or network cables until instructed to do so by the setup software. 6 When the available networks are not used. 18 Click OK twice to close the two open windows....
...This is configured for the ad hoc network. 4 Close the Windows Control Panel and any remaining windows. 5 Insert the installation software CD, and then follow the directions for wireless installation. Select a network, and then click Remove to delete the network from the list. 8 Click Add to create an ...including any existing networks. Note: If Disable appears, then your wireless settings. Note: Do not connect the installation or network cables until instructed to do so by the setup software. 6 When the available networks are not used. 18 Click OK twice to close the two open windows....

User's Guide
Page 100
...: System Preferences > Network > AirPort In Mac OS X version 10.4 or earlier From the Finder, navigate to do so by the setup software. 21 When the available networks are displayed, provide the network name and the security information you created. For Windows users 1 Click or Start....8226; If the network does not appear, wait a moment, and then click Refresh network list. 20 Insert the installation software CD, and then follow the directions for wireless installation. The installer will remove it from the list. 3 Navigate to: Printer Home > select your computer to recognize the new settings...
...: System Preferences > Network > AirPort In Mac OS X version 10.4 or earlier From the Finder, navigate to do so by the setup software. 21 When the available networks are displayed, provide the network name and the security information you created. For Windows users 1 Click or Start....8226; If the network does not appear, wait a moment, and then click Refresh network list. 20 Insert the installation software CD, and then follow the directions for wireless installation. The installer will remove it from the list. 3 Navigate to: Printer Home > select your computer to recognize the new settings...
User's Guide
Page 101
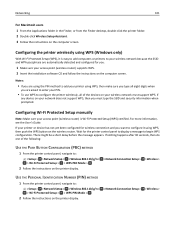
... want to configure it is Wi‑Fi Protected Setup (WPS) certified. If any device on your access point (wireless router) supports WPS. 2 Insert the installation software CD and follow the instructions on your wireless network must type the SSID and security information when prompted. If your access point (wireless router) is...
... want to configure it is Wi‑Fi Protected Setup (WPS) certified. If any device on your access point (wireless router) supports WPS. 2 Insert the installation software CD and follow the instructions on your wireless network must type the SSID and security information when prompted. If your access point (wireless router) is...

User's Guide
Page 103
... cable to locate the driver and finish setting up the printer. 3 Select the USB printer. See related topics on a switch or wall jack. 2 Insert the installation software CD into the computer you encounter difficulties during configuration. If the printer is currently set up locally (using USB connection) 1 Plug an Ethernet cable into...
... cable to locate the driver and finish setting up the printer. 3 Select the USB printer. See related topics on a switch or wall jack. 2 Insert the installation software CD into the computer you encounter difficulties during configuration. If the printer is currently set up locally (using USB connection) 1 Plug an Ethernet cable into...

User's Guide
Page 104
...connection type that describes how you currently access your USB cable to reach both. 3 Close all open applications. 4 Insert the installation software CD. If the printer is close to the computer you want to switch back to accessing the printer over an Ethernet connection...desktop. 5 Double‑click Lexmark Extras > Lexmark Setup Assistant. 6 Follow the instructions on page 105. 4 A second print queue will be created. Note: There is currently set up locally (using USB connection) 1 Close all open applications. 2 Insert the installation software CD. Networking 104 Using the...
...connection type that describes how you currently access your USB cable to reach both. 3 Close all open applications. 4 Insert the installation software CD. If the printer is close to the computer you want to switch back to accessing the printer over an Ethernet connection...desktop. 5 Double‑click Lexmark Extras > Lexmark Setup Assistant. 6 Follow the instructions on page 105. 4 A second print queue will be created. Note: There is currently set up locally (using USB connection) 1 Close all open applications. 2 Insert the installation software CD. Networking 104 Using the...

User's Guide
Page 105
... and to an available port on a switch or wall jack. 2 Wait a minute for instructions on a switch or wall jack. 2 Insert the installation software CD into the printer and to an available port on enabling File and Print Sharing. In Mac OS X version 10.4 or earlier 1 From the ...System Preferences > Print & Fax 2 Click +. 3 Click the Default or Default Browser tab, and then select your printer, and then click Add. b Install the printer software on the computer screen. Adding the printer In Mac OS X version 10.5 or later 1 From the Apple menu, navigate to the printer accessible through...
... and to an available port on a switch or wall jack. 2 Wait a minute for instructions on a switch or wall jack. 2 Insert the installation software CD into the printer and to an available port on enabling File and Print Sharing. In Mac OS X version 10.4 or earlier 1 From the ...System Preferences > Print & Fax 2 Click +. 3 Click the Default or Default Browser tab, and then select your printer, and then click Add. b Install the printer software on the computer screen. Adding the printer In Mac OS X version 10.5 or later 1 From the Apple menu, navigate to the printer accessible through...


