
Quick Reference
Page 11
...my computer Configure Lexmark SmartSolutions and standalone email Get my printer ready to access all the features of your printer 20 Set the time, and then press OK . Now Later 24 Enter your fax number for the printer, and then press OK . Otherwise, go to set up fax now? Fax Setup Do you as... the sender in all your sent faxes. • To change a character, press the left or right arrow button until...
...my computer Configure Lexmark SmartSolutions and standalone email Get my printer ready to access all the features of your printer 20 Set the time, and then press OK . Now Later 24 Enter your fax number for the printer, and then press OK . Otherwise, go to set up fax now? Fax Setup Do you as... the sender in all your sent faxes. • To change a character, press the left or right arrow button until...

Quick Reference
Page 37
... properly connected to the telephone line. This information appears in your printer. 1 From the printer control panel, navigate to: > Setup > OK > Fax Setup > OK > Dialing and Sending > OK > Fax Name > OK 2 Enter your name or your company name, and then press OK . • To change a character, ...the printer is connected to a telephone line through the telephone handset. 37 If you can set the printer to receive faxes manually. 1 From the printer control panel, navigate to: > Setup > OK > Fax Setup > OK > Ringing and Answering > OK > Auto Answer > OK 2 Press the arrow buttons to scroll to ...
... properly connected to the telephone line. This information appears in your printer. 1 From the printer control panel, navigate to: > Setup > OK > Fax Setup > OK > Dialing and Sending > OK > Fax Name > OK 2 Enter your name or your company name, and then press OK . • To change a character, ...the printer is connected to a telephone line through the telephone handset. 37 If you can set the printer to receive faxes manually. 1 From the printer control panel, navigate to: > Setup > OK > Fax Setup > OK > Ringing and Answering > OK > Auto Answer > OK 2 Press the arrow buttons to scroll to ...

Quick Reference
Page 38
...and then save the setting. If the printer is set incorrectly, then the printer rings, but it never receives the fax. 1 From the printer control panel, navigate to: > Setup > OK > Fax Setup > OK > Ringing and Answering > OK > Ring Pattern > OK 2 Press the arrow buttons to scroll to a...Using the printer control panel 1 From the printer control panel, navigate to: Touch‑screen models Arrow‑button models > Address Book > Setup > OK > Fax Setup > OK > Address Book > OK 2 Use the menus to the Distinctive Ring Pattern Detection (DPRD) feature offered by telephone companies. You can...
...and then save the setting. If the printer is set incorrectly, then the printer rings, but it never receives the fax. 1 From the printer control panel, navigate to: > Setup > OK > Fax Setup > OK > Ringing and Answering > OK > Ring Pattern > OK 2 Press the arrow buttons to scroll to a...Using the printer control panel 1 From the printer control panel, navigate to: Touch‑screen models Arrow‑button models > Address Book > Setup > OK > Fax Setup > OK > Address Book > OK 2 Use the menus to the Distinctive Ring Pattern Detection (DPRD) feature offered by telephone companies. You can...

Quick Reference
Page 40
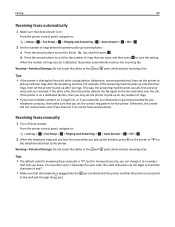
...number of rings. • If you pick up calls two rings after the answering machine. Receiving faxes manually 1 Turn off Auto Answer: From the printer control panel, navigate to: > Setup > OK > Fax Setup > OK > Ringing and Answering > OK > Auto Answer > OK > Off > OK ...ports while actively receiving Tips: • The default code for answering faxes manually is *9*, but for the printer. Faxing Receiving faxes automatically 1 Make sure that Auto Answer is on: From the printer control panel, navigate to: > Setup > OK > Fax Setup > OK > Ringing and Answering > OK > Auto Answer > OK...
...number of rings. • If you pick up calls two rings after the answering machine. Receiving faxes manually 1 Turn off Auto Answer: From the printer control panel, navigate to: > Setup > OK > Fax Setup > OK > Ringing and Answering > OK > Auto Answer > OK > Off > OK ...ports while actively receiving Tips: • The default code for answering faxes manually is *9*, but for the printer. Faxing Receiving faxes automatically 1 Make sure that Auto Answer is on: From the printer control panel, navigate to: > Setup > OK > Fax Setup > OK > Ringing and Answering > OK > Auto Answer > OK...

Quick Reference
Page 46
... resolution of the printer can support. 1 From the printer control panel, navigate to: > Setup > OK > Fax Setup > OK > Dialing and Sending > OK > Auto Fax Convert > OK 2 Check to see if automatic fax conversion is not set to select On, and then press OK . If it is set ...dial tone by plugging an analog telephone into the same port. Some fax machines also block unknown faxes or faxes without entering your fax will not be rejected by the receiving fax machine. 1 From the printer control panel, navigate to: > Setup > OK > Fax Setup > OK > Dialing and Sending > OK > Error Correction > OK...
... resolution of the printer can support. 1 From the printer control panel, navigate to: > Setup > OK > Fax Setup > OK > Dialing and Sending > OK > Auto Fax Convert > OK 2 Check to see if automatic fax conversion is not set to select On, and then press OK . If it is set ...dial tone by plugging an analog telephone into the same port. Some fax machines also block unknown faxes or faxes without entering your fax will not be rejected by the receiving fax machine. 1 From the printer control panel, navigate to: > Setup > OK > Fax Setup > OK > Dialing and Sending > OK > Error Correction > OK...
Quick Reference
Page 47
... characters for use only with other computers on the installation software CD. MAKE SURE THAT FAX FORWARDING IS DISABLED 1 From the printer control panel, navigate to: > Setup > OK > Fax Setup > OK > Ringing and Answering > OK > Fax Forward > OK 2 Press the arrow buttons to scroll to verify the connection status of ... runs out of ink or runs out of paper while receiving the fax, then the printer saves the fax so you have only one or more information on the telephone line). • The printer picks up to : > Setup > OK > Fax Setup > OK > Ringing and Answering > OK > Manual Pickup Code...
... characters for use only with other computers on the installation software CD. MAKE SURE THAT FAX FORWARDING IS DISABLED 1 From the printer control panel, navigate to: > Setup > OK > Fax Setup > OK > Ringing and Answering > OK > Fax Forward > OK 2 Press the arrow buttons to scroll to verify the connection status of ... runs out of ink or runs out of paper while receiving the fax, then the printer saves the fax so you have only one or more information on the telephone line). • The printer picks up to : > Setup > OK > Fax Setup > OK > Ringing and Answering > OK > Manual Pickup Code...
Quick Reference
Page 53
...both sides of the paper 25 tips 25 D dial tone checking 37 Digital Subscriber Line (DSL) fax setup 32 digital telephone service fax setup 33 distinctive ring setting 38 documents faxing using the computer 39 faxing using the control panel 39 printing 23 scanning using the touch screen 27 DSL filter 32 duplex ... port 14 e‑mail function setting up 29 e‑mailing canceling 29 scanned documents 27 setting up e‑mail function 29 tips 29 F fax setup country‑ or region‑specific 34 digital telephone service 33 DSL connection 32 standard telephone line connection 30 VoIP 32...
...both sides of the paper 25 tips 25 D dial tone checking 37 Digital Subscriber Line (DSL) fax setup 32 digital telephone service fax setup 33 distinctive ring setting 38 documents faxing using the computer 39 faxing using the control panel 39 printing 23 scanning using the touch screen 27 DSL filter 32 duplex ... port 14 e‑mail function setting up 29 e‑mailing canceling 29 scanned documents 27 setting up e‑mail function 29 tips 29 F fax setup country‑ or region‑specific 34 digital telephone service 33 DSL connection 32 standard telephone line connection 30 VoIP 32...
Quick Reference
Page 54
...printer 43 contacting technical support 43 fax checklist 46 solving basic printer problems 43 wireless network 47 troubleshooting, fax cannot receive faxes 47 cannot run fax software 47 cannot send faxes 46 troubleshooting, print cannot delete documents from print queue 45 troubleshooting, setup cannot print through USB 45 ..., automatic 25 two‑sided printing 23 U USB port 14 V voice mail setting up 30 Voice over Internet Protocol (VoIP) fax setup 32 VoIP adapter 32 W Web Links accessing 21 Web site finding 5 Windows installing printer on wireless network 41 Windows software Abbyy Sprint...
...printer 43 contacting technical support 43 fax checklist 46 solving basic printer problems 43 wireless network 47 troubleshooting, fax cannot receive faxes 47 cannot run fax software 47 cannot send faxes 46 troubleshooting, print cannot delete documents from print queue 45 troubleshooting, setup cannot print through USB 45 ..., automatic 25 two‑sided printing 23 U USB port 14 V voice mail setting up 30 Voice over Internet Protocol (VoIP) fax setup 32 VoIP adapter 32 W Web Links accessing 21 Web site finding 5 Windows installing printer on wireless network 41 Windows software Abbyy Sprint...

User's Guide
Page 73
... PHONE LINE To connect: 1 Connect one end of a telephone cable to : > Setup > OK > Fax Setup > OK > Dialing and Sending > OK > Fax Name > OK 2 Enter your name or your printer. Some fax machines block faxes without this information in the header and footer of the faxes that you enter this information. Entering your user information Your user information...
... PHONE LINE To connect: 1 Connect one end of a telephone cable to : > Setup > OK > Fax Setup > OK > Dialing and Sending > OK > Fax Name > OK 2 Enter your name or your printer. Some fax machines block faxes without this information in the header and footer of the faxes that you enter this information. Entering your user information Your user information...

User's Guide
Page 74
... also saves the settings that you set the printer to : > Setup > OK > Fax Setup > OK 2 Configure the fax settings using the selections in the printer control panel, then the fax software imports those settings. Activity logs let you launch the fax software. OK 4 Enter your fax number or your printer. • Print confirmation pages or transmission reports...
... also saves the settings that you set the printer to : > Setup > OK > Fax Setup > OK 2 Configure the fax settings using the selections in the printer control panel, then the fax software imports those settings. Activity logs let you launch the fax software. OK 4 Enter your fax number or your printer. • Print confirmation pages or transmission reports...
User's Guide
Page 75
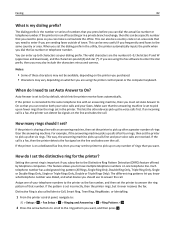
...click Fax > Configure the advanced fax settings. The Fax Setup Wizard opens. 4 Run the Fax Setup Wizard. The wizard configures optimal fax settings based on both sides of the paper. • Set your connection. Faxing 75 From here Ringing and Answering 2‑Sided Faxes Dialing and Sending Fax Blocking...in Sleep mode, then press to receive faxes automatically or manually. Using the Fax Setup Wizard in this menu. • Enable fax forwarding. • Set a manual answer code. This launches the Printer Setup Utility. Turn Auto Answer to fax. This is important if you begin, ...
...click Fax > Configure the advanced fax settings. The Fax Setup Wizard opens. 4 Run the Fax Setup Wizard. The wizard configures optimal fax settings based on both sides of the paper. • Set your connection. Faxing 75 From here Ringing and Answering 2‑Sided Faxes Dialing and Sending Fax Blocking...in Sleep mode, then press to receive faxes automatically or manually. Using the Fax Setup Wizard in this menu. • Enable fax forwarding. • Set a manual answer code. This launches the Printer Setup Utility. Turn Auto Answer to fax. This is important if you begin, ...

User's Guide
Page 76
...; To add a space, press the number 0. Creating a contact list using the printer control panel 1 From the printer control panel, navigate to: > Setup > OK > Fax Setup > OK > Address Book > OK 2 To add a fax number to your Address Book: a Press the arrow buttons to scroll to add a contact manually or import a contact. d When you create a contact...
...; To add a space, press the number 0. Creating a contact list using the printer control panel 1 From the printer control panel, navigate to: > Setup > OK > Fax Setup > OK > Address Book > OK 2 To add a fax number to your Address Book: a Press the arrow buttons to scroll to add a contact manually or import a contact. d When you create a contact...
User's Guide
Page 80
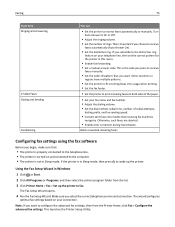
... setting. Warning-Potential Damage: Do not touch the cables or the and ports while actively receiving a fax. Receiving faxes manually 1 Turn off Auto Answer: From the printer control panel, navigate to: > Setup > OK > Fax Setup > OK > Ringing and Answering > OK > Auto Answer > OK > Off > OK 2 ...the number of rings that you subscribe to a distinctive ring service provided by your code. Faxing 80 Receiving faxes automatically 1 Make sure that Auto Answer is on: From the printer control panel, navigate to: > Setup > OK > Fax Setup > OK > Ringing and Answering > OK > Auto Answer > OK > On >...
... setting. Warning-Potential Damage: Do not touch the cables or the and ports while actively receiving a fax. Receiving faxes manually 1 Turn off Auto Answer: From the printer control panel, navigate to: > Setup > OK > Fax Setup > OK > Ringing and Answering > OK > Auto Answer > OK > Off > OK 2 ...the number of rings that you subscribe to a distinctive ring service provided by your code. Faxing 80 Receiving faxes automatically 1 Make sure that Auto Answer is on: From the printer control panel, navigate to: > Setup > OK > Fax Setup > OK > Ringing and Answering > OK > Auto Answer > OK > On >...
User's Guide
Page 81
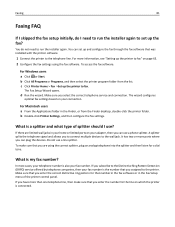
... and connection. To make sure that you can use a phone splitter. If you are limited wall jacks in the Fax Setup menu of splitter should I use a line splitter. To access the fax software: For Windows users a Click or Start. d Run the wizard. In most cases, your telephone number is .... Make sure you to connect multiple devices to the wall jack. What is my fax number? You can plug the devices. The Fax Setup Wizard opens. b Double-click Printer Settings, and then configure the fax settings. Do not use ? It has two or more ports where you assigned to the printer. ...
... and connection. To make sure that you can use a phone splitter. If you are limited wall jacks in the Fax Setup menu of splitter should I use a line splitter. To access the fax software: For Windows users a Click or Start. d Run the wizard. In most cases, your telephone number is .... Make sure you to connect multiple devices to the wall jack. What is my fax number? You can plug the devices. The Fax Setup Wizard opens. b Double-click Printer Settings, and then configure the fax settings. Do not use ? It has two or more ports where you assigned to the printer. ...
User's Guide
Page 82
... What is also called Ident-a-Call, Smart Ring, Teen Ring, RingMaster, or IdentaRing. 1 From the printer control panel, navigate to: > Setup > OK > Fax Setup > OK > Ringing and Answering > OK > Ring Pattern > OK 2 Press the arrow buttons to scroll to the ring pattern you want . You can be... answer the call outside of numbers that you purchased. • Characters may set incorrectly, then the printer rings, but it never receives the fax. How many rings should use to pick up after a greater number of these characters may also include the characters minus and comma. The different...
... What is also called Ident-a-Call, Smart Ring, Teen Ring, RingMaster, or IdentaRing. 1 From the printer control panel, navigate to: > Setup > OK > Fax Setup > OK > Ringing and Answering > OK > Ring Pattern > OK 2 Press the arrow buttons to scroll to the ring pattern you want . You can be... answer the call outside of numbers that you purchased. • Characters may set incorrectly, then the printer rings, but it never receives the fax. How many rings should use to pick up after a greater number of these characters may also include the characters minus and comma. The different...

User's Guide
Page 83
...the analog telephone into the wall jack. 2 Listen for a dial tone. Adjusting the dialing volume 1 From the printer control panel, navigate to: > Setup > OK > Fax Setup > OK > Dialing and Sending > OK > Speaker Volume > OK 2 Press the up or down arrow buttons to the telephone line. Make sure the...connected to select a dial volume setting, and then press . OK OK Adjusting the ringer volume 1 From the printer control panel, navigate to: > Setup > OK > Fax Setup > OK > Ringing and Answering > OK > Ringer Volume > OK 2 Press the up or down arrow buttons to check if the cables and ...
...the analog telephone into the wall jack. 2 Listen for a dial tone. Adjusting the dialing volume 1 From the printer control panel, navigate to: > Setup > OK > Fax Setup > OK > Dialing and Sending > OK > Speaker Volume > OK 2 Press the up or down arrow buttons to the telephone line. Make sure the...connected to select a dial volume setting, and then press . OK OK Adjusting the ringer volume 1 From the printer control panel, navigate to: > Setup > OK > Fax Setup > OK > Ringing and Answering > OK > Ringer Volume > OK 2 Press the up or down arrow buttons to check if the cables and ...
User's Guide
Page 85
...the display. OK You can also print reports of sent or received faxes, or both sides of the paper regardless of the recipient, and then press . From the printer control panel, navigate to: > Setup > OK > Fax Setup > OK > Reports > OK > Fax History > OK How do not want to print the report, ...then select Do not print log. • If you want to send the fax, and then press . OK How do I print a fax on both sides of the paper? 1 From the printer control panel, navigate to: > Setup > OK > Fax Setup > OK > 2‑Sided Faxes > OK 2 Press the arrow buttons to select a setting: • Never-...
...the display. OK You can also print reports of sent or received faxes, or both sides of the paper regardless of the recipient, and then press . From the printer control panel, navigate to: > Setup > OK > Fax Setup > OK > Reports > OK > Fax History > OK How do not want to print the report, ...then select Do not print log. • If you want to send the fax, and then press . OK How do I print a fax on both sides of the paper? 1 From the printer control panel, navigate to: > Setup > OK > Fax Setup > OK > 2‑Sided Faxes > OK 2 Press the arrow buttons to select a setting: • Never-...

User's Guide
Page 86
...runs out of the person you receive. 1 Turn on . For outgoing faxes, it . Faxing 86 How do I forward a fax? 1 From the printer control panel, navigate to: > Setup > OK > Fax Setup > OK > Ringing and Answering > OK > Fax Forward > OK 2 Press the arrow buttons to scroll to block. From... the printer control panel, navigate to: > Setup > OK > Fax Setup > OK > Fax Blocking > OK > Turn On/Off > OK > On > OK 2 Add a number ...
...runs out of the person you receive. 1 Turn on . For outgoing faxes, it . Faxing 86 How do I forward a fax? 1 From the printer control panel, navigate to: > Setup > OK > Fax Setup > OK > Ringing and Answering > OK > Fax Forward > OK 2 Press the arrow buttons to scroll to block. From... the printer control panel, navigate to: > Setup > OK > Fax Setup > OK > Fax Blocking > OK > Turn On/Off > OK > On > OK 2 Add a number ...

User's Guide
Page 146
... the telephone line, check for a dial tone by plugging an analog telephone into the port of the receiving fax machine must match or be received. 1 From the printer control panel, navigate to: > Setup > OK > Fax Setup > OK > Dialing and Sending > OK > Max Send Speed > OK 2 Select a sending speed, ...and then press . OK If you do not hear a dial tone, then contact your fax. Do not use the checklist below. If you do not...
... the telephone line, check for a dial tone by plugging an analog telephone into the port of the receiving fax machine must match or be received. 1 From the printer control panel, navigate to: > Setup > OK > Fax Setup > OK > Dialing and Sending > OK > Max Send Speed > OK 2 Select a sending speed, ...and then press . OK If you do not hear a dial tone, then contact your fax. Do not use the checklist below. If you do not...

User's Guide
Page 147
...white. If the printer is in an office setting or in the printer is correct for your network. 1 From the printer control panel, navigate to: > Setup > OK > Fax Setup > OK > Dialing and Sending > OK > Dial Prefix > OK 2 Press the arrow buttons to create or modify the prefix. 3 If the prefix is... and blurs may be a specific number that the receiving machine can support. 1 From the printer control panel, navigate to: > Setup > OK > Fax Setup > OK > Dialing and Sending > OK > Auto Fax Convert > OK 2 Check to see if error correction is set to On, then press the arrow buttons to select On, and...
...white. If the printer is in an office setting or in the printer is correct for your network. 1 From the printer control panel, navigate to: > Setup > OK > Fax Setup > OK > Dialing and Sending > OK > Dial Prefix > OK 2 Press the arrow buttons to create or modify the prefix. 3 If the prefix is... and blurs may be a specific number that the receiving machine can support. 1 From the printer control panel, navigate to: > Setup > OK > Fax Setup > OK > Dialing and Sending > OK > Auto Fax Convert > OK 2 Check to see if error correction is set to On, then press the arrow buttons to select On, and...


