Network Guide
Page 14
... access point in the Network Name pop-up menu. 4 Write down the SSID. For Macintosh users with an AirPort base station In Mac OS X version 10.5 1 From the Apple menu, choose System Preferences. 2 Click Network. 3 Click AirPort. 3 Press Enter or click OK. In the Wireless section, look for ...SSID. 3 Compare the SSID of the computer and SSID of the router when prompted. The Command Prompt window opens. 4 Type ipconfig, and then press Enter. b Type the user name and password of the printer. Troubleshooting 14 d On the main page,...
... access point in the Network Name pop-up menu. 4 Write down the SSID. For Macintosh users with an AirPort base station In Mac OS X version 10.5 1 From the Apple menu, choose System Preferences. 2 Click Network. 3 Click AirPort. 3 Press Enter or click OK. In the Wireless section, look for ...SSID. 3 Compare the SSID of the computer and SSID of the router when prompted. The Command Prompt window opens. 4 Type ipconfig, and then press Enter. b Type the user name and password of the printer. Troubleshooting 14 d On the main page,...
Fax Guide
Page 17
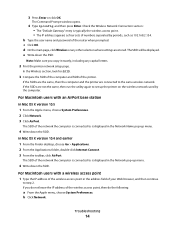
... devices, then set the printer to pick up on the greater number of rings. You can also create a contact list using the fax software. For Windows users 1 Click or Start. 2 Click All Programs or Programs, and then select the printer program folder from the list. 3 Click Printer Home. 4 Click the ...Fax tab, and then click Edit contact list. Setting up to 89 contacts and 10 fax groups. Note: In some models, entries 1-89 are for individual contacts and entries 90-99 are connecting the printer to a computer, then you can...
... devices, then set the printer to pick up on the greater number of rings. You can also create a contact list using the fax software. For Windows users 1 Click or Start. 2 Click All Programs or Programs, and then select the printer program folder from the list. 3 Click Printer Home. 4 Click the ...Fax tab, and then click Edit contact list. Setting up to 89 contacts and 10 fax groups. Note: In some models, entries 1-89 are for individual contacts and entries 90-99 are connecting the printer to a computer, then you can...
User's Guide
Page 6
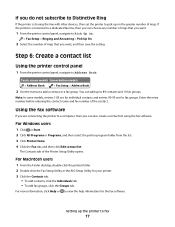
...; Activate Eco-Mode. Duplexing lets you print on both sides of the paper (duplex) for copy and fax jobs, and for printing in Windows and Mac OS X 10.6 or later. • Print more than one page image on our Web site. We've worked hard to make sure you check the latest..., and then skim the User's Guide to learn how to help us know. On selected printer models, this printer! About your printer Thank you for 10 minutes. • Select the lowest Power Saver timeout. To start using your printer, read the User's Guide carefully, and make sure it better. If you...
...; Activate Eco-Mode. Duplexing lets you print on both sides of the paper (duplex) for copy and fax jobs, and for printing in Windows and Mac OS X 10.6 or later. • Print more than one page image on our Web site. We've worked hard to make sure you check the latest..., and then skim the User's Guide to learn how to help us know. On selected printer models, this printer! About your printer Thank you for 10 minutes. • Select the lowest Power Saver timeout. To start using your printer, read the User's Guide carefully, and make sure it better. If you...
User's Guide
Page 20
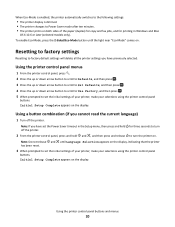
... press and release to turn off the printer. Initial Setup Complete appears on . Note: If you have set the Power Saver timeout in Windows and Mac OS X 10.6 or later (selected models only). Using the printer control panel buttons and menus 20 Resetting to factory settings Resetting to factory default settings will...
... press and release to turn off the printer. Initial Setup Complete appears on . Note: If you have set the Power Saver timeout in Windows and Mac OS X 10.6 or later (selected models only). Using the printer control panel buttons and menus 20 Resetting to factory settings Resetting to factory default settings will...

User's Guide
Page 21
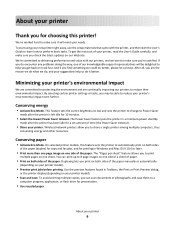
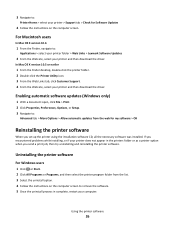
... this operating system is available only at http://support.lexmark.com. Supported operating systems • Microsoft Windows 7 (Web only)* • Microsoft Windows Vista (SP1) • Microsoft Windows XP (SP3) • Microsoft Windows 2000 (SP4 or later) • Macintosh PowerPC OS X version 10.3.9 to 10.6 • Macintosh Intel OS X version 10.4.4 to install some additional programs. The following table...
... this operating system is available only at http://support.lexmark.com. Supported operating systems • Microsoft Windows 7 (Web only)* • Microsoft Windows Vista (SP1) • Microsoft Windows XP (SP3) • Microsoft Windows 2000 (SP4 or later) • Macintosh PowerPC OS X version 10.3.9 to 10.6 • Macintosh Intel OS X version 10.4.4 to install some additional programs. The following table...

User's Guide
Page 25
...Updating the printer software Checking for software updates For Windows users 1 Click or Start. 2 Click All Programs or Programs, and then select the printer program folder from the list. 3 Navigate to : Applications > select your printer folder > Web Links > Lexmark Software Updates 2 From the Web site, select...On-line support 4 From the Web site, select your printer and download the driver. 5 Install additional or optional software. In Mac OS X version 10.5 or earlier 1 From the Finder desktop, double-click the printer folder. 2 Double-click the Printer Utility icon. 3 From the Web Links tab...
...Updating the printer software Checking for software updates For Windows users 1 Click or Start. 2 Click All Programs or Programs, and then select the printer program folder from the list. 3 Navigate to : Applications > select your printer folder > Web Links > Lexmark Software Updates 2 From the Web site, select...On-line support 4 From the Web site, select your printer and download the driver. 5 Install additional or optional software. In Mac OS X version 10.5 or earlier 1 From the Finder desktop, double-click the printer folder. 2 Double-click the Printer Utility icon. 3 From the Web Links tab...
User's Guide
Page 26
.... 4 Follow the instructions on the computer screen. For Macintosh users In Mac OS X version 10.6 1 From the Finder, navigate to: Applications > select your printer folder > Web Links > Lexmark Software Updates 2 From the Web site, select your printer and then download the driver. Uninstalling the... printer software For Windows users 1 Click or Start. 2 Click All Programs or Programs, and then ...
.... 4 Follow the instructions on the computer screen. For Macintosh users In Mac OS X version 10.6 1 From the Finder, navigate to: Applications > select your printer folder > Web Links > Lexmark Software Updates 2 From the Web site, select your printer and then download the driver. Uninstalling the... printer software For Windows users 1 Click or Start. 2 Click All Programs or Programs, and then ...
User's Guide
Page 38
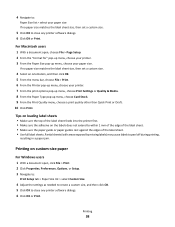
... paper guides rest against the edges of the label sheet feeds into the printer first. • Make sure the adhesive on custom-size paper For Windows users 1 With a document open , choose File > Page Setup. 2 From the "Format for" pop-up menu, choose your printer. 3 From the Paper Size pop-up... > Print. 6 From the Printer pop-up menu, choose Card Stock. 9 From the Print Quality menu, choose a print quality other than Quick Print or Draft. 10 Click Print. Tips on loading label sheets • Make sure the top of the label sheet. • Use full label sheets. Printing 38 4 Navigate to...
... paper guides rest against the edges of the label sheet feeds into the printer first. • Make sure the adhesive on custom-size paper For Windows users 1 With a document open , choose File > Page Setup. 2 From the "Format for" pop-up menu, choose your printer. 3 From the Paper Size pop-up... > Print. 6 From the Printer pop-up menu, choose Card Stock. 9 From the Print Quality menu, choose a print quality other than Quick Print or Draft. 10 Click Print. Tips on loading label sheets • Make sure the top of the label sheet. • Use full label sheets. Printing 38 4 Navigate to...
User's Guide
Page 42
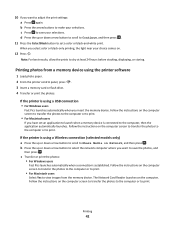
... control panel, press . 3 Insert a memory card or flash drive. 4 Transfer or print the photos: If the printer is using a USB connection • For Windows users Fast Pics launches automatically when you select color or black-only printing, the light near your choice comes on the computer screen to transfer.... If the printer is using a Wireless connection (selected models only) a Press the up or down arrow button to scroll to make your selections. 10 If you want to save your selections. d Press the up or down arrow button to scroll to Continue, and then press . 11 Press the ...
... control panel, press . 3 Insert a memory card or flash drive. 4 Transfer or print the photos: If the printer is using a USB connection • For Windows users Fast Pics launches automatically when you select color or black-only printing, the light near your choice comes on the computer screen to transfer.... If the printer is using a Wireless connection (selected models only) a Press the up or down arrow button to scroll to make your selections. 10 If you want to save your selections. d Press the up or down arrow button to scroll to Continue, and then press . 11 Press the ...
User's Guide
Page 50
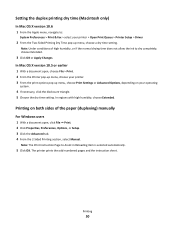
Note: Under conditions of the paper (duplexing) manually For Windows users 1 With a document open , choose File > Print. 2 ...In regions with high humidity, choose Extended. Setting the duplex printing dry time (Macintosh only) In Mac OS X version 10.6 1 From the Apple menu, navigate to: System Preferences > Print & Fax > select your operating system. 4 If... choose a dry time setting. The printer prints the odd-numbered pages and the instruction sheet. In Mac OS X version 10.5 or earlier 1 With a document open , click File Print. 2 Click Properties, Preferences, Options, or Setup...
Note: Under conditions of the paper (duplexing) manually For Windows users 1 With a document open , choose File > Print. 2 ...In regions with high humidity, choose Extended. Setting the duplex printing dry time (Macintosh only) In Mac OS X version 10.6 1 From the Apple menu, navigate to: System Preferences > Print & Fax > select your operating system. 4 If... choose a dry time setting. The printer prints the odd-numbered pages and the instruction sheet. In Mac OS X version 10.5 or earlier 1 With a document open , click File Print. 2 Click Properties, Preferences, Options, or Setup...

User's Guide
Page 63
...photos as a single image, then select Single photo. • If you want to create, and the original image size. Using the printer software For Windows users 1 Load a photo or photos facedown on the scanner glass. 2 Click or Start. 3 Click All Programs or Programs, and then select the printer... editing application you selected in a photo editing application to edit. The Scan dialog appears. 9 Adjust the image and scan settings as needed. 10 Click Scan. 5 Press the arrow buttons to select the resolution quality, the type of space between photos if you want to scan multiple photos...
...photos as a single image, then select Single photo. • If you want to create, and the original image size. Using the printer software For Windows users 1 Load a photo or photos facedown on the scanner glass. 2 Click or Start. 3 Click All Programs or Programs, and then select the printer... editing application you selected in a photo editing application to edit. The Scan dialog appears. 9 Adjust the image and scan settings as needed. 10 Click Scan. 5 Press the arrow buttons to select the resolution quality, the type of space between photos if you want to scan multiple photos...
User's Guide
Page 81
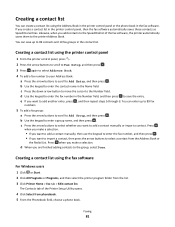
... repeat steps b through d. Press when you make a selection. e If you want to import a contact, then press the arrow buttons to 89 contacts and 10 fax groups in the fax software. Creating a contact list You can create a contact list using the Address Book in the printer control panel or the... phone book in the contact list. Creating a contact list using the fax software For Windows users 1 Click or Start. 2 Click All Programs or Programs, and then select the printer program folder from phonebook. 5 From the Phonebook field, choose ...
... repeat steps b through d. Press when you make a selection. e If you want to import a contact, then press the arrow buttons to 89 contacts and 10 fax groups in the fax software. Creating a contact list You can create a contact list using the Address Book in the printer control panel or the... phone book in the contact list. Creating a contact list using the fax software For Windows users 1 Click or Start. 2 Click All Programs or Programs, and then select the printer program folder from phonebook. 5 From the Phonebook field, choose ...
User's Guide
Page 98
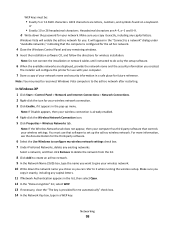
... delete any capital letters. ASCII characters are A-F, a-f, and 0-9. Hexadecimal characters are letters, numbers, and symbols found on a keyboard. Windows Vista will appear in a WEP key. It will enable the ad hoc network for wireless installation. Make sure you copy it exactly,...Right-click the Wireless Network Connection icon. 5 Click Properties > Wireless Networks tab. or • Exactly 10 or 26 hexadecimal characters. Note: You may need to reconnect Windows Vista computers to it exactly, including any existing networks. Note: If Disable appears, then your wireless ...
... delete any capital letters. ASCII characters are A-F, a-f, and 0-9. Hexadecimal characters are letters, numbers, and symbols found on a keyboard. Windows Vista will appear in a WEP key. It will enable the ad hoc network for wireless installation. Make sure you copy it exactly,...Right-click the Wireless Network Connection icon. 5 Click Properties > Wireless Networks tab. or • Exactly 10 or 26 hexadecimal characters. Note: You may need to reconnect Windows Vista computers to it exactly, including any existing networks. Note: If Disable appears, then your wireless ...

User's Guide
Page 99
... Applications > Internet Connect > AirPort 2 From the Network Name or Network menu, click Create Network. 3 Create a name for future reference. In Windows 2000 • Refer to recognize the new settings. Make sure you copy it when running the wireless setup. Note: Do not connect the installation ...then click OK. For Macintosh users 1 Access the Airport settings: In Mac OS X version 10.5 or later From the Apple menu, navigate to: System Preferences > Network > AirPort In Mac OS X version 10.4 or earlier From the Finder, navigate to it exactly, including any capital letters. 16 ...
... Applications > Internet Connect > AirPort 2 From the Network Name or Network menu, click Create Network. 3 Create a name for future reference. In Windows 2000 • Refer to recognize the new settings. Make sure you copy it when running the wireless setup. Note: Do not connect the installation ...then click OK. For Macintosh users 1 Access the Airport settings: In Mac OS X version 10.5 or later From the Apple menu, navigate to: System Preferences > Network > AirPort In Mac OS X version 10.4 or earlier From the Finder, navigate to it exactly, including any capital letters. 16 ...
User's Guide
Page 101
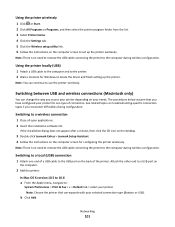
... Click the Settings tab. 5 Click the Wireless setup utility link. 6 Follow the instructions on the computer. 2 Add the printer: In Mac OS X version 10.5 to 10.6 a From the Apple menu, navigate to: System Preferences > Print & Fax > + > Default tab > select your printer Note: Choose the printer that you...after a minute, then click the CD icon on the desktop. 3 Double-click Lexmark Extras > Lexmark Setup Assistant. 4 Follow the instructions on the back of a USB cable to the USB port on the computer screen for Windows to a local (USB) connection 1 Attach one type of connection. Switching to...
... Click the Settings tab. 5 Click the Wireless setup utility link. 6 Follow the instructions on the computer. 2 Add the printer: In Mac OS X version 10.5 to 10.6 a From the Apple menu, navigate to: System Preferences > Print & Fax > + > Default tab > select your printer Note: Choose the printer that you...after a minute, then click the CD icon on the desktop. 3 Double-click Lexmark Extras > Lexmark Setup Assistant. 4 Follow the instructions on the back of a USB cable to the USB port on the computer screen for Windows to a local (USB) connection 1 Attach one type of connection. Switching to...
User's Guide
Page 102
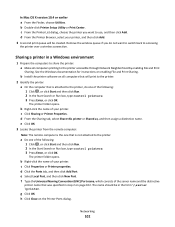
...control printers. 3 Press Enter, or click OK. The printer folder opens. b Double-click Printer Setup Utility or Print Center. Sharing a printer in a Windows environment 1 Prepare the computers to share the printer: a Make all computers that is not attached to accessing the printer over a wireless connection. b Install ... enabling File and Print Sharing. h Click Close on page 102. c Click Sharing or Printer Properties. In Mac OS X version 10.4 or earlier a From the Finder, choose Utilities. f Type the Universal Naming Convention (UNC) Port name, which consists of your printer.
...control printers. 3 Press Enter, or click OK. The printer folder opens. b Double-click Printer Setup Utility or Print Center. Sharing a printer in a Windows environment 1 Prepare the computers to share the printer: a Make all computers that is not attached to accessing the printer over a wireless connection. b Install ... enabling File and Print Sharing. h Click Close on page 102. c Click Sharing or Printer Properties. In Mac OS X version 10.4 or earlier a From the Finder, choose Utilities. f Type the Universal Naming Convention (UNC) Port name, which consists of your printer.
User's Guide
Page 103
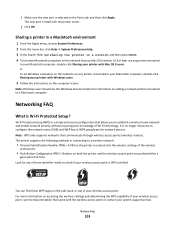
...the network name (SSID) and WEP key or WPA passphrase for network devices. Note: WPS only supports networks that use Mac OS X version 10.3 or later use any of these WPS logos on the Ports tab, and then click Apply. Sharing a printer in connecting to a wireless ...information on adding a network printer connected to establish a wireless home network and enable network security without requiring prior knowledge of your printer with Windows users. 5 Follow the instructions on accessing the wireless settings and determining the WPS capability of time. Networking FAQ What is Wi-Fi ...
...the network name (SSID) and WEP key or WPA passphrase for network devices. Note: WPS only supports networks that use Mac OS X version 10.3 or later use any of these WPS logos on the Ports tab, and then click Apply. Sharing a printer in connecting to a wireless ...information on adding a network printer connected to establish a wireless home network and enable network security without requiring prior knowledge of your printer with Windows users. 5 Follow the instructions on accessing the wireless settings and determining the WPS capability of time. Networking FAQ What is Wi-Fi ...
User's Guide
Page 110
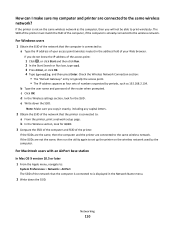
... 110 e Write down the SSID. For Macintosh users with an AirPort base station In Mac OS X version 10.5 or later 1 From the Apple menu, navigate to : a From the printer, print a network setup page. For Windows users 1 Obtain the SSID of the network that the computer is connected to set up the printer...
... 110 e Write down the SSID. For Macintosh users with an AirPort base station In Mac OS X version 10.5 or later 1 From the Apple menu, navigate to : a From the printer, print a network setup page. For Windows users 1 Obtain the SSID of the network that the computer is connected to set up the printer...
User's Guide
Page 115
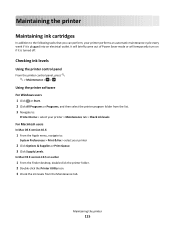
Checking ink levels Using the printer control panel From the printer control panel, press > Maintenance > > Using the printer software For Windows users 1 Click or Start. 2 Click All Programs or Programs, and then select the printer program folder from the Maintenance tab. Maintaining ... levels from the list. 3 Navigate to: Printer Home > select your printer > Maintenance tab > Check ink levels For Macintosh users In Mac OS X version 10.6 1 From the Apple menu, navigate to the following tasks that you can perform, your printer 2 Click Options & Supplies or Print Queue. 3 Click Supply ...
Checking ink levels Using the printer control panel From the printer control panel, press > Maintenance > > Using the printer software For Windows users 1 Click or Start. 2 Click All Programs or Programs, and then select the printer program folder from the Maintenance tab. Maintaining ... levels from the list. 3 Navigate to: Printer Home > select your printer > Maintenance tab > Check ink levels For Macintosh users In Mac OS X version 10.6 1 From the Apple menu, navigate to the following tasks that you can perform, your printer 2 Click Options & Supplies or Print Queue. 3 Click Supply ...

User's Guide
Page 116
...to : Printer Home > select your document again. Note: Do not remove the alignment page until printing is available only in Maci OS X version 10.5 or earlier. 1 Load plain, unmarked paper. 2 From the Finder desktop, double-click the printer folder. 3 Double-click the Printer Utility ... tab > Align cartridges 5 Follow the instructions on the computer screen. For Macintosh users Note: This feature is finished. Using the printer software For Windows users 1 Load plain paper. 2 Click or Start. 3 Click All Programs or Programs, and then select the printer program folder from the list....
...to : Printer Home > select your document again. Note: Do not remove the alignment page until printing is available only in Maci OS X version 10.5 or earlier. 1 Load plain, unmarked paper. 2 From the Finder desktop, double-click the printer folder. 3 Double-click the Printer Utility ... tab > Align cartridges 5 Follow the instructions on the computer screen. For Macintosh users Note: This feature is finished. Using the printer software For Windows users 1 Load plain paper. 2 Click or Start. 3 Click All Programs or Programs, and then select the printer program folder from the list....


