User Guide
Page 2
...of the printer...9 Ordering and replacing supplies 11 Ordering ink cartridges...11 Using genuine Lexmark ink cartridges...11 Replacing ink cartridges...12 Ordering paper and other supplies...13 Recycling Lexmark products...13 Using the printer control panel buttons and menus 14 Using the printer control... panel...14 Changing the Power Saver timeout...16 Saving paper and energy with Eco-Mode...16 Changing temporary settings into new default settings 17 Resetting to factory settings...
...of the printer...9 Ordering and replacing supplies 11 Ordering ink cartridges...11 Using genuine Lexmark ink cartridges...11 Replacing ink cartridges...12 Ordering paper and other supplies...13 Recycling Lexmark products...13 Using the printer control panel buttons and menus 14 Using the printer control... panel...14 Changing the Power Saver timeout...16 Saving paper and energy with Eco-Mode...16 Changing temporary settings into new default settings 17 Resetting to factory settings...

User Guide
Page 18
...to Clear Settings Timeout, and then press . 4 Press the up or down arrow button to scroll to factory default settings will delete all the printer settings you have previously selected. Note: Do not release and until ...to Set Defaults, and then press . 4 Press the up or down arrow button to scroll to Use Factory, and then press . 5 When prompted to set the Power Saver timeout in the Setup menu, then press... the printer. Initial Setup Complete appears on the display. Resetting to factory settings Resetting to Never, and then press . Using the printer control panel buttons and menus 18
...to Clear Settings Timeout, and then press . 4 Press the up or down arrow button to scroll to factory default settings will delete all the printer settings you have previously selected. Note: Do not release and until ...to Set Defaults, and then press . 4 Press the up or down arrow button to scroll to Use Factory, and then press . 5 When prompted to set the Power Saver timeout in the Setup menu, then press... the printer. Initial Setup Complete appears on the display. Resetting to factory settings Resetting to Never, and then press . Using the printer control panel buttons and menus 18
User Guide
Page 47
... (OPP) and Serial Port Profile (SPP). You need to repeat the setup if: • You reset the printer to set a color or black-and-white print. You will need to its factory default settings. • You change the Bluetooth security level or the Bluetooth pass key. Note: For best... results, allow the prints to print the photos. 12 Press the Color/Black button to determine their hardware compatibility and interoperability....
... (OPP) and Serial Port Profile (SPP). You need to repeat the setup if: • You reset the printer to set a color or black-and-white print. You will need to its factory default settings. • You change the Bluetooth security level or the Bluetooth pass key. Note: For best... results, allow the prints to print the photos. 12 Press the Color/Black button to determine their hardware compatibility and interoperability....
User Guide
Page 125
...: If you have set the Power Saver timeout in the Setup menu, then press and hold down and , and then press and release to Use Factory, and then press . 5 Complete the initial printer setup. Note: Do not release and until Language appears on . CHANGE THE LANGUAGE USING A BUTTON COMBINATION (IF YOU...) 1 Turn the printer off the printer. 2 Press and hold for three seconds to turn the printer on the display, indicating that the printer has been reset. 3 Complete the initial printer setup.
...: If you have set the Power Saver timeout in the Setup menu, then press and hold down and , and then press and release to Use Factory, and then press . 5 Complete the initial printer setup. Note: Do not release and until Language appears on . CHANGE THE LANGUAGE USING A BUTTON COMBINATION (IF YOU...) 1 Turn the printer off the printer. 2 Press and hold for three seconds to turn the printer on the display, indicating that the printer has been reset. 3 Complete the initial printer setup.
User Guide
Page 147
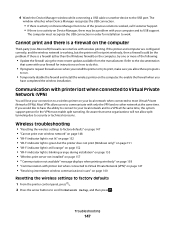
...lose your connection to a wireless printer on your firewall for installation to the USB port. Communication with your local network when connected to factory defaults" on page 147 • "Cannot print over wireless network" on page 148 • "Wi-Fi indicator light is not lit..."Wireless print server not installed" on page 157 • ""Communication not available" message displays when printing wirelessly" on page 160 Resetting the wireless settings to factory defaults 1 From the printer control panel, press . 2 Press the arrow buttons to scroll to print, make sure you install the...
...lose your connection to a wireless printer on your firewall for installation to the USB port. Communication with your local network when connected to factory defaults" on page 147 • "Cannot print over wireless network" on page 148 • "Wi-Fi indicator light is not lit..."Wireless print server not installed" on page 157 • ""Communication not available" message displays when printing wirelessly" on page 160 Resetting the wireless settings to factory defaults 1 From the printer control panel, press . 2 Press the arrow buttons to scroll to print, make sure you install the...

User Guide
Page 148
...wireless access point is using Wi-Fi Protected Access (WPA) security, then the WPA passphrase should be : • From 8 to factory default settings. or • Exactly 64 hexadecimal characters. The printer wireless settings are letters, numbers, and symbols found on again can try...Cannot print over your wireless network. or • Exactly 5 or 13 ASCII characters. 3 Press the arrow buttons to scroll to Reset Network Adapter to Factory Defaults, and then press . 4 Press the arrow buttons to scroll to access the printer over wireless network If you encountered problems ...
...wireless access point is using Wi-Fi Protected Access (WPA) security, then the WPA passphrase should be : • From 8 to factory default settings. or • Exactly 64 hexadecimal characters. The printer wireless settings are letters, numbers, and symbols found on again can try...Cannot print over your wireless network. or • Exactly 5 or 13 ASCII characters. 3 Press the arrow buttons to scroll to Reset Network Adapter to Factory Defaults, and then press . 4 Press the arrow buttons to scroll to access the printer over wireless network If you encountered problems ...

User Guide
Page 157
... screen. Note: You may need to the network. You can also resolve issues due to factory defaults. Wireless print server not installed You may have already changed the wireless network settings on your having been reset to misconfigurations that the printer does not have changed your printer. Some reasons your settings may...
... screen. Note: You may need to the network. You can also resolve issues due to factory defaults. Wireless print server not installed You may have already changed the wireless network settings on your having been reset to misconfigurations that the printer does not have changed your printer. Some reasons your settings may...
User Guide
Page 179
...image 58 repeating an image 60 tips 57 two-sided document 58 custom-size paper printing on 40 D default printer, setting 53 defaults resetting factory defaults 18 dial method, fax setting 81 dial tone checking 89 dial tone volume adjusting 89 dialing prefix 87 Digital Subscriber Line (DSL...for 108 Index 179 EXT port location 10 exterior of the printer cleaning 123 e-mailing scanned documents 66 F factory default settings resetting internal wireless print server 147 resetting to 18 failed faxes retrieving 93 fax confirmation page 91 printer memory 93 transmission report 91 fax activity report 91...
...image 58 repeating an image 60 tips 57 two-sided document 58 custom-size paper printing on 40 D default printer, setting 53 defaults resetting factory defaults 18 dial method, fax setting 81 dial tone checking 89 dial tone volume adjusting 89 dialing prefix 87 Digital Subscriber Line (DSL...for 108 Index 179 EXT port location 10 exterior of the printer cleaning 123 e-mailing scanned documents 66 F factory default settings resetting internal wireless print server 147 resetting to 18 failed faxes retrieving 93 fax confirmation page 91 printer memory 93 transmission report 91 fax activity report 91...
User Guide
Page 180
...for setting up printer on wireless network 95 infrastructure network 114 ink conserving 6 ink cartridges ordering 11 replacing 12 using genuine Lexmark 11 ink levels checking 121 inserting a memory card or flash drive 41 Index 180 installation cable 113 installing network printer ...network (Windows) 109 installing printer software 23 installing wireless printer additional computers 96 interference wireless network 115 internal wireless print server resetting to factory default settings 147 IP address 119 configuring 98 IP address, assigning 120 iron-on transfers loading 32 J jams and misfeeds...
...for setting up printer on wireless network 95 infrastructure network 114 ink conserving 6 ink cartridges ordering 11 replacing 12 using genuine Lexmark 11 ink levels checking 121 inserting a memory card or flash drive 41 Index 180 installation cable 113 installing network printer ...network (Windows) 109 installing printer software 23 installing wireless printer additional computers 96 interference wireless network 115 internal wireless print server resetting to factory default settings 147 IP address 119 configuring 98 IP address, assigning 120 iron-on transfers loading 32 J jams and misfeeds...
User Guide
Page 182
... finding 7 R received history report 91 receiving faxes Auto Answer setting 85, 86 automatically 85 manually 86 tips 85, 86 recycling 6 Lexmark products 13 WEEE statement 165 redial attempts, fax setting 81 redial time, fax setting 81 reducing an image 58 registering fax user information ...79 Index 182 repeating an image 60 replacing ink cartridges 12 reports fax history 91 reports, fax setting 81 resetting internal wireless print server to factory default settings 147 resetting to factory defaults 18 resuming print job 55 reverse page order 36 ringer volume adjusting 89 RJ-11 adapter 75 S ...
... finding 7 R received history report 91 receiving faxes Auto Answer setting 85, 86 automatically 85 manually 86 tips 85, 86 recycling 6 Lexmark products 13 WEEE statement 165 redial attempts, fax setting 81 redial time, fax setting 81 reducing an image 58 registering fax user information ...79 Index 182 repeating an image 60 replacing ink cartridges 12 reports fax history 91 reports, fax setting 81 resetting internal wireless print server to factory default settings 147 resetting to factory defaults 18 resuming print job 55 reverse page order 36 ringer volume adjusting 89 RJ-11 adapter 75 S ...


