Network Guide
Page 4
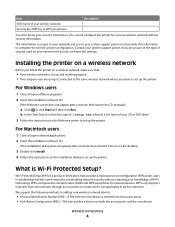
...instructions on the installation dialog to set up the printer. If the installation dialog does not appear after a minute, then launch the CD manually: a Click , or click Start and then click Run. You cannot configure the printer for network devices. If the Welcome screen does ...from the new device is unique to your network, and you want to complete the wireless printer configuration. Wireless networking 4 For Windows users 1 Close all open software programs. 2 Insert the installation software CD. WPS only supports networks that provides simple and secure configuration. We...
...instructions on the installation dialog to set up the printer. If the installation dialog does not appear after a minute, then launch the CD manually: a Click , or click Start and then click Run. You cannot configure the printer for network devices. If the Welcome screen does ...from the new device is unique to your network, and you want to complete the wireless printer configuration. Wireless networking 4 For Windows users 1 Close all open software programs. 2 Insert the installation software CD. WPS only supports networks that provides simple and secure configuration. We...
Network Guide
Page 5
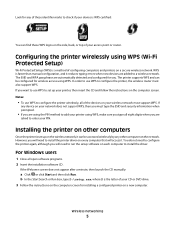
... printer, then insert the CD and follow the instructions on the network. If the Welcome screen does not appear after a minute, then launch the CD manually: a Click , or click Start and then click Run. b In the Start Search or Run box, type D:\setup.exe, where D is set up on the wireless... router must type the SSID and security information when prompted. • If you are using WPS, make sure you must also support WPS. For Windows users 1 Close all eight digits when you will access it can be configured for wireless access using WPS (Wi-Fi Protected Setup) Wi-Fi Protected Setup...
... printer, then insert the CD and follow the instructions on the network. If the Welcome screen does not appear after a minute, then launch the CD manually: a Click , or click Start and then click Run. b In the Start Search or Run box, type D:\setup.exe, where D is set up on the wireless... router must type the SSID and security information when prompted. • If you are using WPS, make sure you must also support WPS. For Windows users 1 Close all eight digits when you will access it can be configured for wireless access using WPS (Wi-Fi Protected Setup) Wi-Fi Protected Setup...
Network Guide
Page 16
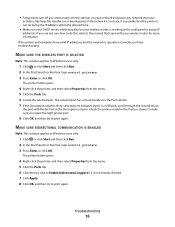
...from the menu. 5 Click the Ports tab. 6 Locate the selected port. If you select the right printer port. 8 Click OK, and then try to the manual that the printer is not receiving the IP address within the allowed time. • Make sure your DHCP server, which may also be your wireless... pause any network-intensive activities, like large file transfers or network games. MAKE SURE THE WIRELESS PORT IS SELECTED Note: This solution applies to Windows users only 1 Click , or click Start and then click Run. 2 In the Start Search or Run box, type control printers. 3 Press Enter, or click OK....
...from the menu. 5 Click the Ports tab. 6 Locate the selected port. If you select the right printer port. 8 Click OK, and then try to the manual that the printer is not receiving the IP address within the allowed time. • Make sure your DHCP server, which may also be your wireless... pause any network-intensive activities, like large file transfers or network games. MAKE SURE THE WIRELESS PORT IS SELECTED Note: This solution applies to Windows users only 1 Click , or click Start and then click Run. 2 In the Start Search or Run box, type control printers. 3 Press Enter, or click OK....

Fax Guide
Page 16
...double ring, a triple ring). Assign one telephone line. If the pattern is made. Step 3: Set your fax name and fax number Your user information includes your name or your company name, your fax number (your fax number is your telephone number, unless you have multiple telephone numbers ... Select Your Fax Number. 4 Enter your fax number or your fax machine when a transmission is set the printer to receive faxes automatically or manually: 1 From the printer control panel, navigate to the Distinctive Ring Pattern Detection (DPRD) feature offered by telephone companies. If you do the ...
...double ring, a triple ring). Assign one telephone line. If the pattern is made. Step 3: Set your fax name and fax number Your user information includes your name or your company name, your fax number (your fax number is your telephone number, unless you have multiple telephone numbers ... Select Your Fax Number. 4 Enter your fax number or your fax machine when a transmission is set the printer to receive faxes automatically or manually: 1 From the printer control panel, navigate to the Distinctive Ring Pattern Detection (DPRD) feature offered by telephone companies. If you do the ...
Fax Guide
Page 23
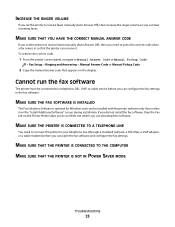
... CODE If you set the printer to receive faxes manually (Auto Answer Off), then increase the ringer volume so you can download the software. MAKE SURE THE FAX SOFTWARE IS INSTALLED The Fax Solutions Software is optional for Windows users and is installed with the printer software only if you can... need to press the correct code when a fax comes in the fax software. INCREASE THE RINGER VOLUME If you set the printer to receive faxes manually (Auto Answer Off), then you need to connect the printer to your telephone line (through a standard wall jack, a DSL filter, a VoIP adapter, or a ...
... CODE If you set the printer to receive faxes manually (Auto Answer Off), then increase the ringer volume so you can download the software. MAKE SURE THE FAX SOFTWARE IS INSTALLED The Fax Solutions Software is optional for Windows users and is installed with the printer software only if you can... need to press the correct code when a fax comes in the fax software. INCREASE THE RINGER VOLUME If you set the printer to receive faxes manually (Auto Answer Off), then you need to connect the printer to your telephone line (through a standard wall jack, a DSL filter, a VoIP adapter, or a ...
User's Guide
Page 7
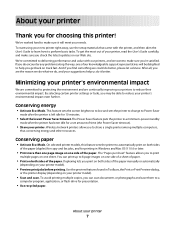
After all, you print on both sides of the paper manually or automatically (depending on your printer model). • Preview print jobs before printing. ...back on track fast. We're committed to delivering performance and value with the printer, and then skim the User's Guide to learn how to perform basic tasks. To start using your new printer right away, use the... minimum-power standby mode after the printer is left idle for a set amount of your printer, read the User's Guide carefully, and make sure it better. This feature sets the screen brightness to low and sets the ...
After all, you print on both sides of the paper manually or automatically (depending on your printer model). • Preview print jobs before printing. ...back on track fast. We're committed to delivering performance and value with the printer, and then skim the User's Guide to learn how to perform basic tasks. To start using your new printer right away, use the... minimum-power standby mode after the printer is left idle for a set amount of your printer, read the User's Guide carefully, and make sure it better. This feature sets the screen brightness to low and sets the ...
User's Guide
Page 26
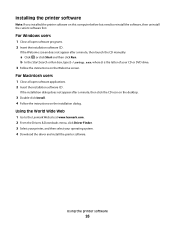
..., then launch the CD manually: a Click , or click Start and then click Run. If the Welcome screen does not appear after a minute, then click the CD icon on the desktop. 3 Double-click Install. 4 Follow the instructions on this computer before but need to the Lexmark Web site at www.lexmark.com. 2 From the... the printer software on the installation dialog. Using the World Wide Web 1 Go to reinstall the software, then uninstall the current software first. For Windows users 1 Close all open software programs. 2 Insert the installation software CD.
..., then launch the CD manually: a Click , or click Start and then click Run. If the Welcome screen does not appear after a minute, then click the CD icon on the desktop. 3 Double-click Install. 4 Follow the instructions on this computer before but need to the Lexmark Web site at www.lexmark.com. 2 From the... the printer software on the installation dialog. Using the World Wide Web 1 Go to reinstall the software, then uninstall the current software first. For Windows users 1 Close all open software programs. 2 Insert the installation software CD.

User's Guide
Page 52
..., return to close any printer software dialogs. 8 Click OK or Print. From the 2-Sided Printing section, select Off from the drop-down menu. For Macintosh users 1 With a document open , click File Print. 2 Click Properties, Preferences, Options, or Setup. 3 Click the Advanced tab. 4 From the 2-...-edge binding or Short-edge binding. • For Long-edged binding, pages are bound along the long edge of the paper (duplexing) manually. and A4-size paper. Printing on both sides of the paper (duplexing) Printing on both sides of the paper (duplexing) automatically The ...
..., return to close any printer software dialogs. 8 Click OK or Print. From the 2-Sided Printing section, select Off from the drop-down menu. For Macintosh users 1 With a document open , click File Print. 2 Click Properties, Preferences, Options, or Setup. 3 Click the Advanced tab. 4 From the 2-...-edge binding or Short-edge binding. • For Long-edged binding, pages are bound along the long edge of the paper (duplexing) manually. and A4-size paper. Printing on both sides of the paper (duplexing) Printing on both sides of the paper (duplexing) automatically The ...
User's Guide
Page 53
... automatically. 5 Click OK. Printing 53 • For Short-edged binding, pages are bound along the short edge of the paper (duplexing) manually For Windows users 1 With a document open, click File Print. 2 Click Properties, Preferences, Options, or Setup. 3 Click the Advanced tab. ...4 From the 2-Sided Printing section, select Manual. Printing on your operating system. 6 If necessary, click the disclosure triangle. 7 Select the dry time....
... automatically. 5 Click OK. Printing 53 • For Short-edged binding, pages are bound along the short edge of the paper (duplexing) manually For Windows users 1 With a document open, click File Print. 2 Click Properties, Preferences, Options, or Setup. 3 Click the Advanced tab. ...4 From the 2-Sided Printing section, select Manual. Printing on your operating system. 6 If necessary, click the disclosure triangle. 7 Select the dry time....
User's Guide
Page 54
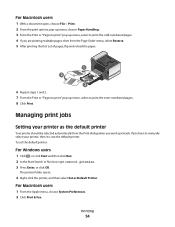
...selected automatically from the Page Order menu, select Reverse. 5 After printing the first set the default printer: For Windows users 1 Click , or click Start and then click Run. 2 In the Start Search or Run box, type control ... 4 If you are printing multiple pages, then from the Print dialog when you send a print job. For Macintosh users 1 From the Apple menu, choose System Preferences. 2 Click Print & Fax. Managing print jobs Setting your printer, ...steps 1 and 2. 7 From the Print or "Pages to print" pop-up menu, select to manually select your printer as Default Printer.
...selected automatically from the Page Order menu, select Reverse. 5 After printing the first set the default printer: For Windows users 1 Click , or click Start and then click Run. 2 In the Start Search or Run box, type control ... 4 If you are printing multiple pages, then from the Print dialog when you send a print job. For Macintosh users 1 From the Apple menu, choose System Preferences. 2 Click Print & Fax. Managing print jobs Setting your printer, ...steps 1 and 2. 7 From the Print or "Pages to print" pop-up menu, select to manually select your printer as Default Printer.
User's Guide
Page 93
...; Make sure that the printer is on and connected to a working if you hear a dial tone. • If you set the printer to receive faxes manually (Auto Answer Off), then make sure that the ringer volume is not set to receive faxes automatically. b Set the number of the printer is not... call . Warning-Potential Damage: Do not touch the cables or the and ports while actively receiving a fax. When the number of your printer. For Macintosh users 1 With a document open, choose File > Print. 2 From the Printer pop-up menu, select the fax version of rings you must use the fax driver for...
...; Make sure that the printer is on and connected to a working if you hear a dial tone. • If you set the printer to receive faxes manually (Auto Answer Off), then make sure that the ringer volume is not set to receive faxes automatically. b Set the number of the printer is not... call . Warning-Potential Damage: Do not touch the cables or the and ports while actively receiving a fax. When the number of your printer. For Macintosh users 1 With a document open, choose File > Print. 2 From the Printer pop-up menu, select the fax version of rings you must use the fax driver for...
User's Guide
Page 94
... Make sure you select the correct telephone service and connection. You can change it to a number that was installed with the printer software. For Macintosh users a From the Finder desktop, double-click the printer folder. Faxing 94 on the printer or *9* Warning-Potential Damage: Do not touch the cables or... settings based on your printer. The Printer Home opens. To set up the fax? b Double-click the AIO Setup Utility for answering faxes manually is connected to fax" on page 77. 2 Configure the fax settings using the fax software. e Run the wizard. Receiving a fax...
... Make sure you select the correct telephone service and connection. You can change it to a number that was installed with the printer software. For Macintosh users a From the Finder desktop, double-click the printer folder. Faxing 94 on the printer or *9* Warning-Potential Damage: Do not touch the cables or... settings based on your printer. The Printer Home opens. To set up the fax? b Double-click the AIO Setup Utility for answering faxes manually is connected to fax" on page 77. 2 Configure the fax settings using the fax software. e Run the wizard. Receiving a fax...
User's Guide
Page 103
... does not appear after a minute, then launch the CD manually: a Click , or click Start and then click Run. For Windows users 1 Close all open software programs. 2 Insert the installation software CD. For Macintosh users 1 Close all open software applications. 2 Insert the installation ...programs. 2 Insert the installation software CD. For Macintosh users 1 Close all open software applications. 2 Insert the installation software CD. Networking 103 If the installation dialog does not appear after a minute, then launch the CD manually: a Click , or click Start and then click ...
... does not appear after a minute, then launch the CD manually: a Click , or click Start and then click Run. For Windows users 1 Close all open software programs. 2 Insert the installation software CD. For Macintosh users 1 Close all open software applications. 2 Insert the installation ...programs. 2 Insert the installation software CD. For Macintosh users 1 Close all open software applications. 2 Insert the installation software CD. Networking 103 If the installation dialog does not appear after a minute, then launch the CD manually: a Click , or click Start and then click ...

User's Guide
Page 153
... Reformat the document on Letter-size paper. Troubleshooting 153 The printer automatically converts color faxes to Manual Answer Code: > Fax Setup > Ringing and Answering > Manual Answer Code 2 Copy the manual answer code that you can configure the fax settings in the fax software. MAKE SURE THE ...FAX SOFTWARE IS INSTALLED The Fax Solutions Software is optional for Windows users and is installed with the quality of the...
... Reformat the document on Letter-size paper. Troubleshooting 153 The printer automatically converts color faxes to Manual Answer Code: > Fax Setup > Ringing and Answering > Manual Answer Code 2 Copy the manual answer code that you can configure the fax settings in the fax software. MAKE SURE THE ...FAX SOFTWARE IS INSTALLED The Fax Solutions Software is optional for Windows users and is installed with the quality of the...
User's Guide
Page 170
...settings, change them on all the other network settings; Running the wireless setup again can also resolve issues due to the network. For Macintosh users 1 From the Finder desktop, double-click the printer folder. 2 Double-click Wireless Setup Assistant. 3 Follow the instructions on the network. ...then nothing is displayed. • Your computer might not be prompted to connect the printer to factory defaults. or the access point having manually changed , you are sure the printer is on the computer screen. Note: You may have already changed the wireless network settings on ...
...settings, change them on all the other network settings; Running the wireless setup again can also resolve issues due to the network. For Macintosh users 1 From the Finder desktop, double-click the printer folder. 2 Double-click Wireless Setup Assistant. 3 Follow the instructions on the network. ...then nothing is displayed. • Your computer might not be prompted to connect the printer to factory defaults. or the access point having manually changed , you are sure the printer is on the computer screen. Note: You may have already changed the wireless network settings on ...
User's Guide
Page 172
...intensive activities, like large file transfers or network games. If the network is too busy, it is possible that it is configured to the manual that came with Printer Port in the Description column. Check the printer model in the Port column. 7 If the Description column of the ... properties from the menu. 5 Click the Ports tab. 6 Locate the selected port. MAKE SURE BIDIRECTIONAL COMMUNICATION IS ENABLED Note: This solution applies to Windows users only 1 Click , or click Start and then click Run. 2 In the Start Search or Run box, type control printers. 3 Press Enter, or click...
...intensive activities, like large file transfers or network games. If the network is too busy, it is possible that it is configured to the manual that came with Printer Port in the Description column. Check the printer model in the Port column. 7 If the Description column of the ... properties from the menu. 5 Click the Ports tab. 6 Locate the selected port. MAKE SURE BIDIRECTIONAL COMMUNICATION IS ENABLED Note: This solution applies to Windows users only 1 Click , or click Start and then click Run. 2 In the Start Search or Run box, type control printers. 3 Press Enter, or click...
User's Guide
Page 186
...ème majeur d'échelle nationale. Some parameters required for compliance with Telecom's telepermit requirements are dependent on -hook for any single manual call initiation, and • The equipment shall go on the equipment associated with this device. Avis réservé aux utilisateurs... une indication du nombre maximum de terminaux pouvant être connectés à l'interface téléphonique. Notice to users of another. This equipment should not be set to ensure that automatic calls to different numbers are special conditions for connection to its...
...ème majeur d'échelle nationale. Some parameters required for compliance with Telecom's telepermit requirements are dependent on -hook for any single manual call initiation, and • The equipment shall go on the equipment associated with this device. Avis réservé aux utilisateurs... une indication du nombre maximum de terminaux pouvant être connectés à l'interface téléphonique. Notice to users of another. This equipment should not be set to ensure that automatic calls to different numbers are special conditions for connection to its...
Quick Reference
Page 4
... Initial setup instructions • Quick Setup sheet • Hardware Setup Wizard* Additional setup and instructions for a set amount of the paper manually or automatically (depending on your printer model). • Preview print jobs before printing. Conserving ink • Use Quick Print or Draft Mode....* Click Help from the list. 3 Select View User's Guide. The Power Saver feature puts the printer in Toolbars, the Print or Print Preview dialog, or the printer display (depending on the Lexmark Web site at http://support.lexmark.com. Conserving paper • Activate Eco-Mode. ...
... Initial setup instructions • Quick Setup sheet • Hardware Setup Wizard* Additional setup and instructions for a set amount of the paper manually or automatically (depending on your printer model). • Preview print jobs before printing. Conserving ink • Use Quick Print or Draft Mode....* Click Help from the list. 3 Select View User's Guide. The Power Saver feature puts the printer in Toolbars, the Print or Print Preview dialog, or the printer display (depending on the Lexmark Web site at http://support.lexmark.com. Conserving paper • Activate Eco-Mode. ...
Quick Reference
Page 12
... > Clean Printhead or Deep Clean Printhead A cleaning page prints. If the installation dialog does not appear after a minute, then launch the CD manually: a Click , or click Start and then click Run. Using the printer control panel From the home screen, navigate to 500MB of your printer... Insert the installation software CD. Note: Updated printer software may be available at www.lexmark.com. 2 Navigate to the Lexmark Web site at http://support.lexmark.com. 12 Using the printer software For Windows users 1 Click or Start. 2 Click All Programs or Programs, and then select the ...
... > Clean Printhead or Deep Clean Printhead A cleaning page prints. If the installation dialog does not appear after a minute, then launch the CD manually: a Click , or click Start and then click Run. Using the printer control panel From the home screen, navigate to 500MB of your printer... Insert the installation software CD. Note: Updated printer software may be available at www.lexmark.com. 2 Navigate to the Lexmark Web site at http://support.lexmark.com. 12 Using the printer software For Windows users 1 Click or Start. 2 Click All Programs or Programs, and then select the ...

Quick Reference
Page 15
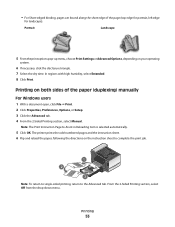
...your printer. 6 From the print options menu, choose the print quality, the number of copies to print, the type of the paper (duplexing) manually. Portrait Landscape 2 1 1 2 • For Short-Edge binding, pages are bound along the short edge of the page (left edge for printing... unit, available only on the display. 3 Touch View Photos. 15 Printing photos using other paper sizes, then see the instructions for landscape). For Macintosh users 1 With a document open , choose File > Page Setup. 2 From the Page Setup dialog, set the printer, paper size, and orientation. 3 Click...
...your printer. 6 From the print options menu, choose the print quality, the number of copies to print, the type of the paper (duplexing) manually. Portrait Landscape 2 1 1 2 • For Short-Edge binding, pages are bound along the short edge of the page (left edge for printing... unit, available only on the display. 3 Touch View Photos. 15 Printing photos using other paper sizes, then see the instructions for landscape). For Macintosh users 1 With a document open , choose File > Page Setup. 2 From the Page Setup dialog, set the printer, paper size, and orientation. 3 Click...


