User's Guide
Page 11
... a Setup Solutions booklet, see the Mac Help: 1 From the Finder desktop, double-click the Lexmark 9300 Series folder. 2 Double-click the printer Help icon. Getting Started or Setup Solutions booklet Description Where to solve printer setup problems. Note: These documents do not ship with all printers. If you instructions for setting up...
... a Setup Solutions booklet, see the Mac Help: 1 From the Finder desktop, double-click the Lexmark 9300 Series folder. 2 Double-click the printer Help icon. Getting Started or Setup Solutions booklet Description Where to solve printer setup problems. Note: These documents do not ship with all printers. If you instructions for setting up...
User's Guide
Page 12
...printer to a network (if supported by your printer) • Troubleshooting problems with the other software, if your printer 1 Click Start ª Programs or All Programs ª Lexmark connects to a computer. 9300 Series. 2 Select Lexmark Solution Center. 12 Note: If necessary, click Start ª Run,... the printer software, the User's Guide will be installed. 1 Click Start ª Programs or All Programs ª Lexmark 9300 Series. 2 Click View Lexmark's User's Guide. Help Description The Help gives you instructions for using the software, if your printer connects to a computer...
...printer to a network (if supported by your printer) • Troubleshooting problems with the other software, if your printer 1 Click Start ª Programs or All Programs ª Lexmark connects to a computer. 9300 Series. 2 Select Lexmark Solution Center. 12 Note: If necessary, click Start ª Run,... the printer software, the User's Guide will be installed. 1 Click Start ª Programs or All Programs ª Lexmark 9300 Series. 2 Click View Lexmark's User's Guide. Help Description The Help gives you instructions for using the software, if your printer connects to a computer...
User's Guide
Page 18
...answering machine, or a computer modem. If you do need to connect it to a telephone line to send and receive faxes. If problems occur, see "Setup troubleshooting" on page 23 Receive both incoming voice messages and "Connecting to an answering machine" faxes. on page 26... • Three telephone cords Benefits Send and receive faxes without using a computer. Method 2 a Click Start ª Programs or All Programs ª Lexmark 9300 Series. CAUTION: Do not use the fax feature during a lightning storm. Other devices (such as a telephone or answering machine) can connect the ...
...answering machine, or a computer modem. If you do need to connect it to a telephone line to send and receive faxes. If problems occur, see "Setup troubleshooting" on page 23 Receive both incoming voice messages and "Connecting to an answering machine" faxes. on page 26... • Three telephone cords Benefits Send and receive faxes without using a computer. Method 2 a Click Start ª Programs or All Programs ª Lexmark 9300 Series. CAUTION: Do not use the fax feature during a lightning storm. Other devices (such as a telephone or answering machine) can connect the ...
User's Guide
Page 32
...8226; The printer has a valid IP address on the network. For more information, see "Power button is using a unique network name (SSID). • Your wireless network is not lit" on page 151. 32 Network printer does not print • Make sure all cables to the network printer Check Ethernet connection...system support person to make sure the printer is connected to be configured does not appear in the list of the previous actions fixes the problem, uninstall the printer software, and reinstall it is possible that the printer/print server is not lit" on page 151. Contact your network...
...8226; The printer has a valid IP address on the network. For more information, see "Power button is using a unique network name (SSID). • Your wireless network is not lit" on page 151. 32 Network printer does not print • Make sure all cables to the network printer Check Ethernet connection...system support person to make sure the printer is connected to be configured does not appear in the list of the previous actions fixes the problem, uninstall the printer software, and reinstall it is possible that the printer/print server is not lit" on page 151. Contact your network...

User's Guide
Page 67
From this section Open With Photo Prints Productivity Tools You can : • Select the quantity and color of the screen. Print an image as information about using the Saved Images tab, click Help in a scanned document (OCR). - Fax an image or ...and the Fax Setup Utility. 1 Click Start ª Programs or All Programs ª Lexmark 9300 Series. 2 Select All-In-One Center. 3 Click Maintain/Troubleshoot. 4 Select from these topics: • Maintain or fix quality problems • Troubleshoot problems • Device status and ink levels • More printing ideas and how to send ...
From this section Open With Photo Prints Productivity Tools You can : • Select the quantity and color of the screen. Print an image as information about using the Saved Images tab, click Help in a scanned document (OCR). - Fax an image or ...and the Fax Setup Utility. 1 Click Start ª Programs or All Programs ª Lexmark 9300 Series. 2 Select All-In-One Center. 3 Click Maintain/Troubleshoot. 4 Select from these topics: • Maintain or fix quality problems • Troubleshoot problems • Device status and ink levels • More printing ideas and how to send ...
User's Guide
Page 68
.... • Print a test page. • Clean to fix horizontal streaks. • Align to fix blurry edges. • Troubleshoot other ink problems. • View ink levels and order new print cartridges. • Learn how to : - Note: Wait until scanning is Busy Printing. •... new print cartridges. • Learn tips about the current status. • Solve printer problems. • View ink levels and order new print cartridges. Method 2 1 Click Start ª Programs or All Programs ª Lexmark 9300 Series. 2 Select Solution Center. Use basic features. - Print, scan, copy, ...
.... • Print a test page. • Clean to fix horizontal streaks. • Align to fix blurry edges. • Troubleshoot other ink problems. • View ink levels and order new print cartridges. • Learn how to : - Note: Wait until scanning is Busy Printing. •... new print cartridges. • Learn tips about the current status. • Solve printer problems. • View ink levels and order new print cartridges. Method 2 1 Click Start ª Programs or All Programs ª Lexmark 9300 Series. 2 Select Solution Center. Use basic features. - Print, scan, copy, ...
User's Guide
Page 165
...)" on them Ask the sender to verify the original document was loaded correctly. Printer receives a blank fax Check original Check ink Cartridges may have been a problem with the quality of the original document is highlighted. 5 Press . 6 Press or highlighted. Check the ink levels, and install a new print cartridge if necessary. 1 Remove...
...)" on them Ask the sender to verify the original document was loaded correctly. Printer receives a blank fax Check original Check ink Cartridges may have been a problem with the quality of the original document is highlighted. 5 Press . 6 Press or highlighted. Check the ink levels, and install a new print cartridge if necessary. 1 Remove...

User's Guide
Page 166
... future faxes until you reach Max Send Speed. 8 Press or to select a lower transmission speed. 9 Press to save. 10 Resend the fax. 11 If the problem persists, repeat step 1 through step 10 to switch the pattern in the printer Remove the jam To eject the paper: 1 Press and hold . 2 Remove the...
... future faxes until you reach Max Send Speed. 8 Press or to select a lower transmission speed. 9 Press to save. 10 Resend the fax. 11 If the problem persists, repeat step 1 through step 10 to switch the pattern in the printer Remove the jam To eject the paper: 1 Press and hold . 2 Remove the...
User's Guide
Page 178
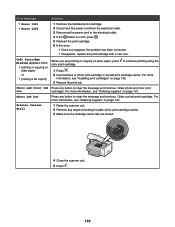
...Installing print cartridges" on page 142. 1 Remove the print cartridges. 2 Reinstall the black cartridge or the photo cartridge in the left carrier. 3 Reinstall the color cartridge in the right carrier. 1 Raise the scanner unit. 2 Remove any objects blocking the path of the cartridges is not lit, press . 5 Reinsert the... electrical outlet. 4 If the button is not lit, press . 5 Reinsert the print cartridges. 6 If the error: • Does not reappear, the problem has been corrected. • Reappears, one of the print cartridge carrier. 3 Make sure the cartridge carrier lids are installed.
...Installing print cartridges" on page 142. 1 Remove the print cartridges. 2 Reinstall the black cartridge or the photo cartridge in the left carrier. 3 Reinstall the color cartridge in the right carrier. 1 Raise the scanner unit. 2 Remove any objects blocking the path of the cartridges is not lit, press . 5 Reinsert the... electrical outlet. 4 If the button is not lit, press . 5 Reinsert the print cartridges. 6 If the error: • Does not reappear, the problem has been corrected. • Reappears, one of the print cartridge carrier. 3 Make sure the cartridge carrier lids are installed.
User's Guide
Page 179
... 1206 1 Remove the indicated print cartridge. 2 Disconnect the power cord from the electrical outlet. 3 Reconnect the power cord to continue printing using the color print cartridge. 1 Press . 2 Insert a black or photo print cartridge in the left print cartridge carrier. Order a photo print cartridge. For more... outlet. 4 If the button is not lit, press . 5 Reinsert the print cartridge. 6 If the error: • Does not reappear, the problem has been corrected. • Reappears, replace the print cartridge with a new one. Left Cartridge Missing (appears when: • printing or copying on ...
... 1206 1 Remove the indicated print cartridge. 2 Disconnect the power cord from the electrical outlet. 3 Reconnect the power cord to continue printing using the color print cartridge. 1 Press . 2 Insert a black or photo print cartridge in the left print cartridge carrier. Order a photo print cartridge. For more... outlet. 4 If the button is not lit, press . 5 Reinsert the print cartridge. 6 If the error: • Does not reappear, the problem has been corrected. • Reappears, replace the print cartridge with a new one. Left Cartridge Missing (appears when: • printing or copying on ...

User's Guide
Page 181
... and Sending menu appears. 8 Press or repeatedly until the option for a dial tone. There may have stopped communicating. There may have been a problem with the quality of the telephone line connection. 181 If you want to send a fax to make sure that the printer is detecting a dial ... Fax Mode menu appears. 4 Press or repeatedly until Fax is highlighted. 5 Press . 6 Press or highlighted. The fax machines have been a problem with the quality of the telephone line connection. Error message Failed to which you hear a dial tone, but the printer hangs up without dialing, this...
... and Sending menu appears. 8 Press or repeatedly until the option for a dial tone. There may have stopped communicating. There may have been a problem with the quality of the telephone line connection. 181 If you want to send a fax to make sure that the printer is detecting a dial ... Fax Mode menu appears. 4 Press or repeatedly until Fax is highlighted. 5 Press . 6 Press or highlighted. The fax machines have been a problem with the quality of the telephone line connection. Error message Failed to which you hear a dial tone, but the printer hangs up without dialing, this...

User's Guide
Page 182
... a dial tone. The Dialing and Sending menu appears. 8 Press or repeatedly until Dialing and Sending is highlighted. 5 Press . 6 Press or highlighted. There may have been a problem with the quality of the telephone line connection. Error message No Answer Solution Resend the fax. Make sure that the printer is detecting a dial tone...
... a dial tone. The Dialing and Sending menu appears. 8 Press or repeatedly until Dialing and Sending is highlighted. 5 Press . 6 Press or highlighted. There may have been a problem with the quality of the telephone line connection. Error message No Answer Solution Resend the fax. Make sure that the printer is detecting a dial tone...

User's Guide
Page 184
... Fax is highlighted. 2 Press . 3 Press or repeatedly until a lower speed appears. 9 Press . There may have been a problem with the quality of the fax you reset the transmission speed. 10 Resend the fax. 11 If the problem persists, repeat step 1 through step 10. Lower the transmission speed of your fax to be sent... Fax Mode Solution Resend the fax. repeatedly until Fax Setup is highlighted. 4 Press . 5 Press or highlighted. The fax machine of the recipient does not support color or does not support the resolution of the telephone line connection.
... Fax is highlighted. 2 Press . 3 Press or repeatedly until a lower speed appears. 9 Press . There may have been a problem with the quality of the fax you reset the transmission speed. 10 Resend the fax. 11 If the problem persists, repeat step 1 through step 10. Lower the transmission speed of your fax to be sent... Fax Mode Solution Resend the fax. repeatedly until Fax Setup is highlighted. 4 Press . 5 Press or highlighted. The fax machine of the recipient does not support color or does not support the resolution of the telephone line connection.

User's Guide
Page 190
...or corporation commission for electronic products in advance that you disconnect the equipment until the problem is resolved. The Telephone Consumer Protection Act of 1991 makes it is defined as determined...device is provided with this equipment to state tariffs. For repair and warranty information, contact Lexmark International, Inc. For earlier products, the REN is subject to the premises' wiring and... of our products. If advance notice is to avoid damage to your local sales office phone number. If requested, this product. at the top or bottom of your alarm...
...or corporation commission for electronic products in advance that you disconnect the equipment until the problem is resolved. The Telephone Consumer Protection Act of 1991 makes it is defined as determined...device is provided with this equipment to state tariffs. For repair and warranty information, contact Lexmark International, Inc. For earlier products, the REN is subject to the premises' wiring and... of our products. If advance notice is to avoid damage to your local sales office phone number. If requested, this product. at the top or bottom of your alarm...

User's Guide
Page 191
...nationale. Telephone companies report that is located on the rear of use. Using this device. Notice to be used, as a major nationwide problem. En conséquence, il vous est recommandé de brancher un parasurtenseur dans la prise de courant à laquelle l'équipement ...de ce produit en Suisse Cet appareil nécessite l'utilisation d'un filtre de tonalité de facturation suisse (nº de référence Lexmark : 14B5123) devant être installé sur toute ligne recevant des impulsions de comptage en Suisse. The Ringer Equivalence Number (REN) is...
...nationale. Telephone companies report that is located on the rear of use. Using this device. Notice to be used, as a major nationwide problem. En conséquence, il vous est recommandé de brancher un parasurtenseur dans la prise de courant à laquelle l'équipement ...de ce produit en Suisse Cet appareil nécessite l'utilisation d'un filtre de tonalité de facturation suisse (nº de référence Lexmark : 14B5123) devant être installé sur toute ligne recevant des impulsions de comptage en Suisse. The Ringer Equivalence Number (REN) is...


