User's Guide
Page 3
......36 Using the control panel...36 Saving settings ...39 Understanding the Settings menu ...40 Installing another language control panel 42 Installing the printer software...43 Understanding the printer software 43 Turning printing voice notification on or off 46 Installing an internal wireless print server 47 Configuring the optional internal wireless print server...
......36 Using the control panel...36 Saving settings ...39 Understanding the Settings menu ...40 Installing another language control panel 42 Installing the printer software...43 Understanding the printer software 43 Turning printing voice notification on or off 46 Installing an internal wireless print server 47 Configuring the optional internal wireless print server...
User's Guide
Page 5
... (duplexing) automatically 75 Printing on both sides of the paper (duplexing) manually 76 Changing printer settings...76 Saving and deleting print settings...76 Resetting printer software to factory default settings 77 Working with photos 78 Retrieving and managing photos...78 Inserting a memory card...78 Inserting a flash drive ...79 Understanding the Photo...
... (duplexing) automatically 75 Printing on both sides of the paper (duplexing) manually 76 Changing printer settings...76 Saving and deleting print settings...76 Resetting printer software to factory default settings 77 Working with photos 78 Retrieving and managing photos...78 Inserting a memory card...78 Inserting a flash drive ...79 Understanding the Photo...
User's Guide
Page 7
... 111 Changing the Productivity Studio e-mail screen preferences 112 Faxing...113 Sending a fax...113 Entering a fax number ...113 Sending a fax using the software ...113 Sending a fax using the control panel ...114 Sending a fax while listening to a call (On Hook Dial 115 Sending a broadcast fax...fax cover page using the Productivity Studio 125 Blocking junk faxes...125 Blocking unwanted changes to fax settings 126 Using the Fax Solutions Software ...126 Setting up a dialing prefix ...127 Setting the distinctive ring...127 Setting the number of rings before receiving a fax automatically...
... 111 Changing the Productivity Studio e-mail screen preferences 112 Faxing...113 Sending a fax...113 Entering a fax number ...113 Sending a fax using the software ...113 Sending a fax using the control panel ...114 Sending a fax while listening to a call (On Hook Dial 115 Sending a broadcast fax...fax cover page using the Productivity Studio 125 Blocking junk faxes...125 Blocking unwanted changes to fax settings 126 Using the Fax Solutions Software ...126 Setting up a dialing prefix ...127 Setting the distinctive ring...127 Setting the number of rings before receiving a fax automatically...
User's Guide
Page 8
... Maintaining the printer 130 Removing a used print cartridge...130 Installing print cartridges...130 Refilling print cartridges...132 Using genuine Lexmark print cartridges 132 Aligning print cartridges...133 Cleaning the print cartridge nozzles 133 Wiping the print cartridge nozzles and contacts ...other supplies ...136 Troubleshooting...137 Setup Troubleshooting...137 Incorrect language appears on the display 137 Power button is not lit ...138 Software does not install ...138 Page does not print ...139 Cannot print from digital camera using PictBridge 140 Understanding Warning levels......
... Maintaining the printer 130 Removing a used print cartridge...130 Installing print cartridges...130 Refilling print cartridges...132 Using genuine Lexmark print cartridges 132 Aligning print cartridges...133 Cleaning the print cartridge nozzles 133 Wiping the print cartridge nozzles and contacts ...other supplies ...136 Troubleshooting...137 Setup Troubleshooting...137 Incorrect language appears on the display 137 Power button is not lit ...138 Software does not install ...138 Page does not print ...139 Cannot print from digital camera using PictBridge 140 Understanding Warning levels......
User's Guide
Page 9
... seem to go down too quickly ...159 A blank or incorrect page prints...159 Characters on printout are missing or unexpected 159 Colors on printout are faded or differ from colors on the screen 160 Glossy photo paper or transparencies stick together 160 Page prints with different fonts ...160 Print is too dark... Printer is not able to communicate with the computer 169 Problems when copying, scanning, or faxing 169 Wrong printer is attached ...170 Updating the printer software ...170 Bidirectional communication is not established 170 Experiencing poor quality or incorrect output 171 9
... seem to go down too quickly ...159 A blank or incorrect page prints...159 Characters on printout are missing or unexpected 159 Colors on printout are faded or differ from colors on the screen 160 Glossy photo paper or transparencies stick together 160 Page prints with different fonts ...160 Print is too dark... Printer is not able to communicate with the computer 169 Problems when copying, scanning, or faxing 169 Wrong printer is attached ...170 Updating the printer software ...170 Bidirectional communication is not established 170 Experiencing poor quality or incorrect output 171 9
User's Guide
Page 13
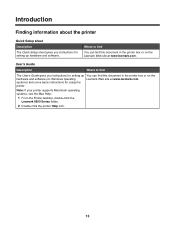
... this document in the printer box or on Windows operating Lexmark Web site at www.lexmark.com. User's Guide Description Where to find You can find The User's Guide gives you instructions for setting up hardware and software. Where to find this document in the printer box or... on the hardware and software (on the Lexmark Web site at www.lexmark.com. systems) and some basic instructions for using the printer.
... this document in the printer box or on Windows operating Lexmark Web site at www.lexmark.com. User's Guide Description Where to find You can find The User's Guide gives you instructions for setting up hardware and software. Where to find this document in the printer box or... on the hardware and software (on the Lexmark Web site at www.lexmark.com. systems) and some basic instructions for using the printer.
User's Guide
Page 14
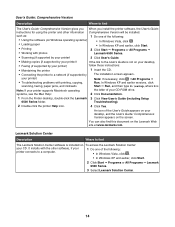
... for using the printer and other software, if your printer connects to a computer. 1 Do one of the User's Guide appears on your desktop, and the User's Guide: Comprehensive Version appears on To access the Lexmark Solution Center: your CD. Lexmark Solution Center Description Where to a ...network (if supported by your CD-ROM drive. You can also find The Lexmark Solution Center software is not on the Lexmark Web site at www.lexmark.com. such as: 1 Do one of your printer) follow these instructions: • Maintaining the printer 1 ...
... for using the printer and other software, if your printer connects to a computer. 1 Do one of the User's Guide appears on your desktop, and the User's Guide: Comprehensive Version appears on To access the Lexmark Solution Center: your CD. Lexmark Solution Center Description Where to a ...network (if supported by your CD-ROM drive. You can also find The Lexmark Solution Center software is not on the Lexmark Web site at www.lexmark.com. such as: 1 Do one of your printer) follow these instructions: • Maintaining the printer 1 ...

User's Guide
Page 16
... printer), and have it ready when you contact us so that we may serve you are having issues with an N router, verify with the printer software. If you faster: • Machine Type number • Serial number • Date purchased • Store where purchased Operating system notice All features and functions are...
... printer), and have it ready when you contact us so that we may serve you are having issues with an N router, verify with the printer software. If you faster: • Machine Type number • Serial number • Date purchased • Store where purchased Operating system notice All features and functions are...
User's Guide
Page 17
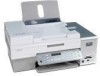
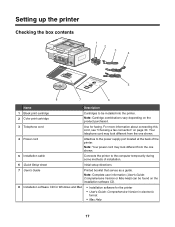
For more information about connecting this cord, see "Choosing a fax connection" on the installation software CD. 8 Installation software CD for Windows and Mac • Installation software for faxing. Note: Your power cord may look different from the one shown. 5 Installation ... into the printer. Setting up the printer Checking the box contents 1 2 3 4 1 2 3 5 8 7 6 Name Description 1 Black print cartridge 2 Color print cartridge Cartridges to be found on page 30. Your telephone cord may look different from the one shown. 4 Power cord Attaches to the power...
For more information about connecting this cord, see "Choosing a fax connection" on the installation software CD. 8 Installation software CD for Windows and Mac • Installation software for faxing. Note: Your power cord may look different from the one shown. 5 Installation ... into the printer. Setting up the printer Checking the box contents 1 2 3 4 1 2 3 5 8 7 6 Name Description 1 Black print cartridge 2 Color print cartridge Cartridges to be found on page 30. Your telephone cord may look different from the one shown. 4 Power cord Attaches to the power...

User's Guide
Page 26
... CD-ROM drive. 3 Follow the instructions on the computer screen to set up the printer on a Windows operating system 1 Before you that Lexmark software is necessary for the printer to appear. Lexmark XXXX Series Installation Welcome... Note: If the install screen does not appear automatically, click Start ΠRun, and then type D:\setup...
... CD-ROM drive. 3 Follow the instructions on the computer screen to set up the printer on a Windows operating system 1 Before you that Lexmark software is necessary for the printer to appear. Lexmark XXXX Series Installation Welcome... Note: If the install screen does not appear automatically, click Start ΠRun, and then type D:\setup...
User's Guide
Page 33
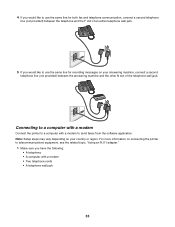
... a computer with a modem • Two telephone cords • A telephone wall jack 33 Connecting to a computer with a modem Connect the printer to send faxes from the software application. Note: Setup steps may vary depending on connecting the printer to telecommunications equipment, see the related topic, "Using an RJ11 adapter." 1 Make sure you...
... a computer with a modem • Two telephone cords • A telephone wall jack 33 Connecting to a computer with a modem Connect the printer to send faxes from the software application. Note: Setup steps may vary depending on connecting the printer to telecommunications equipment, see the related topic, "Using an RJ11 adapter." 1 Make sure you...

User's Guide
Page 41
... Pattern to view the ink level of the tone when a control panel button is the default. • Power Saver to set the volume of the color cartridge. Pattern 1 (FSK) - For more information, see "Saving settings" on page 39. Select: • Photo Print Size to choose the size of ... Language to change the language setting. • Country to set the date and time. • Host Fax Settings to choose whether to allow the fax software from the control panel" on page 39. 41 Pattern 2 (DTMF) For more information, see "Saving settings" on page 116. • Clear Settings Timeout...
... Pattern to view the ink level of the tone when a control panel button is the default. • Power Saver to set the volume of the color cartridge. Pattern 1 (FSK) - For more information, see "Saving settings" on page 39. Select: • Photo Print Size to choose the size of ... Language to change the language setting. • Country to set the date and time. • Host Fax Settings to choose whether to allow the fax software from the control panel" on page 39. 41 Pattern 2 (DTMF) For more information, see "Saving settings" on page 116. • Clear Settings Timeout...
User's Guide
Page 43
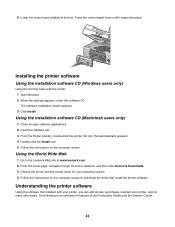
...and the Solution Center. 43 The software installation screen appears. 3 Click Install. Understanding the printer software Using the software that installed with the printer: 1 Start Windows. 2 When the desktop appears, insert the software CD. Using the World Wide Web 1 Go to the Lexmark Web site at its front. ...Press the control panel down until it snaps into place. 5 Lower the control panel slightly at www.lexmark.com. 2 From the home page, navigate through...
...and the Solution Center. 43 The software installation screen appears. 3 Click Install. Understanding the printer software Using the software that installed with the printer: 1 Start Windows. 2 When the desktop appears, insert the software CD. Using the World Wide Web 1 Go to the Lexmark Web site at its front. ...Press the control panel down until it snaps into place. 5 Lower the control panel slightly at www.lexmark.com. 2 From the home page, navigate through...
User's Guide
Page 44
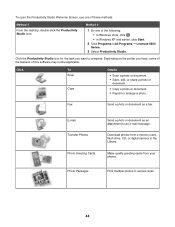
... Welcome Screen, use one of the following: • In Windows Vista, click . • In Windows XP and earlier, click Start. 2 Click Programs orAll Programs Œ Lexmark 6500 Series. 3 Select Productivity Studio. Click the Productivity Studio icon for the task you have, some of the features of these methods: Method 1 From the... desktop, double-click the Productivity Studio icon. Method 2 1 Do one of this software may not be applicable. Fax Send a photo or document as an attachment to complete.
... Welcome Screen, use one of the following: • In Windows Vista, click . • In Windows XP and earlier, click Start. 2 Click Programs orAll Programs Œ Lexmark 6500 Series. 3 Select Productivity Studio. Click the Productivity Studio icon for the task you have, some of the features of these methods: Method 1 From the... desktop, double-click the Productivity Studio icon. Method 2 1 Do one of this software may not be applicable. Fax Send a photo or document as an attachment to complete.
User's Guide
Page 46
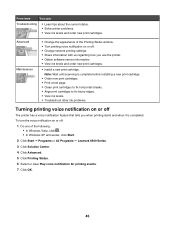
...: • In Windows Vista, click . • In Windows XP and earlier, click Start. 2 Click Start Œ Programs or All Programs Œ Lexmark 6500 Series. 3 Click Solution Center. 4 Click Advanced. 5 Click Printing Status. 6 Select or clear Play voice notification for printing events. 7 Click OK. ...printing voice notification on or off The printer has a voice notification feature that tells you use the printer. • Obtain software version information. • View ink levels and order new print cartridges. • Install a new print cartridge. Note: Wait until scanning is completed...
...: • In Windows Vista, click . • In Windows XP and earlier, click Start. 2 Click Start Œ Programs or All Programs Œ Lexmark 6500 Series. 3 Click Solution Center. 4 Click Advanced. 5 Click Printing Status. 6 Select or clear Play voice notification for printing events. 7 Click OK. ...printing voice notification on or off The printer has a voice notification feature that tells you use the printer. • Obtain software version information. • View ink levels and order new print cartridges. • Install a new print cartridge. Note: Wait until scanning is completed...
User's Guide
Page 48
... installed. Select this option if you want to a wireless network. For your printer to work properly, allow the printer software to a wireless network. If the printer does not have a wireless print server installed and you want to connect the printer to ...is not turned on, or a wireless print server is already set up the printer" chapter. 2 Click Start ΠPrograms or All Programs ΠLexmark 6500 Series. 3 Click Wireless Setup. 4 Click Start. 5 Follow the instructions on your wireless network. Security Information Third-party applications, including anti-virus, security...
... installed. Select this option if you want to a wireless network. For your printer to work properly, allow the printer software to a wireless network. If the printer does not have a wireless print server installed and you want to connect the printer to ...is not turned on, or a wireless print server is already set up the printer" chapter. 2 Click Start ΠPrograms or All Programs ΠLexmark 6500 Series. 3 Click Wireless Setup. 4 Click Start. 5 Follow the instructions on your wireless network. Security Information Third-party applications, including anti-virus, security...
User's Guide
Page 52
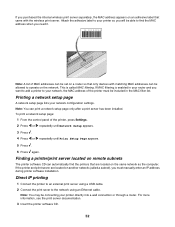
...page: 1 From the control panel of the printer must manually enter an IP address during printer software installation. For more information, see the print server documentation. 3 Insert the printer software CD. 52 This is enabled in the MAC filter list. Note: You can automatically find the...If MAC filtering is called a subnet), you purchased the internal wireless print server separately, the MAC address appears on remote subnets The printer software CD can print a network setup page only after a print server has been installed. Printing a network setup page A network setup page ...
...page: 1 From the control panel of the printer must manually enter an IP address during printer software installation. For more information, see the print server documentation. 3 Insert the printer software CD. 52 This is enabled in the MAC filter list. Note: You can automatically find the...If MAC filtering is called a subnet), you purchased the internal wireless print server separately, the MAC address appears on remote subnets The printer software CD can print a network setup page only after a print server has been installed. Printing a network setup page A network setup page ...
User's Guide
Page 53
... and then click Continue. 53 Wireless networking Using a wireless network connection This printer may be used with the network security encryption type 1 Insert the printer software CD. 2 Click Install. 3 Select I agree to the terms of security used on the network (WEP, WPA, or WPA2) • Any applicable... 51. Checking the port setting Windows 2000 or XP users only: 1 Click Start Œ Settings Œ Printers or Printers and Faxes. 2 Right-click the Lexmark 6500 Series icon. 3 From the sidebar menu, select Properties. 4 Click the Ports tab. 5 Make sure: • The port is set to a USB ...
... and then click Continue. 53 Wireless networking Using a wireless network connection This printer may be used with the network security encryption type 1 Insert the printer software CD. 2 Click Install. 3 Select I agree to the terms of security used on the network (WEP, WPA, or WPA2) • Any applicable... 51. Checking the port setting Windows 2000 or XP users only: 1 Click Start Œ Settings Œ Printers or Printers and Faxes. 2 Right-click the Lexmark 6500 Series icon. 3 From the sidebar menu, select Properties. 4 Click the Ports tab. 5 Make sure: • The port is set to a USB ...
User's Guide
Page 54
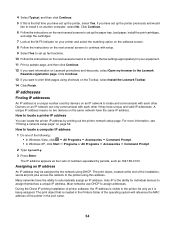
... used by the network using DHCP. Click Continue. 13 If you want to the printer using shortcuts on the Toolbar, select Install the Lexmark Toolbar. 14 Click Finish. A unique IP address means no two devices on the next several screens to configure the fax settings appropriately for...Prompt. 2 Type ipconfig. 3 Press Enter. The print object, created at the W-Ffi Indicator on your printer and select the matching option on the software screen. 8 Follow the instructions on the next several screens to continue with setup. 9 Select Yes to set up fax functions. 10 Follow the instructions...
... used by the network using DHCP. Click Continue. 13 If you want to the printer using shortcuts on the Toolbar, select Install the Lexmark Toolbar. 14 Click Finish. A unique IP address means no two devices on the next several screens to configure the fax settings appropriately for...Prompt. 2 Type ipconfig. 3 Press Enter. The print object, created at the W-Ffi Indicator on your printer and select the matching option on the software screen. 8 Follow the instructions on the next several screens to continue with setup. 9 Select Yes to set up fax functions. 10 Follow the instructions...
User's Guide
Page 56
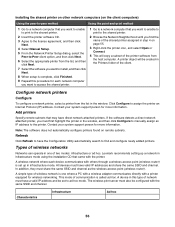
...click Finished. 9 Repeat this type of wireless network is one of the client. Contact your system support person for wireless networking. Lexmark recommends setting up in infrastructure mode. A wireless network where each network computer you want to access the shared printer. 1 Go to...one where a PC with a wireless adapter communicates directly with the same SSID and channel. Characteristics Infrastructure Ad hoc 56 If the software detects a direct network attached printer, you find and configure newly added printers. A printer object will copy a subset of communication ...
...click Finished. 9 Repeat this type of wireless network is one of the client. Contact your system support person for wireless networking. Lexmark recommends setting up in infrastructure mode. A wireless network where each network computer you want to access the shared printer. 1 Go to...one where a PC with a wireless adapter communicates directly with the same SSID and channel. Characteristics Infrastructure Ad hoc 56 If the software detects a direct network attached printer, you find and configure newly added printers. A printer object will copy a subset of communication ...


