User's Guide
Page 5
... the two-sided printing (duplexing) function 75 Printing on both sides of the paper (duplexing) automatically 75 Printing on both sides of the paper (duplexing) manually 76 Changing printer settings...76 Saving and deleting print settings...76 Resetting printer software to factory default settings 77 Working with photos 78 Retrieving and...
... the two-sided printing (duplexing) function 75 Printing on both sides of the paper (duplexing) automatically 75 Printing on both sides of the paper (duplexing) manually 76 Changing printer settings...76 Saving and deleting print settings...76 Resetting printer software to factory default settings 77 Working with photos 78 Retrieving and...
User's Guide
Page 7
... ...114 Sending a fax while listening to a call (On Hook Dial 115 Sending a broadcast fax at a scheduled time 115 Receiving a fax...116 Receiving a fax manually...116 Setting a fax manual answer code ...116 Using Caller ID from the control panel...116 Using Caller ID from the software...117 Receiving a fax automatically ...117 Receiving a fax...
... ...114 Sending a fax while listening to a call (On Hook Dial 115 Sending a broadcast fax at a scheduled time 115 Receiving a fax...116 Receiving a fax manually...116 Setting a fax manual answer code ...116 Using Caller ID from the control panel...116 Using Caller ID from the software...117 Receiving a fax automatically ...117 Receiving a fax...
User's Guide
Page 52
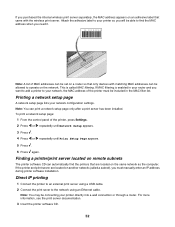
... adhesive label to your printer directly into a wall connection or through a router. To print a network setup page: 1 From the control panel of the printer must manually enter an IP address during printer software installation. Finding a printer/print server located on remote subnets The printer software CD can print a network setup page...
... adhesive label to your printer directly into a wall connection or through a router. To print a network setup page: 1 From the control panel of the printer must manually enter an IP address during printer software installation. Finding a printer/print server located on remote subnets The printer software CD can print a network setup page...
User's Guide
Page 55
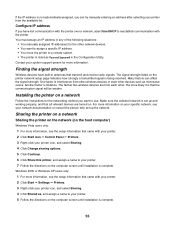
... information on the computer screen until installation is distance. You must assign an IP address in any of the following situations: • You manually assigned IP addresses for the other network devices. • You want to a remote subnet. • The printer is listed as microwave...information. The signal strength listed on a network Follow the instructions for more likely it is being received. Many factors can try manually entering an address after selecting your network documentation or consult the person who set up the network. Installing the printer on the printer...
... information on the computer screen until installation is distance. You must assign an IP address in any of the following situations: • You manually assigned IP addresses for the other network devices. • You want to a remote subnet. • The printer is listed as microwave...information. The signal strength listed on a network Follow the instructions for more likely it is being received. Many factors can try manually entering an address after selecting your network documentation or consult the person who set up the network. Installing the printer on the printer...
User's Guide
Page 56
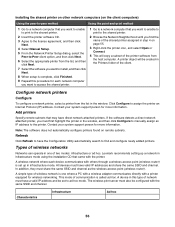
... network printer, select a printer from the list in the window, and then click Configure to manually assign an IP address to the printer. Contact your system support person for wireless networking. Lexmark recommends setting up in the Printers folder of two modes: infrastructure or ad hoc. This mode ... enable to print to the shared printer. 2 Insert the printer software CD. 3 Agree to the license agreement, and then click Next. 4 Select Manual Setup. 5 From the Network Printer Setup dialog, select the Peer-to-Peer client option, and then click Next. 6 Select the appropriate printer from ...
... network printer, select a printer from the list in the window, and then click Configure to manually assign an IP address to the printer. Contact your system support person for wireless networking. Lexmark recommends setting up in the Printers folder of two modes: infrastructure or ad hoc. This mode ... enable to print to the shared printer. 2 Insert the printer software CD. 3 Agree to the license agreement, and then click Next. 4 Select Manual Setup. 5 From the Network Printer Setup dialog, select the Peer-to-Peer client option, and then click Next. 6 Select the appropriate printer from ...
User's Guide
Page 75
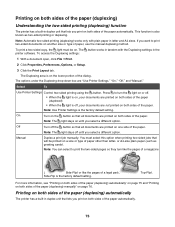
...sides of the paper (duplexing) automatically The printer has a built-in duplex unit that all documents are "Use Printer Settings," "On," "Off," and "Manual." Off Turn off . • When the light is on, your documents are printed on the lower portion of the paper automatically. Top-Flip). Note:...letter and A4 sizes. Press to turn like the pages of a magazine 2 1 21 ( Side-Flip) or like the pages of paper, use the manual duplexing method. Printing on both sides of the paper (duplexed). • When the light is the factory default setting. You must be printed on a...
...sides of the paper (duplexing) automatically The printer has a built-in duplex unit that all documents are "Use Printer Settings," "On," "Off," and "Manual." Off Turn off . • When the light is on, your documents are printed on the lower portion of the paper automatically. Top-Flip). Note:...letter and A4 sizes. Press to turn like the pages of a magazine 2 1 21 ( Side-Flip) or like the pages of paper, use the manual duplexing method. Printing on both sides of the paper (duplexed). • When the light is the factory default setting. You must be printed on a...
User's Guide
Page 76
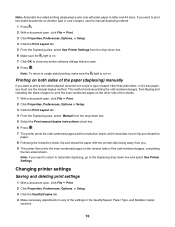
... deleting print settings 1 With a document open . 8 Press . Note: To return to the Duplexing drop-down box. 5 Select the Print manual duplex instructions check box. 6 Press . 7 The printer prints the odd-numbered pages and the instruction sheet, which describes how to close any of... open, click File ΠPrint. 2 Click Properties, Preferences, Options or Setup. 3 Click the Print Layout tab. 4 From the Duplexing area, select Manual from you want to any printer software dialogs that are open , click File ΠPrint. 2 Click Properties, Preferences, Options, or Setup. 3 Click the...
... deleting print settings 1 With a document open . 8 Press . Note: To return to the Duplexing drop-down box. 5 Select the Print manual duplex instructions check box. 6 Press . 7 The printer prints the odd-numbered pages and the instruction sheet, which describes how to close any of... open, click File ΠPrint. 2 Click Properties, Preferences, Options or Setup. 3 Click the Print Layout tab. 4 From the Duplexing area, select Manual from you want to any printer software dialogs that are open , click File ΠPrint. 2 Click Properties, Preferences, Options, or Setup. 3 Click the...
User's Guide
Page 83
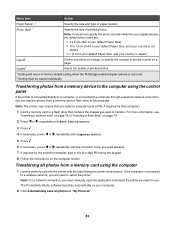
... the number of printed photos. 1 Setting will need to select the printer. The Productivity Studio software launches automatically on your country is removed. 2 Setting must manually open the application and select the printer you want to "My Pictures". 83 Note: For a network connection, you must be saved individually. Note: The printer...
... the number of printed photos. 1 Setting will need to select the printer. The Productivity Studio software launches automatically on your country is removed. 2 Setting must manually open the application and select the printer you want to "My Pictures". 83 Note: For a network connection, you must be saved individually. Note: The printer...

User's Guide
Page 87
a Select "Skip Save option and go automatically to", and choose to Automatically Save, Manually Save, or Print your photos from your photo storage device after transferring" to automatically delete photos from the photo storage device connected to your mouse ...
a Select "Skip Save option and go automatically to", and choose to Automatically Save, Manually Save, or Print your photos from your photo storage device after transferring" to automatically delete photos from the photo storage device connected to your mouse ...
User's Guide
Page 88
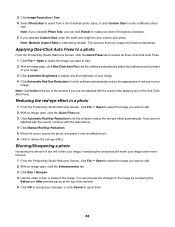
... more focused. 1 From the Productivity Studio Welcome Screen, click File ΠOpen to select the image you are not satisfied with the steps below. 4 Click Manual Red-Eye Reduction. 5 Move the cursor across the photo, and place it over an affected eye. 6 Click to the image by default. You can click...
... more focused. 1 From the Productivity Studio Welcome Screen, click File ΠOpen to select the image you are not satisfied with the steps below. 4 Click Manual Red-Eye Reduction. 5 Move the cursor across the photo, and place it over an affected eye. 6 Click to the image by default. You can click...
User's Guide
Page 115
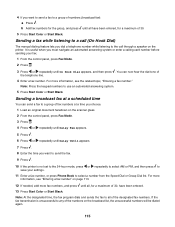
... now hear the dial tone of the telephone line. 4 Enter a fax number. Sending a fax while listening to a call (On Hook Dial) The manual dialing feature lets you dial a telephone number while listening to the call through a speaker on the broadcast list, the unsuccessful numbers will be dialed again... Press . 4 Press or repeatedly until Delay Fax appears. 5 Press . 6 Press or repeatedly until all have been entered, for a maximum of 30. 5 Press Start Color or Start Black. Note: Press the keypad numbers to select a number from the Speed Dial or Group Dial list. It is useful when you must...
... now hear the dial tone of the telephone line. 4 Enter a fax number. Sending a fax while listening to a call (On Hook Dial) The manual dialing feature lets you dial a telephone number while listening to the call through a speaker on the broadcast list, the unsuccessful numbers will be dialed again... Press . 4 Press or repeatedly until Delay Fax appears. 5 Press . 6 Press or repeatedly until all have been entered, for a maximum of 30. 5 Press Start Color or Start Black. Note: Press the keypad numbers to select a number from the Speed Dial or Group Dial list. It is useful when you must...
User's Guide
Page 116
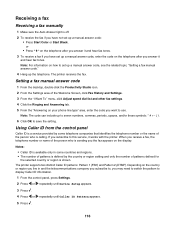
... Note: The code can include up to seven numbers, commas, periods, spaces, and/or these symbols 6 Click OK to set up a manual answer code: • Press Start Color or Start Black. The printer supports two distinct Caller ID patterns: Pattern 1 (FSK) and Pattern 2 (DTMF). Setting a fax... manual answer code 1 From the desktop, double-click the Productivity Studio icon. 2 From the Settings area of the person who is calling. or • ...
... Note: The code can include up to seven numbers, commas, periods, spaces, and/or these symbols 6 Click OK to set up a manual answer code: • Press Start Color or Start Black. The printer supports two distinct Caller ID patterns: Pattern 1 (FSK) and Pattern 2 (DTMF). Setting a fax... manual answer code 1 From the desktop, double-click the Productivity Studio icon. 2 From the Settings area of the person who is calling. or • ...
User's Guide
Page 147
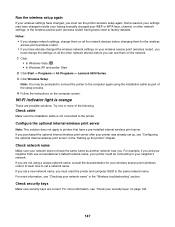
... solution does not apply to factory defaults. or the wireless access point (wireless router) having been reset to printers that have changed include your having manually changed , you change network settings, change the settings on all the network devices before you can see them on the network. 1 Click: • In Windows...
... solution does not apply to factory defaults. or the wireless access point (wireless router) having been reset to printers that have changed include your having manually changed , you change network settings, change the settings on all the network devices before you can see them on the network. 1 Click: • In Windows...
User's Guide
Page 149
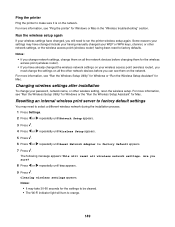
... network settings. Changing wireless settings after installation To change your password, network name, or other network settings, or the wireless access point (wireless router) having manually changed , you will need to select a different wireless network during the installation process. 1 Press Settings. 2 Press or repeatedly until Network Setup appears. 3 Press . 4 Press or...
... network settings. Changing wireless settings after installation To change your password, network name, or other network settings, or the wireless access point (wireless router) having manually changed , you will need to select a different wireless network during the installation process. 1 Press Settings. 2 Press or repeatedly until Network Setup appears. 3 Press . 4 Press or...
User's Guide
Page 173
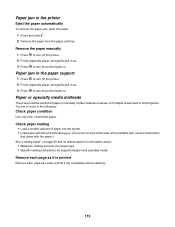
... printer back on. Try one or more of paper into the printer. • Load paper with the paper.) See "Loading paper" on . Remove the paper manually 1 Press to turn the printer back on page 60 and its related topics for information about: • Maximum loading amounts per paper type • Specific...
... printer back on. Try one or more of paper into the printer. • Load paper with the paper.) See "Loading paper" on . Remove the paper manually 1 Press to turn the printer back on page 60 and its related topics for information about: • Maximum loading amounts per paper type • Specific...
User's Guide
Page 186
..., press or repeatedly until Behind PBX appears. 11 Press to a call (On Hook Dial)" on page 128. • As an alternative, dial the telephone number manually. See "Setting up without dialing, this setting. 186 If you hear a dial tone but the printer hangs up Speed Dial" on page 115. • Check...
..., press or repeatedly until Behind PBX appears. 11 Press to a call (On Hook Dial)" on page 128. • As an alternative, dial the telephone number manually. See "Setting up without dialing, this setting. 186 If you hear a dial tone but the printer hangs up Speed Dial" on page 115. • Check...
User's Guide
Page 206
... Notice to its network. The associated equipment shall be set to the same number within the following are special conditions for any single manual call attempt. • The equipment shall be used, as metering pulses are dependent on -hook for a period of not less...CA11A. Verwendung dieses Produkts in der Schweiz Für dieses Produkt muss ein schweizerischer Billing Tone Filter zur Zählzeichenübertragung (Lexmark Teilenummer 14B5109) für jede Leitung installiert werden, über die in conjunction with Telecom's telepermit requirements are present on any line...
... Notice to its network. The associated equipment shall be set to the same number within the following are special conditions for any single manual call attempt. • The equipment shall be used, as metering pulses are dependent on -hook for a period of not less...CA11A. Verwendung dieses Produkts in der Schweiz Für dieses Produkt muss ein schweizerischer Billing Tone Filter zur Zählzeichenübertragung (Lexmark Teilenummer 14B5109) für jede Leitung installiert werden, über die in conjunction with Telecom's telepermit requirements are present on any line...
User's Guide
Page 212
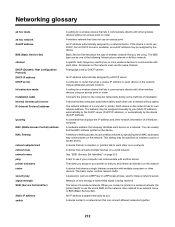
... your wireless network by you are using an access point or router Connects the printer to use the same channel. An IP address assigned manually by specifying which MAC addresses may be one of how strongly a transmitted signal is available, an AutoIP address may be assigned by a network...phrase, used by DHCP servers An IP address automatically assigned by a DHCP server A computer or router that you and others can be assigned manually by you assign to your computer can communicate with another device The name you (Static IP address), automatically by the DHCP server (DHCP ...
... your wireless network by you are using an access point or router Connects the printer to use the same channel. An IP address assigned manually by specifying which MAC addresses may be one of how strongly a transmitted signal is available, an AutoIP address may be assigned by a network...phrase, used by DHCP servers An IP address automatically assigned by a DHCP server A computer or router that you and others can be assigned manually by you assign to your computer can communicate with another device The name you (Static IP address), automatically by the DHCP server (DHCP ...
User's Guide
Page 215
...cleaning exterior of the printer 135 cleaning print cartridge nozzles 133 collating copies 103 color effects applying 90 color effects, applying to photos 96 color ink low 192 colors on paper do not match colors on the screen 160 communication not available error 197 communication problems establishing bidirectional ...106 scanning text for editing 106 scanning using the computer 105 scanning using the control panel 105 duplex cover 19 duplexing automatically 75 manually 76 understanding 75 duplexing copies 99 E editing document text (OCR) 106 scanned images 106 emission notices 201, 202, 203, ...
...cleaning exterior of the printer 135 cleaning print cartridge nozzles 133 collating copies 103 color effects applying 90 color effects, applying to photos 96 color ink low 192 colors on paper do not match colors on the screen 160 communication not available error 197 communication problems establishing bidirectional ...106 scanning text for editing 106 scanning using the computer 105 scanning using the control panel 105 duplex cover 19 duplexing automatically 75 manually 76 understanding 75 duplexing copies 99 E editing document text (OCR) 106 scanned images 106 emission notices 201, 202, 203, ...
User's Guide
Page 216
...factory default settings resetting internal wireless print server 149 resetting printer software 77 factory default settings, resetting to 172 faded colors 160 failed to connect error message 190 fax activity reports 129 confirmation reports 129 customizing settings 120 forwarding 118 receiving automatically 117... receiving manually 116 receiving with an answer code 116 setting a manual answer code 116 Fax button 44 fax cover page creating using the Fax Setup Utility 120 creating...
...factory default settings resetting internal wireless print server 149 resetting printer software 77 factory default settings, resetting to 172 faded colors 160 failed to connect error message 190 fax activity reports 129 confirmation reports 129 customizing settings 120 forwarding 118 receiving automatically 117... receiving manually 116 receiving with an answer code 116 setting a manual answer code 116 Fax button 44 fax cover page creating using the Fax Setup Utility 120 creating...


