User's Guide
Page 3
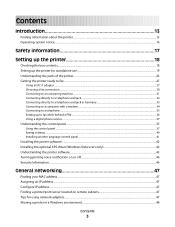
......37 Using the control panel ...37 Saving settings...40 Installing another language control panel...41 Installing the printer software...42 Installing the optional XPS driver (Windows Vista users only 42 Understanding the printer software...43 Turning printing voice notification on or off...46 Security Information...46 General networking 47 Finding your... IP address...47 Configure IP address...47 Finding a printer/print server located on remote subnets 47 Tips for using network adapters...47 Sharing a printer in a Windows environment...48 Contents 3
......37 Using the control panel ...37 Saving settings...40 Installing another language control panel...41 Installing the printer software...42 Installing the optional XPS driver (Windows Vista users only 42 Understanding the printer software...43 Turning printing voice notification on or off...46 Security Information...46 General networking 47 Finding your... IP address...47 Configure IP address...47 Finding a printer/print server located on remote subnets 47 Tips for using network adapters...47 Sharing a printer in a Windows environment...48 Contents 3
User's Guide
Page 13
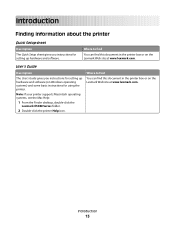
... Mac Help: 1 From the Finder desktop, double-click the Lexmark X5400 Series folder. 2 Double-click the printer Help icon. User's Guide Description The User's Guide gives you instructions for setting up hardware and software (on Windows operating systems) and some basic instructions for setting up hardware and... software. Introduction 13 Where to find You can find this document in the printer box or on the Lexmark Web site at www.lexmark.com. Where to find You ...
... Mac Help: 1 From the Finder desktop, double-click the Lexmark X5400 Series folder. 2 Double-click the printer Help icon. User's Guide Description The User's Guide gives you instructions for setting up hardware and software (on Windows operating systems) and some basic instructions for setting up hardware and... software. Introduction 13 Where to find You can find this document in the printer box or on the Lexmark Web site at www.lexmark.com. Where to find You ...
User's Guide
Page 14
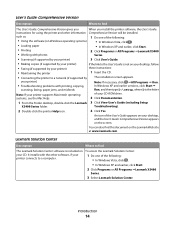
...An icon of the following : • In Windows Vista, click . • In Windows XP and earlier, click Start. 2 Click Programs or All Programs ŒLexmark X5400 Series. 3 Select Lexmark Solution Center. You can also find The Lexmark Solution Center software is included on your CD-ROM ..., and then type D:\setup, where D is not on Windows operating systems) • In Windows Vista, click . • Loading paper • In Windows XP and earlier, click Start. • Printing 2 Click Programs or All Programs ŒLexmark X5400 • Working with printing, copying, Note: If...
...An icon of the following : • In Windows Vista, click . • In Windows XP and earlier, click Start. 2 Click Programs or All Programs ŒLexmark X5400 Series. 3 Select Lexmark Solution Center. You can also find The Lexmark Solution Center software is included on your CD-ROM ..., and then type D:\setup, where D is not on Windows operating systems) • In Windows Vista, click . • Loading paper • In Windows XP and earlier, click Start. • Printing 2 Click Programs or All Programs ŒLexmark X5400 • Working with printing, copying, Note: If...
User's Guide
Page 16
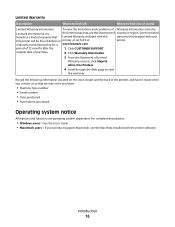
...of defects in printer, or set forth at printer. materials and workmanship for a www.lexmark.com. period of Warranty information varies by Lexmark International, Inc. For complete descriptions: • Windows users-See the User's Guide. • Macintosh users-If your this warranty that we...country or region. Introduction 16 original date of purchase. 2 Click Warranty Information. 3 From the Statement of Limited Warranty section, click Inkjet & All-In-One Printers. 4 Scroll through the Web page to find (rest of world) Limited Warranty Information To view the ...
...of defects in printer, or set forth at printer. materials and workmanship for a www.lexmark.com. period of Warranty information varies by Lexmark International, Inc. For complete descriptions: • Windows users-See the User's Guide. • Macintosh users-If your this warranty that we...country or region. Introduction 16 original date of purchase. 2 Click Warranty Information. 3 From the Statement of Limited Warranty section, click Inkjet & All-In-One Printers. 4 Scroll through the Web page to find (rest of world) Limited Warranty Information To view the ...
User's Guide
Page 42
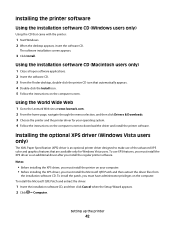
... site at www.lexmark.com. 2 From the home page, navigate through the menu selection, and then click Drivers & Downloads. 3 Choose the printer and the printer driver for Windows Vista users. Using the World Wide Web 1 Go to download the driver and install the printer software. To install the ...Insert the installation software CD, and then click Cancel when the Setup Wizard appears. 2 Click Œ Computer. To use of the advanced XPS color and graphics features that are available only for your computer. • Before installing the XPS driver, you must install the Microsoft QFE Patch and ...
... site at www.lexmark.com. 2 From the home page, navigate through the menu selection, and then click Drivers & Downloads. 3 Choose the printer and the printer driver for Windows Vista users. Using the World Wide Web 1 Go to download the driver and install the printer software. To install the ...Insert the installation software CD, and then click Cancel when the Setup Wizard appears. 2 Click Œ Computer. To use of the advanced XPS color and graphics features that are available only for your computer. • Before installing the XPS driver, you must install the Microsoft QFE Patch and ...
User's Guide
Page 45
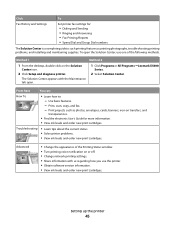
... : - The Solution Center appears with us regarding how you use one of the Printing Status window. • Turn printing voice notification on the Solution Center icon. 2 Click Setup and diagnose printer. 1 Click Programs or All Programs ŒLexmark X5400 Series. 2 Select Solution Center. Print, scan, copy, and fax. - Advanced • Change the...
... : - The Solution Center appears with us regarding how you use one of the Printing Status window. • Turn printing voice notification on the Solution Center icon. 2 Click Setup and diagnose printer. 1 Click Programs or All Programs ŒLexmark X5400 Series. 2 Select Solution Center. Print, scan, copy, and fax. - Advanced • Change the...
User's Guide
Page 46
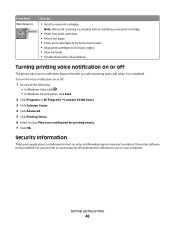
...; Troubleshoot other ink problems. Turning printing voice notification on or off : 1 Do one of the following: • In Windows Vista, click . • In Windows XP and earlier, click Start. 2 Click Programs or All Programs ŒLexmark X5400 Series. 3 Click Solution Center. 4 Click Advanced. 5 Click Printing Status. 6 Select or clear Play voice notification for...
...; Troubleshoot other ink problems. Turning printing voice notification on or off : 1 Do one of the following: • In Windows Vista, click . • In Windows XP and earlier, click Start. 2 Click Programs or All Programs ŒLexmark X5400 Series. 3 Click Solution Center. 4 Click Advanced. 5 Click Printing Status. 6 Select or clear Play voice notification for...
User's Guide
Page 48
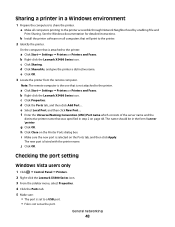
...Close on page 48. The name should be in step 2 on the Printer Ports dialog box. b Right-click the Lexmark X5400 Series icon. Sharing a printer in a Windows environment 1 Prepare the computers to the printer accessible through Network Neighborhood by enabling File and Print Sharing. a Make all ... to a USB port. • File is set as the port. j Click OK. Checking the port setting Windows Vista users only 1 Click Œ Control Panel Œ Printers. 2 Right-click the Lexmark X5400 Series icon. 3 From the sidebar menu, select Properties. 4 Click the Ports tab. 5 Make sure: ...
...Close on page 48. The name should be in step 2 on the Printer Ports dialog box. b Right-click the Lexmark X5400 Series icon. Sharing a printer in a Windows environment 1 Prepare the computers to the printer accessible through Network Neighborhood by enabling File and Print Sharing. a Make all ... to a USB port. • File is set as the port. j Click OK. Checking the port setting Windows Vista users only 1 Click Œ Control Panel Œ Printers. 2 Right-click the Lexmark X5400 Series icon. 3 From the sidebar menu, select Properties. 4 Click the Ports tab. 5 Make sure: ...
User's Guide
Page 49
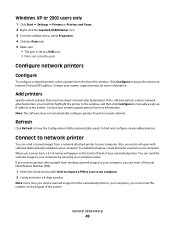
.... Also, your jobs will appear on the Control Panel of your networked printer. When you must first highlight the printer in the window. Click Configure to find and configure newly added printers. Contact your system support person for more information. If you want to prevent other... then click Configure to manually assign an IP address to the printer. Windows XP or 2000 users only 1 Click Start ΠSettings ΠPrinters or Printers and Faxes. 2 Right-click the Lexmark X5400 Series icon. 3 From the sidebar menu, select Properties. 4 Click the Ports tab. 5 Make sure:...
.... Also, your jobs will appear on the Control Panel of your networked printer. When you must first highlight the printer in the window. Click Configure to find and configure newly added printers. Contact your system support person for more information. If you want to prevent other... then click Configure to manually assign an IP address to the printer. Windows XP or 2000 users only 1 Click Start ΠSettings ΠPrinters or Printers and Faxes. 2 Right-click the Lexmark X5400 Series icon. 3 From the sidebar menu, select Properties. 4 Click the Ports tab. 5 Make sure:...
User's Guide
Page 57
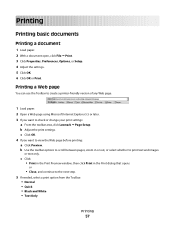
... dialog that opens or • Close, and continue to print text and images or text only. c Click: • Print in the Print Preview window, then click Print in or out, or select whether to the next step. 5 If needed, select a print option from the Toolbar: •...view the Web page before printing: a Click Preview. c Click OK. 4 If you want to check or change your print settings: a From the toolbar area, click Lexmark Œ Page Setup. Printing Printing basic documents Printing a document 1 Load paper. 2 With a document open, click File Œ Print. 3 Click Properties, Preferences, ...
... dialog that opens or • Close, and continue to print text and images or text only. c Click: • Print in the Print Preview window, then click Print in or out, or select whether to the next step. 5 If needed, select a print option from the Toolbar: •...view the Web page before printing: a Click Preview. c Click OK. 4 If you want to check or change your print settings: a From the toolbar area, click Lexmark Œ Page Setup. Printing Printing basic documents Printing a document 1 Load paper. 2 With a document open, click File Œ Print. 3 Click Properties, Preferences, ...
User's Guide
Page 60
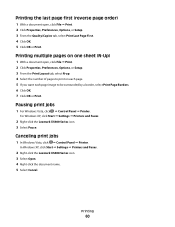
...click Start ΠSettings ΠPrinters and Faxes. 2 Right-click the Lexmark X5400 Series icon. 3 Select Pause. Canceling print jobs 1 In Windows Vista, click ΠControl Panel ΠPrinter. Pausing print jobs 1 For Windows Vista, click ΠControl Panel ΠPrinter. Printing 60 Printing multiple ... Quality/Copies tab, select Print Last Page First. 4 Click OK. 5 Click OK or Print. In Windows XP, click Start ΠSettings ΠPrinters and Faxes. 2 Right-click the Lexmark X5400 Series icon. 3 Select Open. 4 Right-click the document name. 5 Select Cancel. Printing the ...
...click Start ΠSettings ΠPrinters and Faxes. 2 Right-click the Lexmark X5400 Series icon. 3 Select Pause. Canceling print jobs 1 In Windows Vista, click ΠControl Panel ΠPrinter. Pausing print jobs 1 For Windows Vista, click ΠControl Panel ΠPrinter. Printing 60 Printing multiple ... Quality/Copies tab, select Print Last Page First. 4 Click OK. 5 Click OK or Print. In Windows XP, click Start ΠSettings ΠPrinters and Faxes. 2 Right-click the Lexmark X5400 Series icon. 3 Select Open. 4 Right-click the document name. 5 Select Cancel. Printing the ...
User's Guide
Page 65
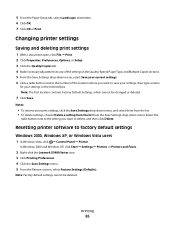
...to any of the location where you want to delete, and then click Delete. In Windows 2000 and Windows XP, click Start ΠSettings ΠPrinters or Printers and Faxes. 2 Right-click the Lexmark X5400 Series icon. 3 Click Printing Preferences. 4 Click the Save Settings menu. 5 ... Save Settings drop-down menu, select Save your current settings. 6 Click a radio button next to factory default settings Windows 2000, Windows XP, or Windows Vista users 1 In Windows Vista, click ΠControl Panel ΠPrinter. Resetting printer software to the number of the settings in the selected...
...to any of the location where you want to delete, and then click Delete. In Windows 2000 and Windows XP, click Start ΠSettings ΠPrinters or Printers and Faxes. 2 Right-click the Lexmark X5400 Series icon. 3 Click Printing Preferences. 4 Click the Save Settings menu. 5 ... Save Settings drop-down menu, select Save your current settings. 6 Click a radio button next to factory default settings Windows 2000, Windows XP, or Windows Vista users 1 In Windows Vista, click ΠControl Panel ΠPrinter. Resetting printer software to the number of the settings in the selected...
User's Guide
Page 72
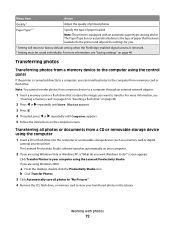
... documents from a memory card or flash drive. Note: The printer is connected directly to a computer, you want to view your computer using Windows Vista or Windows XP, a "What do ?" For more information, see "Inserting a memory card" on page 67 or "Inserting a flash drive" on ...device. Transferring all photos to "My Pictures". 4 Remove the CD, flash drive, or memory card to transfer. If you are using the Lexmark Productivity Studio. Transferring photos Transferring photos from a memory device to a computer through an external network adapter. 1 Insert a memory card or ...
... documents from a memory card or flash drive. Note: The printer is connected directly to a computer, you want to view your computer using Windows Vista or Windows XP, a "What do ?" For more information, see "Inserting a memory card" on page 67 or "Inserting a flash drive" on ...device. Transferring all photos to "My Pictures". 4 Remove the CD, flash drive, or memory card to transfer. If you are using the Lexmark Productivity Studio. Transferring photos Transferring photos from a memory device to a computer through an external network adapter. 1 Insert a memory card or ...

User's Guide
Page 73
... card to a flash drive 1 Insert a memory card that contains the images you want to transfer. 2 Insert a flash drive into the printer. The Lexmark Productivity Studio software launches automatically on your computer. 2 If you just transferred, click the check box and enter a name. 9 Click Next. 10 Remove ... appears. 4 Press . 5 Press or repeatedly until Save Photos appears. 6 Press . 7 If needed, press or repeatedly until the date you want Windows to do?" screen appears. Working with the most recent month. • If the computer is also connected, you must select USB as a memory card...
... card to a flash drive 1 Insert a memory card that contains the images you want to transfer. 2 Insert a flash drive into the printer. The Lexmark Productivity Studio software launches automatically on your computer. 2 If you just transferred, click the check box and enter a name. 9 Click Next. 10 Remove ... appears. 4 Press . 5 Press or repeatedly until Save Photos appears. 6 Press . 7 If needed, press or repeatedly until the date you want Windows to do?" screen appears. Working with the most recent month. • If the computer is also connected, you must select USB as a memory card...
User's Guide
Page 76
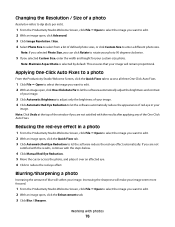
... Size, enter the width and height for your photo 90 degrees clockwise. 5 If you are not satisfied with the results after applying any of the window if you want to edit. 2 With an image open , click the Enhancements tab. 3 Click Blur / Sharpen. Blurring/Sharpening a photo Increasing the amount of defined photo...
... Size, enter the width and height for your photo 90 degrees clockwise. 5 If you are not satisfied with the results after applying any of the window if you want to edit. 2 With an image open , click the Enhancements tab. 3 Click Blur / Sharpen. Blurring/Sharpening a photo Increasing the amount of defined photo...
User's Guide
Page 77
... to reject them. Changing the Gamma Value of a photo or image Adjusting the gamma value helps you to control the overall brightness of the window. When images are not satisfied with photos 77 You can preview the changes to reject them . Adjusting its saturation lets you control the intensity ...of the color. 1 From the Productivity Studio Welcome Screen, click File ΠOpen to select the image you want to edit. 2 With an image open , click ...
... to reject them. Changing the Gamma Value of a photo or image Adjusting the gamma value helps you to control the overall brightness of the window. When images are not satisfied with photos 77 You can preview the changes to reject them . Adjusting its saturation lets you control the intensity ...of the color. 1 From the Productivity Studio Welcome Screen, click File ΠOpen to select the image you want to edit. 2 With an image open , click ...
User's Guide
Page 78
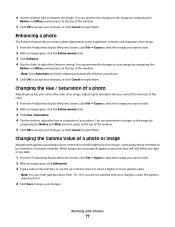
... can let the software automatically adjust only the brightness of the image by comparing the Before and After preview panes at the top of the window. 5 Click OK. The thumbnail is updated. Changing the Brightness / Contrast settings of a photo 1 From the Productivity Studio Welcome Screen, click File ..., click File ΠOpen to select the image you want to edit. 2 With an image open, click the Enhancements tab. 3 Click Color Effects. 4 Apply a color effect. Working with photos 78 You can select sepia, antique brown, black and white, or antique grey. 5 Click OK. Changing the Exposure...
... can let the software automatically adjust only the brightness of the image by comparing the Before and After preview panes at the top of the window. 5 Click OK. The thumbnail is updated. Changing the Brightness / Contrast settings of a photo 1 From the Productivity Studio Welcome Screen, click File ..., click File ΠOpen to select the image you want to edit. 2 With an image open, click the Enhancements tab. 3 Click Color Effects. 4 Apply a color effect. Working with photos 78 You can select sepia, antique brown, black and white, or antique grey. 5 Click OK. Changing the Exposure...
User's Guide
Page 79
... do ?" Printing photos Printing photos from a CD or removable storage device using Windows Vista, an "AutoPlay" screen appears. Click Transfer Photos to your computer using the Productivity Studio. • If you are on. 2 Load an original document facedown on color photos, click the check box, and then move the slider to the...
... do ?" Printing photos Printing photos from a CD or removable storage device using Windows Vista, an "AutoPlay" screen appears. Click Transfer Photos to your computer using the Productivity Studio. • If you are on. 2 Load an original document facedown on color photos, click the check box, and then move the slider to the...

User's Guide
Page 80
... the options you want in the table. Working with edits in the bottom right corner to return to the print window. 10 Click Print Now in the bottom right corner of the window. 11 Remove the CD or storage device. Click More Retouch Tools to go to view and select other sizes..., Automatic Red-Eye Reduction, or Automatic Brightness Fix to view and select other sizes. 8 Click Print Now in the last column to the photo-editing window. When you want to include in your photo package. 4 Click Next. 5 From the Quality drop-down list, select a copy quality. 6 From the Paper Size in...
... the options you want in the table. Working with edits in the bottom right corner to return to the print window. 10 Click Print Now in the bottom right corner of the window. 11 Remove the CD or storage device. Click More Retouch Tools to go to view and select other sizes..., Automatic Red-Eye Reduction, or Automatic Brightness Fix to view and select other sizes. 8 Click Print Now in the last column to the photo-editing window. When you want to include in your photo package. 4 Click Next. 5 From the Quality drop-down list, select a copy quality. 6 From the Paper Size in...

User's Guide
Page 86
Note: You can also modify the setting that lets the slideshow replay automatically (loop). 5 Click the Share tab to save or print your cursor to adjust the amount of time between each photo in the lower-right corner of the window to start the slideshow. Working with photos 86 You can exit the slideshow any time by moving your slideshow. 6 Click View Show in the slideshow. 4 Click the Slideshow Settings tab to the bottom center of the screen and clicking Exit Slideshow.
Note: You can also modify the setting that lets the slideshow replay automatically (loop). 5 Click the Share tab to save or print your cursor to adjust the amount of time between each photo in the lower-right corner of the window to start the slideshow. Working with photos 86 You can exit the slideshow any time by moving your slideshow. 6 Click View Show in the slideshow. 4 Click the Slideshow Settings tab to the bottom center of the screen and clicking Exit Slideshow.


