User's Guide
Page 8
... the display...128 Power button is not lit ...128 Software does not install...129 Page does not print...130 Solving printer communication problems ...131 Understanding Warning levels ...132 Removing and reinstalling the software ...132 Enabling the USB port...132 Print troubleshooting...133 Improving print quality... too quickly ...138 A blank or incorrect page prints...138 Characters on printout are missing or unexpected ...138 Colors on printout are faded or differ from colors on the screen 139 Copied item does not match the original item...139 Glossy photo paper or transparencies stick ...
... the display...128 Power button is not lit ...128 Software does not install...129 Page does not print...130 Solving printer communication problems ...131 Understanding Warning levels ...132 Removing and reinstalling the software ...132 Enabling the USB port...132 Print troubleshooting...133 Improving print quality... too quickly ...138 A blank or incorrect page prints...138 Characters on printout are missing or unexpected ...138 Colors on printout are faded or differ from colors on the screen 139 Copied item does not match the original item...139 Glossy photo paper or transparencies stick ...
User's Guide
Page 9
... print to File ...149 Printer cannot communicate with computers over peer-to-peer network 149 Printer is not able to communicate with the computer 151 Problems when copying, scanning, or faxing ...151 Wrong printer is attached...151 Updating the printer software ...151 Bidirectional communication is not established...152 Experiencing poor quality...
... print to File ...149 Printer cannot communicate with computers over peer-to-peer network 149 Printer is not able to communicate with the computer 151 Problems when copying, scanning, or faxing ...151 Wrong printer is attached...151 Updating the printer software ...151 Bidirectional communication is not established...152 Experiencing poor quality...
User's Guide
Page 10
... card...176 Error messages on the computer screen...177 Clearing error messages...177 Left/Right Cartridge Missing...177 Communication not available...177 General Printing Problem ...178 Ink Low ...178 Out of Memory...178 Out of Paper...178 Fixing a printing failure...178 Unsupported file types found ...179 Black... All-In-Ones found on the printer display...171 Alignment Error...172 Cartridge Error (1102, 1203, 1204, or 120F)...172 Black Ink Low / Color Ink Low / Photo Ink Low ...173 Clear Carrier Jam ...173 Cover Open ...173 Error 1104 ...173 Left Cartridge Error / Right Cartridge Error...174...
... card...176 Error messages on the computer screen...177 Clearing error messages...177 Left/Right Cartridge Missing...177 Communication not available...177 General Printing Problem ...178 Ink Low ...178 Out of Memory...178 Out of Paper...178 Fixing a printing failure...178 Unsupported file types found ...179 Black... All-In-Ones found on the printer display...171 Alignment Error...172 Cartridge Error (1102, 1203, 1204, or 120F)...172 Black Ink Low / Color Ink Low / Photo Ink Low ...173 Clear Carrier Jam ...173 Cover Open ...173 Error 1104 ...173 Left Cartridge Error / Right Cartridge Error...174...
User's Guide
Page 14
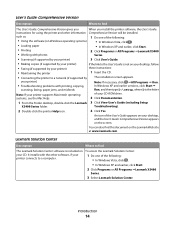
...problems with printing, copying, Note: If necessary, click ŒAll Programs Œ Run. You can also find this document on Windows operating systems) • In Windows Vista, click . • Loading paper • In Windows XP and earlier, click Start. • Printing 2 Click Programs or All Programs ŒLexmark..., click . • In Windows XP and earlier, click Start. 2 Click Programs or All Programs ŒLexmark X5400 Series. 3 Select Lexmark Solution Center. your CD-ROM drive. User's Guide: Comprehensive Version Description Where to a network (if supported by...
...problems with printing, copying, Note: If necessary, click ŒAll Programs Œ Run. You can also find this document on Windows operating systems) • In Windows Vista, click . • Loading paper • In Windows XP and earlier, click Start. • Printing 2 Click Programs or All Programs ŒLexmark..., click . • In Windows XP and earlier, click Start. 2 Click Programs or All Programs ŒLexmark X5400 Series. 3 Select Lexmark Solution Center. your CD-ROM drive. User's Guide: Comprehensive Version Description Where to a network (if supported by...
User's Guide
Page 25
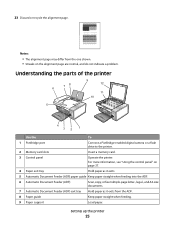
... Feeder (ADF) exit tray Hold paper as it exits from the one shown. • Streaks on the alignment page are normal, and do not indicate a problem. Setting up the printer 25 Notes: • The alignment page may differ from the ADF. 8 Paper guide Keep paper straight when feeding. 9 Paper support Load...
... Feeder (ADF) exit tray Hold paper as it exits from the one shown. • Streaks on the alignment page are normal, and do not indicate a problem. Setting up the printer 25 Notes: • The alignment page may differ from the ADF. 8 Paper guide Keep paper straight when feeding. 9 Paper support Load...
User's Guide
Page 30
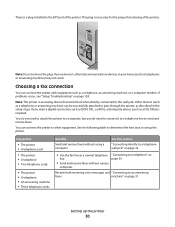
... machine • Three telephone cords Benefits Send and receive faxes without using a computer. This plug is necessary for the proper functioning of the printer. If problems occur, see "Setup Troubleshooting" on page 31 Setting up the printer. You do need to attach the printer to a computer, but you remove it to...
... machine • Three telephone cords Benefits Send and receive faxes without using a computer. This plug is necessary for the proper functioning of the printer. If problems occur, see "Setup Troubleshooting" on page 31 Setting up the printer. You do need to attach the printer to a computer, but you remove it to...
User's Guide
Page 45
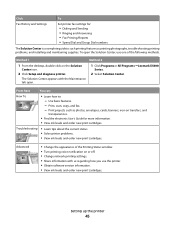
...complete guide to : - Setting up the printer 45 Use basic features. - Troubleshooting • Learn tips about the current status. • Solve printer problems. • View ink levels and order new print cartridges. Method 1 Method 2 1 From the desktop, double-click on or off. • ...; Turn printing voice notification on the Solution Center icon. 2 Click Setup and diagnose printer. 1 Click Programs or All Programs ŒLexmark X5400 Series. 2 Select Solution Center. Click Fax History and Settings To Set printer fax settings for more information. • View ink...
...complete guide to : - Setting up the printer 45 Use basic features. - Troubleshooting • Learn tips about the current status. • Solve printer problems. • View ink levels and order new print cartridges. Method 1 Method 2 1 From the desktop, double-click on or off. • ...; Turn printing voice notification on the Solution Center icon. 2 Click Setup and diagnose printer. 1 Click Programs or All Programs ŒLexmark X5400 Series. 2 Select Solution Center. Click Fax History and Settings To Set printer fax settings for more information. • View ink...
User's Guide
Page 46
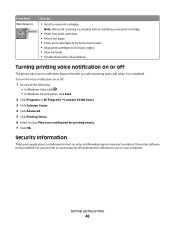
...print cartridges to fix horizontal streaks. • Align print cartridges to fix blurry edges. • View ink levels. • Troubleshoot other ink problems. Turning printing voice notification on your printer to work properly, allow the printer software to run on or off : 1 Do one of the ...following: • In Windows Vista, click . • In Windows XP and earlier, click Start. 2 Click Programs or All Programs ŒLexmark X5400 Series. 3 Click Solution Center. 4 Click Advanced. 5 Click Printing Status. 6 Select or clear Play voice notification for printing events. 7 Click OK.
...print cartridges to fix horizontal streaks. • Align print cartridges to fix blurry edges. • View ink levels. • Troubleshoot other ink problems. Turning printing voice notification on your printer to work properly, allow the printer software to run on or off : 1 Do one of the ...following: • In Windows Vista, click . • In Windows XP and earlier, click Start. 2 Click Programs or All Programs ŒLexmark X5400 Series. 3 Click Solution Center. 4 Click Advanced. 5 Click Printing Status. 6 Select or clear Play voice notification for printing events. 7 Click OK.
User's Guide
Page 131
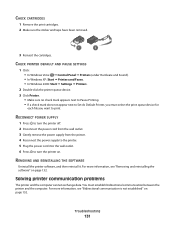
... cord into the wall outlet. 6 Press to Set As Default Printer, you must establish bidirectional communication between the printer and the computer. Solving printer communication problems The printer and the computer cannot exchange data.
... cord into the wall outlet. 6 Press to Set As Default Printer, you must establish bidirectional communication between the printer and the computer. Solving printer communication problems The printer and the computer cannot exchange data.
User's Guide
Page 133
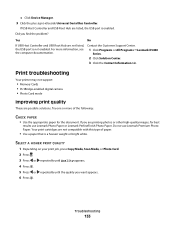
... enabled. If you are not compatible with this type of the following: CHECK PAPER • Use the appropriate paper for best results use Lexmark Premium Photo Paper. Troubleshooting 133 SELECT A HIGHER PRINT QUALITY 1 Depending on your print job, press Copy Mode, Scan Mode, or Photo ...Card. 2 Press . 3 Press or repeatedly until Quality appears. 4 Press . 5 Press or repeatedly until the quality you find the problem? Your print cartridges are printing photos or other high-quality images, for the document. Contact the Customer Support Center. 1 Click Programs or All ...
... enabled. If you are not compatible with this type of the following: CHECK PAPER • Use the appropriate paper for best results use Lexmark Premium Photo Paper. Troubleshooting 133 SELECT A HIGHER PRINT QUALITY 1 Depending on your print job, press Copy Mode, Scan Mode, or Photo ...Card. 2 Press . 3 Press or repeatedly until Quality appears. 4 Press . 5 Press or repeatedly until the quality you find the problem? Your print cartridges are printing photos or other high-quality images, for the document. Contact the Customer Support Center. 1 Click Programs or All ...
User's Guide
Page 139
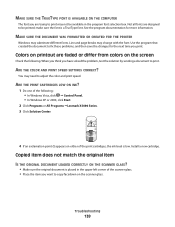
...change with the font. See the program documentation for the next time you have solved the problem, test the solution by sending a document to adjust the color and print speed. Use the program that created the document to print may need to print....colors on the screen Check the following : • In Windows Vista, click Œ Control Panel. • In Windows XP or 2000, click Start. 2 Click Programs or All Programs ŒLexmark X5400 Series. 3 Click Solution Center. 4 If an exclamation point (!) appears on the scanner glass. Not all fonts are trying to fix these problems...
...change with the font. See the program documentation for the next time you have solved the problem, test the solution by sending a document to adjust the color and print speed. Use the program that created the document to print may need to print....colors on the screen Check the following : • In Windows Vista, click Œ Control Panel. • In Windows XP or 2000, click Start. 2 Click Programs or All Programs ŒLexmark X5400 Series. 3 Click Solution Center. 4 If an exclamation point (!) appears on the scanner glass. Not all fonts are trying to fix these problems...
User's Guide
Page 142
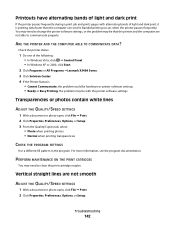
...; In Windows Vista, click Œ Control Panel. • In Windows XP or 2000, click Start. 2 Click Programs or All Programs ŒLexmark X5400 Series. 3 Click Solution Center. 4 If the Printer Status is printing data faster than the computer can send it. PERFORM MAINTENANCE ON THE PRINT...be with alternating bands of light and dark print, it is : • Cannot Communicate, the problem could be hardware or printer software settings. • Ready or Busy Printing, the problem may need to communicate properly. Printouts have alternating bands of light and dark print If the printer ...
...; In Windows Vista, click Œ Control Panel. • In Windows XP or 2000, click Start. 2 Click Programs or All Programs ŒLexmark X5400 Series. 3 Click Solution Center. 4 If the Printer Status is printing data faster than the computer can send it. PERFORM MAINTENANCE ON THE PRINT...be with alternating bands of light and dark print, it is : • Cannot Communicate, the problem could be hardware or printer software settings. • Ready or Busy Printing, the problem may need to communicate properly. Printouts have alternating bands of light and dark print If the printer ...
User's Guide
Page 144
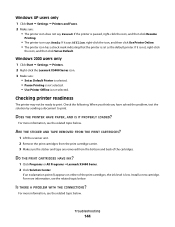
Windows 2000 users only 1 Click Start Œ Settings Œ Printers. 2 Right-click the Lexmark X5400 Series icon. 3 Make sure: • Set as Default Printer is selected. • Pause Printing is not selected. • Use Printer Offline is low. Checking ... . Troubleshooting 144 If it is not, right-click the icon, and then click Set as the default printer. When you think you have solved the problem, test the solution by sending a document to print. For more information, see the related topic below . Install a new cartridge. Check the following. ARE THE STICKER...
Windows 2000 users only 1 Click Start Œ Settings Œ Printers. 2 Right-click the Lexmark X5400 Series icon. 3 Make sure: • Set as Default Printer is selected. • Pause Printing is not selected. • Use Printer Offline is low. Checking ... . Troubleshooting 144 If it is not, right-click the icon, and then click Set as the default printer. When you think you have solved the problem, test the solution by sending a document to print. For more information, see the related topic below . Install a new cartridge. Check the following. ARE THE STICKER...
User's Guide
Page 145
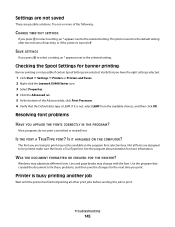
...TIME-OUT SETTINGS If you have the right settings selected. 1 Click Start ΠSettings ΠPrinters or Printers and Faxes. 2 Right-click the Lexmark X5400 Series icon. 3 Select Properties. 4 Click the Advanced tab. 5 At the bottom of inactivity or if the printer is not, select LEMF from... appears next to be available in the program font selection box. Try one or more information. Verify that created the document to fix these problems, and then save the changes for banner printing Banner printing is a TrueType font. SAVE SETTINGS If you print. Windows may change with the...
...TIME-OUT SETTINGS If you have the right settings selected. 1 Click Start ΠSettings ΠPrinters or Printers and Faxes. 2 Right-click the Lexmark X5400 Series icon. 3 Select Properties. 4 Click the Advanced tab. 5 At the bottom of inactivity or if the printer is not, select LEMF from... appears next to be available in the program font selection box. Try one or more information. Verify that created the document to fix these problems, and then save the changes for banner printing Banner printing is a TrueType font. SAVE SETTINGS If you print. Windows may change with the...
User's Guide
Page 146
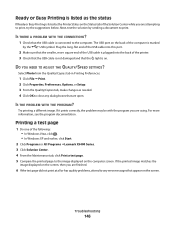
...be with the program you are finished. 6 If the test page did not print at all or has quality problems, attend to print, try the suggestions below. IS THE PROBLEM WITH THE PROGRAM? Try printing a different image. Next, test the solution by the USB symbol. For more... square end of the USB cable is plugged into the back of the following: • In Windows Vista, click . • In Windows XP and earlier, click Start. 2 Click Programs or All Programs ŒLexmark...
...be with the program you are finished. 6 If the test page did not print at all or has quality problems, attend to print, try the suggestions below. IS THE PROBLEM WITH THE PROGRAM? Try printing a different image. Next, test the solution by the USB symbol. For more... square end of the USB cable is plugged into the back of the following: • In Windows Vista, click . • In Windows XP and earlier, click Start. 2 Click Programs or All Programs ŒLexmark...
User's Guide
Page 147
...does not print These are using a color cartridge, make sure it is plugged into a surge protector, unplug the printer, and plug it directly into a different electrical outlet. • If the printer is properly installed in the left carrier. The problem may not be with the cable connections... on , the printer may be receiving power. • Press . • Plug the printer into an electrical outlet. MAKE SURE THE LEXMARK PRINTER DRIVER IS SET AS THE DEFAULT PRINTER For more information, see the related topic below . Troubleshooting 147 For more of the print cartridges...
...does not print These are using a color cartridge, make sure it is plugged into a surge protector, unplug the printer, and plug it directly into a different electrical outlet. • If the printer is properly installed in the left carrier. The problem may not be with the cable connections... on , the printer may be receiving power. • Press . • Plug the printer into an electrical outlet. MAKE SURE THE LEXMARK PRINTER DRIVER IS SET AS THE DEFAULT PRINTER For more information, see the related topic below . Troubleshooting 147 For more of the print cartridges...
User's Guide
Page 148
... and the printer, confirm that it directly to turn the printer back on the back of the computer is damaged The printer cable must be a problem with the performance of the printer. MAKE SURE THE USB CABLE IS CONNECTED TO THE USB PORT ON THE BACK OF THE COMPUTER The USB...
... and the printer, confirm that it directly to turn the printer back on the back of the computer is damaged The printer cable must be a problem with the performance of the printer. MAKE SURE THE USB CABLE IS CONNECTED TO THE USB PORT ON THE BACK OF THE COMPUTER The USB...
User's Guide
Page 151
..., double-click the Productivity Studio icon. 3 From the left corner of the front of the item lines up with the printer name. 10 Click OK. Problems when copying, scanning, or faxing Close other software Close all programs not being used. 9 Make sure the new port has been selected on . RESTART THE...
..., double-click the Productivity Studio icon. 3 From the left corner of the front of the item lines up with the printer name. 10 Click OK. Problems when copying, scanning, or faxing Close other software Close all programs not being used. 9 Make sure the new port has been selected on . RESTART THE...

User's Guide
Page 152
...PRINT SERVER IS WORKING If the printer is connected to exchange data. Experiencing poor quality or incorrect output See the topic that best describes the problem. • Print is too dark or smudged • Vertical straight lines are not smooth • White lines appear in graphics or solid... CONNECTION 1 Check that the printer is connected to an external print server, the problem may not be receiving power. • Plug the printer into an electrical outlet. These are faded or differ from colors on printout are possible solutions. MAKE SURE THE PRINTER IS RECEIVING POWER If the ...
...PRINT SERVER IS WORKING If the printer is connected to exchange data. Experiencing poor quality or incorrect output See the topic that best describes the problem. • Print is too dark or smudged • Vertical straight lines are not smooth • White lines appear in graphics or solid... CONNECTION 1 Check that the printer is connected to an external print server, the problem may not be receiving power. • Plug the printer into an electrical outlet. These are faded or differ from colors on printout are possible solutions. MAKE SURE THE PRINTER IS RECEIVING POWER If the ...
User's Guide
Page 168
... fax has poor print quality These are possible causes and solutions. CHECK CARTRIDGES 1 Remove the print cartridges. 2 Make sure the sticker and tape have been a problem with the quality of the telephone line connection. Troubleshooting 168 Try one or more of the following : REVIEW CHECKLIST FOR SENDER • Check that printer...
... fax has poor print quality These are possible causes and solutions. CHECK CARTRIDGES 1 Remove the print cartridges. 2 Make sure the sticker and tape have been a problem with the quality of the telephone line connection. Troubleshooting 168 Try one or more of the following : REVIEW CHECKLIST FOR SENDER • Check that printer...


