User Manual
Page 3
... configurations ...31 What information do I need and where do I find it 33 Finding the MAC address ...33 Printing a network setup page ...34 Sharing a printer in a Windows environment 34 Finding a printer/print server located on remote subnets 35 Wireless networking...35 Finding IP addresses...35 Assigning an IP address...36 Configure IP...
... configurations ...31 What information do I need and where do I find it 33 Finding the MAC address ...33 Printing a network setup page ...34 Sharing a printer in a Windows environment 34 Finding a printer/print server located on remote subnets 35 Wireless networking...35 Finding IP addresses...35 Assigning an IP address...36 Configure IP...

User Manual
Page 4
... Adding a printer to an existing ad hoc wireless network using Windows 40 Loading paper and original documents 41 Loading paper...41 Using the automatic paper type sensor 41 Loading envelopes...41 Loading labels...42 Loading greeting ...
... Adding a printer to an existing ad hoc wireless network using Windows 40 Loading paper and original documents 41 Loading paper...41 Using the automatic paper type sensor 41 Loading envelopes...41 Loading labels...42 Loading greeting ...

User Manual
Page 8
... only 116 Changing wireless settings after installation 116 Resetting an internal wireless print server to factory default settings 117 Check printer ports (Windows users only 117 Print troubleshooting...117 Partial 4 x 6 in. (10 x 15 cm) photo prints when using a PictBridge-enabled digital camera 117 ... down too quickly ...122 A blank or incorrect page prints...122 Characters on printout are missing or unexpected 123 Colors on printout are faded or differ from colors on the screen 123 Glossy photo paper or transparencies stick together 124 Page prints with different fonts ...124 Print ...
... only 116 Changing wireless settings after installation 116 Resetting an internal wireless print server to factory default settings 117 Check printer ports (Windows users only 117 Print troubleshooting...117 Partial 4 x 6 in. (10 x 15 cm) photo prints when using a PictBridge-enabled digital camera 117 ... down too quickly ...122 A blank or incorrect page prints...122 Characters on printout are missing or unexpected 123 Colors on printout are faded or differ from colors on the screen 123 Glossy photo paper or transparencies stick together 124 Page prints with different fonts ...124 Print ...
User Manual
Page 11
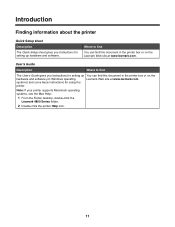
Note: If your printer supports Macintosh operating systems, see the Mac Help: 1 From the Finder desktop, double-click the Lexmark 4800 Series folder. 2 Double-click the printer Help icon. 11 Introduction Finding information about the printer Quick Setup sheet Description The Quick ...for setting up hardware and software. Where to find this document in the printer box or on the hardware and software (on the Lexmark Web site at www.lexmark.com. User's Guide Description Where to find You can find The User's Guide gives you instructions for using the printer. systems)...
Note: If your printer supports Macintosh operating systems, see the Mac Help: 1 From the Finder desktop, double-click the Lexmark 4800 Series folder. 2 Double-click the printer Help icon. 11 Introduction Finding information about the printer Quick Setup sheet Description The Quick ...for setting up hardware and software. Where to find this document in the printer box or on the hardware and software (on the Lexmark Web site at www.lexmark.com. User's Guide Description Where to find You can find The User's Guide gives you instructions for using the printer. systems)...
User Manual
Page 12
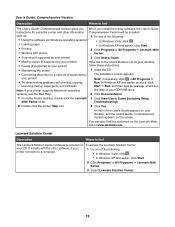
...connects to a computer. 1 Do one of the following : • In Windows Vista, click . • In Windows XP and earlier, click Start. 2 Click Programs or All Programs Œ Lexmark 4800 Series. 3 Select Lexmark Solution Center. 12 such as: 1 Do one of the following : •...; Using the software (on Windows operating systems) • In Windows Vista, click . • Loading paper • In Windows XP and earlier, click Start. • Printing 2 Click Programs or All Programs Œ Lexmark 4800 • Working with the other information Comprehensive ...
...connects to a computer. 1 Do one of the following : • In Windows Vista, click . • In Windows XP and earlier, click Start. 2 Click Programs or All Programs Œ Lexmark 4800 Series. 3 Select Lexmark Solution Center. 12 such as: 1 Do one of the following : •...; Using the software (on Windows operating systems) • In Windows Vista, click . • Loading paper • In Windows XP and earlier, click Start. • Printing 2 Click Programs or All Programs Œ Lexmark 4800 • Working with the other information Comprehensive ...

User Manual
Page 15
... temporarily during some methods of the printer. Note: Your power cord may look different from the one shown. • Installation software for Windows and Macintosh 5 Getting Started 6 Quick Setup sheet 7 Installation cable WI F I PRINTING 1 2 3 Description Cartridges to be found on... Setting up the printer Checking the box contents 7 1 2 3 6 5 4 Name 1 Black print cartridge 2 Color print cartridge 3 Power cord 4 Installation software CD for the printer • Windows Help • User's Guide in electronic format • Mac Help Printed booklet that serves as a guide. Note...
... temporarily during some methods of the printer. Note: Your power cord may look different from the one shown. • Installation software for Windows and Macintosh 5 Getting Started 6 Quick Setup sheet 7 Installation cable WI F I PRINTING 1 2 3 Description Cartridges to be found on... Setting up the printer Checking the box contents 7 1 2 3 6 5 4 Name 1 Black print cartridge 2 Color print cartridge 3 Power cord 4 Installation software CD for the printer • Windows Help • User's Guide in electronic format • Mac Help Printed booklet that serves as a guide. Note...
User Manual
Page 23
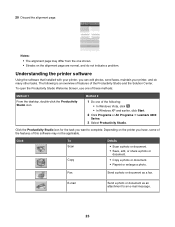
... a photo or document. • Copy a photo or document. • Reprint or enlarge a photo. The following : • In Windows Vista, click . • In Windows XP and earlier, click Start. 2 Click Programs or All Programs Œ Lexmark 4800 Series. 3 Select Productivity Studio. Depending on the alignment page are normal, and do many other tasks. Fax...
... a photo or document. • Copy a photo or document. • Reprint or enlarge a photo. The following : • In Windows Vista, click . • In Windows XP and earlier, click Start. 2 Click Programs or All Programs Œ Lexmark 4800 Series. 3 Select Productivity Studio. Depending on the alignment page are normal, and do many other tasks. Fax...
User Manual
Page 25
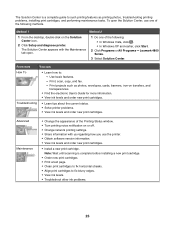
...Solution Center appears with us regarding how you use one of the following methods. To open . 1 Do one of the Printing Status window. • Turn printing voice notification on or off. • Change network printing settings. • Share information with the Maintenance ... streaks. • Align print cartridges to : - Advanced Maintenance • Change the appearance of the following : • In Windows Vista, click . • In Windows XP and earlier, click Start. 2 Click Programs or All Programs Œ Lexmark 4800 Series. 3 Select Solution Center. Use basic features. -
...Solution Center appears with us regarding how you use one of the following methods. To open . 1 Do one of the Printing Status window. • Turn printing voice notification on or off. • Change network printing settings. • Share information with the Maintenance ... streaks. • Align print cartridges to : - Advanced Maintenance • Change the appearance of the following : • In Windows Vista, click . • In Windows XP and earlier, click Start. 2 Click Programs or All Programs Œ Lexmark 4800 Series. 3 Select Solution Center. Use basic features. -

User Manual
Page 29
...printer CD icon that tells you when printing starts and when it is completed. 29 Using the World Wide Web 1 Go to the Lexmark Web site at www.lexmark.com. 2 From the home page, navigate through the menu selection, and then click Drivers & Downloads. 3 Choose the printer and the...the wireless settings of the printer. • Green indicates that came with the wireless network. Installing the printer software Using the installation software CD (Windows users only) Using the CD that the printer is connected to a wireless network. If the printer does not have a wireless print server installed ...
...printer CD icon that tells you when printing starts and when it is completed. 29 Using the World Wide Web 1 Go to the Lexmark Web site at www.lexmark.com. 2 From the home page, navigate through the menu selection, and then click Drivers & Downloads. 3 Choose the printer and the...the wireless settings of the printer. • Green indicates that came with the wireless network. Installing the printer software Using the installation software CD (Windows users only) Using the CD that the printer is connected to a wireless network. If the printer does not have a wireless print server installed ...
User Manual
Page 30
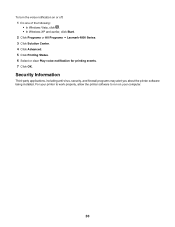
... work properly, allow the printer software to run on or off: 1 Do one of the following: • In Windows Vista, click . • In Windows XP and earlier, click Start. 2 Click Programs or All Programs Œ Lexmark 4800 Series. 3 Click Solution Center. 4 Click Advanced. 5 Click Printing Status. 6 Select or clear Play voice notification for...
... work properly, allow the printer software to run on or off: 1 Do one of the following: • In Windows Vista, click . • In Windows XP and earlier, click Start. 2 Click Programs or All Programs Œ Lexmark 4800 Series. 3 Click Solution Center. 4 Click Advanced. 5 Click Printing Status. 6 Select or clear Play voice notification for...
User Manual
Page 34
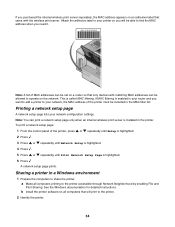
... setup page prints. To print a network setup page: 1 From the control panel of the printer must be included in the MAC filter list. See the Windows documentation for detailed instructions. If MAC filtering is enabled in the printer. b Install the printer software on all computers printing to the printer. 2 Identify the...
... setup page prints. To print a network setup page: 1 From the control panel of the printer must be included in the MAC filter list. See the Windows documentation for detailed instructions. If MAC filtering is enabled in the printer. b Install the printer software on all computers printing to the printer. 2 Identify the...
User Manual
Page 35
... distinctive printer name that are located on another network (called a subnet), you must manually enter an IP address during printer software installation. Windows 2000 or Windows XP users only: a Click Start ΠSettings ΠPrinters and Faxes. d Click the Ports tab, and then click Add Port...more information, see "Printing a network setup page" on the Printer Ports dialog box. c Click Sharing. b Right-click the Lexmark 4800 Series icon. b Right-click the Lexmark 4800 Series icon. e Select Local Port, and then click New Port.... h Click Close on page 34. If the printer and...
... distinctive printer name that are located on another network (called a subnet), you must manually enter an IP address during printer software installation. Windows 2000 or Windows XP users only: a Click Start ΠSettings ΠPrinters and Faxes. d Click the Ports tab, and then click Add Port...more information, see "Printing a network setup page" on the Printer Ports dialog box. c Click Sharing. b Right-click the Lexmark 4800 Series icon. b Right-click the Lexmark 4800 Series icon. e Select Local Port, and then click New Port.... h Click Close on page 34. If the printer and...
User Manual
Page 36
... object, created at the end of the installation, sends all relevant devices are from the available list. The signal strength listed on the host computer) Windows Vista users only: 1 For more likely it is created in the printer list only as microwave ovens. Another factor is being assigned. During the Direct...
... object, created at the end of the installation, sends all relevant devices are from the available list. The signal strength listed on the host computer) Windows Vista users only: 1 For more likely it is created in the printer list only as microwave ovens. Another factor is being assigned. During the Direct...
User Manual
Page 37
...a network printer, select a printer from the list, and then click Next. 7 Select the software you must first highlight the printer in the window, and then click Configure to manually assign an IP address to the printer. Contact your printer. 5 Follow the directions on page 37. 3 Right... Printer Setup dialog, select the Peer-to-Peer client option, and then click Next. 6 Select the appropriate printer from the list in the window. Windows 2000 or Windows XP users only: 1 For more information, see the setup information that came with your printer. 2 Click Start ΠSettings ΠPrinters...
...a network printer, select a printer from the list, and then click Next. 7 Select the software you must first highlight the printer in the window, and then click Configure to manually assign an IP address to the printer. Contact your printer. 5 Follow the directions on page 37. 3 Right... Printer Setup dialog, select the Peer-to-Peer client option, and then click Next. 6 Select the appropriate printer from the list in the window. Windows 2000 or Windows XP users only: 1 For more information, see the setup information that came with your printer. 2 Click Start ΠSettings ΠPrinters...
User Manual
Page 39
...you should configure your printer for use that the computer is configured for the ad hoc network. 5 Close the Control Panel and any remaining windows. 6 Insert the printer CD into the computer and follow the direction for wireless installation. 7 When the available networks are displayed, provide the...that software to set up the ad hoc wireless network. You must be either 5 or 13 characters. A network set up menu, click it. For Windows XP users 1 Click Start ΠSettings ΠControl Panel ΠNetwork Connections. 2 Right-click Wireless Network Connections. 3 If Enable appears in ...
...you should configure your printer for use that the computer is configured for the ad hoc network. 5 Close the Control Panel and any remaining windows. 6 Insert the printer CD into the computer and follow the direction for wireless installation. 7 When the available networks are displayed, provide the...that software to set up the ad hoc wireless network. You must be either 5 or 13 characters. A network set up menu, click it. For Windows XP users 1 Click Start ΠSettings ΠControl Panel ΠNetwork Connections. 2 Right-click Wireless Network Connections. 3 If Enable appears in ...
User Manual
Page 40
... minutes for future reference. a Click the network to be prompted to connect the printer to the computer again using Windows 1 Click Programs or All Programs ΠLexmark 4800 Series. 2 Click Wireless Setup. 3 Follow the instructions on the computer screen. 40 Make sure you copy... information about passwords (security keys), see "Check your wireless network. 11 Write down exactly, including any existing networks. 7 Select the Use Windows to configure my wireless network settings check box. 8 Under Preferred Networks, delete any capital letters. b Click the Remove button. 9 Click ...
... minutes for future reference. a Click the network to be prompted to connect the printer to the computer again using Windows 1 Click Programs or All Programs ΠLexmark 4800 Series. 2 Click Wireless Setup. 3 Follow the instructions on the computer screen. 40 Make sure you copy... information about passwords (security keys), see "Check your wireless network. 11 Write down exactly, including any existing networks. 7 Select the Use Windows to configure my wireless network settings check box. 8 Under Preferred Networks, delete any capital letters. b Click the Remove button. 9 Click ...

User Manual
Page 45
... to print text and images or text only. c Click: • Print in the Print Preview window, then click Print in or out, or select whether to check or change your print settings: a From the toolbar area, click Lexmark Œ Page Setup. Printing Printing basic documents Printing a document 1 Load paper. 2 With a document open...
... to print text and images or text only. c Click: • Print in the Print Preview window, then click Print in or out, or select whether to check or change your print settings: a From the toolbar area, click Lexmark Œ Page Setup. Printing Printing basic documents Printing a document 1 Load paper. 2 With a document open...

User Manual
Page 48
..., click Œ Control Panel Œ Printer. In Windows XP, click Start Œ Settings Œ Printers and Faxes. 2 Right-click the Lexmark 4800 Series icon. 3 Select Open. 4 Right-click the document name. 5 Select Cancel. The following file types are supported: • .doc (Microsoft Word) ... must be on. 1 Insert a memory card or flash drive containing document files into the printer. For Windows XP, click Start Œ Settings Œ Printers and Faxes. 2 Right-click the Lexmark 4800 Series icon. 3 Select Pause. Understanding the Print Files Options menu To use the Print Files function,...
..., click Œ Control Panel Œ Printer. In Windows XP, click Start Œ Settings Œ Printers and Faxes. 2 Right-click the Lexmark 4800 Series icon. 3 Select Open. 4 Right-click the document name. 5 Select Cancel. The following file types are supported: • .doc (Microsoft Word) ... must be on. 1 Insert a memory card or flash drive containing document files into the printer. For Windows XP, click Start Œ Settings Œ Printers and Faxes. 2 Right-click the Lexmark 4800 Series icon. 3 Select Pause. Understanding the Print Files Options menu To use the Print Files function,...

User Manual
Page 56
... to save your settings, then type a name for your settings in the selected box. In Windows 2000 and Windows XP, click Start ΠSettings ΠPrinters or Printers and Faxes. 2 Right-click the Lexmark 4800 Series icon. 3 Click Printing Preferences. 4 Click the Save Settings menu. 5 From the...your current settings. 6 Click a radio button next to the number of the location where you want to factory default settings Windows 2000, Windows XP, or Windows Vista users 1 In Windows Vista, click ΠControl Panel ΠPrinter. Select the radio button next to the setting you want to enter...
... to save your settings, then type a name for your settings in the selected box. In Windows 2000 and Windows XP, click Start ΠSettings ΠPrinters or Printers and Faxes. 2 Right-click the Lexmark 4800 Series icon. 3 Click Printing Preferences. 4 Click the Save Settings menu. 5 From the...your current settings. 6 Click a radio button next to the number of the location where you want to factory default settings Windows 2000, Windows XP, or Windows Vista users 1 In Windows Vista, click ΠControl Panel ΠPrinter. Select the radio button next to the setting you want to enter...

User Manual
Page 64
...copied before you want . b Click Transfer Photos. 5 Click Automatically save the photos to the default folder, click Next. 8 If you are using Windows 2000: a From the desktop, double-click the Productivity Studio icon. b Click Transfer Photos. 4 Click Select photos to save the photos in the ...Library. Transferring selected photos from a CD or flash drive using Windows Vista, an "AutoPlay" screen appears. If you are using the computer 1 Insert a CD or a flash drive into the computer. 2 If you...
...copied before you want . b Click Transfer Photos. 5 Click Automatically save the photos to the default folder, click Next. 8 If you are using Windows 2000: a From the desktop, double-click the Productivity Studio icon. b Click Transfer Photos. 4 Click Select photos to save the photos in the ...Library. Transferring selected photos from a CD or flash drive using Windows Vista, an "AutoPlay" screen appears. If you are using the computer 1 Insert a CD or a flash drive into the computer. 2 If you...


