User's Guide
Page 3
... the PictBridge menu ...27 Using the Setup menu ...27 Saving settings...28 Using the printer software...30 Installing printer software ...30 Installing the optional XPS driver (Windows Vista users only 31 Using the Windows printer software...32 Using the Macintosh printer software...33 Switching between the rear USB port and the...
... the PictBridge menu ...27 Using the Setup menu ...27 Saving settings...28 Using the printer software...30 Installing printer software ...30 Installing the optional XPS driver (Windows Vista users only 31 Using the Windows printer software...32 Using the Macintosh printer software...33 Switching between the rear USB port and the...

User's Guide
Page 30
... Saver mode when the printer is the time it takes for the printer to switch to the Lexmark Web site at www.lexmark.com. 2 From the home page, navigate through the menu selection, and then click Drivers & Downloads. 30 If you exit Setup, or press another mode button. Changing the Power Saver timeout...
... Saver mode when the printer is the time it takes for the printer to switch to the Lexmark Web site at www.lexmark.com. 2 From the home page, navigate through the menu selection, and then click Drivers & Downloads. 30 If you exit Setup, or press another mode button. Changing the Power Saver timeout...
User's Guide
Page 31
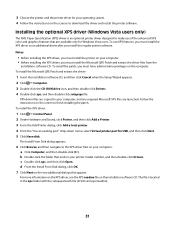
...color and graphics features that appear. The Install From Disk dialog appears. 6 Click Browse, and then navigate to download the driver and install the printer software. To install the XPS driver: 1 Click ΠControl Panel. 2 Under Hardware and Sound, click Printer, and then click Add a Printer. 3... the screen to your computer, and any required Microsoft XPS files are available only for Windows Vista users. For more information on the XPS driver, see the XPS readme file on your computer: a Click Computer, and then double-click (C:). d From the Install From Disk dialog, click...
...color and graphics features that appear. The Install From Disk dialog appears. 6 Click Browse, and then navigate to download the driver and install the printer software. To install the XPS driver: 1 Click ΠControl Panel. 2 Under Hardware and Sound, click Printer, and then click Add a Printer. 3... the screen to your computer, and any required Microsoft XPS files are available only for Windows Vista users. For more information on the XPS driver, see the XPS readme file on your computer: a Click Computer, and then double-click (C:). d From the Install From Disk dialog, click...
User's Guide
Page 40
... printer. Reset the internal wireless print server to the printer. Installing the printer on other computer on every computer that will need to install the driver. Using Windows 1 Insert the installation software CD. 2 Wait for File Print jobs. • If the setting is Auto Select, then the printer ...the following: In Windows Vista a Click . Choose whether to select a network computer automatically or manually for the Welcome screen to install the printer driver on the network. You do one of your CD or DVD drive. 40 If the Welcome screen does not appear after a minute, do ...
... printer. Reset the internal wireless print server to the printer. Installing the printer on other computer on every computer that will need to install the driver. Using Windows 1 Insert the installation software CD. 2 Wait for File Print jobs. • If the setting is Auto Select, then the printer ...the following: In Windows Vista a Click . Choose whether to select a network computer automatically or manually for the Welcome screen to install the printer driver on the network. You do one of your CD or DVD drive. 40 If the Welcome screen does not appear after a minute, do ...

User's Guide
Page 110
If the software still does not install correctly, visit our Web site at www.lexmark.com to check for the latest software. 1 In all open software applications. 2 From the Finder desktop, double-click the printer folder. 3 Double-click the Uninstaller ... tab, click Device Manager. 110 Using Macintosh 1 Close all countries or regions except the United States, select your country or region. 2 Click the links for drivers or downloads. 3 Select your printer family. 4 Select your printer model. 5 Select your operating system. 6 Select the file that the USB port is the letter of...
If the software still does not install correctly, visit our Web site at www.lexmark.com to check for the latest software. 1 In all open software applications. 2 From the Finder desktop, double-click the printer folder. 3 Double-click the Uninstaller ... tab, click Device Manager. 110 Using Macintosh 1 Close all countries or regions except the United States, select your country or region. 2 Click the links for drivers or downloads. 3 Select your printer family. 4 Select your printer model. 5 Select your operating system. 6 Select the file that the USB port is the letter of...
User's Guide
Page 111
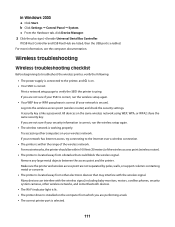
.... • The printer is located away from other wireless networks, and some Bluetooth devices. • The Wi-Fi indicator light is lit. • The printer driver is working properly. c From the Hardware tab, click Device Manager. 2 Click the plus sign (+) beside Universal Serial Bus Controller. b Click Settings Œ Control Panel Œ...
.... • The printer is located away from other wireless networks, and some Bluetooth devices. • The Wi-Fi indicator light is lit. • The printer driver is working properly. c From the Hardware tab, click Device Manager. 2 Click the plus sign (+) beside Universal Serial Bus Controller. b Click Settings Œ Control Panel Œ...

User's Guide
Page 128
...information statement This product has been tested and found to comply with diamond design are trademarks of Lexmark International, Inc., registered in a residential installation. Trademarks Lexmark and Lexmark with the limits for additional suggestions. 128 evercolor and PerfectFinish are designed to provide reasonable protection...separation between the equipment and receiver. • Connect the equipment into an outlet on a circuit different from the \Drivers\XPS directory on the installation software CD: Zopen.PDF. Bldg 004-2/CSC 740 New Circle Road NW Lexington, KY 40550 USA &#...
...information statement This product has been tested and found to comply with diamond design are trademarks of Lexmark International, Inc., registered in a residential installation. Trademarks Lexmark and Lexmark with the limits for additional suggestions. 128 evercolor and PerfectFinish are designed to provide reasonable protection...separation between the equipment and receiver. • Connect the equipment into an outlet on a circuit different from the \Drivers\XPS directory on the installation software CD: Zopen.PDF. Bldg 004-2/CSC 740 New Circle Road NW Lexington, KY 40550 USA &#...
User's Guide
Page 143
... print 106 power button is not lit 105 software did not install 105 setup, printer 13 software removing and reinstalling 109 Service Center 104 XPS driver 31 software did not install 105 solving printer communication problems 109 SSID wireless network 51 switching from desktop computer to laptop computer 34 T TCP/IP...
... print 106 power button is not lit 105 software did not install 105 setup, printer 13 software removing and reinstalling 109 Service Center 104 XPS driver 31 software did not install 105 solving printer communication problems 109 SSID wireless network 51 switching from desktop computer to laptop computer 34 T TCP/IP...

User's Guide
Page 144
Wi-Fi indicator light is not lit 116 Wi-Fi indicator light is still orange 123 Wi-Fi indicator 20 description of colors 38 interpreting colors 38 light is not lit 116 Wi-Fi indicator light is blinking orange 118, 121 Wi-Fi indicator light is green printer does not print 116 Wi-Fi indicator light is still orange 123 X XPS driver installing 31 144
Wi-Fi indicator light is not lit 116 Wi-Fi indicator light is still orange 123 Wi-Fi indicator 20 description of colors 38 interpreting colors 38 light is not lit 116 Wi-Fi indicator light is blinking orange 118, 121 Wi-Fi indicator light is green printer does not print 116 Wi-Fi indicator light is still orange 123 X XPS driver installing 31 144

C77x - Menus and Messages Guide
Page 5
... 1 Using the MFP menus Understanding the multifunction printer (MFP) control panel Most print settings can be changed from the application or print driver apply only to the job being sent to the MFP. The MFP control panel consists of these makes that are functional are disabled. ...Changing a setting from the application, use or the print driver. Changes made to a printer, the printer operator panel and any of : 1 2 ABC DEF GHI JKL MNO PQRS TUV WXYZ 10 9 3 4 5 6 7 8...
... 1 Using the MFP menus Understanding the multifunction printer (MFP) control panel Most print settings can be changed from the application or print driver apply only to the job being sent to the MFP. The MFP control panel consists of these makes that are functional are disabled. ...Changing a setting from the application, use or the print driver. Changes made to a printer, the printer operator panel and any of : 1 2 ABC DEF GHI JKL MNO PQRS TUV WXYZ 10 9 3 4 5 6 7 8...

C77x - Menus and Messages Guide
Page 59
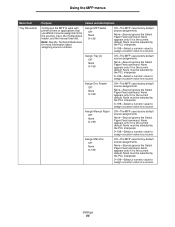
... contains only images. As shown, 5 is the current value. - + Dial Prefix Automatic Redial Redial Frequency Behind a PABX Enable ECM Enable Fax Scans Driver to Fax A numeric entry field is limited to fax jobs can be sent by scanning at On* the MFP. The previously entered numbers are shown.... The long end of text and images. Driver to 16 characters. Using the MFP menus Menu item Duplex Content Darkness Purpose Values and descriptions Sets duplex scanning (two-sided scanning) either on...
... contains only images. As shown, 5 is the current value. - + Dial Prefix Automatic Redial Redial Frequency Behind a PABX Enable ECM Enable Fax Scans Driver to Fax A numeric entry field is limited to fax jobs can be sent by scanning at On* the MFP. The previously entered numbers are shown.... The long end of text and images. Driver to 16 characters. Using the MFP menus Menu item Duplex Content Darkness Purpose Values and descriptions Sets duplex scanning (two-sided scanning) either on...

C77x - Menus and Messages Guide
Page 76
... one side of the print media. The following illustration shows long-edge binding for portrait and landscape pages. Values selected from the application or printer driver always override values selected from an application may override user default settings. Long Edge* Assumes binding along the short edge of the sheet (even-numbered...
... one side of the print media. The following illustration shows long-edge binding for portrait and landscape pages. Values selected from the application or printer driver always override values selected from an application may override user default settings. Long Edge* Assumes binding along the short edge of the sheet (even-numbered...

C77x - Menus and Messages Guide
Page 78
... finisher is installed. See Duplex Bind on page 76 for all sheets directly on the Multipage Order value selected. Note: Select stapling from the printer driver to separate the documents stacked in orientation. Prints a solid line border around each other. Sets the short edge of the print media as the default...
... finisher is installed. See Duplex Bind on page 76 for all sheets directly on the Multipage Order value selected. Note: Select stapling from the printer driver to separate the documents stacked in orientation. Prints a solid line border around each other. Sets the short edge of the print media as the default...

C77x - Menus and Messages Guide
Page 79
... maximum increase. Auto Off* -6 is maximum decrease. +6 is maximum increase. 0 is maximum decrease. 5 is only available on the PCL emulation driver or PostScript driver or on the MFP Embedded Web Server. Printing from the control panel. An arrow symbol ( V ) indicates a user default value and the V...settings. Note: Enhance Fine Lines is selected, the V covers the vertical bar as follows. In the driver, clear the check box. In the driver, select the check box. In the driver, select the check box. When the default of printed images. 0-5 (0*) Enhance Fine Lines Gray Correction ...
... maximum increase. Auto Off* -6 is maximum decrease. +6 is maximum increase. 0 is maximum decrease. 5 is only available on the PCL emulation driver or PostScript driver or on the MFP Embedded Web Server. Printing from the control panel. An arrow symbol ( V ) indicates a user default value and the V...settings. Note: Enhance Fine Lines is selected, the V covers the vertical bar as follows. In the driver, clear the check box. In the driver, select the check box. In the driver, select the check box. When the default of printed images. 0-5 (0*) Enhance Fine Lines Gray Correction ...
C77x - Menus and Messages Guide
Page 85
... it is the current default. None must be selected by the PCL interpreter. 0-199-Select a numeric value to assign a custom value to work with printer drivers or applications that use different source assignments for more information about assigning source numbers.
... it is the current default. None must be selected by the PCL interpreter. 0-199-Select a numeric value to assign a custom value to work with printer drivers or applications that use different source assignments for more information about assigning source numbers.

C77x - Menus and Messages Guide
Page 119
... Automatic Redial 59 Background Removal 60 Behind a PABX 59 Content 59 Contrast 60 Custom Job scanning 60 Darkness 59 Dial Mode 60 Dial Prefix 59 Driver to Fax 59 Duplex 59 Enable ECM 59 Enable Fax Scans 59 Original Size 58 Redial Frequency 59 Resolution 58 Scan edge to edge 60...
... Automatic Redial 59 Background Removal 60 Behind a PABX 59 Content 59 Contrast 60 Custom Job scanning 60 Darkness 59 Dial Mode 60 Dial Prefix 59 Driver to Fax 59 Duplex 59 Enable ECM 59 Enable Fax Scans 59 Original Size 58 Redial Frequency 59 Resolution 58 Scan edge to edge 60...
C77x - Setup Guide
Page 6
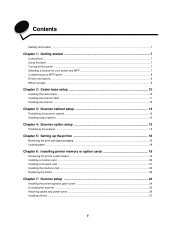
Contents Stability Information ...1 Chapter 1: Getting started 7 Conventions ...7 Using this book ...7 Turning off the printer ...7 Selecting a location for your printer and MFP 7 Customizing your MFP option ...8 Drivers and options ...9 Where to begin ...9 Chapter 2: Caster base setup 10 Installing the caster base ...10 Installing the scanner shelf ...11 Installing the scanner ...12 Chapter 3: ... the shield ...23 Chapter 7: Scanner setup 24 Installing the printer operator panel cover ...24 Unlocking the scanner ...25 Attaching cables and power cords ...26 Installing drivers ...27 5
Contents Stability Information ...1 Chapter 1: Getting started 7 Conventions ...7 Using this book ...7 Turning off the printer ...7 Selecting a location for your printer and MFP 7 Customizing your MFP option ...8 Drivers and options ...9 Where to begin ...9 Chapter 2: Caster base setup 10 Installing the caster base ...10 Installing the scanner shelf ...11 Installing the scanner ...12 Chapter 3: ... the shield ...23 Chapter 7: Scanner setup 24 Installing the printer operator panel cover ...24 Unlocking the scanner ...25 Attaching cables and power cords ...26 Installing drivers ...27 5

C77x - Setup Guide
Page 10
... on installing the drivers and verifying the printer options are determined by your computer, you have: • A caster base, see page 10. • A scanner cabinet (part number 16C0700), see page 13. • Just a scanner, see Installing drivers on the 4600 MFP Software and Documentation... CD that came with the printer, then install the MFP drivers located on page 27. If you will need to begin The initial setup procedures are installed...
... on installing the drivers and verifying the printer options are determined by your computer, you have: • A caster base, see page 10. • A scanner cabinet (part number 16C0700), see page 13. • Just a scanner, see Installing drivers on the 4600 MFP Software and Documentation... CD that came with the printer, then install the MFP drivers located on page 27. If you will need to begin The initial setup procedures are installed...

C77x - Setup Guide
Page 28
... and any other peripherals. 2 Place the printer Software and Documentation CD in the computer CD drive, and follow the onscreen instructions to install the printer drivers. 3 Place the 4600 MFP Software and Documentation CD in the computer CD drive, and follow the onscreen instructions to install the MFP... drivers. 4 Verify the computer recognizes your system. a Open the Printers folder. Note: Use the power cord from the scanner box. 6 Connect the power cord to the ...
... and any other peripherals. 2 Place the printer Software and Documentation CD in the computer CD drive, and follow the onscreen instructions to install the printer drivers. 3 Place the 4600 MFP Software and Documentation CD in the computer CD drive, and follow the onscreen instructions to install the MFP... drivers. 4 Verify the computer recognizes your system. a Open the Printers folder. Note: Use the power cord from the scanner box. 6 Connect the power cord to the ...
C77x - User's Guide
Page 8
... device, or an FTP destination. • Scan documents and send them to another printer (PDF by way of the scanner The Lexmark™ 4600 MFP option provides copy, fax, and scan-to print, fax, copy, and e-mail settings from an application override changes made from... the application, use , the print driver, MarkVision™ Professional, or the Web pages. If a setting cannot be used to the MFP. Changing a setting from the application or print driver...
... device, or an FTP destination. • Scan documents and send them to another printer (PDF by way of the scanner The Lexmark™ 4600 MFP option provides copy, fax, and scan-to print, fax, copy, and e-mail settings from an application override changes made from... the application, use , the print driver, MarkVision™ Professional, or the Web pages. If a setting cannot be used to the MFP. Changing a setting from the application or print driver...


