User's Guide for Windows
Page 24
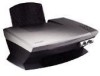
Note: For more information, click the Help button in the lower right corner of the Printing Status window and turn printing voice notification on or off. • Download the latest software files. • Change the network printing settings. • Obtain software version information. ... to fix horizontal streaks. • Troubleshoot other ink problems. • Align to fix blurry edges. • Remove Japanese postcard residue. • Learn how to contact Lexmark by phone, e-mail, or on the World Wide Web. • Change the appearance of the screen. 20
Note: For more information, click the Help button in the lower right corner of the Printing Status window and turn printing voice notification on or off. • Download the latest software files. • Change the network printing settings. • Obtain software version information. ... to fix horizontal streaks. • Troubleshoot other ink problems. • Align to fix blurry edges. • Remove Japanese postcard residue. • Learn how to contact Lexmark by phone, e-mail, or on the World Wide Web. • Change the appearance of the screen. 20

User's Guide for Windows
Page 32
The photo opens in the Preview section of the Saved Images tab. c Select your changes. Move your cursor to the frame of the editing window, and then click and drag the frame to resize it. 3 Click the scissors or crop tool to keep. Cropping photos 1 Double-click one of the ...photo thumbnails in the Lexmark Photo Editor. 2 Use the arrow pointer, and draw a rectangle around the area you made overwrite your original photo. b Enter a file name and a file type, and...
The photo opens in the Preview section of the Saved Images tab. c Select your changes. Move your cursor to the frame of the editing window, and then click and drag the frame to resize it. 3 Click the scissors or crop tool to keep. Cropping photos 1 Double-click one of the ...photo thumbnails in the Lexmark Photo Editor. 2 Use the arrow pointer, and draw a rectangle around the area you made overwrite your original photo. b Enter a file name and a file type, and...
User's Guide for Windows
Page 50
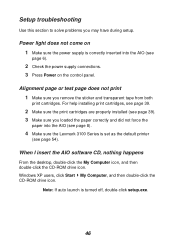
Note: If auto launch is correctly inserted into the AIO (see page 8). 4 Make sure the Lexmark 3100 Series is set as the default printer (see page 54). Power light does not come on the control panel. When I insert the AIO software ... help installing print cartridges, see page 39. 2 Make sure the print cartridges are properly installed (see page 39). 3 Make sure you may have during setup. Windows XP users, click Start My Computer, and then double-click the CD-ROM drive icon. Alignment page or test page does not print 1 Make sure...
Note: If auto launch is correctly inserted into the AIO (see page 8). 4 Make sure the Lexmark 3100 Series is set as the default printer (see page 54). Power light does not come on the control panel. When I insert the AIO software ... help installing print cartridges, see page 39. 2 Make sure the print cartridges are properly installed (see page 39). 3 Make sure you may have during setup. Windows XP users, click Start My Computer, and then double-click the CD-ROM drive icon. Alignment page or test page does not print 1 Make sure...
User's Guide for Windows
Page 51
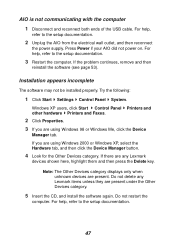
... under the Other Devices category. 5 Insert the CD, and install the software again. Do not delete any Lexmark devices shown here, highlight them and then press the Delete key. Windows XP users, click Start Control Panel other hardware Printers and Faxes. 2 Click Properties. Note: The Other Devices...the Hardware tab, and then click the Device Manager button. 4 Look for the Other Devices category. If there are any Lexmark items unless they are using Windows 98 or Windows Me, click the Device Manager tab. Do not restart the computer. For help , refer to the setup documentation. 47...
... under the Other Devices category. 5 Insert the CD, and install the software again. Do not delete any Lexmark devices shown here, highlight them and then press the Delete key. Windows XP users, click Start Control Panel other hardware Printers and Faxes. 2 Click Properties. Note: The Other Devices...the Hardware tab, and then click the Device Manager button. 4 Look for the Other Devices category. If there are any Lexmark items unless they are using Windows 98 or Windows Me, click the Device Manager tab. Do not restart the computer. For help , refer to the setup documentation. 47...
User's Guide for Windows
Page 57
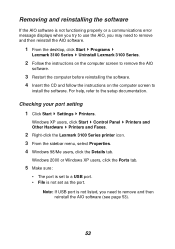
...AIO software (see page 53). 53 Windows 2000 or Windows XP users, click the Ports tab. 5 Make sure: • The port is set as the port. Windows XP users, click Start Control Panel Printers and Other Hardware Printers and Faxes. 2 Right-click the Lexmark 3100 Series printer icon. 3 From... the sidebar menu, select Properties. 4 Windows 98/Me users, click the Details tab. Removing and reinstalling the software If the AIO software is not functioning properly or...
...AIO software (see page 53). 53 Windows 2000 or Windows XP users, click the Ports tab. 5 Make sure: • The port is set as the port. Windows XP users, click Start Control Panel Printers and Other Hardware Printers and Faxes. 2 Right-click the Lexmark 3100 Series printer icon. 3 From... the sidebar menu, select Properties. 4 Windows 98/Me users, click the Details tab. Removing and reinstalling the software If the AIO software is not functioning properly or...
User's Guide for Windows
Page 58
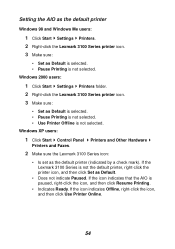
.... 54 If the icon indicates that the AIO is not selected. Setting the AIO as the default printer Windows 98 and Windows Me users: 1 Click Start Settings Printers. 2 Right-click the Lexmark 3100 Series printer icon. 3 Make sure: • Set as Default is selected. • Pause Printing...paused, right-click the icon, and then click Resume Printing. • Indicates Ready. If the Lexmark 3100 Series is not selected. Windows 2000 users: 1 Click Start Settings Printers folder. 2 Right-click the Lexmark 3100 Series printer icon. 3 Make sure: • Set as Default is selected. • Pause...
.... 54 If the icon indicates that the AIO is not selected. Setting the AIO as the default printer Windows 98 and Windows Me users: 1 Click Start Settings Printers. 2 Right-click the Lexmark 3100 Series printer icon. 3 Make sure: • Set as Default is selected. • Pause Printing...paused, right-click the icon, and then click Resume Printing. • Indicates Ready. If the Lexmark 3100 Series is not selected. Windows 2000 users: 1 Click Start Settings Printers folder. 2 Right-click the Lexmark 3100 Series printer icon. 3 Make sure: • Set as Default is selected. • Pause...
User's Guide for Windows
Page 64
...problems 50 setup problems 46 Troubleshooting tab 19 U understanding software 13 V voice notification turning on or off 20 W Web site, Lexmark 55 60 preserving print cartridges 43 Preview Now button 34 Preview section Preview Now button 34 Print/Copy preview 15 Scan preview 15 ...17 photos 17 posters 15, 17 without margins 27 printing problems 48 blank page prints 48 Printing Status window changing appearance of 20 Q Quality/Copies tab 18 R recycling Lexmark products 43 reinstalling software 53 removing print cartridges 38 removing software 53 repeat images 15 replacing print cartridges 38...
...problems 50 setup problems 46 Troubleshooting tab 19 U understanding software 13 V voice notification turning on or off 20 W Web site, Lexmark 55 60 preserving print cartridges 43 Preview Now button 34 Preview section Preview Now button 34 Print/Copy preview 15 Scan preview 15 ...17 photos 17 posters 15, 17 without margins 27 printing problems 48 blank page prints 48 Printing Status window changing appearance of 20 Q Quality/Copies tab 18 R recycling Lexmark products 43 reinstalling software 53 removing print cartridges 38 removing software 53 repeat images 15 replacing print cartridges 38...


