
User's Guide
Page 17
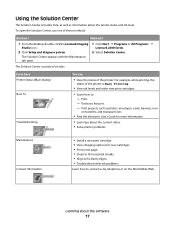
... use one of these methods: Method 1 Method 2 1 From the desktop, double-click the Lexmark Imaging Studio icon. 2 Click Setup and diagnose printer. 1 Click Start Œ Programs or All Programs Œ Lexmark 2500 Series. 2 Select Solution Center. Use basic features. - Using the Solution Center The Solution Center provides ...Main dialog) How To Troubleshooting You can • View the status of the printer is Busy Printing. • View ink levels and order new print cartridges. • Learn how to contact us by telephone or on the World Wide Web. Learning about the printer status ...
... use one of these methods: Method 1 Method 2 1 From the desktop, double-click the Lexmark Imaging Studio icon. 2 Click Setup and diagnose printer. 1 Click Start Œ Programs or All Programs Œ Lexmark 2500 Series. 2 Select Solution Center. Use basic features. - Using the Solution Center The Solution Center provides ...Main dialog) How To Troubleshooting You can • View the status of the printer is Busy Printing. • View ink levels and order new print cartridges. • Learn how to contact us by telephone or on the World Wide Web. Learning about the printer status ...
User's Guide
Page 55
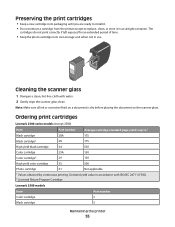
... water. 2 Gently wipe the scanner glass clean. Note: Make sure all ink or corrective fluid on the scanner glass. Ordering print cartridges Lexmark 2500 series models (except 2580) Item Black cartridge Black cartridge2 High yield black cartridge Color cartridge Color cartridge2 Part number 28A 28 34 29A 29 Average cartridge standard page yield is dry before placing the document on a document...
... water. 2 Gently wipe the scanner glass clean. Note: Make sure all ink or corrective fluid on the scanner glass. Ordering print cartridges Lexmark 2500 series models (except 2580) Item Black cartridge Black cartridge2 High yield black cartridge Color cartridge Color cartridge2 Part number 28A 28 34 29A 29 Average cartridge standard page yield is dry before placing the document on a document...
User's Guide
Page 72
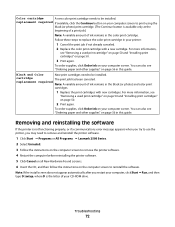
... is available only at the beginning of a print job.) Note: A variable amount of ink remains in this guide. Black and Color New print cartridges need to remove and reinstall the printer software. 1 Click Start ΠPrograms or All Programs ΠLexmark 2500 Series. 2 Select Uninstall. 3 Follow the instructions on the computer screen to remove the printer...
... is available only at the beginning of a print job.) Note: A variable amount of ink remains in this guide. Black and Color New print cartridges need to remove and reinstall the printer software. 1 Click Start ΠPrograms or All Programs ΠLexmark 2500 Series. 2 Select Uninstall. 3 Follow the instructions on the computer screen to remove the printer...
Getting Started
Page 15
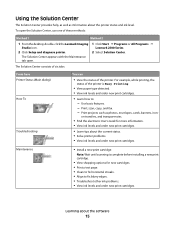
... Studio icon. 2 Click Setup and diagnose printer. 1 Click Start Œ Programs or All Programs Œ Lexmark 2500 Series. 2 Select Solution Center. Use basic features. - Note: Wait until scanning is Busy Printing. • View paper type detected. • View ink levels and order new print cartridges. • Learn how to fix blurry edges. • Troubleshoot other...
... Studio icon. 2 Click Setup and diagnose printer. 1 Click Start Œ Programs or All Programs Œ Lexmark 2500 Series. 2 Select Solution Center. Use basic features. - Note: Wait until scanning is Busy Printing. • View paper type detected. • View ink levels and order new print cartridges. • Learn how to fix blurry edges. • Troubleshoot other...
Getting Started
Page 55
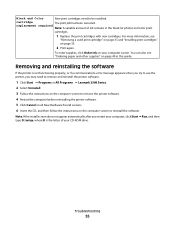
..., where D is the letter of ink remains in this guide. Note: If the install screen does not appear automatically after you may need to be installed. Black and Color New print cartridges need to remove and reinstall the printer software. 1 Click Start ΠPrograms or All Programs ΠLexmark 2500 Series. 2 Select Uninstall. 3 Follow the instructions...
..., where D is the letter of ink remains in this guide. Note: If the install screen does not appear automatically after you may need to be installed. Black and Color New print cartridges need to remove and reinstall the printer software. 1 Click Start ΠPrograms or All Programs ΠLexmark 2500 Series. 2 Select Uninstall. 3 Follow the instructions...


