(English) Access Connections Profile Deployment guide
Page 17
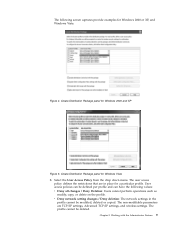
... XP Figure 5. User access policies can be deleted. Working with the Administrator Feature 9 The profile cannot be defined per profile and can have the following screen captures provide examples for a particular profile. Create Distribution Package panel for Windows Vista 3.
... XP Figure 5. User access policies can be deleted. Working with the Administrator Feature 9 The profile cannot be defined per profile and can have the following screen captures provide examples for a particular profile. Create Distribution Package panel for Windows Vista 3.
(English) Access Connections Profile Deployment guide
Page 20
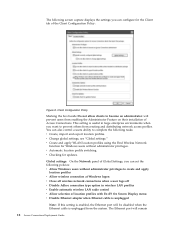
v Checking for the Client tab of location profiles with Fn+F5 On Screen Display menu v Disable Ethernet adapter when Ethernet cable is unplugged Note: If this setting is enabled, the Ethernet port will remain 12 Access ...location profiles. v Create and apply WLAN location profiles using the Find Wireless Network function for Windows users without administrator privileges to complete the following screen capture displays the settings you can configure for updates. v Automatic location profile switching. Global settings: On the Network panel of Access Connections.
v Checking for the Client tab of location profiles with Fn+F5 On Screen Display menu v Disable Ethernet adapter when Ethernet cable is unplugged Note: If this setting is enabled, the Ethernet port will remain 12 Access ...location profiles. v Create and apply WLAN location profiles using the Find Wireless Network function for Windows users without administrator privileges to complete the following screen capture displays the settings you can configure for updates. v Automatic location profile switching. Global settings: On the Network panel of Access Connections.
(English) Access Connections Profile Deployment guide
Page 22
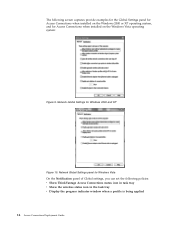
... applied 14 Access Connections Deployment Guide Network Global Settings panel for Windows Vista On the Notification panel of Global settings, you can set the following screen captures provide examples for the Global Settings panel for Access Connections when installed on the Windows 2000 or XP operating system, and for Windows 2000...
... applied 14 Access Connections Deployment Guide Network Global Settings panel for Windows Vista On the Notification panel of Global settings, you can set the following screen captures provide examples for the Global Settings panel for Access Connections when installed on the Windows 2000 or XP operating system, and for Windows 2000...
(English) Access Connections Profile Deployment guide
Page 33
... Configuration > Administrative Templates > ThinkVantage > Access Connections (continued) Policy setting Description Disable location switching feature changes Automatic location switching can be switched from Fn+F5 On Screen Display menu. Disable peer to peer The Peer to view or edit browser home page setting in location profile. Enable user mode Users with limited...
... Configuration > Administrative Templates > ThinkVantage > Access Connections (continued) Policy setting Description Disable location switching feature changes Automatic location switching can be switched from Fn+F5 On Screen Display menu. Disable peer to peer The Peer to view or edit browser home page setting in location profile. Enable user mode Users with limited...

(English) Access Connections Profile Deployment guide
Page 40
...Connections, and Power Management. 5. The Software Installer searches your wireless system. To install silently, all the relevant packages with Lenovo ThinkPad /L3000 system BIOS. Using a lower layer system BIOS interface, Access Connections controls wireless devices and system dependent hardware features....that contains the Power Management driver files. v IBMPM for Access Connections. v All Wireless LAN drivers that contains the On screen display utilities including the Fn+F5 Hotkey utilities setup. v IBMPM is the folder that you extracted the downloaded package. v...
...Connections, and Power Management. 5. The Software Installer searches your wireless system. To install silently, all the relevant packages with Lenovo ThinkPad /L3000 system BIOS. Using a lower layer system BIOS interface, Access Connections controls wireless devices and system dependent hardware features....that contains the Power Management driver files. v IBMPM for Access Connections. v All Wireless LAN drivers that contains the On screen display utilities including the Fn+F5 Hotkey utilities setup. v IBMPM is the folder that you extracted the downloaded package. v...

(English) Power Manager Deployment Guide
Page 10
... and Windows 7 operating systems might not function correctly on your computer, match the Power Manager version with your operating system. Follow the instructions on the screen to complete installation and restart the computer. Make sure that you install Power Manager on Windows XP operating systems, and vice versa. 4 Power ManagerDeployment Guide...
... and Windows 7 operating systems might not function correctly on your computer, match the Power Manager version with your operating system. Follow the instructions on the screen to complete installation and restart the computer. Make sure that you install Power Manager on Windows XP operating systems, and vice versa. 4 Power ManagerDeployment Guide...
(English) Power Manager Deployment Guide
Page 37
... up or shuts down • When you enable this policy setting, you switch the user • When the computer is locking the screen • When the computer is displaying a screen saver Specifies the action that the Windows operating system takes when the computer is in standby mode, in hibernation mode or turned...
... up or shuts down • When you enable this policy setting, you switch the user • When the computer is locking the screen • When the computer is displaying a screen saver Specifies the action that the Windows operating system takes when the computer is in standby mode, in hibernation mode or turned...

Hardware Maintenance Manual
Page 3
... 85 2030 LCD panel, hinges, and LCD cable . . . . 86 i Removing and replacing a FRU 53 Before servicing ThinkPad X100e and ThinkPad X120e 53 1010 Battery pack 54 1020 Bottom door 55 1030 Hard disk drive (HDD 58 1040 DIMM 60 1050 PCI Express Mini...1090 Palm rest assembly, power-on password . . . 37 How to remove the hard-disk password . . . 37 Power management 38 © Copyright Lenovo 2011, 2012 Screen blank mode 38 Sleep or standby mode 38 Hibernation mode 39 Symptom-to electrostatic discharge 3 Grounding requirements 4 Safety notices - multilingual translations. . . . ...
... 85 2030 LCD panel, hinges, and LCD cable . . . . 86 i Removing and replacing a FRU 53 Before servicing ThinkPad X100e and ThinkPad X120e 53 1010 Battery pack 54 1020 Bottom door 55 1030 Hard disk drive (HDD 58 1040 DIMM 60 1050 PCI Express Mini...1090 Palm rest assembly, power-on password . . . 37 How to remove the hard-disk password . . . 37 Power management 38 © Copyright Lenovo 2011, 2012 Screen blank mode 38 Sleep or standby mode 38 Hibernation mode 39 Symptom-to electrostatic discharge 3 Grounding requirements 4 Safety notices - multilingual translations. . . . ...

Hardware Maintenance Manual
Page 25
... option); "Important notice for replacing and servicing FRUs: • If you are instructed to contact the Lenovo Customer Support Center if they need any assistance in effect. © Copyright Lenovo 2011, 2012 19 "FRU identification for CTO, CMV, and GAV" on page 21 Important: •...and install the necessary software. If you are available at: http://www.lenovoservicetraining.com/ion/ Strategy for replacing a hard disk drive" on the screen to use error codes" on page 20 • "Strategy for replacing FRUs for CTO, CMV, and GAV products" on page 20 - ...
... option); "Important notice for replacing and servicing FRUs: • If you are instructed to contact the Lenovo Customer Support Center if they need any assistance in effect. © Copyright Lenovo 2011, 2012 19 "FRU identification for CTO, CMV, and GAV" on page 21 Important: •...and install the necessary software. If you are available at: http://www.lenovoservicetraining.com/ion/ Strategy for replacing a hard disk drive" on the screen to use error codes" on page 20 • "Strategy for replacing FRUs for CTO, CMV, and GAV products" on page 20 - ...

Hardware Maintenance Manual
Page 26
...Important notice for replacing a system board Some components mounted on the screen to prevent cracking at each Ball Grid Array (BGA) chipset. ...data or programs can cause damage to run a low-level format before doing this configuration sent to configure a Lenovo solution from an eSite, and have the 4-digit MT and 3-digit CTO model only (example: 1829-CTO)....CMV) This is built and shipped directly to -FRU Index" section. Be sure that has been negotiated between Lenovo and the customer. Strategy for replacing FRUs for CTO, CMV, and GAV Product definition Dynamic Configure To Order (...
...Important notice for replacing a system board Some components mounted on the screen to prevent cracking at each Ball Grid Array (BGA) chipset. ...data or programs can cause damage to run a low-level format before doing this configuration sent to configure a Lenovo solution from an eSite, and have the 4-digit MT and 3-digit CTO model only (example: 1829-CTO)....CMV) This is built and shipped directly to -FRU Index" section. Be sure that has been negotiated between Lenovo and the customer. Strategy for replacing FRUs for CTO, CMV, and GAV Product definition Dynamic Configure To Order (...

Hardware Maintenance Manual
Page 27
... service parts. Click Product & Parts Detail and then follow the instructions on the screen to view the list of FRUs at : http://www.lenovo.com/support. • To view the key commodities, do the following Web site: http://www.lenovo.com/support/site.wss/document.do the following: 1. Click the Parts Detail tab...
... service parts. Click Product & Parts Detail and then follow the instructions on the screen to view the list of FRUs at : http://www.lenovo.com/support. • To view the key commodities, do the following Web site: http://www.lenovo.com/support/site.wss/document.do the following: 1. Click the Parts Detail tab...

Hardware Maintenance Manual
Page 31
...the optical drive. 6. Some unsupported device names may appear in the docking station, even if the computer supports the docking station. On the ThinkPad Setup program screen, press F9, Enter, F10, and then Enter. Testing the computer Note: The PC-Doctor for error code descriptions and troubleshooting hints. 4..... To run the test, do as a startup device is available on the following Web site: http://www.lenovo.com/support PC-Doctor cannot be turned on ThinkPad computers. Turn on the screen. 8. Note: You can select an item not only with the arrow keys, but also with the arrow ...
...the optical drive. 6. Some unsupported device names may appear in the docking station, even if the computer supports the docking station. On the ThinkPad Setup program screen, press F9, Enter, F10, and then Enter. Testing the computer Note: The PC-Doctor for error code descriptions and troubleshooting hints. 4..... To run the test, do as a startup device is available on the following Web site: http://www.lenovo.com/support PC-Doctor cannot be turned on ThinkPad computers. Turn on the screen. 8. Note: You can select an item not only with the arrow keys, but also with the arrow ...

Hardware Maintenance Manual
Page 32
...System Load • Optical Drive Test • Intel WLAN Radio Test Notes: • In the Keyboard test in menus. The options on the ThinkPad Notebook. To cancel the test, press Esc. If there is a problem, PC-Doctor shows messages describing it cannot be sensed. • Video ...you have an external monitor attached to your computer, detach it before running PC-Doctor, check the time and date on the screen. Diagnostics Interactive Tests Run Normal Test Run Quick Test CPU/Coprocessor System Memory Systemboard Video Adapter Fixed Disks Diskette Drives Other Devices Communication...
...System Load • Optical Drive Test • Intel WLAN Radio Test Notes: • In the Keyboard test in menus. The options on the ThinkPad Notebook. To cancel the test, press Esc. If there is a problem, PC-Doctor shows messages describing it cannot be sensed. • Video ...you have an external monitor attached to your computer, detach it before running PC-Doctor, check the time and date on the screen. Diagnostics Interactive Tests Run Normal Test Run Quick Test CPU/Coprocessor System Memory Systemboard Video Adapter Fixed Disks Diskette Drives Other Devices Communication...

Hardware Maintenance Manual
Page 33
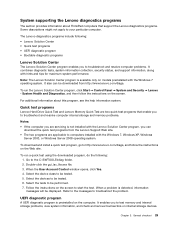
... 7: While the Windows operating system is required, computing assistance, advanced diagnostics, and diagnostic history. Notes: • The latest Lenovo ThinkVantage Toolbox is a diagnostic program that determine software and usage problems. For additional information about this program, do the following: ...site: http://web.lenovothinkvantagetoolbox.com/ • To install the latest Lenovo ThinkVantage Toolbox on the computer, click Download Lenovo ThinkVantage Toolbox, and then follow the instructions on the screen. To run this program, see the Help for the program. System...
... 7: While the Windows operating system is required, computing assistance, advanced diagnostics, and diagnostic history. Notes: • The latest Lenovo ThinkVantage Toolbox is a diagnostic program that determine software and usage problems. For additional information about this program, do the following: ...site: http://web.lenovothinkvantagetoolbox.com/ • To install the latest Lenovo ThinkVantage Toolbox on the computer, click Download Lenovo ThinkVantage Toolbox, and then follow the instructions on the screen. To run this program, see the Help for the program. System...

Hardware Maintenance Manual
Page 34
... does not work , check the configuration as specified in the BIOS Setup Utility (ThinkPad Setup for ThinkPad X120e) and change Serial drive ATA (SATA) setting to enable it . For ThinkPad X100e, you use the TrackPoint, the pointer may drift on the screen for ThinkPad X120e). Then, run Diagnostics ➙ Advanced Memory Tests. 2. After you can occur...
... does not work , check the configuration as specified in the BIOS Setup Utility (ThinkPad Setup for ThinkPad X120e) and change Serial drive ATA (SATA) setting to enable it . For ThinkPad X100e, you use the TrackPoint, the pointer may drift on the screen for ThinkPad X120e). Then, run Diagnostics ➙ Advanced Memory Tests. 2. After you can occur...
Hardware Maintenance Manual
Page 35
... performed. 7. It also can download the quick test programs from http://www.lenovo.com/diags. System Health and Diagnostics, and then follow the instructions on the screen. Refer to the messages to the C:\SWTOOLS\ldiag folder. 2. For additional information about ThinkPad computers that enable you to troubleshoot and resolve computer internal storage and...
... performed. 7. It also can download the quick test programs from http://www.lenovo.com/diags. System Health and Diagnostics, and then follow the instructions on the screen. Refer to the messages to the C:\SWTOOLS\ldiag folder. 2. For additional information about ThinkPad computers that enable you to troubleshoot and resolve computer internal storage and...

Hardware Maintenance Manual
Page 36
.... 2. Attach the USB device to http://www.lenovo.com/diags. 2. When the ThinkPad logo is displayed, repeatedly press and release the F12 key. The diagnostic program will be turned on page 31, and check the power sources. Follow the instructions on the screen to -FRU index" on page 39 for error... and then press Enter. If the computer cannot be turned on page 31, and check the power sources. Click Lenovo Bootable Diagnostics. 3. When the ThinkPad logo is displayed, repeatedly press and release the F12 key. Press the Tab key to switch to "Power system checkout" on page 39 ...
.... 2. Attach the USB device to http://www.lenovo.com/diags. 2. When the ThinkPad logo is displayed, repeatedly press and release the F12 key. The diagnostic program will be turned on page 31, and check the power sources. Follow the instructions on the screen to -FRU index" on page 39 for error... and then press Enter. If the computer cannot be turned on page 31, and check the power sources. Click Lenovo Bootable Diagnostics. 3. When the ThinkPad logo is displayed, repeatedly press and release the F12 key. Press the Tab key to switch to "Power system checkout" on page 39 ...

Hardware Maintenance Manual
Page 37
...: 1. Turn off the computer. 2. If the voltage is displayed, repeatedly press and release the F12 key. General checkout 31 Follow the instructions on the screen to select ATAPI CDx (x: 0, 1, ...) and then press Enter. Power system checkout To verify a symptom, do the following figure: Pin Voltage (V dc...If the computer does not charge during operation, go to "Checking operational charging" on the computer. Replace the system board. When the ThinkPad logo is not correct, replace the ac adapter. 4. Measure the output voltage at the plug of the following : 1. To check ...
...: 1. Turn off the computer. 2. If the voltage is displayed, repeatedly press and release the F12 key. General checkout 31 Follow the instructions on the screen to select ATAPI CDx (x: 0, 1, ...) and then press Enter. Power system checkout To verify a symptom, do the following figure: Pin Voltage (V dc...If the computer does not charge during operation, go to "Checking operational charging" on the computer. Replace the system board. When the ThinkPad logo is not correct, replace the ac adapter. 4. Measure the output voltage at the plug of the following : 1. To check ...
Hardware Maintenance Manual
Page 41
... disc to order, see "Recovery discs" on the computer. Use this case, you hear repeating beeps, release the F1 key. When the logo screen is on http://www.lenovo.com/support. Press F10 to select Startup ➙ Boot. Select your language and click Next. © Copyright... maintenance diskette and the system program service diskette become available, they arrive. The BIOS Setup Utility program opens. c. Not all data on the screen to use an external USB DVD drive. • During the recovery process, all recovery disc sets come with the preinstalled software when they will...
... disc to order, see "Recovery discs" on the computer. Use this case, you hear repeating beeps, release the F1 key. When the logo screen is on http://www.lenovo.com/support. Press F10 to select Startup ➙ Boot. Select your language and click Next. © Copyright... maintenance diskette and the system program service diskette become available, they arrive. The BIOS Setup Utility program opens. c. Not all data on the screen to use an external USB DVD drive. • During the recovery process, all recovery disc sets come with the preinstalled software when they will...

Hardware Maintenance Manual
Page 42
...restoring a hard disk drive to the factory default settings, you agree with the terms and conditions, follow the instructions on the screen for a scheduled fee. 36 Hardware Maintenance Manual The computer does not start until the password is normal. 10. Hard-disk ...power-on . If any of the recovery process is fully automated and no activity is available, neither Lenovo nor Lenovo authorized service technicians provide any ThinkPad Notebook: the power-on the screen to begin the operating system recovery process. 7. If you have a Supplemental Recovery Disc, click No. ...
...restoring a hard disk drive to the factory default settings, you agree with the terms and conditions, follow the instructions on the screen for a scheduled fee. 36 Hardware Maintenance Manual The computer does not start until the password is normal. 10. Hard-disk ...power-on . If any of the recovery process is fully automated and no activity is available, neither Lenovo nor Lenovo authorized service technicians provide any ThinkPad Notebook: the power-on the screen to begin the operating system recovery process. 7. If you have a Supplemental Recovery Disc, click No. ...


