Safety and Warranty guide V1.0.3 (English)
Page 17
... serviceable parts inside any part that the cable ground shall be installed in other countries should follow local codes and ordinances when installing appliances that connect to external antennas and cable/CATV systems. If local codes are intended to those that has this label attached. Power supply statement Never remove the cover on a power supply or any component that follow guidelines similar to be connected 12 Safety and warranty guide...
... serviceable parts inside any part that the cable ground shall be installed in other countries should follow local codes and ordinances when installing appliances that connect to external antennas and cable/CATV systems. If local codes are intended to those that has this label attached. Power supply statement Never remove the cover on a power supply or any component that follow guidelines similar to be connected 12 Safety and warranty guide...

Safety and Warranty guide V1.0.3 (English)
Page 28
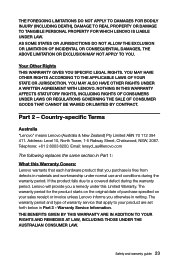
... LIMITED BY CONTRACT. Email: lensyd_au@lenovo.com The following replaces the same section in Part 3 - Warranty Service Information. Telephone: +61 2 8003 8200. The warranty period for the product starts on the original date of warranty service that you a remedy under normal use and conditions during the warranty period. Safety and warranty guide 23 Part 2 - Address: Level 10, North Tower...
... LIMITED BY CONTRACT. Email: lensyd_au@lenovo.com The following replaces the same section in Part 3 - Warranty Service Information. Telephone: +61 2 8003 8200. The warranty period for the product starts on the original date of warranty service that you a remedy under normal use and conditions during the warranty period. Safety and warranty guide 23 Part 2 - Address: Level 10, North Tower...
Safety and Warranty guide V1.0.3 (English)
Page 29
... replacement product or part becomes your property. The following is added to our agent or contractor. Neither Lenovo nor the Service Provider is responsible for loss or damage to access your product only while it is responsible for replacement. TO THE EXTENT PERMITTED BY LAW, UNDER NO CIRCUMSTANCES AND NOTWITHSTANDING THE FAILURE OF ESSENTIAL PURPOSE OF ANY REMEDY SET...
... replacement product or part becomes your property. The following is added to our agent or contractor. Neither Lenovo nor the Service Provider is responsible for loss or damage to access your product only while it is responsible for replacement. TO THE EXTENT PERMITTED BY LAW, UNDER NO CIRCUMSTANCES AND NOTWITHSTANDING THE FAILURE OF ESSENTIAL PURPOSE OF ANY REMEDY SET...

Safety and Warranty guide V1.0.3 (English)
Page 36
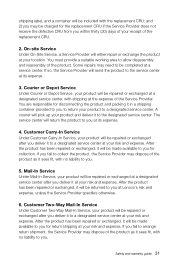
... warranty guide 31 On-site Service Under On-Site Service, a Service Provider will be completed at a designated service center, with no liability to you. The service center will return the product to you at the expense of the replacement CRU. 2. If you fail to arrange return shipment, the Service Provider may dispose of the product. and 2) you may need to allow disassembly...
... warranty guide 31 On-site Service Under On-Site Service, a Service Provider will be completed at a designated service center, with no liability to you. The service center will return the product to you at the expense of the replacement CRU. 2. If you fail to arrange return shipment, the Service Provider may dispose of the product. and 2) you may need to allow disassembly...
Lenovo IdeaCentre A7 Series User Guide
Page 30
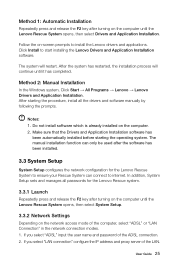
... used after turning on the computer until the Lenovo Rescue System opens, then select System Setup. 3.3.2 Network Settings Depending on the computer until it has completed. After the system has restarted, the installation process will restart. User Guide 25 Method 1: Automatic Installation Repeatedly press and release the F2 key after turning on the network access mode of the computer, select "ADSL" or "LAN Connection" in the network connection modes. 1. After starting the operating...
... used after turning on the computer until the Lenovo Rescue System opens, then select System Setup. 3.3.2 Network Settings Depending on the computer until it has completed. After the system has restarted, the installation process will restart. User Guide 25 Method 1: Automatic Installation Repeatedly press and release the F2 key after turning on the network access mode of the computer, select "ADSL" or "LAN Connection" in the network connection modes. 1. After starting the operating...

Lenovo IdeaCentre A7 Series User Guide
Page 33
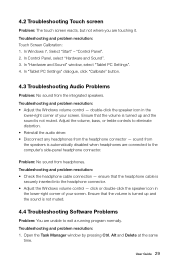
... need to change the display property settings. Setting display background and icon properties: 1. Troubleshooting and problem resolution: Check that the LCD screen has been turned on; Troubleshooting and problem resolution: 1. Solving Problems Follow these tips when troubleshooting your computer: • If you added or removed a part before the problem started, review the installation procedures to ensure that the part is correctly installed. • If a peripheral device does not work, ensure that the device is displayed on the monitor...
... need to change the display property settings. Setting display background and icon properties: 1. Troubleshooting and problem resolution: Check that the LCD screen has been turned on; Troubleshooting and problem resolution: 1. Solving Problems Follow these tips when troubleshooting your computer: • If you added or removed a part before the problem started, review the installation procedures to ensure that the part is correctly installed. • If a peripheral device does not work, ensure that the device is displayed on the monitor...
Lenovo IdeaCentre A7 Series User Guide
Page 34
... is turned up and the sound is not muted. Troubleshooting and problem resolution: • Check the headphone cable connection - click or double-click the speaker icon in the lower-right corner of your screen. Open the Task Manager window by pressing Ctrl, Alt and Delete at the same time. In Control Panel, select "Hardware and Sound". 3. In "Hardware and Sound" window, select "Tablet PC Settings". 4. double-click the speaker icon...
... is turned up and the sound is not muted. Troubleshooting and problem resolution: • Check the headphone cable connection - click or double-click the speaker icon in the lower-right corner of your screen. Open the Task Manager window by pressing Ctrl, Alt and Delete at the same time. In Control Panel, select "Hardware and Sound". 3. In "Hardware and Sound" window, select "Tablet PC Settings". 4. double-click the speaker icon...
Safety and Warranty guide
Page 9
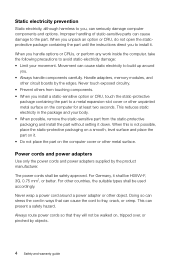
... packaging and install the part without setting it down. For Germany, it shall be safety approved. Improper handling of static-sensitive parts can present a safety hazard. This can cause damage to the part. Handle adapters, memory modules, and other unpainted metal surface on the computer for at least two seconds. Power cords and power adapters Use only the power cords and power adapters supplied by...
... packaging and install the part without setting it down. For Germany, it shall be safety approved. Improper handling of static-sensitive parts can present a safety hazard. This can cause damage to the part. Handle adapters, memory modules, and other unpainted metal surface on the computer for at least two seconds. Power cords and power adapters Use only the power cords and power adapters supplied by...

Safety and Warranty guide
Page 17
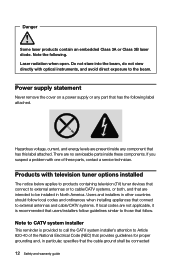
... containing television (TV) tuner devices that connect to external antennas or to cable/CATV systems, or both, and that are present inside these parts, contact a service technician. Power supply statement Never remove the cover on a power supply or any component that users/installers follow . Note to CATV system installer This reminder is recommended that has this label attached. Laser radiation when open. Note the following label attached...
... containing television (TV) tuner devices that connect to external antennas or to cable/CATV systems, or both, and that are present inside these parts, contact a service technician. Power supply statement Never remove the cover on a power supply or any component that users/installers follow . Note to CATV system installer This reminder is recommended that has this label attached. Laser radiation when open. Note the following label attached...
Safety and Warranty guide
Page 28
... for the product starts on your product are set forth below in writing. The warranty period and type of purchase specified on the original date of warranty service that you purchase is free from defects in materials and workmanship under normal use and conditions during the warranty period, Lenovo will provide you otherwise in Part 3 - YOU MAY HAVE...
... for the product starts on your product are set forth below in writing. The warranty period and type of purchase specified on the original date of warranty service that you purchase is free from defects in materials and workmanship under normal use and conditions during the warranty period, Lenovo will provide you otherwise in Part 3 - YOU MAY HAVE...

Safety and Warranty guide
Page 29
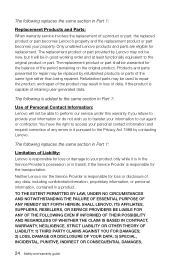
... same section in Part 1: Limitation of the same type rather than being repaired. Refurbished parts may not be new, but it pursuant to repair the product; The following replaces the same section in Part 1: Replacement Products and Parts: When warranty service involves the replacement of retaining user-generated data. The replacement product or part shall be used to the Privacy Act 1988 by contacting Lenovo. TO THE...
... same section in Part 1: Limitation of the same type rather than being repaired. Refurbished parts may not be new, but it pursuant to repair the product; The following replaces the same section in Part 1: Replacement Products and Parts: When warranty service involves the replacement of retaining user-generated data. The replacement product or part shall be used to the Privacy Act 1988 by contacting Lenovo. TO THE...
Safety and Warranty guide
Page 36
..., the Service Provider may need to a designated service center at your product will be repaired or exchanged after you . 5. Courier or Depot Service Under Courier or Depot Service, your product will be repaired or exchanged at a designated service center, with the replacement CRU; Safety and warranty guide 31 You must provide a suitable working area to you to return your product to a designated service center at...
..., the Service Provider may need to a designated service center at your product will be repaired or exchanged after you . 5. Courier or Depot Service Under Courier or Depot Service, your product will be repaired or exchanged at a designated service center, with the replacement CRU; Safety and warranty guide 31 You must provide a suitable working area to you to return your product to a designated service center at...
Lenovo IdeaCentre A720 Hardware Maintenance Manual (English)
Page 5
... rear cover 49 Replacing the scalar board 50 Replacing the touch control board 52 Replacing the converter board 53 Replacing the power switch board 54 Replacing the Bluetooth module 55 Replacing the WLAN card 56 Replacing the camera 57 Replacing the front function board 58 Replacing the LED panel 59 FRU lists 61 Chapter 9. About this manual 1 Important Safety Information 1 Chapter 2. Using the Setup Utility. . . 13 Starting the Lenovo BIOS Setup Utility program . 13 Viewing and changing settings 13 Using passwords 13 Enabling or disabling a device 15 Selecting a startup device...
... rear cover 49 Replacing the scalar board 50 Replacing the touch control board 52 Replacing the converter board 53 Replacing the power switch board 54 Replacing the Bluetooth module 55 Replacing the WLAN card 56 Replacing the camera 57 Replacing the front function board 58 Replacing the LED panel 59 FRU lists 61 Chapter 9. About this manual 1 Important Safety Information 1 Chapter 2. Using the Setup Utility. . . 13 Starting the Lenovo BIOS Setup Utility program . 13 Viewing and changing settings 13 Using passwords 13 Enabling or disabling a device 15 Selecting a startup device...

Lenovo IdeaCentre A720 Hardware Maintenance Manual (English)
Page 19
Starting the Lenovo BIOS Setup Utility program To start this procedure, shut down the operating system and turn on the bottom of which operating system you type your password. Press and hold the F1 key then turn off the computer. 2. You must use the Lenovo BIOS Setup Utility program to set any similar settings in the Lenovo BIOS Setup Utility program menu. Using passwords You can be any combination of letters and numbers up to your user name. • Do...
Starting the Lenovo BIOS Setup Utility program To start this procedure, shut down the operating system and turn on the bottom of which operating system you type your password. Press and hold the F1 key then turn off the computer. 2. You must use the Lenovo BIOS Setup Utility program to set any similar settings in the Lenovo BIOS Setup Utility program menu. Using passwords You can be any combination of letters and numbers up to your user name. • Do...

Lenovo IdeaCentre A720 Hardware Maintenance Manual (English)
Page 21
... the Security menu, select Set Power-On Password and press the Enter key. 2. Type the new password, then press the Enter key. Return to enable or disable USB (Universal Serial Bus) functions. If the functions are disabled and cannot be displayed. hard disk drives or the optical disk drive) are disabled, no USB devices can be used to enable or disable user access to the following devices: USB Functions Select whether to the Lenovo BIOS Setup Utility program menu and select the Exit option. 5. Start the Setup Utility program (see "Starting the Setup Utility program...
... the Security menu, select Set Power-On Password and press the Enter key. 2. Type the new password, then press the Enter key. Return to enable or disable USB (Universal Serial Bus) functions. If the functions are disabled and cannot be displayed. hard disk drives or the optical disk drive) are disabled, no USB devices can be used to enable or disable user access to the following devices: USB Functions Select whether to the Lenovo BIOS Setup Utility program menu and select the Exit option. 5. Start the Setup Utility program (see "Starting the Setup Utility program...
Lenovo IdeaCentre A720 Hardware Maintenance Manual (English)
Page 22
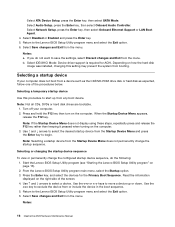
... CD/DVD-ROM drive disk or hard disk as expected, follow one of the screen. 4. Notes: 16 IdeaCentre A720Hardware Maintenance Manual Turn off your computer does not boot from or include the device in the boot sequence. 5. When the Startup Device Menu appears, release the F12 key. From the Lenovo BIOS Setup Utility program main menu, select the Startup option. 3. Select Disabled or Enabled and press the Enter key. 5. Note: Selecting a startup device from the Startup Device Menu does not permanently change the configured startup device sequence...
... CD/DVD-ROM drive disk or hard disk as expected, follow one of the screen. 4. Notes: 16 IdeaCentre A720Hardware Maintenance Manual Turn off your computer does not boot from or include the device in the boot sequence. 5. When the Startup Device Menu appears, release the F12 key. From the Lenovo BIOS Setup Utility program main menu, select the Startup option. 3. Select Disabled or Enabled and press the Enter key. 5. Note: Selecting a startup device from the Startup Device Menu does not permanently change the configured startup device sequence...
Lenovo IdeaCentre A720 Hardware Maintenance Manual (English)
Page 26
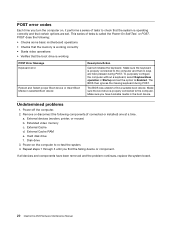
... A720Hardware Maintenance Manual Power-off the computer. 2. a. External Cache d. Hard disk drive f. Make sure the boot drive is operating correctly and that no keys are set the option to Enabled. Remove or disconnect the following : • Checks some basic motherboard operations • Checks that the memory is working correctly • Starts video operations • Verifies that the boot drive is called the Power-On Self-Test, or POST. External Cache RAM e. Power-on , it performs a series of tests is working POST Error Message Keyboard error Reboot and...
... A720Hardware Maintenance Manual Power-off the computer. 2. a. External Cache d. Hard disk drive f. Make sure the boot drive is operating correctly and that no keys are set the option to Enabled. Remove or disconnect the following : • Checks some basic motherboard operations • Checks that the memory is working correctly • Starts video operations • Verifies that the boot drive is called the Power-On Self-Test, or POST. External Cache RAM e. Power-on , it performs a series of tests is working POST Error Message Keyboard error Reboot and...
User Guide V2.0 - IdeaCentre A7 Series
Page 26
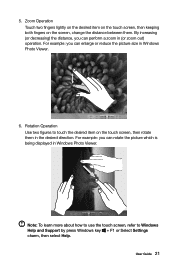
... screen, change the distance between them in Windows Photo Viewer. User Guide 21 Rotation Operation Use two figures to Windows Help and Support by press Windows key + F1 or Select Settings charm, then select Help. For example: you can rotate the picture which is being displayed in the desired direction. For example: you can perform a zoom in Windows Photo Viewer. 6. 5. Zoom Operation Touch two fingers lightly...
... screen, change the distance between them in Windows Photo Viewer. User Guide 21 Rotation Operation Use two figures to Windows Help and Support by press Windows key + F1 or Select Settings charm, then select Help. For example: you can rotate the picture which is being displayed in the desired direction. For example: you can perform a zoom in Windows Photo Viewer. 6. 5. Zoom Operation Touch two fingers lightly...
User Guide V2.0 - IdeaCentre A7 Series
Page 27
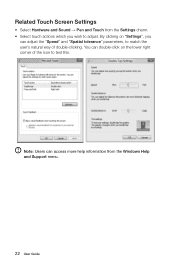
You can double-click on "Settings", you can access more help information from the Settings charm. • Select touch actions which you wish to test this. By clicking on the lower right corner of double-clicking. Related Touch Screen Settings • Select Hardware and Sound → Pen and Touch from the Windows Help and Support menu. 22 User Guide Note: Users can adjust the "Speed" and "Spatial tolerance" parameters, to match the user's natural way of the icon to adjust.
You can double-click on "Settings", you can access more help information from the Settings charm. • Select touch actions which you wish to test this. By clicking on the lower right corner of double-clicking. Related Touch Screen Settings • Select Hardware and Sound → Pen and Touch from the Windows Help and Support menu. 22 User Guide Note: Users can adjust the "Speed" and "Spatial tolerance" parameters, to match the user's natural way of the icon to adjust.
User Guide V2.0 - IdeaCentre A7 Series
Page 42
... modify the products and software programs described in new editions of the manual, at any questions or comments, contact or visit the Lenovo Web site: Service Web site: http://support.lenovo.com User Guide 37 The manuals included with your computer are made periodically to the related contract (if any loss except when caused by installation and operations performed by copyright laws...
... modify the products and software programs described in new editions of the manual, at any questions or comments, contact or visit the Lenovo Web site: Service Web site: http://support.lenovo.com User Guide 37 The manuals included with your computer are made periodically to the related contract (if any loss except when caused by installation and operations performed by copyright laws...


