User Guide
Page 75
Note: If an attachment or subject is added to a text message, the message type will be charged accordingly. (See "Sending Pictures and Videos From Messaging" on page 90.) 2D. To attach attachments, touch Add Attachment for the available options. 7. Review your message and touch Send (You may select additional messaging options by touching More to Picture Message and you will change to add subject, set the message priority urgent, set the callback number, or save it as draft. Touch Done. 6. Contacts 5. Contacts 63
Note: If an attachment or subject is added to a text message, the message type will be charged accordingly. (See "Sending Pictures and Videos From Messaging" on page 90.) 2D. To attach attachments, touch Add Attachment for the available options. 7. Review your message and touch Send (You may select additional messaging options by touching More to Picture Message and you will change to add subject, set the message priority urgent, set the callback number, or save it as draft. Touch Done. 6. Contacts 5. Contacts 63
User Guide
Page 95
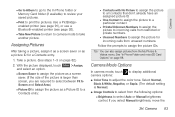
... steps 1-3 on page 88. Camera 83 Camera Ⅲ Go to Album to go to the In Phone folder or Memory Card folder (if available) to review your saved pictures. Ⅲ Print to adjust the color tone. Assigning Pictures After taking a picture, assign it as a screen saver or as a Picture ID to...
... steps 1-3 on page 88. Camera 83 Camera Ⅲ Go to Album to go to the In Phone folder or Memory Card folder (if available) to review your saved pictures. Ⅲ Print to adjust the color tone. Assigning Pictures After taking a picture, assign it as a screen saver or as a Picture ID to...
User Guide
Page 96
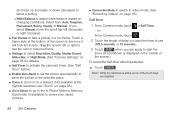
... mode. (See "Recording Videos" on page 85.) ⅷ Go to Album to go to the In Phone folder or Memory Card folder (if available) to review your saved pictures. ⅷ Camcorder Mode to switch to use (Off, 5 seconds, or 10 seconds). 3. Note: While the Self-timer is displayed in a fun frame...
... mode. (See "Recording Videos" on page 85.) ⅷ Go to Album to go to the In Phone folder or Memory Card folder (if available) to review your saved pictures. ⅷ Camcorder Mode to switch to use (Off, 5 seconds, or 10 seconds). 3. Note: While the Self-timer is displayed in a fun frame...
User Guide
Page 98
... display screen as a ringer. Ⅲ Take New Video to return to camcorder mode. Ⅲ Delete to delete the video that was just recorded. Ⅲ Review My Videos to go to the In Phone folder or Memory Card folder (if available) to a selected place. 86 2H. 3. Touch RECORD , or press the.... Ⅲ White Balance to adjust white balance based on page 84.) ⅷ Enable Auto-Send to set the phone automatically to send the video to review your subject. 4. Camera Touch More for more options: Ⅲ Send (only for Video Mail videos) to send the video. (See page 87 for details.)...
... display screen as a ringer. Ⅲ Take New Video to return to camcorder mode. Ⅲ Delete to delete the video that was just recorded. Ⅲ Review My Videos to go to the In Phone folder or Memory Card folder (if available) to a selected place. 86 2H. 3. Touch RECORD , or press the.... Ⅲ White Balance to adjust white balance based on page 84.) ⅷ Enable Auto-Send to set the phone automatically to send the video to review your subject. 4. Camera Touch More for more options: Ⅲ Send (only for Video Mail videos) to send the video. (See page 87 for details.)...
User Guide
Page 99
... on a subject. (See "Zoom" on page 85.) ⅷ Go to Album to go to the In Phone folder or Memory Card folder (if available) to review your saved videos. ⅷ Camera Mode to switch to camera mode. (See "Taking Pictures" on page 82.) Video Settings 1. Touch > Main Menu > Photos & Videos > Other...
... on a subject. (See "Zoom" on page 85.) ⅷ Go to Album to go to the In Phone folder or Memory Card folder (if available) to review your saved videos. ⅷ Camera Mode to switch to camera mode. (See "Taking Pictures" on page 82.) Video Settings 1. Touch > Main Menu > Photos & Videos > Other...
User Guide
Page 100
... mode. ⅷ Assign to assign the picture as a screen saver or picture ID, or the video as a ringer. ⅷ Delete to print selected pictures. To review your stored pictures and videos on the microSD card. You can use a PictBridge-enabled printer (see page 91) or a Bluetooth-enabled printer (see page 92...
... mode. ⅷ Assign to assign the picture as a screen saver or picture ID, or the video as a ringer. ⅷ Delete to print selected pictures. To review your stored pictures and videos on the microSD card. You can use a PictBridge-enabled printer (see page 91) or a Bluetooth-enabled printer (see page 92...
User Guide
Page 111
... your wireless phone number. 2. Sprint Service: The Basics 99 When your voicemail answers, press and enter your wireless phone. Retrieving Your Voicemail Messages You can review your messages directly from your passcode. Dial your wireless phone or from your wireless phone, either speed dial your voicemail answers, press . 3. To display your...
... your wireless phone number. 2. Sprint Service: The Basics 99 When your voicemail answers, press and enter your wireless phone. Retrieving Your Voicemail Messages You can review your messages directly from your passcode. Dial your wireless phone or from your wireless phone, either speed dial your voicemail answers, press . 3. To display your...
User Guide
Page 113
... select Symbols, Emoticons, or Smileys. Touch a desired symbol, emoticon, or smiley and Done . (See "Entering Numbers, Symbols, Emoticons, Smileys and Preset Messages" on page 32.) 5. Review your Contacts. (Qualifying Contacts entries must contain a wireless phone number or an email address.) 3. Enter a message or use the preset messages, symbols, smileys, or emoticons...
... select Symbols, Emoticons, or Smileys. Touch a desired symbol, emoticon, or smiley and Done . (See "Entering Numbers, Symbols, Emoticons, Smileys and Preset Messages" on page 32.) 5. Review your Contacts. (Qualifying Contacts entries must contain a wireless phone number or an email address.) 3. Enter a message or use the preset messages, symbols, smileys, or emoticons...
User Guide
Page 125
... the top of the screen, and then select Add Account. Please consult your service plan for instant access to enable Mail Push. another notice appears, review it and touch Yes again to all your accounts. 1. Launch the application for details. or - From an Email New Message notice (if you have enabled...
... the top of the screen, and then select Add Account. Please consult your service plan for instant access to enable Mail Push. another notice appears, review it and touch Yes again to all your accounts. 1. Launch the application for details. or - From an Email New Message notice (if you have enabled...
User Guide
Page 149
...non-Sprint-approved accessories may violate FCC RF exposure guidelines. In 1993, the Federal Communications Commission (FCC) adopted this updated standard after reviewing the available body of Electrical and Electronics Engineers (IEEE) and the American National Standards Institute (ANSI) joined in safety. Use of safety...because of a variety of factors including its proximity to the relative amount of RF energy absorbed into the head of a user of the LG Rumor TouchTM are tested at or below . The highest reported SAR values of a wireless handset. If you wear a handset on your ...
...non-Sprint-approved accessories may violate FCC RF exposure guidelines. In 1993, the Federal Communications Commission (FCC) adopted this updated standard after reviewing the available body of Electrical and Electronics Engineers (IEEE) and the American National Standards Institute (ANSI) joined in safety. Use of safety...because of a variety of factors including its proximity to the relative amount of RF energy absorbed into the head of a user of the LG Rumor TouchTM are tested at or below . The highest reported SAR values of a wireless handset. If you wear a handset on your ...

