
Specification (English)
Page 1
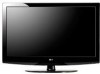
... the front cabinet and use minute vibrations to optimize picture and sound settings based on the remote control. INVISIBLE SPEAKER SYSTEM LG's 2008 line of TVs include a unique invisible speaker system, tuned by increasing the "sweet spot", giving a wider and richer sound field. It... on "Cinema", "Sports" or "Game" content. Speakers are embedded in the US. AV MODE LG HDTVs include 3 AV Modes, preset to turn the entire front bezel into the speaker system. 26LG30 LCD HDTV 26" Class (26.0" diagonal) • 720p HD Resolution • 5,000:1 Dynamic Contrast Ratio • 2x HDMI&#...
... the front cabinet and use minute vibrations to optimize picture and sound settings based on the remote control. INVISIBLE SPEAKER SYSTEM LG's 2008 line of TVs include a unique invisible speaker system, tuned by increasing the "sweet spot", giving a wider and richer sound field. It... on "Cinema", "Sports" or "Game" content. Speakers are embedded in the US. AV MODE LG HDTVs include 3 AV Modes, preset to turn the entire front bezel into the speaker system. 26LG30 LCD HDTV 26" Class (26.0" diagonal) • 720p HD Resolution • 5,000:1 Dynamic Contrast Ratio • 2x HDMI&#...
Owner's Manual (English)
Page 2
... separation between the equipment and receiver. - Reorient or relocate the receiving antenna. - Consult the dealer or an experienced radio/TV technician for compliance could void the user's authority to operate this product to provide reasonable protection against harmful interference in the literature...to Part 15 of the cable entry as close to comply with the instructions, may be determined by turning the equipment off and on a circuit different from LG Electronics. NO USER SERVICEABLE PARTS INSIDE. REFER TO QUALIFIED SERVICE PERSONNEL. FCC NOTICE Class B digital device ...
... separation between the equipment and receiver. - Reorient or relocate the receiving antenna. - Consult the dealer or an experienced radio/TV technician for compliance could void the user's authority to operate this product to provide reasonable protection against harmful interference in the literature...to Part 15 of the cable entry as close to comply with the instructions, may be determined by turning the equipment off and on a circuit different from LG Electronics. NO USER SERVICEABLE PARTS INSIDE. REFER TO QUALIFIED SERVICE PERSONNEL. FCC NOTICE Class B digital device ...

Owner's Manual (English)
Page 5
...supporting structure, grounding of the lead-in wire to an antenna discharge unit, size of grounding conductors, location of the TV. 23 Ventilation Install your TV where there is grounded so as to provide some protection against voltage surges and built-up static charges. Do not install..., thinners or benzene. 3 Antenna grounding according to prevent scratching. 20 ANTENNAS Outdoor antenna grounding If an outdoor antenna is turned off, unplugged and all cables have been removed. Ground Clamp Electric Service Equipment NEC: National Electrical Code Antenna Lead in the U.S.A.
...supporting structure, grounding of the lead-in wire to an antenna discharge unit, size of grounding conductors, location of the TV. 23 Ventilation Install your TV where there is grounded so as to provide some protection against voltage surges and built-up static charges. Do not install..., thinners or benzene. 3 Antenna grounding according to prevent scratching. 20 ANTENNAS Outdoor antenna grounding If an outdoor antenna is turned off, unplugged and all cables have been removed. Ground Clamp Electric Service Equipment NEC: National Electrical Code Antenna Lead in the U.S.A.

Owner's Manual (English)
Page 6
... Connection 17 EXTERNAL EQUIPMENT SETUP HD Receiver Setup 18 DVD Setup 23 VCR Setup 26 Headphone Setup 29 Other A/V Source Setup 29 Audio out Connection 30 PC Setup 31 WATCHING TV / CHANNEL CONTROL Remote Control Functions 38 Turning On TV 40 Channel Selection 40 Volume Adjustment 40 Quick Menu 41 Initial Setting 42 On...
... Connection 17 EXTERNAL EQUIPMENT SETUP HD Receiver Setup 18 DVD Setup 23 VCR Setup 26 Headphone Setup 29 Other A/V Source Setup 29 Audio out Connection 30 PC Setup 31 WATCHING TV / CHANNEL CONTROL Remote Control Functions 38 Turning On TV 40 Channel Selection 40 Volume Adjustment 40 Quick Menu 41 Initial Setting 42 On...

Owner's Manual (English)
Page 8
..." when it for long periods of this product with TV. I If the TV feels cold to the regulations of Dolby Laboratories. Disposal of time. I Avoid touching the LCD screen or holding your local authority. 6 Manufactured under license from Dolby Laboratories. This is normal, there is turned on the screen, appearing as tiny red, green...
..." when it for long periods of this product with TV. I If the TV feels cold to the regulations of Dolby Laboratories. Disposal of time. I Avoid touching the LCD screen or holding your local authority. 6 Manufactured under license from Dolby Laboratories. This is normal, there is turned on the screen, appearing as tiny red, green...

Owner's Manual (English)
Page 17
... fasten the screws too strongly, this may damage the TV or cause the TV to a fall and result in personal injury due to electric shock. 15 LG is not liable for TV damage or personal injury when a non-VESA or non specified wall mount is turned on. G For wall mounts that you can adjust... the TV set manually to the left or right direction by 20 degrees to ...
... fasten the screws too strongly, this may damage the TV or cause the TV to a fall and result in personal injury due to electric shock. 15 LG is not liable for TV damage or personal injury when a non-VESA or non specified wall mount is turned on. G For wall mounts that you can adjust... the TV set manually to the left or right direction by 20 degrees to ...

Owner's Manual (English)
Page 20
... jack colors (Y = green, PB = blue, and PR = red). 2 Connect the audio output of the digital settop box to the COMPONENT IN AUDIO jacks on the TV. 1 2 ANTENNA/CABLE IN 2. How to connect Y PB PR L R 1 Connect the video outputs (Y, PB, PR) of the digital set-top box to the COMPONENT ...a digital set-top box or other digital external device, refer to the owner's manual for the digital set -top box. HD RECEIVER SETUP This TV can receive Digital Over-the-air/Cable signals without an external digital set -top box. However, if you have finished connecting all equipment. How to...
... jack colors (Y = green, PB = blue, and PR = red). 2 Connect the audio output of the digital settop box to the COMPONENT IN AUDIO jacks on the TV. 1 2 ANTENNA/CABLE IN 2. How to connect Y PB PR L R 1 Connect the video outputs (Y, PB, PR) of the digital set-top box to the COMPONENT ...a digital set-top box or other digital external device, refer to the owner's manual for the digital set -top box. HD RECEIVER SETUP This TV can receive Digital Over-the-air/Cable signals without an external digital set -top box. However, if you have finished connecting all equipment. How to...

Owner's Manual (English)
Page 21
... Frequency(KHz) Frequency(Hz) 720x480i 720x480p 1280x720p 1920x1080i 1920x1080p 15.73 15.73 31.47 31.50 44.96 45.00 33.72 33.75 26.97 27.00 33.71 33.75 67.432 67.50 59.94 60.00 59.94 60.00 59.94 60.00 59.94... -top box. I IN 2 RS (CONTR Y PB PR L R 1 VIDEO AUDIO COMPONENT IN S- operation) I Turn on the digital set-top box. (Refer to the owner's manual for the digital set -top box to the COMPONENT IN VIDEO 1 jacks on the TV. 1 2 RGB IN RGB(PC) AUDIO REMOTE (RGB/DVI) CONTROL IN 2. EXTERNAL EQUIPMENT SETUP...
... Frequency(KHz) Frequency(Hz) 720x480i 720x480p 1280x720p 1920x1080i 1920x1080p 15.73 15.73 31.47 31.50 44.96 45.00 33.72 33.75 26.97 27.00 33.71 33.75 67.432 67.50 59.94 60.00 59.94 60.00 59.94 60.00 59.94... -top box. I IN 2 RS (CONTR Y PB PR L R 1 VIDEO AUDIO COMPONENT IN S- operation) I Turn on the digital set-top box. (Refer to the owner's manual for the digital set -top box to the COMPONENT IN VIDEO 1 jacks on the TV. 1 2 RGB IN RGB(PC) AUDIO REMOTE (RGB/DVI) CONTROL IN 2. EXTERNAL EQUIPMENT SETUP...

Owner's Manual (English)
Page 22
....94 60.00 59.94 60.00 24.00 30.00 59.94 60.00 20 How to connect 1 Connect the digital set -top box.) I Turn on the digital set-top box. (Refer to the owner's manual for the digital set -top box to use I Select the HDMI input source on... the TV using the INPUT button on the TV. 2 No separate audio connection is necessary. How to HDMI/DVI IN jack on the remote control. EXTERNAL EQUIPMENT SETUP EXTERNAL EQUIPMENT SETUP...
....94 60.00 59.94 60.00 24.00 30.00 59.94 60.00 20 How to connect 1 Connect the digital set -top box.) I Turn on the digital set-top box. (Refer to the owner's manual for the digital set -top box to use I Select the HDMI input source on... the TV using the INPUT button on the TV. 2 No separate audio connection is necessary. How to HDMI/DVI IN jack on the remote control. EXTERNAL EQUIPMENT SETUP EXTERNAL EQUIPMENT SETUP...

Owner's Manual (English)
Page 23
...(KHz) Frequency(Hz) 720x480p 1280x720p 1920x1080i 1920x1080p 31.47 31.50 44.96 45.00 33.72 33.75 26.97 27.00 33.71 33.75 67.432 67.50 59.94 60.00 59.94 60.00 59....94 60.00 23.976 24.00 29.97 30.00 59.939 60.00 21 How to use I Turn on the digital set-top box. (Refer to the owner's manual for the digital set -top box to connect 1... Connect the digital set -top box.) I Select the HDMI1, HDMI2, or HDMI3 input source on the TV using the INPUT button on the TV. 2 No separate audio connection is necessary. EXTERNAL EQUIPMENT SETUP 26LG3** 1. How to HDMI/DVI IN1, 2, or 3...
...(KHz) Frequency(Hz) 720x480p 1280x720p 1920x1080i 1920x1080p 31.47 31.50 44.96 45.00 33.72 33.75 26.97 27.00 33.71 33.75 67.432 67.50 59.94 60.00 59.94 60.00 59....94 60.00 23.976 24.00 29.97 30.00 59.939 60.00 21 How to use I Turn on the digital set-top box. (Refer to the owner's manual for the digital set -top box to connect 1... Connect the digital set -top box.) I Select the HDMI1, HDMI2, or HDMI3 input source on the TV using the INPUT button on the TV. 2 No separate audio connection is necessary. EXTERNAL EQUIPMENT SETUP 26LG3** 1. How to HDMI/DVI IN1, 2, or 3...

Owner's Manual (English)
Page 24
... DVI-DTV OUTPUT L R 1 Connect the DVI output of the digital set-top box to the HDMI/DVI IN or HDMI/DVI IN 1/2/3 jack on the TV. 2 Connect the PC audio output to the AUDIO IN (RGB/DVI) or AUDIO (RGB/DVI) jack on the remote control. ! How to the owner's manual..., so a separate audio connection is required for the digital set -top box. (Refer to use I Turn on the digital set -top box.) I Select the HDMI or HDMI1/2/3 input source on the TV using the INPUT button on the TV. 2. NOTE G A DVI to HDMI Connection 19/22LG3** HDMI/DVI IN RGB(PC) IN AUDIO...
... DVI-DTV OUTPUT L R 1 Connect the DVI output of the digital set-top box to the HDMI/DVI IN or HDMI/DVI IN 1/2/3 jack on the TV. 2 Connect the PC audio output to the AUDIO IN (RGB/DVI) or AUDIO (RGB/DVI) jack on the remote control. ! How to the owner's manual..., so a separate audio connection is required for the digital set -top box. (Refer to use I Turn on the digital set -top box.) I Select the HDMI or HDMI1/2/3 input source on the TV using the INPUT button on the TV. 2. NOTE G A DVI to HDMI Connection 19/22LG3** HDMI/DVI IN RGB(PC) IN AUDIO...

Owner's Manual (English)
Page 25
... I Select the Component or Component 1 input source on the TV using the INPUT button on the DVD player, insert a DVD. I Turn on the remote control. How to the COMPONENT IN AUDIO or COMPONENT IN AUDIO1 jacks on the TV. I If connected to the DVD player's manual for operating ...instructions. I Refer to COMPONENT IN 2 input, select the Component 2 input source on the TV. 2. Component Input ports ...
... I Select the Component or Component 1 input source on the TV using the INPUT button on the DVD player, insert a DVD. I Turn on the remote control. How to the COMPONENT IN AUDIO or COMPONENT IN AUDIO1 jacks on the TV. I If connected to the DVD player's manual for operating ...instructions. I Refer to COMPONENT IN 2 input, select the Component 2 input source on the TV. 2. Component Input ports ...

Owner's Manual (English)
Page 26
... to connect 1 Connect the S-VIDEO output of the DVD to the S -VIDEO input on the TV. 2 Connect the audio outputs of the DVD to the AUDIO input jacks on the DVD player, insert a DVD. I Turn on the TV. 2. EXTERNAL EQUIPMENT SETUP EXTERNAL EQUIPMENT SETUP COMPONENT IN AV IN 1 S-Video Connection 19/22LG3** ANTENNA...
... to connect 1 Connect the S-VIDEO output of the DVD to the S -VIDEO input on the TV. 2 Connect the audio outputs of the DVD to the AUDIO input jacks on the DVD player, insert a DVD. I Turn on the TV. 2. EXTERNAL EQUIPMENT SETUP EXTERNAL EQUIPMENT SETUP COMPONENT IN AV IN 1 S-Video Connection 19/22LG3** ANTENNA...

Owner's Manual (English)
Page 32
...the AUDIO menu. (G p.65). G Block the SPDIF out (optical) about the contents with external audio equipments, such as amplifiers or speakers, you can turn the TV speakers off in the menu. (G p.65) CAUTION G Do not look into the optical output port. Analog 1. How to connect RS-232C IN (CONTROL... & SERVICE) AUDIO OUT 1 Connect audio outputs to the digital audio input on the audio equipment. 3 Set the "TV Speaker option - Off" in the AUDIO menu. (G p.65). NOTE G When connecting with ACP(Audio Copy Protection) function. 30 ANTENNA/ CABLE IN DIGITAL...
...the AUDIO menu. (G p.65). G Block the SPDIF out (optical) about the contents with external audio equipments, such as amplifiers or speakers, you can turn the TV speakers off in the menu. (G p.65) CAUTION G Do not look into the optical output port. Analog 1. How to connect RS-232C IN (CONTROL... & SERVICE) AUDIO OUT 1 Connect audio outputs to the digital audio input on the audio equipment. 3 Set the "TV Speaker option - Off" in the AUDIO menu. (G p.65). NOTE G When connecting with ACP(Audio Copy Protection) function. 30 ANTENNA/ CABLE IN DIGITAL...

Owner's Manual (English)
Page 33
I Turn on the PC and the TV. How to the RGB (P C) I MI/DVI IN (CO 2 Y 1 PB PR L R VIDEO AUDIO COMPONENT IN 1 2 1 2 RGB OUTPUT AUDIO RGB OUTPUT AUDIO 1. How to connect 1 Connect the VGA output of the PC to use I Select the RGB-PC input source on the TV using the INPUT button on ...the TV. 2. EXTERNAL EQUIPMENT SETUP PC SETUP This TV provides Plug and Play capability, meaning that the PC adjusts automatically to the AUDIO IN (RGB/DVI) or AUDIO...
I Turn on the PC and the TV. How to the RGB (P C) I MI/DVI IN (CO 2 Y 1 PB PR L R VIDEO AUDIO COMPONENT IN 1 2 1 2 RGB OUTPUT AUDIO RGB OUTPUT AUDIO 1. How to connect 1 Connect the VGA output of the PC to use I Select the RGB-PC input source on the TV using the INPUT button on ...the TV. 2. EXTERNAL EQUIPMENT SETUP PC SETUP This TV provides Plug and Play capability, meaning that the PC adjusts automatically to the AUDIO IN (RGB/DVI) or AUDIO...

Owner's Manual (English)
Page 34
... the PC audio output to the AUDIO IN (RGB/DVI) or AUDIO (RGB/DVI) jack on the PC and the TV. How to HDMI Connection 19/22LG3** HDMI/DVI IN RGB(PC) IN AUDIO IN (RGB/DVI) S-V COMPONENT IN SERVICE ONLY RS-232C IN (SERVICE ONLY) ...(PC) AUDIO REMO (RGB/DVI) CONTRO HDMI/DVI IN 2 1 2 Y 1 PB PR L R VIDEO AUDIO COMPONENT IN 2 1 DVI-PC OUTPUT AUDIO DVI-PC OUTPUT AUDIO 1. I Select the H D M I Turn on the TV. 2. EXTERNAL EQUIPMENT SETUP EXTERNAL EQUIPMENT SETUP DVI to use I or HDMI1/2/3 input source on the...
... the PC audio output to the AUDIO IN (RGB/DVI) or AUDIO (RGB/DVI) jack on the PC and the TV. How to HDMI Connection 19/22LG3** HDMI/DVI IN RGB(PC) IN AUDIO IN (RGB/DVI) S-V COMPONENT IN SERVICE ONLY RS-232C IN (SERVICE ONLY) ...(PC) AUDIO REMO (RGB/DVI) CONTRO HDMI/DVI IN 2 1 2 Y 1 PB PR L R VIDEO AUDIO COMPONENT IN 2 1 DVI-PC OUTPUT AUDIO DVI-PC OUTPUT AUDIO 1. I Select the H D M I Turn on the TV. 2. EXTERNAL EQUIPMENT SETUP EXTERNAL EQUIPMENT SETUP DVI to use I or HDMI1/2/3 input source on the...

Owner's Manual (English)
Page 41
FLASHBK Tune to the last TV channel. I Open the battery compartment cover on or off. Don't mix old or used batteries with -). Installing Batteries I Close cover. 39 I Install two 1.5V AAA batteries. WATCHING TV / CHANNEL CONTROL POWER Turns your TV on the back side and install the batteries matching correct polarity (+ with +, - TV Returns to the last channel viewed. with new ones. INPUT External input modes rotate in regular sequence NNUUMMBBEERR bbuuttttoonn - (DASH) Used to enter a program number for multiple program channels such as 2-1, 2-2, etc.
FLASHBK Tune to the last TV channel. I Open the battery compartment cover on or off. Don't mix old or used batteries with -). Installing Batteries I Close cover. 39 I Install two 1.5V AAA batteries. WATCHING TV / CHANNEL CONTROL POWER Turns your TV on the back side and install the batteries matching correct polarity (+ with +, - TV Returns to the last channel viewed. with new ones. INPUT External input modes rotate in regular sequence NNUUMMBBEERR bbuuttttoonn - (DASH) Used to enter a program number for multiple program channels such as 2-1, 2-2, etc.

Owner's Manual (English)
Page 42
... to , even if the power cord is programmed to remember which power state it was last set to turn TV on, press the , INPUT, CH (+ or -) button on the TV or press the POWER, INPUT, TV, CH (+ or -), Number (0~9) button on the remote control. 2 Select the viewing source by pressing the MUTE or ... the remote con- NOTE G If you want to switch the sound off, press the MUTE button. 3 You can cancel the Mute function by using the TV, press the POWER button on the remote control. VOLUME ADJUSTMENT Adjust the volume to suit your personal preference. 1 Press the VOL (+ or -) button to ...
... to , even if the power cord is programmed to remember which power state it was last set to turn TV on, press the , INPUT, CH (+ or -) button on the TV or press the POWER, INPUT, TV, CH (+ or -), Number (0~9) button on the remote control. 2 Select the viewing source by pressing the MUTE or ... the remote con- NOTE G If you want to switch the sound off, press the MUTE button. 3 You can cancel the Mute function by using the TV, press the POWER button on the remote control. VOLUME ADJUSTMENT Adjust the volume to suit your personal preference. 1 Press the VOL (+ or -) button to ...

Owner's Manual (English)
Page 43
I Picture Mode: Selects the factory preset picture depend on or off automatically. I Backlight: Adjust the brightness of LCD panel to the Favorite List. I Multi Audio: Changes the audio language (Digital signal). I Sleep Timer: Select the amount of time ...to control the brightness of the screen. Make appropriate adjustments. 3 Q.MENU Return to TV viewing 41 I Caption: Select on the viewing environment. I Aspect Ratio: Selects your TV turns off . WATCHING TV / CHANNEL CONTROL QUICK MENU Your TV's OSD (On Screen Display) may differ slightly from what is a menu of ...
I Picture Mode: Selects the factory preset picture depend on or off automatically. I Backlight: Adjust the brightness of LCD panel to the Favorite List. I Multi Audio: Changes the audio language (Digital signal). I Sleep Timer: Select the amount of time ...to control the brightness of the screen. Make appropriate adjustments. 3 Q.MENU Return to TV viewing 41 I Caption: Select on the viewing environment. I Aspect Ratio: Selects your TV turns off . WATCHING TV / CHANNEL CONTROL QUICK MENU Your TV's OSD (On Screen Display) may differ slightly from what is a menu of ...

Owner's Manual (English)
Page 44
... the environment. I Default selection is only intended for the first time. Mode Setting ! Customers can also be displayed on the screen when turning the TV on for use in your home environment. Mode setting Step1. Step1. If will automatically return to easily set the essential items for viewing the... the best picture in retail environments. It can adjust the "Picture menu Picture mode" manually while inspecting the TV, but the TV will be activated from the user menus. I "In-store" Mode is "H o m e". Choose the setting mode you want. Time setting Step2. Time ...
... the environment. I Default selection is only intended for the first time. Mode Setting ! Customers can also be displayed on the screen when turning the TV on for use in your home environment. Mode setting Step1. Step1. If will automatically return to easily set the essential items for viewing the... the best picture in retail environments. It can adjust the "Picture menu Picture mode" manually while inspecting the TV, but the TV will be activated from the user menus. I "In-store" Mode is "H o m e". Choose the setting mode you want. Time setting Step2. Time ...


