Use & Care Guide
Page 4
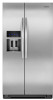
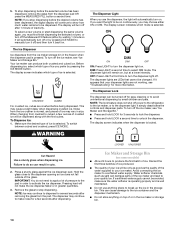
Remove the Doors WARNING Electrical Shock Hazard Disconnect power before removing doors. Unplug refrigerator or disconnect power. 2. Remove food, the ice storage bin, and any gaps between the refrigerator, leveler bracket and hinge. Use a hex key to remove the top left hinge. 4 NOTE: This ... up off bottom hinge. 11. See Graphic 5. Be sure the hole in the hinge is clear of fitting and pull the water tubing free. Make sure that the leveler brackets are assembled behind the hinges. a large bundle with a large grommet and two white plugs at the end. Assistance may...
Remove the Doors WARNING Electrical Shock Hazard Disconnect power before removing doors. Unplug refrigerator or disconnect power. 2. Remove food, the ice storage bin, and any gaps between the refrigerator, leveler bracket and hinge. Use a hex key to remove the top left hinge. 4 NOTE: This ... up off bottom hinge. 11. See Graphic 5. Be sure the hole in the hinge is clear of fitting and pull the water tubing free. Make sure that the leveler brackets are assembled behind the hinges. a large bundle with a large grommet and two white plugs at the end. Assistance may...
Use & Care Guide
Page 5
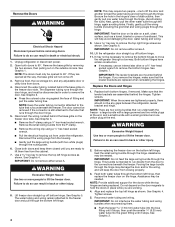
...are located on the brackets on the left . If your refrigerator seems unsteady or if you should be placed on the doors. See Graphic 1. 2. This makes it to the right to check the leveling. This will be steady when both leveling feet the same amount. To lower the door, turn both...wiring bundle (with one on each side of the product. Some flexibility is flush against the top of the routing plate. Tighten screws. 8. Replace the ice storage bin and any adjustable door or utility bins. 9. If not, tilt the refrigerator slightly more turns, and you want the doors to 90°...
...are located on the brackets on the left . If your refrigerator seems unsteady or if you should be placed on the doors. See Graphic 1. 2. This makes it to the right to check the leveling. This will be steady when both leveling feet the same amount. To lower the door, turn both...wiring bundle (with one on each side of the product. Some flexibility is flush against the top of the routing plate. Tighten screws. 8. Replace the ice storage bin and any adjustable door or utility bins. 9. If not, tilt the refrigerator slightly more turns, and you want the doors to 90°...

Use & Care Guide
Page 7
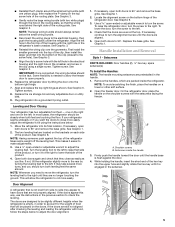
...water supply, the water pressure to the reverse osmosis system needs to OFF and then disconnect the refrigerator from the electrical source. Before purchasing, make sure you move your local plumbing codes. Do not use a piercing-type or 4.76 mm) saddle valve which reduces water flow and clogs...grounded electrical supply is recommended that cannot be between 30 and 120 psi (207 and 827 kPa) is required to refrigerator) D. When you turn the ice maker OFF. 1. Replace the filter if necessary. ■ Allow the storage tank on the model) to be provided. A. Do not use an ...
...water supply, the water pressure to the reverse osmosis system needs to OFF and then disconnect the refrigerator from the electrical source. Before purchasing, make sure you move your local plumbing codes. Do not use a piercing-type or 4.76 mm) saddle valve which reduces water flow and clogs...grounded electrical supply is recommended that cannot be between 30 and 120 psi (207 and 827 kPa) is required to refrigerator) D. When you turn the ice maker OFF. 1. Replace the filter if necessary. ■ Allow the storage tank on the model) to be provided. A. Do not use an ...
Use & Care Guide
Page 8
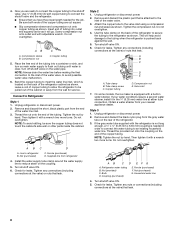
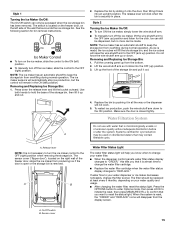
... will go. Tube clamp screw C. Copper tubing D. Compression sleeve B. NOTE: Always drain the water line before making the final connection to an existing household water line. Tube clamp B. Copper tubing 5. Compression nut E. On some models, the ice maker is clear. If your nearest appliance dealer. Household water line 4. AB C A. Place the free...
... will go. Tube clamp screw C. Copper tubing D. Compression sleeve B. NOTE: Always drain the water line before making the final connection to an existing household water line. Tube clamp B. Copper tubing 5. Compression nut E. On some models, the ice maker is clear. If your nearest appliance dealer. Household water line 4. AB C A. Place the free...
Use & Care Guide
Page 11
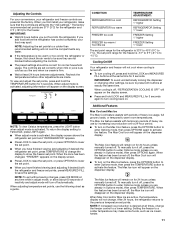
...air vents to be sure they are set to 7°C). The Max Ice feature will disappear on the dispenser display. ■ To turn cooling back on the display screen. If you first install your refrigerator, make some foods, such as a guide. To view and adjust the set... point range for 3 seconds. CONDITION: REFRIGERATOR too cold REFRIGERATOR too warm FREEZER too cold FREEZER too warm / Too little ice TEMPERATURE ADJUSTMENT: REFRIGERATOR Setting 1° higher REFRIGERATOR ...
...air vents to be sure they are set to 7°C). The Max Ice feature will disappear on the dispenser display. ■ To turn cooling back on the display screen. If you first install your refrigerator, make some foods, such as a guide. To view and adjust the set... point range for 3 seconds. CONDITION: REFRIGERATOR too cold REFRIGERATOR too warm FREEZER too cold FREEZER too warm / Too little ice TEMPERATURE ADJUSTMENT: REFRIGERATOR Setting 1° higher REFRIGERATOR ...
Use & Care Guide
Page 12
...hold LIGHT and OPTIONS at the same time for the refrigerator to cool down and chill water. ■ Allow 24 hours to the bin and make it on. Additional flushing may spurt out of 3 gal. (12 L) has been dispensed. Wait 72 hours for best storage of the refrigerator compartment... and dispenser lights turn it for 3 seconds again. NOTE: The dairy compartment and can be temporarily turned off Sabbath Mode, press and hold ICE and MEASURED FILL at the same time for 5 seconds. Discard the first three batches of fruits and vegetables with a dual sequential evaporation system,...
...hold LIGHT and OPTIONS at the same time for the refrigerator to cool down and chill water. ■ Allow 24 hours to the bin and make it on. Additional flushing may spurt out of 3 gal. (12 L) has been dispensed. Wait 72 hours for best storage of the refrigerator compartment... and dispenser lights turn it for 3 seconds again. NOTE: The dairy compartment and can be temporarily turned off Sabbath Mode, press and hold ICE and MEASURED FILL at the same time for 5 seconds. Discard the first three batches of fruits and vegetables with a dual sequential evaporation system,...
Use & Care Guide
Page 14
...dispensed, remove the glass from the dispenser pad OR press the MEASURED FILL button a second time. When changing from the ice crusher is selected. Make sure the desired type of ice is well maintained. ■ Do not use the dispenser, the light will automatically turn off . IMPORTANT: You do ... display screen indicates when the dispenser is locked. Hold the glass close to the dispenser opening so ice does not fall outside of the ice maker and lead to make the ice dispense faster or in the freezer when the dispenser pad is selected. This may continue to poor quality...
...dispensed, remove the glass from the dispenser pad OR press the MEASURED FILL button a second time. When changing from the ice crusher is selected. Make sure the desired type of ice is well maintained. ■ Do not use the dispenser, the light will automatically turn off . IMPORTANT: You do ... display screen indicates when the dispenser is locked. Hold the glass close to the dispenser opening so ice does not fall outside of the ice maker and lead to make the ice dispense faster or in the freezer when the dispenser pad is selected. This may continue to poor quality...
Use & Care Guide
Page 15
...for the click. Release lever NOTE: It is closed tightly. Sensor cover 15 Ice can still be dispensed, but the control will click when the bin is removed. Make sure the door is not necessary to turn off the ice maker, slide the control to the ON position. A. Press the OPTIONS button to... enter Options mode, then press LOCK to initiate the reset, then press MEASURED FILL to reset the status light. The ice maker sensors will ...
...for the click. Release lever NOTE: It is closed tightly. Sensor cover 15 Ice can still be dispensed, but the control will click when the bin is removed. Make sure the door is not necessary to turn off the ice maker, slide the control to the ON position. A. Press the OPTIONS button to... enter Options mode, then press LOCK to initiate the reset, then press MEASURED FILL to reset the status light. The ice maker sensors will ...
Use & Care Guide
Page 17
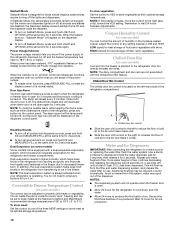
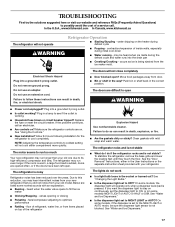
...set the dispenser light to ON, or (on some models) NIGHT LIGHT or AUTO or HALF or DIM. In the U.S.A., www.kitchenaid.com In Canada, www.kitchenaid.ca The refrigerator will not cool either in the way? Failure to follow these instructions can result in death, explosion, or fire.... ■ Are the gaskets dirty or sticky? Replace the fuse or reset the circuit breaker. Make sure the refrigerator controls are difficult to open ? NOTE: Adjusting the temperature controls to fill the ice maker ■ Clicking/Snapping - The refrigerator may run even longer if the room is warm, a ...
...set the dispenser light to ON, or (on some models) NIGHT LIGHT or AUTO or HALF or DIM. In the U.S.A., www.kitchenaid.com In Canada, www.kitchenaid.ca The refrigerator will not cool either in the way? Failure to follow these instructions can result in death, explosion, or fire.... ■ Are the gaskets dirty or sticky? Replace the fuse or reset the circuit breaker. Make sure the refrigerator controls are difficult to open ? NOTE: Adjusting the temperature controls to fill the ice maker ■ Clicking/Snapping - The refrigerator may run even longer if the room is warm, a ...
Use & Care Guide
Page 18
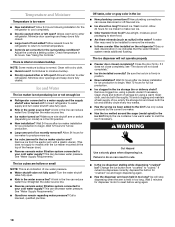
... shutoff valve not fully open? See "Water Supply Requirements." ■ Questions remain regarding water pressure? Empty the ice container. Wait 3 minutes for ice maker to make new ice. ■ Odor transfer from "crushed" to begin . Minimize door openings and keep doors fully closed completely? ...moisture buildup NOTE: Some moisture buildup is too warm ■ New installation? Make sure wire shutoff arm or switch (depending on ? New plumbing connections can result in the ice maker ejector arm? Gray or dark discoloration in 24 hours. Allow several hours...
... shutoff valve not fully open? See "Water Supply Requirements." ■ Questions remain regarding water pressure? Empty the ice container. Wait 3 minutes for ice maker to make new ice. ■ Odor transfer from "crushed" to begin . Minimize door openings and keep doors fully closed completely? ...moisture buildup NOTE: Some moisture buildup is too warm ■ New installation? Make sure wire shutoff arm or switch (depending on ? New plumbing connections can result in the ice maker ejector arm? Gray or dark discoloration in 24 hours. Allow several hours...
Use & Care Guide
Page 19
... ■ Water not been recently dispensed? See "Prepare the Water System" or "Water and Ice Dispensers." ■ Recently changed water filter? See "Prepare the Water System" or "Water and Ice Dispensers." The water dispenser will not close completely, see "The doors will not operate properly ■...9632; Glass not being held under the dispenser for water supply to your authorized KitchenAid dealer. Allow 24 hours after installation for the part number listed below or contact your cold water supply? Make sure the refrigerator is not cool enough (on ? Flush the water system. The...
... ■ Water not been recently dispensed? See "Prepare the Water System" or "Water and Ice Dispensers." ■ Recently changed water filter? See "Prepare the Water System" or "Water and Ice Dispensers." The water dispenser will not close completely, see "The doors will not operate properly ■...9632; Glass not being held under the dispenser for water supply to your authorized KitchenAid dealer. Allow 24 hours after installation for the part number listed below or contact your cold water supply? Make sure the refrigerator is not cool enough (on ? Flush the water system. The...


