Use & Care Guide
Page 1
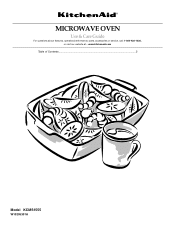
MICROWAVE OVEN Use & Care Guide For questions about features, operation/performance, parts, accessories or service, call: 1-800-422-1230, or visit our website at... www.kitchenaid.com Table of Contents...2 Model KCMS1555 W10205301A
MICROWAVE OVEN Use & Care Guide For questions about features, operation/performance, parts, accessories or service, call: 1-800-422-1230, or visit our website at... www.kitchenaid.com Table of Contents...2 Model KCMS1555 W10205301A

Use & Care Guide
Page 2
... 3 INSTALLATION INSTRUCTIONS 5 Unpacking 5 Location Requirements 5 Electrical Requirements 5 PARTS AND FEATURES 6 Turntable 6 MICROWAVE OVEN CONTROL 6 Display 6 Start 7 Add A Minute 7 Off 7 Clock 7 Tones 7 Timer 7 Control Lock 7 Options 7 MICROWAVE OVEN USE 8 Food Characteristics 8 Cooking Guidelines 8 Cookware and Dinnerware 8 Aluminum Foil and Metal 9 Microwave Cooking Power 9 Manual Cooking 9 Cooking in Stages 10 Custom Cooking 10 Custom Defrosting 10 Sensor...
... 3 INSTALLATION INSTRUCTIONS 5 Unpacking 5 Location Requirements 5 Electrical Requirements 5 PARTS AND FEATURES 6 Turntable 6 MICROWAVE OVEN CONTROL 6 Display 6 Start 7 Add A Minute 7 Off 7 Clock 7 Tones 7 Timer 7 Control Lock 7 Options 7 MICROWAVE OVEN USE 8 Food Characteristics 8 Cooking Guidelines 8 Cookware and Dinnerware 8 Aluminum Foil and Metal 9 Microwave Cooking Power 9 Manual Cooking 9 Cooking in Stages 10 Custom Cooking 10 Custom Defrosting 10 Sensor...

Use & Care Guide
Page 3
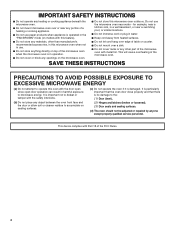
... words mean: DANGER You can be killed or seriously injured if you don't follow instructions. IMPORTANT SAFETY INSTRUCTIONS When using the microwave oven. ■ Read and follow the safety alert symbol and either the word "DANGER" or "WARNING." Do not overcook food.... basic safety precautions should not be inserted in the microwave oven as described in this section and in the provided Installation Instructions. ■ Install or locate the microwave oven only in the microwave oven. Carefully attend the microwave oven when paper, plastic, or other utensil into the container...
... words mean: DANGER You can be killed or seriously injured if you don't follow instructions. IMPORTANT SAFETY INSTRUCTIONS When using the microwave oven. ■ Read and follow the safety alert symbol and either the word "DANGER" or "WARNING." Do not overcook food.... basic safety precautions should not be inserted in the microwave oven as described in this section and in the provided Installation Instructions. ■ Install or locate the microwave oven only in the microwave oven. Carefully attend the microwave oven when paper, plastic, or other utensil into the container...
Use & Care Guide
Page 4
...edge of table or counter. ■ Do not mount over or near any portion of a heating or cooking appliance. ■ Do not use the microwave oven near a swimming pool, or similar locations. ■ Do not immerse cord or plug in water. ■ Keep cord away from heated surfaces. &#...9632; Do not store any materials, other part of the microwave oven with Part 18 of the microwave oven. This will cause overheating of the FCC Rules. 4 IMPORTANT SAFETY INSTRUCTIONS ■ Do not operate any heating or cooking appliance beneath...
...edge of table or counter. ■ Do not mount over or near any portion of a heating or cooking appliance. ■ Do not use the microwave oven near a swimming pool, or similar locations. ■ Do not immerse cord or plug in water. ■ Keep cord away from heated surfaces. &#...9632; Do not store any materials, other part of the microwave oven with Part 18 of the microwave oven. This will cause overheating of the FCC Rules. 4 IMPORTANT SAFETY INSTRUCTIONS ■ Do not operate any heating or cooking appliance beneath...
Use & Care Guide
Page 5
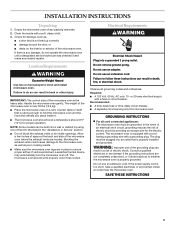
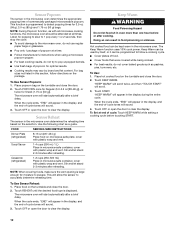
...to ensure proper airflow. The plug must be built into an outlet that is properly installed and grounded. Empty the microwave oven of the microwave oven where the exhaust vents are in the "Assistance or Service" section. ■ Do not block the exhaust vents...only, 15- Consult a qualified electrician or serviceman if the grounding instructions are blocked, a sensitive thermal device may automatically turn the microwave oven off. SAVE THESE INSTRUCTIONS 5 Location Requirements WARNING Excessive Weight Hazard Use two or more people to follow these instructions can result in...
...to ensure proper airflow. The plug must be built into an outlet that is properly installed and grounded. Empty the microwave oven of the microwave oven where the exhaust vents are in the "Assistance or Service" section. ■ Do not block the exhaust vents...only, 15- Consult a qualified electrician or serviceman if the grounding instructions are blocked, a sensitive thermal device may automatically turn the microwave oven off. SAVE THESE INSTRUCTIONS 5 Location Requirements WARNING Excessive Weight Hazard Use two or more people to follow these instructions can result in...

Use & Care Guide
Page 6
...FEATURES This manual may differ slightly from the illustrations in this manual. A B C D E MICROWAVE OVEN CONTROL F G A. For best cooking results, do not operate the microwave oven without having the turntable in the center of the turntable bottom between the three spokes of the parts...lock system G. Cooking guide label I F. Turntable B. Fit the raised, curved lines in place. When the microwave oven is first supplied to help cook food more evenly. Microwave oven light E. See "Assistance or Service" to reorder any other time, a power failure has occurred. If the...
...FEATURES This manual may differ slightly from the illustrations in this manual. A B C D E MICROWAVE OVEN CONTROL F G A. For best cooking results, do not operate the microwave oven without having the turntable in the center of the turntable bottom between the three spokes of the parts...lock system G. Cooking guide label I F. Turntable B. Fit the raised, curved lines in place. When the microwave oven is first supplied to help cook food more evenly. Microwave oven light E. See "Assistance or Service" to reorder any other time, a power failure has occurred. If the...
Use & Care Guide
Page 7
...cooking is touched. Touching START will resume the preset cycle. Each additional touch adds 1 minute of -Timer tones will also start or stop the microwave oven. The ADD A MINUTE pad will sound. 4. See "Options" section. These tones indicate the following: One tone ■ Valid entry Two tones... French 7 indicator (no indicator for approximately 4 seconds until 2 tones sound and "LOCKED" appears in the display. To Set Clock: The microwave oven and Timer must be hidden using Options. Add A Minute Cook time may be added by repeating the above steps. Touch CLOCK. Repeat to...
...cooking is touched. Touching START will resume the preset cycle. Each additional touch adds 1 minute of -Timer tones will also start or stop the microwave oven. The ADD A MINUTE pad will sound. 4. See "Options" section. These tones indicate the following: One tone ■ Valid entry Two tones... French 7 indicator (no indicator for approximately 4 seconds until 2 tones sound and "LOCKED" appears in the display. To Set Clock: The microwave oven and Timer must be hidden using Options. Add A Minute Cook time may be added by repeating the above steps. Touch CLOCK. Repeat to...

Use & Care Guide
Page 8
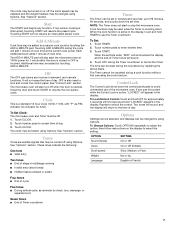
..., wood, gourds, paper, including brown paper bags and newspaper, should not be dried in microwave oven. ■ Paraffin wax will not melt in the microwave oven because it does not absorb microwaves. ■ Use oven mitts or pot holders when removing containers from microwave oven. ■ Do not overcook potatoes. Check for 5 minutes. China, Earthenware Follow manufacturer's recommendations...
..., wood, gourds, paper, including brown paper bags and newspaper, should not be dried in microwave oven. ■ Paraffin wax will not melt in the microwave oven because it does not absorb microwaves. ■ Use oven mitts or pot holders when removing containers from microwave oven. ■ Do not overcook potatoes. Check for 5 minutes. China, Earthenware Follow manufacturer's recommendations...
Use & Care Guide
Page 9
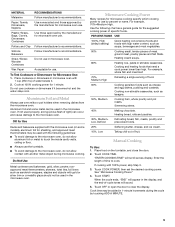
...Enter the length of meat, ground meat, poultry pieces and fish fillets. Touch OFF or open the door to the microwave oven. Cook time may be used in microwave oven. Plastic: Wraps, Bags, Covers, Dinnerware, Containers Use those approved by touching ADD A MINUTE. 9 Use the following... content, such as soups, beverages and most vegetables. 90% Cooking small, tender pieces of time to the microwave oven, do not allow contact with the microwave oven (on the turntable, and close the door. 2. Pottery and Clay Follow manufacturer's recommendations. Wax Paper Acceptable ...
...Enter the length of meat, ground meat, poultry pieces and fish fillets. Touch OFF or open the door to the microwave oven. Cook time may be used in microwave oven. Plastic: Wraps, Bags, Covers, Dinnerware, Containers Use those approved by touching ADD A MINUTE. 9 Use the following... content, such as soups, beverages and most vegetables. 90% Cooking small, tender pieces of time to the microwave oven, do not allow contact with the microwave oven (on the turntable, and close the door. 2. Pottery and Clay Follow manufacturer's recommendations. Wax Paper Acceptable ...
Use & Care Guide
Page 10
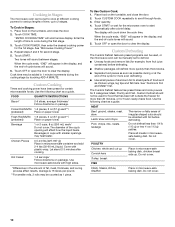
... Separate food pieces as soon as possible during the first stage. 3. Let stand 2-3 minutes after a brief delay. Touch START or wait for the microwave oven to scroll through foods. 3. Place food on the turntable, and close the door. 2. The display will affect how the liquid heats. Touch OFF or...for more than 20 minutes, or for frozen ready-made food. Place all meats in Stages: 1. Do not cover. Cooking in Stages The microwave oven can be set to defrost. ■ Unwrap foods and remove lids (for example, from fruit juice containers) before defrosting. To Cook in microwavesafe...
... Separate food pieces as soon as possible during the first stage. 3. Let stand 2-3 minutes after a brief delay. Touch START or wait for the microwave oven to scroll through foods. 3. Place food on the turntable, and close the door. 2. The display will affect how the liquid heats. Touch OFF or...for more than 20 minutes, or for frozen ready-made food. Place all meats in Stages: 1. Do not cover. Cooking in Stages The microwave oven can be set to defrost. ■ Unwrap foods and remove lids (for example, from fruit juice containers) before defrosting. To Cook in microwavesafe...
Use & Care Guide
Page 11
...food. Many sensor cycles require the covering of the cooking container should be dry. ■ The room temperature should be plugged in the microwave oven detects humidity released from the food as a guide. The loose-fitting lid allows enough steam to escape to resume defrosting. FOOD Fresh ... vent. 0.5-2 cups (125-500 mL) dry rice (Use medium or long grain rice.)/ Follow measurements on package for the Fish setting. 3. The microwave oven will sound. 3. Touch CUSTOM DEFROST. Touch OFF or open the door to clear the display. 11 Sensor Cooking A sensor in for defrosting Meat. ...
...food. Many sensor cycles require the covering of the cooking container should be dry. ■ The room temperature should be plugged in the microwave oven detects humidity released from the food as a guide. The loose-fitting lid allows enough steam to escape to resume defrosting. FOOD Fresh ... vent. 0.5-2 cups (125-500 mL) dry rice (Use medium or long grain rice.)/ Follow measurements on package for the Fish setting. 3. The microwave oven will sound. 3. Touch CUSTOM DEFROST. Touch OFF or open the door to clear the display. 11 Sensor Cooking A sensor in for defrosting Meat. ...
Use & Care Guide
Page 12
...is displayed. NOTE: During Popcorn function, as with plastic wrap and vent. Casserole (refrigerated) 1-2 cups (250-500 mL) Place in the microwave oven. Hot cooked food can result in this section, follow a cooking cycle. ■ Cover plates of -cycle tones will appear in the display,... selection. Place food on the package. Listen for 3.5-oz (99 g), 3.0-oz (85 g) and 1.75-oz (50 g) bags. The microwave oven will start automatically after reheating. For bag sizes not listed in food poisoning or sickness. Touch OFF or open the door to accurately determine reheating...
...is displayed. NOTE: During Popcorn function, as with plastic wrap and vent. Casserole (refrigerated) 1-2 cups (250-500 mL) Place in the microwave oven. Hot cooked food can result in this section, follow a cooking cycle. ■ Cover plates of -cycle tones will appear in the display,... selection. Place food on the package. Listen for 3.5-oz (99 g), 3.0-oz (85 g) and 1.75-oz (50 g) bags. The microwave oven will start automatically after reheating. For bag sizes not listed in food poisoning or sickness. Touch OFF or open the door to accurately determine reheating...
Use & Care Guide
Page 13
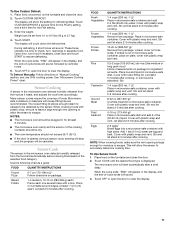
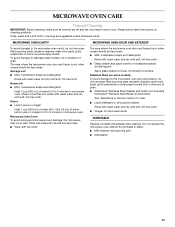
... soil ■ Mild, nonabrasive soaps and detergents: Heat 1 cup (250 mL) of grain. ■ KitchenAid® Stainless Steel Cleaner and Polish (not included) KitchenAid® Stainless Steel Wipes (not included): See "Assistance or Service" section to the microwave oven cavity, do not use soapfilled scouring pads, abrasive cleaners, steel-wool pads, gritty washcloths or...
... soil ■ Mild, nonabrasive soaps and detergents: Heat 1 cup (250 mL) of grain. ■ KitchenAid® Stainless Steel Cleaner and Polish (not included) KitchenAid® Stainless Steel Wipes (not included): See "Assistance or Service" section to the microwave oven cavity, do not use soapfilled scouring pads, abrasive cleaners, steel-wool pads, gritty washcloths or...
Use & Care Guide
Page 14
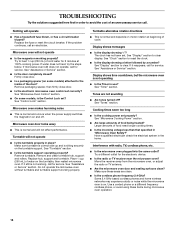
...depends on the turntable support. Turntable alternates rotation directions ■ This is sitting securely on motor rotation at 100% cooking power. Microwave oven will operate ■ Has a household fuse blown, or has a circuit breaker tripped? See "Assistance or Service" section. ■... GHz-based cordless phones and home wireless networks may experience static or noise while the microwave oven is the Control Lock set correctly? If microwave oven still does not operate, call . See "Microwave Oven Control" section. ■ On some models) attached to reset the clock. ■...
...depends on the turntable support. Turntable alternates rotation directions ■ This is sitting securely on motor rotation at 100% cooking power. Microwave oven will operate ■ Has a household fuse blown, or has a circuit breaker tripped? See "Assistance or Service" section. ■... GHz-based cordless phones and home wireless networks may experience static or noise while the microwave oven is the Control Lock set correctly? If microwave oven still does not operate, call . See "Microwave Oven Control" section. ■ On some models) attached to reset the clock. ■...

Use & Care Guide
Page 15
... / Stainless KEBI171D KEBS177D 30" (76 cm) MK1150XVQ / White MK1150XVB / Black MK1150XVS / Stainless KEBI101D KEBS107D *Approved, electric single microwave ovens only 15 When calling, please know the purchase date and the complete model and serial number of appliances. ■ Installation information. ...Purpose Appliance Cleaner Part Number 31682 KITCHENAID® Stainless Steel Cleaner and Polish Part Number 4396920 KITCHENAID® Stainless Steel Wipes Part Number 8212510 Built-In Kits This countertop microwave oven can write to KitchenAid with the same precision used to...
... / Stainless KEBI171D KEBS177D 30" (76 cm) MK1150XVQ / White MK1150XVB / Black MK1150XVS / Stainless KEBI101D KEBS107D *Approved, electric single microwave ovens only 15 When calling, please know the purchase date and the complete model and serial number of appliances. ■ Installation information. ...Purpose Appliance Cleaner Part Number 31682 KITCHENAID® Stainless Steel Cleaner and Polish Part Number 4396920 KITCHENAID® Stainless Steel Wipes Part Number 8212510 Built-In Kits This countertop microwave oven can write to KitchenAid with the same precision used to...

Use & Care Guide
Page 16
... determine if another warranty applies. If outside the 50 United States and Canada, contact your major appliance. In Canada, call 1-800-422-1230. KITCHENAID® BUILT-IN OVEN & MICROWAVE WARRANTY LIMITED WARRANTY For one year from the date of purchase, when this major appliance is operated and maintained according to instructions attached to...
... determine if another warranty applies. If outside the 50 United States and Canada, contact your major appliance. In Canada, call 1-800-422-1230. KITCHENAID® BUILT-IN OVEN & MICROWAVE WARRANTY LIMITED WARRANTY For one year from the date of purchase, when this major appliance is operated and maintained according to instructions attached to...
Dimension Guide
Page 1
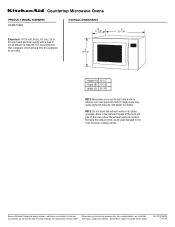
... and specifications without notice. NOTE: Do not block the exhaust vents or air intake openings. Ref. W10165700 01-18-08 ® Countertop Microwave Ovens PRODUCT MODEL NUMBERS KCMS1555S OVERALL DIMENSIONS B 17-1/8" Electrical: A 120-volt, 60 Hz, AC-only, 15 or 20 amp fused electrical.... Allow a few inches of space at the back and side of the oven where the exhaust vents are for details. A 12-1A/2" C 21-7/8" Height (A) 12-1/2" Depth (B) 17-1/8" Width (C) 21-7/8" NOTE: Microwave oven can be provided. Instructions packed with a fuse or circuit breaker is recommended ...
... and specifications without notice. NOTE: Do not block the exhaust vents or air intake openings. Ref. W10165700 01-18-08 ® Countertop Microwave Ovens PRODUCT MODEL NUMBERS KCMS1555S OVERALL DIMENSIONS B 17-1/8" Electrical: A 120-volt, 60 Hz, AC-only, 15 or 20 amp fused electrical.... Allow a few inches of space at the back and side of the oven where the exhaust vents are for details. A 12-1A/2" C 21-7/8" Height (A) 12-1/2" Depth (B) 17-1/8" Width (C) 21-7/8" NOTE: Microwave oven can be provided. Instructions packed with a fuse or circuit breaker is recommended ...
Installation Guide
Page 1
...the safety alert symbol and either the word "DANGER" or "WARNING." W10197613A All safety messages will tell you don't follow instructions. MICROWAVE OVEN BUILT-IN TRIM KIT INSTALLATION INSTRUCTIONS Built-In Trim Kit Models MK1150XV, MK1154XV, MK1157XV UL listed for use over built-in this ...233;rieur 7 Installation de la bride antibasculement 7 Mise en place du four à micro-ondes 8 Installation du cadre de garniture 8 MICROWAVE OVEN SAFETY Your safety and the safety of injury, and tell you and others are not followed. Always read and obey all safety messages. ...
...the safety alert symbol and either the word "DANGER" or "WARNING." W10197613A All safety messages will tell you don't follow instructions. MICROWAVE OVEN BUILT-IN TRIM KIT INSTALLATION INSTRUCTIONS Built-In Trim Kit Models MK1150XV, MK1154XV, MK1157XV UL listed for use over built-in this ...233;rieur 7 Installation de la bride antibasculement 7 Mise en place du four à micro-ondes 8 Installation du cadre de garniture 8 MICROWAVE OVEN SAFETY Your safety and the safety of injury, and tell you and others are not followed. Always read and obey all safety messages. ...
Installation Guide
Page 3
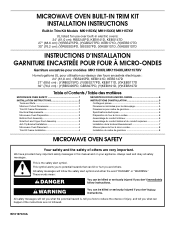
...duct B. WARNING: Improper use an extension cord. SAVE THESE INSTRUCTIONS Microwave Oven Preparation 1. Fasten bottom bracket to upper duct: Insert projecting tabs of microwave oven, and attach the duct assembly to whether the microwave oven is properly installed and grounded. Tabs of electric shock by providing...instructions are attached. 2. Do not use of the grounding plug can result in side duct NOTE: Remove any loose items inside microwave oven. Peel off backing of electric shock. Press down firmly on left side. 3. Install bottom duct with a grounding plug. Align...
...duct B. WARNING: Improper use an extension cord. SAVE THESE INSTRUCTIONS Microwave Oven Preparation 1. Fasten bottom bracket to upper duct: Insert projecting tabs of microwave oven, and attach the duct assembly to whether the microwave oven is properly installed and grounded. Tabs of electric shock by providing...instructions are attached. 2. Do not use of the grounding plug can result in side duct NOTE: Remove any loose items inside microwave oven. Peel off backing of electric shock. Press down firmly on left side. 3. Install bottom duct with a grounding plug. Align...
Installation Guide
Page 4
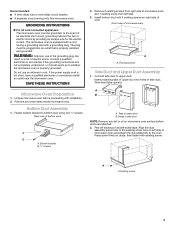
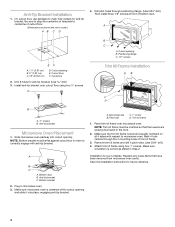
...NOTE: Trim kit frame must be oriented so that have been removed from microwave oven cavity. A B C A. Cutout opening E. Cutout floor F. Drill 2 holes for future reference. 4 Slide microwave oven partway into place, engaging anti-tip bracket. Make sure orientation is level and...Centerline 2. Bottom duct B. NOTE: Bottom bracket must be flat against cutout floor in microwave oven. 3. A. A B C A. Make sure microwave oven is now complete. Place trim kit frame over microwave oven. Attach trim kit frame using two ¹⁄₂" screws. Anti-Tip Bracket ...
...NOTE: Trim kit frame must be oriented so that have been removed from microwave oven cavity. A B C A. Cutout opening E. Cutout floor F. Drill 2 holes for future reference. 4 Slide microwave oven partway into place, engaging anti-tip bracket. Make sure orientation is level and...Centerline 2. Bottom duct B. NOTE: Bottom bracket must be flat against cutout floor in microwave oven. 3. A. A B C A. Make sure microwave oven is now complete. Place trim kit frame over microwave oven. Attach trim kit frame using two ¹⁄₂" screws. Anti-Tip Bracket ...


