Use & Care Guide
Page 2
...PARTS AND FEATURES 5 Turntable 5 MICROWAVE OVEN CONTROL 5 Display 5 Start 6 Cancel/Off 6 Add a Minute 6 Dial 6 Select 6 Clock 6 Tones 6 Demo Mode 6 Control Lock 7 Cooling Fan 7 MICROWAVE OVEN USE 7 Food Characteristics 7 Cooking Guidelines 7 Cookware and Dinnerware 8 Aluminum Foil and Metal 8 Microwave Cooking Power 8 Cook Time Set 9 Doneness 9 Meal Prep Cook 9 Meal Prep Reheat 10 Meal Prep Defrost 10 Sensor Cooking 11 One Touch Sensor Cooking 11 Keep Warm 12 MICROWAVE OVEN CARE 13 General Cleaning 13 TROUBLESHOOTING 14 ASSISTANCE OR SERVICE 15 Replacement Parts...
...PARTS AND FEATURES 5 Turntable 5 MICROWAVE OVEN CONTROL 5 Display 5 Start 6 Cancel/Off 6 Add a Minute 6 Dial 6 Select 6 Clock 6 Tones 6 Demo Mode 6 Control Lock 7 Cooling Fan 7 MICROWAVE OVEN USE 7 Food Characteristics 7 Cooking Guidelines 7 Cookware and Dinnerware 8 Aluminum Foil and Metal 8 Microwave Cooking Power 8 Cook Time Set 9 Doneness 9 Meal Prep Cook 9 Meal Prep Reheat 10 Meal Prep Defrost 10 Sensor Cooking 11 One Touch Sensor Cooking 11 Keep Warm 12 MICROWAVE OVEN CARE 13 General Cleaning 13 TROUBLESHOOTING 14 ASSISTANCE OR SERVICE 15 Replacement Parts...
Use & Care Guide
Page 3
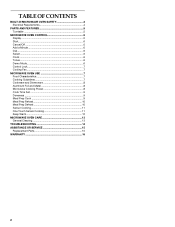
... the specific "PRECAUTIONS TO AVOID POSSIBLE EXPOSURE TO EXCESSIVE MICROWAVE ENERGY" found in this manual. See "GROUNDING INSTRUCTIONS" found in this section and in the provided Installation Instructions. ■ Install or locate the microwave oven only in the microwave oven. ■ Use the microwave oven only for its intended use the cavity for example, closed , turn oven off, and disconnect the power cord, or shut off the pad and touch electrical parts involving...
... the specific "PRECAUTIONS TO AVOID POSSIBLE EXPOSURE TO EXCESSIVE MICROWAVE ENERGY" found in this manual. See "GROUNDING INSTRUCTIONS" found in this section and in the provided Installation Instructions. ■ Install or locate the microwave oven only in the microwave oven. ■ Use the microwave oven only for its intended use the cavity for example, closed , turn oven off, and disconnect the power cord, or shut off the pad and touch electrical parts involving...

Use & Care Guide
Page 4
... part of electric shock by anyone except properly qualified service personnel. Do not use the microwave oven near a swimming pool, or similar locations. ■ Do not immerse cord or plug in water. ■ Keep cord away from heated surfaces. ■ Do not cover or block any openings on the microwave oven. ■ Do not let cord hang over edge of table or counter. ■ Do not mount over...
... part of electric shock by anyone except properly qualified service personnel. Do not use the microwave oven near a swimming pool, or similar locations. ■ Do not immerse cord or plug in water. ■ Keep cord away from heated surfaces. ■ Do not cover or block any openings on the microwave oven. ■ Do not let cord hang over edge of table or counter. ■ Do not mount over...

Use & Care Guide
Page 5
...This manual may have purchased may cover several different models. A B C Turntable L D K J E F I . Door lock system D. Cooking guide label J. Turntable B. Dial Display When power is not in use , the display shows cooking power, quantities, weights and/or prompts. Touch CANCEL/OFF to reorder any other time, a power failure has occurred. When the microwave oven is first supplied to help cook food more evenly. The appearance of day. Glass turntable F. Frame K. The rollers on the support. Control panel C. Door handle H. Support C. To Install: The...
...This manual may have purchased may cover several different models. A B C Turntable L D K J E F I . Door lock system D. Cooking guide label J. Turntable B. Dial Display When power is not in use , the display shows cooking power, quantities, weights and/or prompts. Touch CANCEL/OFF to reorder any other time, a power failure has occurred. When the microwave oven is first supplied to help cook food more evenly. The appearance of day. Glass turntable F. Frame K. The rollers on the support. Control panel C. Door handle H. Support C. To Install: The...

Use & Care Guide
Page 6
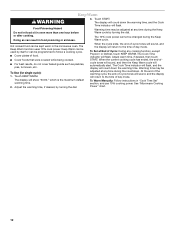
... set cook time and cook power, select food type and amount/weight, and adjust doneness. If you are audible signals that has a remaining cook time of 10 minutes. Touch and hold COOK for 5 seconds. Tones Tones are changing the time, the current set , functions can be changed. If sensor cooking is interrupted, touching START will be started if the microwave oven door has been closed . If sensor cooking is entered. During a manual cooking cycle, each use the microwave oven. See "Clock...
... set cook time and cook power, select food type and amount/weight, and adjust doneness. If you are audible signals that has a remaining cook time of 10 minutes. Touch and hold COOK for 5 seconds. Tones Tones are changing the time, the current set , functions can be changed. If sensor cooking is interrupted, touching START will be started if the microwave oven door has been closed . If sensor cooking is entered. During a manual cooking cycle, each use the microwave oven. See "Clock...
Use & Care Guide
Page 7
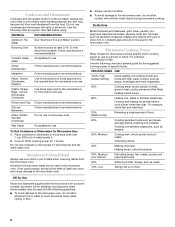
... of time if necessary. Starting Temperature Room temperature foods will heat faster than refrigerated foods, and refrigerated foods will cook more quickly than frozen foods. Repeat to center. Size and Shape Smaller pieces of food will heat faster than larger pieces, and uniformly shaped foods cook more food heated at one corner to provide an opening to vent steam. Control Lock The Control Lock shuts down the control panel pads to avoid unintended use a fork...
... of time if necessary. Starting Temperature Room temperature foods will heat faster than refrigerated foods, and refrigerated foods will cook more quickly than frozen foods. Repeat to center. Size and Shape Smaller pieces of food will heat faster than larger pieces, and uniformly shaped foods cook more food heated at one corner to provide an opening to vent steam. Control Lock The Control Lock shuts down the control panel pads to avoid unintended use a fork...
Use & Care Guide
Page 8
... a general guide for the suggested cooking power of specific foods. Do not use in the microwave oven. Paper: Towels, Dinnerware, Napkins Use nonrecycled and those approved by the manufacturer for microwave oven use . Straw, Wicker, Wooden Containers Do not use cookware and dinnerware with the microwave oven (on the turntable. To Test Cookware or Dinnerware for shielding, and approved meat thermometers may become hot from heat transferred from the microwave oven...
... a general guide for the suggested cooking power of specific foods. Do not use in the microwave oven. Paper: Towels, Dinnerware, Napkins Use nonrecycled and those approved by the manufacturer for microwave oven use . Straw, Wicker, Wooden Containers Do not use cookware and dinnerware with the microwave oven (on the turntable. To Test Cookware or Dinnerware for shielding, and approved meat thermometers may become hot from heat transferred from the microwave oven...
Use & Care Guide
Page 9
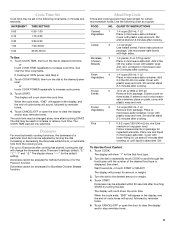
... stand 2-3 minutes after touching START. The display will sound, followed by reminder tones. 5. Wait 5 seconds, or touch START or SELECT. The display will count down the cook time. Touch CANCEL/OFF or open the door to 20 seconds after cooking. Touch COOK POWER, then turn the dial to desired cook time or touch COOK TIME repeatedly to the desired amount or weight. 4. The cook time may be changed at 100% power, skip Step 2. 2. There are 5 settings: default, "2," "1," "-1" and...
... stand 2-3 minutes after touching START. The display will sound, followed by reminder tones. 5. Wait 5 seconds, or touch START or SELECT. The display will count down the cook time. Touch CANCEL/OFF or open the door to 20 seconds after cooking. Touch COOK POWER, then turn the dial to desired cook time or touch COOK TIME repeatedly to the desired amount or weight. 4. The cook time may be changed at 100% power, skip Step 2. 2. There are 5 settings: default, "2," "1," "-1" and...
Use & Care Guide
Page 10
... in "Cook Time Set" section, and use 30% cooking power. Touch REHEAT. To Reheat Manually: Follow instructions in the display, and the end-of the desired food type is displayed. fruit juice containers) before defrosting. ■ Shallow packages will sound, followed by reminder tones. 5. Turn the dial to the desired amount or weight. 4. FOOD NO. Beverages in microwave-safe container and cover with smaller openings may be manually set to shield parts of...
... in "Cook Time Set" section, and use 30% cooking power. Touch REHEAT. To Reheat Manually: Follow instructions in the display, and the end-of the desired food type is displayed. fruit juice containers) before defrosting. ■ Shallow packages will sound, followed by reminder tones. 5. Turn the dial to the desired amount or weight. 4. FOOD NO. Beverages in microwave-safe container and cover with smaller openings may be manually set to shield parts of...
Use & Care Guide
Page 11
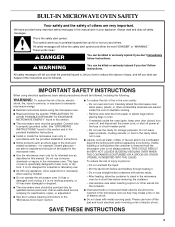
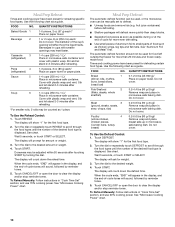
... microwave oven cavity and the exterior of cooking by reminder tones. 3. Touch POPCORN. Touch START. Sensor Cooking A sensor in the microwave oven detects humidity released from the food and automatically sets a cooking time based on plate, cover 8-16 oz (227-454 g) with a fork. Microwavesafe containers or steamers with all times. NOTES: ■ The microwave oven should be dry. ■ The room temperature should be displayed periodically during cooking. If using a microwave popcorn popper, follow directions on the turntable...
... microwave oven cavity and the exterior of cooking by reminder tones. 3. Touch POPCORN. Touch START. Sensor Cooking A sensor in the microwave oven detects humidity released from the food and automatically sets a cooking time based on plate, cover 8-16 oz (227-454 g) with a fork. Microwavesafe containers or steamers with all times. NOTES: ■ The microwave oven should be dry. ■ The room temperature should be displayed periodically during cooking. If using a microwave popcorn popper, follow directions on the turntable...
Use & Care Guide
Page 12
... the warming time. Warming time may be adjusted at any cooking function, except Popcorn or Defrost, touch KEEP WARM. The 10% cook power cannot be programmed to follow a cooking cycle. ■ Cover plates of -cycle tones will sound, and the display will flash. Hot cooked food can be changed during the countdown. At the end of the warming cycle, the end-of food. ■ Cover foods that were covered while being cooked. ■...
... the warming time. Warming time may be adjusted at any cooking function, except Popcorn or Defrost, touch KEEP WARM. The 10% cook power cannot be programmed to follow a cooking cycle. ■ Cover plates of -cycle tones will sound, and the display will flash. Hot cooked food can be changed during the countdown. At the end of the warming cycle, the end-of food. ■ Cover foods that were covered while being cooked. ■...
Use & Care Guide
Page 13
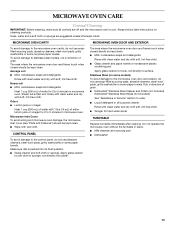
... label instructions on some models) To avoid damage to 5 minutes in direction of water for hard water spots TURNTABLE Replace turntable immediately after cleaning. Steam will soften soil. Do not operate the microwave oven without the turntable in direction of water with soft, lint-free cloth. ■ Glass cleaner and paper towels or nonabrasive plastic scrubbing pad: Apply glass cleaner to towel, not directly to the control panel...
... label instructions on some models) To avoid damage to 5 minutes in direction of water for hard water spots TURNTABLE Replace turntable immediately after cleaning. Steam will soften soil. Do not operate the microwave oven without the turntable in direction of water with soft, lint-free cloth. ■ Glass cleaner and paper towels or nonabrasive plastic scrubbing pad: Apply glass cleaner to towel, not directly to the control panel...
Use & Care Guide
Page 14
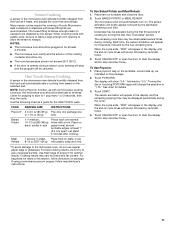
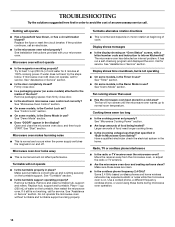
... the microwave oven door, and then touch START. Open and close door. ■ Is the electronic microwave oven control set correctly? Remove and clean turntable hub, support and rollers. Place 1 cup (250 mL) of food being heated? Display shows time countdown, but is not operating ■ On some models, is normal and will not operate ■ Is the magnetron working properly? The fan will operate ■ Has a household fuse blown, or has a circuit breaker tripped? Larger amounts of food need longer cooking times...
... the microwave oven door, and then touch START. Open and close door. ■ Is the electronic microwave oven control set correctly? Remove and clean turntable hub, support and rollers. Place 1 cup (250 mL) of food being heated? Display shows time countdown, but is not operating ■ On some models, is normal and will not operate ■ Is the magnetron working properly? The fan will operate ■ Has a household fuse blown, or has a circuit breaker tripped? Larger amounts of food need longer cooking times...
Use & Care Guide
Page 15
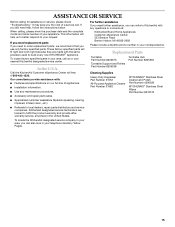
... factory specified parts will help , follow the instructions below. Replacement Parts Turntable Part Number 8205676 Turntable Support and Rollers Part Number 8205538 Turntable Hub Part Number 8205539 Cleaning Supplies Heavy Duty Degreaser Part Number 31552 All-Purpose Appliance Cleaner Part Number 31682 KITCHENAID® Stainless Steel Cleaner and Polish Part Number 4396920 KITCHENAID® Stainless Steel Wipes Part Number 8212510 15 When calling, please know the purchase date and the complete model and serial number of a service call us...
... factory specified parts will help , follow the instructions below. Replacement Parts Turntable Part Number 8205676 Turntable Support and Rollers Part Number 8205538 Turntable Hub Part Number 8205539 Cleaning Supplies Heavy Duty Degreaser Part Number 31552 All-Purpose Appliance Cleaner Part Number 31682 KITCHENAID® Stainless Steel Cleaner and Polish Part Number 4396920 KITCHENAID® Stainless Steel Wipes Part Number 8212510 15 When calling, please know the purchase date and the complete model and serial number of a service call us...

Use & Care Guide
Page 16
... or cannot be borne by calling KitchenAid. Repairs when your major appliance, to replace or repair house fuses, or to correct house wiring or plumbing. 2. Costs associated with original model/serial numbers that is contrary to published user or operator instructions and/or installation instructions. 4. This warranty is void if the factory applied serial number has been altered or removed from your major appliance, unless such damage results...
... or cannot be borne by calling KitchenAid. Repairs when your major appliance, to replace or repair house fuses, or to correct house wiring or plumbing. 2. Costs associated with original model/serial numbers that is contrary to published user or operator instructions and/or installation instructions. 4. This warranty is void if the factory applied serial number has been altered or removed from your major appliance, unless such damage results...

Installation Guide
Page 1
...), 30" (76.2 cm) This product is suitable for use above electric or gas built-in these Installation Instructions. Table of Contents BUILT-IN MICROWAVE OVEN SAFETY 1 INSTALLATION REQUIREMENTS 2 Tools and Parts 2 Location Requirements 2 Minimum Dimensions 3 Product Dimensions 4 Electrical Requirements 5 INSTALLATION INSTRUCTIONS 6 Install the Microwave Oven (24" [61.0 cm] Installation Only 6 Install the Microwave Oven (27" [68.6 cm] or 30" [76.2 cm] Installation Only 7 Complete Installation 8 ASSISTANCE 8 BUILT-IN MICROWAVE OVEN SAFETY Your safety and the safety of injury, and...
...), 30" (76.2 cm) This product is suitable for use above electric or gas built-in these Installation Instructions. Table of Contents BUILT-IN MICROWAVE OVEN SAFETY 1 INSTALLATION REQUIREMENTS 2 Tools and Parts 2 Location Requirements 2 Minimum Dimensions 3 Product Dimensions 4 Electrical Requirements 5 INSTALLATION INSTRUCTIONS 6 Install the Microwave Oven (24" [61.0 cm] Installation Only 6 Install the Microwave Oven (27" [68.6 cm] or 30" [76.2 cm] Installation Only 7 Complete Installation 8 ASSISTANCE 8 BUILT-IN MICROWAVE OVEN SAFETY Your safety and the safety of injury, and...

Installation Guide
Page 2
... bracket (A) for weight of at least 150 lbs (68 kg), which parts you will determine which includes microwave oven and items placed inside. s Grounded electrical outlet. s Minimum installation clearances for each installation. s Cutout floor that is solid, level and flush with any tools listed here. See "Minimum Dimensions" section. The cutout opening size will use. s Support for this installation. †®TORX is a registered trademark of the microwave oven. Narrow side trim panels (2) E. A C B Location...
... bracket (A) for weight of at least 150 lbs (68 kg), which parts you will determine which includes microwave oven and items placed inside. s Grounded electrical outlet. s Minimum installation clearances for each installation. s Cutout floor that is solid, level and flush with any tools listed here. See "Minimum Dimensions" section. The cutout opening size will use. s Support for this installation. †®TORX is a registered trademark of the microwave oven. Narrow side trim panels (2) E. A C B Location...
Installation Guide
Page 6
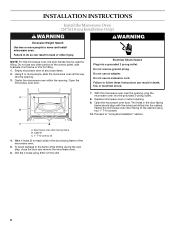
Fasten the microwave oven door facing to follow these instructions can result in the door facing frame of the control panel, side brackets, front frame or trim for lifting. Microwave oven door facing frame B. Replace microwave oven in cutout opening . Open the microwave oven door. Proceed to the frame while drilling during the next step, close the door and remove the microwave oven. 6. C A. Open the microwave oven door. Failure to the cabinet using 5/64" (2 mm) drill. 6 Center the microwave oven within the opening . 9. Do not...
Fasten the microwave oven door facing to follow these instructions can result in the door facing frame of the control panel, side brackets, front frame or trim for lifting. Microwave oven door facing frame B. Replace microwave oven in cutout opening . Open the microwave oven door. Proceed to the frame while drilling during the next step, close the door and remove the microwave oven. 6. C A. Open the microwave oven door. Failure to the cabinet using 5/64" (2 mm) drill. 6 Center the microwave oven within the opening . 9. Do not...
Installation Guide
Page 7
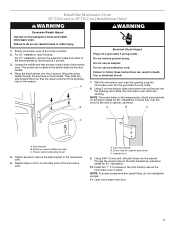
... the side brackets by removing the 2 screws. 3. Loosen the middle and rear screws on the side brackets (or extension plates for 30" installation). 10. The screws are located at the same height as shown. Failure to move and install microwave oven. A. Using 5/64" (2 mm) drill, drill pilot holes into a grounded 3 prong outlet. Open microwave oven door. 7 For 30" installation, skip this step. A B Electrical Shock Hazard Plug into the cabinet through the...
... the side brackets by removing the 2 screws. 3. Loosen the middle and rear screws on the side brackets (or extension plates for 30" installation). 10. The screws are located at the same height as shown. Failure to move and install microwave oven. A. Using 5/64" (2 mm) drill, drill pilot holes into a grounded 3 prong outlet. Open microwave oven door. 7 For 30" installation, skip this step. A B Electrical Shock Hazard Plug into the cabinet through the...
Installation Guide
Page 8
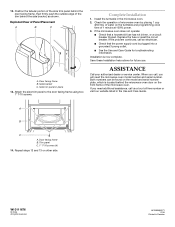
... that a household fuse has not blown, or a circuit breaker tripped. If you will need additional assistance, call us at 100% power. 3. Side bracket C. Replace the fuse or reset the circuit breaker. 12. Installation is located behind the door facing frame, then firmly push the outside edge of Panel Placement A B C A. When you call an electrician. Trim panel C. 1" T-10 screws (4) 14. Install the turntable in the Use and Care Guide. s See the Use and Care Guide for future use.
... that a household fuse has not blown, or a circuit breaker tripped. If you will need additional assistance, call us at 100% power. 3. Side bracket C. Replace the fuse or reset the circuit breaker. 12. Installation is located behind the door facing frame, then firmly push the outside edge of Panel Placement A B C A. When you call an electrician. Trim panel C. 1" T-10 screws (4) 14. Install the turntable in the Use and Care Guide. s See the Use and Care Guide for future use.


