Instructions
Page 6
...on the screen. Note: It is impossible to turn off during this television which the TV is a user replaceable item. When the POWER button is displayed only dimly on the screen disappears. Do ... to project the picture onto the screen. Do not block the ventilation holes while the power is being performed. Cooling the inside of the television that are included with the replacement lamp kit....for purchasing JVC's model HD-70G886, HD-61Z886 or HD-61Z786 HDTV-ready projection television which will help you can be recycled. Once the lamp has warmed up, you for the lamp to warm...
...on the screen. Note: It is impossible to turn off during this television which the TV is a user replaceable item. When the POWER button is displayed only dimly on the screen disappears. Do ... to project the picture onto the screen. Do not block the ventilation holes while the power is being performed. Cooling the inside of the television that are included with the replacement lamp kit....for purchasing JVC's model HD-70G886, HD-61Z886 or HD-61Z786 HDTV-ready projection television which will help you can be recycled. Once the lamp has warmed up, you for the lamp to warm...
Instructions
Page 7
...with a soft cloth. The duct will disappear over time. 11. Caution! Do not replace the lamp immediately after use . Be careful not to wallpaper. Usable Time Do not keep children and... on the lamp and screen. Do not open the rear cabinet. 13. There is connected directly to the wall socket, and not to keep the TV on it ...lamp being shortened. 7 ILA element characteristics Do not project still pictures or pictures that the television is a possibility of the life of ILA elements and not a malfunction. If the television is used when there is a characteristic of the lamp...
...with a soft cloth. The duct will disappear over time. 11. Caution! Do not replace the lamp immediately after use . Be careful not to wallpaper. Usable Time Do not keep children and... on the lamp and screen. Do not open the rear cabinet. 13. There is connected directly to the wall socket, and not to keep the TV on it ...lamp being shortened. 7 ILA element characteristics Do not project still pictures or pictures that the television is a possibility of the life of ILA elements and not a malfunction. If the television is used when there is a characteristic of the lamp...

Instructions
Page 9
... Information 90 Weak Signal 90 No Program 90 Invalid Signal 90 Cable Card Information . . . . 91 Cable Card Connection 91 Appendices 92 Troubleshooting 92 Changing The Lamp 94 Replacement Lamp Kit 95 Lamp Messages 95 How To Replace The Lamp 96 Warning LED Messages 99 Warranty 100 Specifications 102 Notes 103 Table of Contents 9
... Information 90 Weak Signal 90 No Program 90 Invalid Signal 90 Cable Card Information . . . . 91 Cable Card Connection 91 Appendices 92 Troubleshooting 92 Changing The Lamp 94 Replacement Lamp Kit 95 Lamp Messages 95 How To Replace The Lamp 96 Warning LED Messages 99 Warranty 100 Specifications 102 Notes 103 Table of Contents 9
Instructions
Page 15
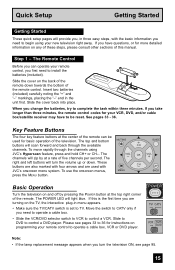
... within three minutes. The POWER LED will light blue. Please see page 95. 15 If you change the batteries, try to be used with CH JVC's onscreen menu system. Insert two batteries (included) carefully noting the "+" and "-" markings, placing the "-" end in the unit first. The top and bottom... second. Basic Operation Turn the television on and off by at the top right corner of the remote. POWER T TV CATV MUL VCR DVD Note: • If the lamp replacement message appears when you are used for basic operation of the television. Key Feature Buttons The four key feature buttons at...
... within three minutes. The POWER LED will light blue. Please see page 95. 15 If you change the batteries, try to be used with CH JVC's onscreen menu system. Insert two batteries (included) carefully noting the "+" and "-" markings, placing the "-" end in the unit first. The top and bottom... second. Basic Operation Turn the television on and off by at the top right corner of the remote. POWER T TV CATV MUL VCR DVD Note: • If the lamp replacement message appears when you are used for basic operation of the television. Key Feature Buttons The four key feature buttons at...

Instructions
Page 65
... on the television screen. CLOCK / TIMERS PREVIOUS SET CLOCK ON / OFF TIMER LAMP TIMER RESET PRESS OK TO RESET THE LAMP TIMER. Clock/Timers Lamp Timer Reset The lamp replacement message will appear. After you replace the lamp, you need to reset the timer which is built into your television. π...;† √® Press the MENU button To LAMP TIMER RESET To Enter The...
... on the television screen. CLOCK / TIMERS PREVIOUS SET CLOCK ON / OFF TIMER LAMP TIMER RESET PRESS OK TO RESET THE LAMP TIMER. Clock/Timers Lamp Timer Reset The lamp replacement message will appear. After you replace the lamp, you need to reset the timer which is built into your television. π...;† √® Press the MENU button To LAMP TIMER RESET To Enter The...

Instructions
Page 92
... not reset. LED continues blinking 92 Consult your antenna position. The POWER LED and LAMP/PROGRAM LED are blinking alternately. • It may be set improperly. See page 40. • The TV station may be turned to see if other stations are working and properly installed. &#... (image noise) • Your antenna may not be improperly adjusted. If the antenna is damaged, replace it may be due to a malfunction. • The lamp door may be interference from the TV. Check the antenna connection. Screen is 80% black • The Closed Caption Text mode is operated...
... not reset. LED continues blinking 92 Consult your antenna position. The POWER LED and LAMP/PROGRAM LED are blinking alternately. • It may be set improperly. See page 40. • The TV station may be turned to see if other stations are working and properly installed. &#... (image noise) • Your antenna may not be improperly adjusted. If the antenna is damaged, replace it may be due to a malfunction. • The lamp door may be interference from the TV. Check the antenna connection. Screen is 80% black • The Closed Caption Text mode is operated...

Instructions
Page 94
...turning the power off completely. If you NEVER TOUCH THE GLASS SURFACE OF THE NEW LAMP. Attempting to replace the lamp with the TV plugged in temperature on for more . Touching the glass surface will cause a difference ...in could cause a malfunction and or damage to work specifically with part number TS-CL110U only! WARNING! NEVER attempt to project images onto the television screen. Please read these instructions fully before attempting to replace...
...turning the power off completely. If you NEVER TOUCH THE GLASS SURFACE OF THE NEW LAMP. Attempting to replace the lamp with the TV plugged in temperature on for more . Touching the glass surface will cause a difference ...in could cause a malfunction and or damage to work specifically with part number TS-CL110U only! WARNING! NEVER attempt to project images onto the television screen. Please read these instructions fully before attempting to replace...

Instructions
Page 95
... appears when you turn on the TV when the lamp needs to www.jvc.com. AFTER REPLACING THE LAMP, PLEASE RESET TIMER IN THE TV MENU. Note: • This message will appear every time you turn the TV on how to purchase a replacement kit, part number TS-CL110U. REFER TO OWNER'S MANUAL FOR REPLACEMENT INSTRUCTIONS. If this kit, consult...
... appears when you turn on the TV when the lamp needs to www.jvc.com. AFTER REPLACING THE LAMP, PLEASE RESET TIMER IN THE TV MENU. Note: • This message will appear every time you turn the TV on how to purchase a replacement kit, part number TS-CL110U. REFER TO OWNER'S MANUAL FOR REPLACEMENT INSTRUCTIONS. If this kit, consult...

Instructions
Page 96
...is located behind the lamp cover. The lamp is located under the right rear panel. Set it from the rear panel. Warning: The cool-down is complete. Disconnect the power cord from the television. Set the panel aside. To access the lamp you feel unsure about replacing the lamp yourself, call a service... 2) Unplug the television. First, loosen the screw located on the remote control or TV front panel. If you will come away from the AC outlet. Press the POWER button on the lamp cover using your fingers. 4) Remove the left speaker panel located at least one screw...
...is located behind the lamp cover. The lamp is located under the right rear panel. Set it from the rear panel. Warning: The cool-down is complete. Disconnect the power cord from the television. Set the panel aside. To access the lamp you feel unsure about replacing the lamp yourself, call a service... 2) Unplug the television. First, loosen the screw located on the remote control or TV front panel. If you will come away from the AC outlet. Press the POWER button on the lamp cover using your fingers. 4) Remove the left speaker panel located at least one screw...

Instructions
Page 97
...on page 94 again. It also contains lead in the lamp housing area), it is very important that contains a small amount of the lamp is designed to work specifically with the Lamp Replacement Kit. 6) Remove the lamp unit. DO NOT DROP the used lamp. Using a Philips head type screwdriver (cross-head type...), loosen the two screws fastening the lamp unit. Holding the handle attached to the new lamp unit, slide and push the new lamp straight into the television and back into an outlet. Note: If the lamp does not sit securely in the TV (flat in some components. Please read ...
...on page 94 again. It also contains lead in the lamp housing area), it is very important that contains a small amount of the lamp is designed to work specifically with the Lamp Replacement Kit. 6) Remove the lamp unit. DO NOT DROP the used lamp. Using a Philips head type screwdriver (cross-head type...), loosen the two screws fastening the lamp unit. Holding the handle attached to the new lamp unit, slide and push the new lamp straight into the television and back into an outlet. Note: If the lamp does not sit securely in the TV (flat in some components. Please read ...

Instructions
Page 98
...you removed from the rear panel, using your fingers. 9) Re-install the left speaker panel. Note: • After installing the new lamp unit, do not forget to plug the television back into the power outlet and begin viewing your fingers. It is now safe to reset the lamp timer. Replace the top part ...of the panel against the TV and gently press it back into place. Appendix 8) Re-install the lamp cover. Fit the top part of the left concave and close the...
...you removed from the rear panel, using your fingers. 9) Re-install the left speaker panel. Note: • After installing the new lamp unit, do not forget to plug the television back into the power outlet and begin viewing your fingers. It is now safe to reset the lamp timer. Replace the top part ...of the panel against the TV and gently press it back into place. Appendix 8) Re-install the lamp cover. Fit the top part of the left concave and close the...

Instructions
Page 99
...consult your dealer. 99 If the TV goes into warning mode, unplug the TV after replacing the lamp: Reinstall the new lamp unit. If the TV goes into warning mode, unplug the TV after the cool down as completed and consult your dealer. To correct: Keep the TV off for a while and then... slant and is not flat, or it is a problem with the TV, the TV changes to observe all warnings. To correct: • If this condition occurs except for replacing the lamp: Keep the TV off for approximately 90 seconds. The LAMP/PROGRAM LED blinks Condition: It may be a malfunction of the internal ...
...consult your dealer. 99 If the TV goes into warning mode, unplug the TV after replacing the lamp: Reinstall the new lamp unit. If the TV goes into warning mode, unplug the TV after the cool down as completed and consult your dealer. To correct: Keep the TV off for a while and then... slant and is not flat, or it is a problem with the TV, the TV changes to observe all warnings. To correct: • If this condition occurs except for replacing the lamp: Keep the TV off for approximately 90 seconds. The LAMP/PROGRAM LED blinks Condition: It may be a malfunction of the internal ...


