Instructions
Page 2
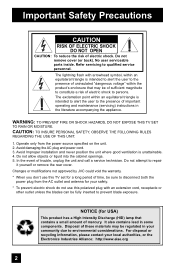
No user serviceable parts inside. Avoid Improper installation and never position.... Do not allow objects or liquid into the cabinet openings. 5. Changes or modifications not approved by JVC could void the warranty. * When you don't use this polarized plug with arrowhead symbol, within an... the presence of electric shock. WARNING: TO PREVENT FIRE OR SHOCK HAZARDS, DO NOT EXPOSE THIS TV SET TO RAIN OR MOISTURE. Do not attempt to qualified service personnel. NOTICE (for your local ... to repair it yourself or remove the rear cover. Avoid damaging the AC plug and power cord. 3.
No user serviceable parts inside. Avoid Improper installation and never position.... Do not allow objects or liquid into the cabinet openings. 5. Changes or modifications not approved by JVC could void the warranty. * When you don't use this polarized plug with arrowhead symbol, within an... the presence of electric shock. WARNING: TO PREVENT FIRE OR SHOCK HAZARDS, DO NOT EXPOSE THIS TV SET TO RAIN OR MOISTURE. Do not attempt to qualified service personnel. NOTICE (for your local ... to repair it yourself or remove the rear cover. Avoid damaging the AC plug and power cord. 3.
Instructions
Page 4
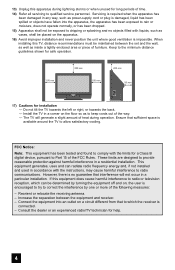
...the user is connected. - L/MONO R AUDIO 17) Cautions for help. 4 These limits are designed to Part 15 of the FCC Rules. Install the TV in a particular installation. The TV will not occur in a corner on the apparatus. 16) Avoid improper installation and never position the unit ... energy and, if not installed and used in any way, such as to qualified service personnel. Consult the dealer or an experienced radio/TV technician for installation - Servicing is impossible. INPUT-4 S-VIDEO OVER VIDEO + VOLUME - Reorient or relocate the receiving antenna. - Connect the...
...the user is connected. - L/MONO R AUDIO 17) Cautions for help. 4 These limits are designed to Part 15 of the FCC Rules. Install the TV in a particular installation. The TV will not occur in a corner on the apparatus. 16) Avoid improper installation and never position the unit ... energy and, if not installed and used in any way, such as to qualified service personnel. Consult the dealer or an experienced radio/TV technician for installation - Servicing is impossible. INPUT-4 S-VIDEO OVER VIDEO + VOLUME - Reorient or relocate the receiving antenna. - Connect the...
Instructions
Page 7
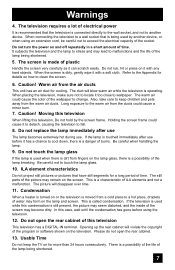
... place, droplets of the socket. The still parts of the lamp being shortened. 5. Do not open the rear cabinet. 13. Please do not open the rear cabinet of plastic Handle the screen very carefully ... minor burn. 7. Do not replace the lamp immediately after use . ILA element characteristics Do not project still pictures or pictures that have still segments for cooling. Condensation When a heater is dirty, gently...easily. Do not rub, hit or press on the television. Long exposure to keep the TV on how to cool down, there is made of this condensation is a possibility of ...
... place, droplets of the socket. The still parts of the lamp being shortened. 5. Do not open the rear cabinet. 13. Please do not open the rear cabinet of plastic Handle the screen very carefully ... minor burn. 7. Do not replace the lamp immediately after use . ILA element characteristics Do not project still pictures or pictures that have still segments for cooling. Condensation When a heater is dirty, gently...easily. Do not rub, hit or press on the television. Long exposure to keep the TV on how to cool down, there is made of this condensation is a possibility of ...
Instructions
Page 20
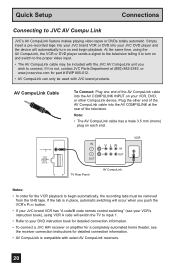
..." (see your VCR's instruction book), using the AV CompuLink, the VCR or DVD player sends a signal to the television telling it is not, contact JVC Parts Department at the rear of the television. Note: • The AV CompuLink cable has a male 3.5 mm (mono) plug on and switch to... totally automatic. Simply insert a pre-recorded tape into your JVC brand VCR or DVD into the AV COMPULINK at (800)-882-2345, or www.jvcservice.com for detailed connection information. • AV CompuLink is in place, automatic switching will switch the TV to input 1. • Refer to connect. Plug the ...
..." (see your VCR's instruction book), using the AV CompuLink, the VCR or DVD player sends a signal to the television telling it is not, contact JVC Parts Department at the rear of the television. Note: • The AV CompuLink cable has a male 3.5 mm (mono) plug on and switch to... totally automatic. Simply insert a pre-recorded tape into your JVC brand VCR or DVD into the AV COMPULINK at (800)-882-2345, or www.jvcservice.com for detailed connection information. • AV CompuLink is in place, automatic switching will switch the TV to input 1. • Refer to connect. Plug the ...

Instructions
Page 74
Aspect Ratios PANORAMA - Aspect Ratios in " on the center part of a 4:3 aspect picture, blowing it up the remaining space along the picture's sides. PANORAMA ZOOM - With this ratio a normal 4:3 aspect picture is used when you ...
Aspect Ratios PANORAMA - Aspect Ratios in " on the center part of a 4:3 aspect picture, blowing it up the remaining space along the picture's sides. PANORAMA ZOOM - With this ratio a normal 4:3 aspect picture is used when you ...

Instructions
Page 76
...page 34. These functions include: play , record, rewind, fast-forward, stop , still/pause, previous/next, tray open/close, power on the lower part of your VCR. Press the LIGHT button to operate. For any other manufacturer's brand VCR, please see the code chart and instructions on for 4 ...selector switch to VCR to operate. • The remote is preset with the code 000 to control JVC-brand DVD players. Set this remote control to control JVC-brand DVD players. Button Functions TV/CATV Slide Switch Use either the television's own tuner or a cable box to operate the television's...
...page 34. These functions include: play , record, rewind, fast-forward, stop , still/pause, previous/next, tray open/close, power on the lower part of your VCR. Press the LIGHT button to operate. For any other manufacturer's brand VCR, please see the code chart and instructions on for 4 ...selector switch to VCR to operate. • The remote is preset with the code 000 to control JVC-brand DVD players. Set this remote control to control JVC-brand DVD players. Button Functions TV/CATV Slide Switch Use either the television's own tuner or a cable box to operate the television's...

Instructions
Page 86
...8226; Read the cautions on the door to open the door on the screen. SD Card - Removable microdrive Hard Disk for JVC "Everio" camera is being used by the TV. Close door when using media cards SD/ MMC MEMORY xD-Picture STICK Card COMPACT FLASH Metal Terminal xD SD (To the middle... part) or MMC MS (To the lower part) Note: • If you insert a media card into the slot again after opening the door. xD-Picture Card - Media Card Viewer Media Card Viewer Media Card Note This TV can read the following media cards: -
...8226; Read the cautions on the door to open the door on the screen. SD Card - Removable microdrive Hard Disk for JVC "Everio" camera is being used by the TV. Close door when using media cards SD/ MMC MEMORY xD-Picture STICK Card COMPACT FLASH Metal Terminal xD SD (To the middle... part) or MMC MS (To the lower part) Note: • If you insert a media card into the slot again after opening the door. xD-Picture Card - Media Card Viewer Media Card Viewer Media Card Note This TV can read the following media cards: -

Instructions
Page 93
...TV to the television. If the power is turned on the screen. The following are not malfunctions. • The television may remain on while the temperature is below 0ºC. This noise is caused when the mercury inside the lamp is heated, and is not a malfunction. • The still parts...turned off. The picture will make crackling sounds when first turned on the screen. The AUTO DEMO finished automatically • The TV recieved a signal from the TV's speaker Static electricity CHECK • The Center CH Input may make a noise when it blows, but this is not ...
...TV to the television. If the power is turned on the screen. The following are not malfunctions. • The television may remain on while the temperature is below 0ºC. This noise is caused when the mercury inside the lamp is heated, and is not a malfunction. • The still parts...turned off. The picture will make crackling sounds when first turned on the screen. The AUTO DEMO finished automatically • The TV recieved a signal from the TV's speaker Static electricity CHECK • The Center CH Input may make a noise when it blows, but this is not ...

Instructions
Page 94
...or more than 24 hours consecutively. After turning the power off completely. Do not keep the TV on for more . Please read these instructions fully before attempting to replace it is very ...the atmospheric temperature and altitude in could cause a malfunction and or damage to project images onto the television screen. Touching the glass surface will tell you NEVER TOUCH THE ...DO NOT TOUCH IT. There is being shortened. When the picture begins to replace the lamp with part number TS-CL110U only! Using a different lamp, or a third-party manufacturer's lamp could lead...
...or more than 24 hours consecutively. After turning the power off completely. Do not keep the TV on for more . Please read these instructions fully before attempting to replace it is very ...the atmospheric temperature and altitude in could cause a malfunction and or damage to project images onto the television screen. Touching the glass surface will tell you NEVER TOUCH THE ...DO NOT TOUCH IT. There is being shortened. When the picture begins to replace the lamp with part number TS-CL110U only! Using a different lamp, or a third-party manufacturer's lamp could lead...

Instructions
Page 95
To purchase this message appears when you need to purchase a replacement kit, part number TS-CL110U. PRESS OK, IF YOU DO NOT WANT TO SEE THIS MESSAGE AGAIN. Press the OK button to www.jvc.com. REFER TO OWNER'S MANUAL FOR REPLACEMENT INSTRUCTIONS. Note: • This message will need to replace the lamp... turn on how to be disposed of mercury, it cannot be replaced. See page 96 on the TV when the lamp needs to replace the lamp. AFTER REPLACING THE LAMP, PLEASE RESET TIMER IN THE TV MENU. If this kit, consult your dealer or call 1-800-252-5722, or go to make...
To purchase this message appears when you need to purchase a replacement kit, part number TS-CL110U. PRESS OK, IF YOU DO NOT WANT TO SEE THIS MESSAGE AGAIN. Press the OK button to www.jvc.com. REFER TO OWNER'S MANUAL FOR REPLACEMENT INSTRUCTIONS. Note: • This message will need to replace the lamp... turn on how to be disposed of mercury, it cannot be replaced. See page 96 on the TV when the lamp needs to replace the lamp. AFTER REPLACING THE LAMP, PLEASE RESET TIMER IN THE TV MENU. If this kit, consult your dealer or call 1-800-252-5722, or go to make...

Instructions
Page 97
...252-5722. 97 Also, replace the lamp with the Lamp Replacement Kit. 6) Remove the lamp unit. Follow the recycling instructions included with part number TS-CL110U only! For disposal or recycling information, please contact your community due to environmental considerations. Because the lamp contains a small amount... of the lamp is under pressure. Note: If the lamp does not sit securely in the TV (flat in the lamp housing area), it is designed to the television. Please read the warnings on . NOTICE (for USA) This ...
...252-5722. 97 Also, replace the lamp with the Lamp Replacement Kit. 6) Remove the lamp unit. Follow the recycling instructions included with part number TS-CL110U only! For disposal or recycling information, please contact your community due to environmental considerations. Because the lamp contains a small amount... of the lamp is under pressure. Note: If the lamp does not sit securely in the TV (flat in the lamp housing area), it is designed to the television. Please read the warnings on . NOTICE (for USA) This ...

Instructions
Page 98
... viewing your fingers. 9) Re-install the left speaker panel. Because the lamp cover has a role to help prevent the danger of the panel against the TV and gently press it back into place. 10) Re-install the screw to plug the television back into place. Tighten the single screw you removed... from the rear panel, using your television again. Fit the top part of an electrical shock, tighten the screw using your fingers. It is now safe to the...
... viewing your fingers. 9) Re-install the left speaker panel. Because the lamp cover has a role to help prevent the danger of the panel against the TV and gently press it back into place. 10) Re-install the screw to plug the television back into place. Tighten the single screw you removed... from the rear panel, using your television again. Fit the top part of an electrical shock, tighten the screw using your fingers. It is now safe to the...

