Instructions
Page 1
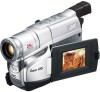
INSTRUCTIONS COMPACT VHS CAMCORDER GR-SXM37 ENGLISH For Customer Use: Enter below the Model No. Before use of the camcorder. Serial No. Dear Customer, Thank you for future reference. Retain this product. Model No. and Serial No. CONTENTS GETTING STARTED 5 ~ 9 RECORDING/PLAYBACK 9 ~ 10 BASIC FEATURES 10 ~ 12 MENU SETTINGS 12 ~ 16 TERMS 24 AUTOMATIC DEMONSTRATION Automatic Demonstration takes place when "DEMO MODE" is set to "ON" (factory-preset). • Available when...
INSTRUCTIONS COMPACT VHS CAMCORDER GR-SXM37 ENGLISH For Customer Use: Enter below the Model No. Before use of the camcorder. Serial No. Dear Customer, Thank you for future reference. Retain this product. Model No. and Serial No. CONTENTS GETTING STARTED 5 ~ 9 RECORDING/PLAYBACK 9 ~ 10 BASIC FEATURES 10 ~ 12 MENU SETTINGS 12 ~ 16 TERMS 24 AUTOMATIC DEMONSTRATION Automatic Demonstration takes place when "DEMO MODE" is set to "ON" (factory-preset). • Available when...
Instructions
Page 2
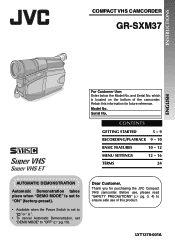
... Strap Cassette Adapter C-P8U Lens Cap NOTE: In order to maintain optimum performance of the camcorder, provided cables may be equipped with one core filter, the end that is closest to the filter should be connected to the camcorder. 2 C-40/30/20 • Compact VHS ( ) Cassettes TC-40/ 30/20 • Active Carrying Bag CB-V75 • A/V (Audio/Video) Cable • S-Video Cable...
... Strap Cassette Adapter C-P8U Lens Cap NOTE: In order to maintain optimum performance of the camcorder, provided cables may be equipped with one core filter, the end that is closest to the filter should be connected to the camcorder. 2 C-40/30/20 • Compact VHS ( ) Cassettes TC-40/ 30/20 • Active Carrying Bag CB-V75 • A/V (Audio/Video) Cable • S-Video Cable...
Instructions
Page 3
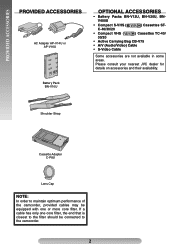
... Electronics Industries Alliance: CAUTIONS • This camcorder is powered by a rechargeable battery. For disposal or recycling information please contact your local solid waste of important operating and maintenance (servicing) instructions in your area for recycling options or proper disposal. The battery is intended to alert the user to constitute a risk of a different standard. NO USER-SERVICEABLE PARTS INSIDE. This product has a fl...
... Electronics Industries Alliance: CAUTIONS • This camcorder is powered by a rechargeable battery. For disposal or recycling information please contact your local solid waste of important operating and maintenance (servicing) instructions in your area for recycling options or proper disposal. The battery is intended to alert the user to constitute a risk of a different standard. NO USER-SERVICEABLE PARTS INSIDE. This product has a fl...
Instructions
Page 4
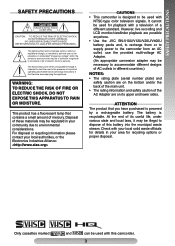
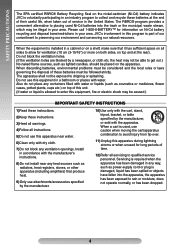
... is part of time. 12)Refer all instructions. 5)Do not use attachments/accessories specified by the manufacturer. 10)Use only with the cart, stand, tripod, bracket, or table specified by a newspaper, or cloth etc. When discarding batteries, environmental problems must be considered and the local rules or laws governing the disposal of service in...
... is part of time. 12)Refer all instructions. 5)Do not use attachments/accessories specified by the manufacturer. 10)Use only with the cart, stand, tripod, bracket, or table specified by a newspaper, or cloth etc. When discarding batteries, environmental problems must be considered and the local rules or laws governing the disposal of service in...

Instructions
Page 5
... for "Warning Indications" 5 Erase protection tab Video Light Microphone LCD Monitor/Viewfinder Indications During Recording During Playback @ \[ ] ^ _ { | } / :; < = > 120M I GHT ? During shooting % & () Keep the lens cap attached to the camcorder Cassette holder ~ 180° 90° + LCD monitor , Turn the gear to this diagram while reading the instructions. V 0 1 2 1X 3 ba 45 TBC 6 789! "# $ Connector Cover Viewfinder Speaker - ET T30 REC SP S-VHS REC PAUSE 5M I N +02 MWB...
... for "Warning Indications" 5 Erase protection tab Video Light Microphone LCD Monitor/Viewfinder Indications During Recording During Playback @ \[ ] ^ _ { | } / :; < = > 120M I GHT ? During shooting % & () Keep the lens cap attached to the camcorder Cassette holder ~ 180° 90° + LCD monitor , Turn the gear to this diagram while reading the instructions. V 0 1 2 1X 3 ba 45 TBC 6 789! "# $ Connector Cover Viewfinder Speaker - ET T30 REC SP S-VHS REC PAUSE 5M I N +02 MWB...

Instructions
Page 6
... 9 Tape Running Indicator 3: Playback ¡: Fast-Forward/ Shuttle Search 1: Rewind/ Shuttle Search 8: Pause ! REC pg. 10 3 Power Zoom Lever [T/W pg. 10 4 • Manual Focus Button [ FOCUS].... ੬ pg. 10 • Time Base Corrector Button [TBC]..... ੬ pg. 11 5 Shoulder Strap Eyelets pg. 9 6 S-Video Output Connector [S pg. 11 7 Audio Output Connector [A pg. 11 8 Video Output Connector [V pg. 11 9 Battery Release Switch [BATTERY RELEASE pg. 7 ! Video Light Indicator pg. 13 < Backlight Compensation Indicator pg. 10 = Recording Format...
... 9 Tape Running Indicator 3: Playback ¡: Fast-Forward/ Shuttle Search 1: Rewind/ Shuttle Search 8: Pause ! REC pg. 10 3 Power Zoom Lever [T/W pg. 10 4 • Manual Focus Button [ FOCUS].... ੬ pg. 10 • Time Base Corrector Button [TBC]..... ੬ pg. 11 5 Shoulder Strap Eyelets pg. 9 6 S-Video Output Connector [S pg. 11 7 Audio Output Connector [A pg. 11 8 Video Output Connector [V pg. 11 9 Battery Release Switch [BATTERY RELEASE pg. 7 ! Video Light Indicator pg. 13 < Backlight Compensation Indicator pg. 10 = Recording Format...

Instructions
Page 7
... battery pack. ATTENTION: Before detaching the power source, make sure that the camcorder's power is finished, charging automatically starts and the CHARGE lamp % blinks normally. 7 Failure to do so can cause the camcorder to indicate charging. 4) When the CHARGE lamp % stops blinking and turns off . approx. 2 hrs. 40 min. Charging time is finished. Connect the AC Adapter to the DC IN connector !, then plug the AC Adapter...
... battery pack. ATTENTION: Before detaching the power source, make sure that the camcorder's power is finished, charging automatically starts and the CHARGE lamp % blinks normally. 7 Failure to do so can cause the camcorder to indicate charging. 4) When the CHARGE lamp % stops blinking and turns off . approx. 2 hrs. 40 min. Charging time is finished. Connect the AC Adapter to the DC IN connector !, then plug the AC Adapter...
Instructions
Page 8
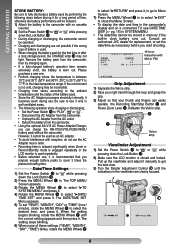
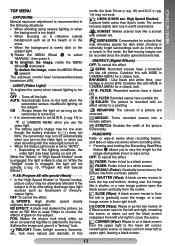
Remove the battery pack from the camcorder. • Using the optional AA-V15 AC Power Adapter/Charger, you can easily operate the Recording Start/Stop Button " and Power Zoom Lever 3. The TOP MENU Screen appears. 3) Rotate the MENU Wheel 1 to select "3TO SYSTEM MENU" and press it becomes warm during use. When the setting begins blinking, rotate the MENU Wheel 1 until the indications in . Refasten the Velcro strip. 3 " Velcro strip Viewfinder...
Remove the battery pack from the camcorder. • Using the optional AA-V15 AC Power Adapter/Charger, you can easily operate the Recording Start/Stop Button " and Power Zoom Lever 3. The TOP MENU Screen appears. 3) Rotate the MENU Wheel 1 to select "3TO SYSTEM MENU" and press it becomes warm during use. When the setting begins blinking, rotate the MENU Wheel 1 until the indications in . Refasten the Velcro strip. 3 " Velcro strip Viewfinder...
Instructions
Page 9
... Button #. Adjust the length. To prevent damage to " ", adjust "LCD BRIGHT" in record mode or detached from power source. + Erase protection tab RECORDING Set REC MODE, S-VHS (S-VHS ET), TAPE LENGTH and DATE/TIME. (੬ pg. 12 - 16, "MENU SETTINGS") 1) Remove the lens cap. Press EJECT ) for more than 2 seconds until it ). If the tab has been removed, cover the hole with the tripod mounting socket .. Shooting while using the viewfinder: Make sure the LCD...
... Button #. Adjust the length. To prevent damage to " ", adjust "LCD BRIGHT" in record mode or detached from power source. + Erase protection tab RECORDING Set REC MODE, S-VHS (S-VHS ET), TAPE LENGTH and DATE/TIME. (੬ pg. 12 - 16, "MENU SETTINGS") 1) Remove the lens cap. Press EJECT ) for more than 2 seconds until it ). If the tab has been removed, cover the hole with the tripod mounting socket .. Shooting while using the viewfinder: Make sure the LCD...

Instructions
Page 10
... turn on again, set the Power Switch $ to "OFF", then to " ", " " or "PLAY". • When the Power Switch $ is set to " ", " " or "PLAY", and the LCD monitor is opened at the start recording. • Noise bars appear and pictures may brighten the subject, resulting in a washed out or white image. • BACKLIGHT ( and Manual Exposure mode (੬pg. 13) cannot be used simultaneously. Rec (5-sec. Rec is normal. Auto/Manual Focus If correct focus...
... turn on again, set the Power Switch $ to "OFF", then to " ", " " or "PLAY". • When the Power Switch $ is set to " ", " " or "PLAY", and the LCD monitor is opened at the start recording. • Noise bars appear and pictures may brighten the subject, resulting in a washed out or white image. • BACKLIGHT ( and Manual Exposure mode (੬pg. 13) cannot be used simultaneously. Rec (5-sec. Rec is normal. Auto/Manual Focus If correct focus...
Instructions
Page 11
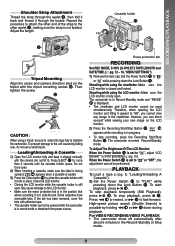
... in the camcorder playback picture. TBC (Time Base Corrector) Removes jitter from fluctuating video signals to use the following cable: YTU94146A S-Video cable. To S-Video Output 6 White to Audio Output 7 S-Video cable (Optional) Connector Cover Yellow to Video Output 8 A/V cable (Optional) To S-Video Input TV White to Audio Input VCR Yellow to the camcorder. Make sure to connect the end with tapes recorded on the VCR's power, and insert the appropriate cassettes in the camcorder and the VCR. Engage the VCR's AUX and Record-Pause modes. 2) Press 3/8 ( to...
... in the camcorder playback picture. TBC (Time Base Corrector) Removes jitter from fluctuating video signals to use the following cable: YTU94146A S-Video cable. To S-Video Output 6 White to Audio Output 7 S-Video cable (Optional) Connector Cover Yellow to Video Output 8 A/V cable (Optional) To S-Video Input TV White to Audio Input VCR Yellow to the camcorder. Make sure to connect the end with tapes recorded on the VCR's power, and insert the appropriate cassettes in the camcorder and the VCR. Engage the VCR's AUX and Record-Pause modes. 2) Press 3/8 ( to...

Instructions
Page 12
... the VCR and play back an S-VHS-C/VHS-C video cassette recorded with this to play the tape back. • To record on a VCR using a compact cassette and the adapter, cover the adapter's recording safety hole with the S-VHS function. • During special-effect playback (slow motion, still frame, etc.), the picture may vibrate or noise bars may become damaged. Playback is 1 Latch affixed 3 Gear Compact video cassette 7 Reels adapter, the tape may appear on a regular VHS VCR. Rotate the MENU...
... the VCR and play back an S-VHS-C/VHS-C video cassette recorded with this to play the tape back. • To record on a VCR using a compact cassette and the adapter, cover the adapter's recording safety hole with the S-VHS function. • During special-effect playback (slow motion, still frame, etc.), the picture may vibrate or noise bars may become damaged. Playback is 1 Latch affixed 3 Gear Compact video cassette 7 Reels adapter, the tape may appear on a regular VHS VCR. Rotate the MENU...
Instructions
Page 13
... wipe-out works when recording ends. • Pressing and holding the Recording Start/Stop Button " allows you start recording with the video light turned on. • When the Video Light mode is set M.W.B. (੬pg. 14) to in CAMERA MENU when you use the video light. • The battery pack's charge may be low even though the battery indicator ( ) does not blink, the camcorder may turn off automatically when you turn on the video light, or when...
... wipe-out works when recording ends. • Pressing and holding the Recording Start/Stop Button " allows you start recording with the video light turned on. • When the Video Light mode is set M.W.B. (੬pg. 14) to in CAMERA MENU when you use the video light. • The battery pack's charge may be low even though the battery indicator ( ) does not blink, the camcorder may turn off automatically when you turn on the video light, or when...

Instructions
Page 14
... playback picture will be blurred at a distance of the subject. When the setting is completed, "MWB" 1 stops blinking. • Once you can function. \ WIDE When set "SIZE", "SCROLL" or "LANGUAGE", rotate the MENU Wheel 1 to "ON", you adjust white balance manually, the setting is retained even if the power is turned off or the battery is removed. • White balance cannot be recorded at high magnification. Change the language in "LANGUAGE" in "TITLE SETUP...
... playback picture will be blurred at a distance of the subject. When the setting is completed, "MWB" 1 stops blinking. • Once you can function. \ WIDE When set "SIZE", "SCROLL" or "LANGUAGE", rotate the MENU Wheel 1 to "ON", you adjust white balance manually, the setting is retained even if the power is turned off or the battery is removed. • White balance cannot be recorded at high magnification. Change the language in "LANGUAGE" in "TITLE SETUP...

Instructions
Page 15
... the cassette is ejected. • To use a cleaning cassette. 15 DATE/TIME DISP. Available when the Power Switch $ is set to make sure whether better results can be recorded. TIME (Time-Lapse) function.) Select the desired interval time and press the Recording Start/Stop Button ". • Fade- If you do test record beforehand to " " or " " and "DEMO MODE" is initiated after focusing on a Super VHS VCR. - The date is replaced after that, the demonstration will be played...
... the cassette is ejected. • To use a cleaning cassette. 15 DATE/TIME DISP. Available when the Power Switch $ is set to make sure whether better results can be recorded. TIME (Time-Lapse) function.) Select the desired interval time and press the Recording Start/Stop Button ". • Fade- If you do test record beforehand to " " or " " and "DEMO MODE" is initiated after focusing on a Super VHS VCR. - The date is replaced after that, the demonstration will be played...
Instructions
Page 17
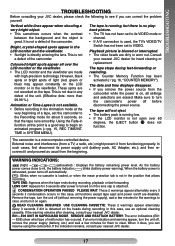
..., REC TIME/INT. CONDENSATION OPERATION PAUSED PLEASE WAIT: These 2 warnings appear alternately every 3 seconds if condensation occurs. Remove the tape, turn the unit off , remove the power supply (battery, etc.) and wait a few minutes for head cleaning or replacement. In this case, all over 60 degrees, the EJECT button ) does not function. If the warning remains after power is turned on the LCD monitor or in SYSTEM MENU). If an error...
..., REC TIME/INT. CONDENSATION OPERATION PAUSED PLEASE WAIT: These 2 warnings appear alternately every 3 seconds if condensation occurs. Remove the tape, turn the unit off , remove the power supply (battery, etc.) and wait a few minutes for head cleaning or replacement. In this case, all over 60 degrees, the EJECT button ) does not function. If the warning remains after power is turned on the LCD monitor or in SYSTEM MENU). If an error...
Instructions
Page 18
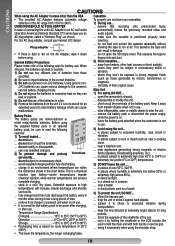
USING HOUSEHOLD AC PLUG ADAPTER ... JVC batteries can cause serious damage to the camera's internal battery charging circuits. 4) Do not expose the batteries to excessive heat as they can leak or explode. 5) Do not dispose of time. ... do not load and unload the cassette repeatedly without fully discharging. ... Terminals 2) Store cassettes... ... away from those generated by holding the viewfinder or the LCD monitor. where...
USING HOUSEHOLD AC PLUG ADAPTER ... JVC batteries can cause serious damage to the camera's internal battery charging circuits. 4) Do not expose the batteries to excessive heat as they can leak or explode. 5) Do not dispose of time. ... do not load and unload the cassette repeatedly without fully discharging. ... Terminals 2) Store cassettes... ... away from those generated by holding the viewfinder or the LCD monitor. where...

Instructions
Page 19
... and, if not installed and used in a residential installation. This same phenomenon occurs on the head drum can cause severe damage to the video tape, and can lead to internal damage to the camcorder itself. 3 Blow the lens with a blower brush, then wipe it gently with lens cleaning paper. 4 Remove dust from the viewfinder using a blower brush. • Avoid using a cleaner or chemically...
... and, if not installed and used in a residential installation. This same phenomenon occurs on the head drum can cause severe damage to the video tape, and can lead to internal damage to the camcorder itself. 3 Blow the lens with a blower brush, then wipe it gently with lens cleaning paper. 4 Remove dust from the viewfinder using a blower brush. • Avoid using a cleaner or chemically...
Instructions
Page 20
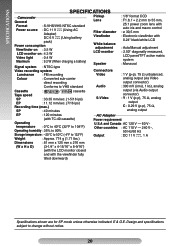
...SPECIFICATIONS Camcorder General Format : S-VHS/VHS NTSC standard Power source : DC 11 V (Using AC Adapter) DC 6 V (Using battery pack) Power consumption Viewfinder on : 3.5 W LCD monitor on : 4.3 W Video light : 0.4 W Maximum : 9.2 W (When charging a battery) Signal system : NTSC-type Pickup Lens Filter diameter Viewfinder White balance adjustment LCD monitor Speaker : 1/6" format CCD : F1.8, f = 2.2 mm to 55 mm, 25:1 power zoom lens with auto iris and macro control : ø 30,5 mm : Electronic viewfinder with 0.24" black/white LCD : Auto/Manual adjustment...
...SPECIFICATIONS Camcorder General Format : S-VHS/VHS NTSC standard Power source : DC 11 V (Using AC Adapter) DC 6 V (Using battery pack) Power consumption Viewfinder on : 3.5 W LCD monitor on : 4.3 W Video light : 0.4 W Maximum : 9.2 W (When charging a battery) Signal system : NTSC-type Pickup Lens Filter diameter Viewfinder White balance adjustment LCD monitor Speaker : 1/6" format CCD : F1.8, f = 2.2 mm to 55 mm, 25:1 power zoom lens with auto iris and macro control : ø 30,5 mm : Electronic viewfinder with 0.24" black/white LCD : Auto/Manual adjustment...
Instructions
Page 24
... V Video Light pg. 13 Viewfinder Adjustment pg. 8 W White Balance Adjustment pg. 14 Wide Mode pg. 14 Z Zooming pg. 10 L LCD Monitor/ Viewfinder, Indications ........ pg. 9, 15 C Q Quick Review pg. 10 R Recording pg. 9 Recording Format (S-VHS/ S-VHS ET).......pg. 15 Recording Mode pg. 14 Retake pg. 10 Cassette Adapter pg. 12 Rewind The Tape pg. 9 Charging The Battery Pack pg. 7 Clean The Camcorder pg. 19 Connection To a VCR/ TV pg. 11 Counter Memory pg. 16 D Date/ Time Display pg. 15 Date/ Time Settings pg...
... V Video Light pg. 13 Viewfinder Adjustment pg. 8 W White Balance Adjustment pg. 14 Wide Mode pg. 14 Z Zooming pg. 10 L LCD Monitor/ Viewfinder, Indications ........ pg. 9, 15 C Q Quick Review pg. 10 R Recording pg. 9 Recording Format (S-VHS/ S-VHS ET).......pg. 15 Recording Mode pg. 14 Retake pg. 10 Cassette Adapter pg. 12 Rewind The Tape pg. 9 Charging The Battery Pack pg. 7 Clean The Camcorder pg. 19 Connection To a VCR/ TV pg. 11 Counter Memory pg. 16 D Date/ Time Display pg. 15 Date/ Time Settings pg...


