User Manual
Page 3
...document may be reproduced or transmitted in this manual may include copyrighted software of their respective owners. Thus the descriptions herein may not exactly match the product or its accessories described herein rely on the software installed, capacities and settings of local network, and may not be activated or may be limited by respective copyright holders under licenses. Huawei... will obtain all necessary governmental permits and licenses in order to change or modify any information or specifications contained in any means without prior notice or obligation. EXCEPT AS...
...document may be reproduced or transmitted in this manual may include copyrighted software of their respective owners. Thus the descriptions herein may not exactly match the product or its accessories described herein rely on the software installed, capacities and settings of local network, and may not be activated or may be limited by respective copyright holders under licenses. Huawei... will obtain all necessary governmental permits and licenses in order to change or modify any information or specifications contained in any means without prior notice or obligation. EXCEPT AS...
User Manual
Page 4
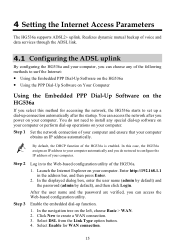
... 3.3 Powering On 14 4 Setting the Internet Access Parameters 15 4.1 Configuring the ADSL uplink 15 Using the Embedded PPP Dial-Up Software on the HG536a 15 Using the PPP Dial-Up Software on Your Computer 16 4.2 Configuring the Wireless Network Connection 17 Setting Up a Wireless Connection Through the WPS Button 17 Setting Up a Wireless Connection Manually 18 5 Basic Configuration for the Host 20 5.1 Changing the Administrator Password 20 5.2 Enabling or Disabling the Wireless Network Function 20 5.3 Changing the Wireless Network Name and the Access Password 21...
... 3.3 Powering On 14 4 Setting the Internet Access Parameters 15 4.1 Configuring the ADSL uplink 15 Using the Embedded PPP Dial-Up Software on the HG536a 15 Using the PPP Dial-Up Software on Your Computer 16 4.2 Configuring the Wireless Network Connection 17 Setting Up a Wireless Connection Through the WPS Button 17 Setting Up a Wireless Connection Manually 18 5 Basic Configuration for the Host 20 5.1 Changing the Administrator Password 20 5.2 Enabling or Disabling the Wireless Network Function 20 5.3 Changing the Wireless Network Name and the Access Password 21...

User Manual
Page 8
... the cables connected to remove the broken part. z Use the AC power supply defined in the specifications of times before it . Maintenance z If the device is not used batteries according to an electric shock, a short circuit of explosion if battery is broken by mistake, or they may explode. Otherwise, the battery may lead to the local regulations or reference instruction supplied with hard...
... the cables connected to remove the broken part. z Use the AC power supply defined in the specifications of times before it . Maintenance z If the device is not used batteries according to an electric shock, a short circuit of explosion if battery is broken by mistake, or they may explode. Otherwise, the battery may lead to the local regulations or reference instruction supplied with hard...

User Manual
Page 9
... rely solely on the device for emergency calls in all the cables connected to it off, and then remove all conditions. Do not use your device for essential communications. 4 z Before cleaning the device, stop using it, power it . Otherwise, the cable may get damaged, causing malfunction of the device. The connection, however, cannot be guaranteed in the service area. z Use a clean, soft, and...
... rely solely on the device for emergency calls in all the cables connected to it off, and then remove all conditions. Do not use your device for essential communications. 4 z Before cleaning the device, stop using it, power it . Otherwise, the cable may get damaged, causing malfunction of the device. The connection, however, cannot be guaranteed in the service area. z Use a clean, soft, and...
User Manual
Page 10
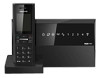
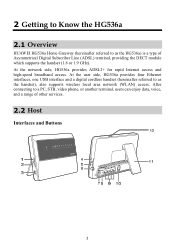
2 Getting to Know the HG536a 2.1 Overview HUAWEI HG536a Home Gateway (hereinafter referred to as the handset), also supports wireless local area network (WLAN) access. At the user side, HG536a provides four Ethernet interfaces, one USB interface and a digital cordless handset (hereinafter referred to a PC, STB, video phone, or another terminal, users can enjoy data, voice, and a range of Asymmetrical Digital Subscriber Line (ADSL) terminal, providing the DECT module which...
2 Getting to Know the HG536a 2.1 Overview HUAWEI HG536a Home Gateway (hereinafter referred to as the handset), also supports wireless local area network (WLAN) access. At the user side, HG536a provides four Ethernet interfaces, one USB interface and a digital cordless handset (hereinafter referred to a PC, STB, video phone, or another terminal, users can enjoy data, voice, and a range of Asymmetrical Digital Subscriber Line (ADSL) terminal, providing the DECT module which...
User Manual
Page 11
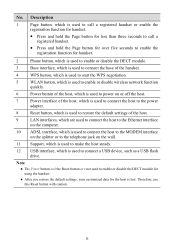
... handset. 4 WPS button, which is used to start the WPS negotiation. 5 WLAN button, which is used to enable or disable wireless network function quickly. 6 Power button of the host, which is used to power on or off the host. 7 Power interface of the host, which is used to connect the host to the power adapter. 8 Reset button, which is used to call a registered handset. Note z The Power button and the Reset button are used to connect the host to the Ethernet interface on the...
... handset. 4 WPS button, which is used to start the WPS negotiation. 5 WLAN button, which is used to enable or disable wireless network function quickly. 6 Power button of the host, which is used to power on or off the host. 7 Power interface of the host, which is used to connect the host to the power adapter. 8 Reset button, which is used to call a registered handset. Note z The Power button and the Reset button are used to connect the host to the Ethernet interface on the...
User Manual
Page 20
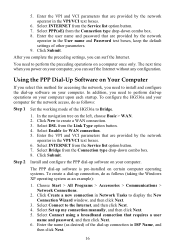
... By configuring the HG536a and your computer. In the navigation tree on the HG536a If you select this case, the HG536a assigns an IP address to your computer automatically and you can access the Web-based configuration utility. You can access the network after the startup. In this method for WAN connection. 15 Select DSL from the Link Type option button. 4. Select Enable for accessing the network, the HG536a starts to create a WAN connection. 3.
... By configuring the HG536a and your computer. In the navigation tree on the HG536a If you select this case, the HG536a assigns an IP address to your computer automatically and you can access the Web-based configuration utility. You can access the network after the startup. In this method for WAN connection. 15 Select DSL from the Link Type option button. 4. Select Enable for accessing the network, the HG536a starts to create a WAN connection. 3.
User Manual
Page 21
.... Select Enable for the network access, do as follows (taking the Windows XP operating system as desired) of the HG536a to install and configure the dial-up software on your computer. Select PPP(oE) from the Service list option button. 7. Enter the user name and password that requires a user name and password, and then click Next. 6. To configure the HG536a and your computer, you need to create a WAN connection. 3. Click New to...
.... Select Enable for the network access, do as follows (taking the Windows XP operating system as desired) of the HG536a to install and configure the dial-up software on your computer. Select PPP(oE) from the Service list option button. 7. Enter the user name and password that requires a user name and password, and then click Next. 6. To configure the HG536a and your computer, you need to create a WAN connection. 3. Click New to...
User Manual
Page 22
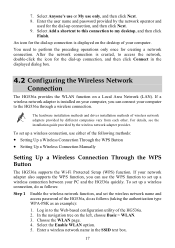
... a wireless connection. To set up a wireless connection, do as follows (taking the authentication type WPA-PSK as follows: Step 1 Enable the wireless network function, and set the wireless network name and access password of the following methods: z Setting Up a Wireless Connection Through the WPS Button z Setting Up a Wireless Connection Manually Setting Up a Wireless Connection Through the WPS Button The HG536a supports the Wi-Fi Protected Setup (WPS) function. To set up connection, and then click Next. 9. Enter the user name and password provided by the wireless network adapter...
... a wireless connection. To set up a wireless connection, do as follows (taking the authentication type WPA-PSK as follows: Step 1 Enable the wireless network function, and set the wireless network name and access password of the following methods: z Setting Up a Wireless Connection Through the WPS Button z Setting Up a Wireless Connection Manually Setting Up a Wireless Connection Through the WPS Button The HG536a supports the Wi-Fi Protected Setup (WPS) function. To set up connection, and then click Next. 9. Enter the user name and password provided by the wireless network adapter...
User Manual
Page 23
... the HG536a manually, do as follows: Step 1 Enable the wireless network function, and set up a wireless connection, use two of the following methods: Use the tool provided by the operating system of the HG536a becomes on the left, choose Basic > WLAN. 3. Choose the WLAN page. 4. Step 4 Press the WPS button on the software user interface to the operation guide provided by the application provider. Enter an access password in the WPA pre-shared key...
... the HG536a manually, do as follows: Step 1 Enable the wireless network function, and set up a wireless connection, use two of the following methods: Use the tool provided by the operating system of the HG536a becomes on the left, choose Basic > WLAN. 3. Choose the WLAN page. 4. Step 4 Press the WPS button on the software user interface to the operation guide provided by the application provider. Enter an access password in the WPA pre-shared key...
User Manual
Page 24
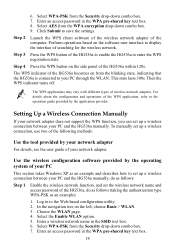
... WPA encryption drop-down combo box. 9. In the Computer Management window, choose Computer Management (Local) > Services and Applications >Services. 3. Select Use Windows to close the dialog box, and then close the Computer Management window. Select AES from the shortcut menu. 2. In the Wireless Network Connection Properties dialog box, select Wireless Networks. 4. Click View Wireless Networks. 6. If not, click Start. 5. In the displayed dialog box, enter the access password that is Started. In the Wireless Zero Configuration...
... WPA encryption drop-down combo box. 9. In the Computer Management window, choose Computer Management (Local) > Services and Applications >Services. 3. Select Use Windows to close the dialog box, and then close the Computer Management window. Select AES from the shortcut menu. 2. In the Wireless Network Connection Properties dialog box, select Wireless Networks. 4. Click View Wireless Networks. 6. If not, click Start. 5. In the displayed dialog box, enter the access password that is Started. In the Wireless Zero Configuration...
User Manual
Page 25
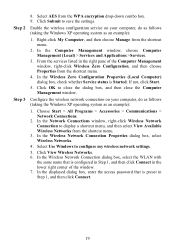
... the user name or password that are restored to the Web-based configuration utility. In addition, you restore the default settings, however, your customized data is enabled. If you can restore the default settings of the HG536a by pressing the WLAN button on the left, choose Maintenance > Account. After you can quickly enable or disable the wireless network function by pressing and holding the Reset button for logging in to default values. Then enter the new password again...
... the user name or password that are restored to the Web-based configuration utility. In addition, you restore the default settings, however, your customized data is enabled. If you can restore the default settings of the HG536a by pressing the WLAN button on the left, choose Maintenance > Account. After you can quickly enable or disable the wireless network function by pressing and holding the Reset button for logging in to default values. Then enter the new password again...

User Manual
Page 26
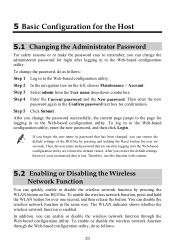
... the left , choose Basic > LAN. Step 3 In the DHCP section, enter a new IP address as an example): Step 1 Log in to the Web-based configuration utility. Step 4 Click Submit. 21 You can change the IP address after logging in to check whether the wireless network function is enabled. 5.3 Changing the Wireless Network Name and the Access Password To change the IP address, do as follows (taking the authentication type WPA-PSK as desired in the...
... the left , choose Basic > LAN. Step 3 In the DHCP section, enter a new IP address as an example): Step 1 Log in to the Web-based configuration utility. Step 4 Click Submit. 21 You can change the IP address after logging in to check whether the wireless network function is enabled. 5.3 Changing the Wireless Network Name and the Access Password To change the IP address, do as follows (taking the authentication type WPA-PSK as desired in the...

User Manual
Page 27
Ensure that the computer can access the Web-based configuration utility. 5.5 Restoring Default Settings You can quickly restore the default settings of the computer is powered on the left, choose Maintenance > Device in the navigation tree to the login page. In addition, you need to launch the Internet Explorer, and then enter the new IP address in the address bar. To restore the default settings through the Web-based configuration utility. Step 2 In the navigation tree on...
Ensure that the computer can access the Web-based configuration utility. 5.5 Restoring Default Settings You can quickly restore the default settings of the computer is powered on the left, choose Maintenance > Device in the navigation tree to the login page. In addition, you need to launch the Internet Explorer, and then enter the new IP address in the address bar. To restore the default settings through the Web-based configuration utility. Step 2 In the navigation tree on...

User Manual
Page 32
... 10 digits, the LCD automatically switches to a smaller font in entering the number, delete it by dialing numbers, do as follows: Step 1 In standby mode, press to display the call , do as follows: Step 1 Enter a phone number in standby mode. Step 2 If you want to call , press . Step 2 Press or repeatedly to select the number you make a mistake in order to...
... 10 digits, the LCD automatically switches to a smaller font in entering the number, delete it by dialing numbers, do as follows: Step 1 In standby mode, press to display the call , do as follows: Step 1 Enter a phone number in standby mode. Step 2 If you want to call , press . Step 2 Press or repeatedly to select the number you make a mistake in order to...

User Manual
Page 37
... access the Internet through the power adapter. The WLAN indicator shows whether the wireless network function is off , contact an authorized maintenance center. If the LAN indicator is enabled. Ensure that the terminal is enabled. 2. Ensure that the network adapter of the computer is turned on , contact your network operator. Ensure that generate strong magnetic or electric fields. 7 FAQs How can I do not use the...
... access the Internet through the power adapter. The WLAN indicator shows whether the wireless network function is off , contact an authorized maintenance center. If the LAN indicator is enabled. Ensure that the terminal is enabled. 2. Ensure that the network adapter of the computer is turned on , contact your network operator. Ensure that generate strong magnetic or electric fields. 7 FAQs How can I do not use the...

User Manual
Page 38
... Computer Management window, click Network adapters to the icon of the Web browser is properly installed. Restore the default settings of the computer. In the Local Area Network (LAN) settings group box, click LAN Settings. 5. Ensure that you can use the PPP dial-up software to dial successfully. Stop the PPP dial-up software to dial again. 2. Check whether the proxy server of the network adapter, you have entered the correct user...
... Computer Management window, click Network adapters to the icon of the Web browser is properly installed. Restore the default settings of the computer. In the Local Area Network (LAN) settings group box, click LAN Settings. 5. Ensure that you can use the PPP dial-up software to dial successfully. Stop the PPP dial-up software to dial again. 2. Check whether the proxy server of the network adapter, you have entered the correct user...
User Manual
Page 39
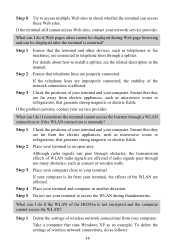
... WLAN radio signals are far from your terminal in the manual. Place your computer. If your terminal, the effects of wireless network connections, do if Web pages often cannot be displayed after the terminal is restarted? For details about how to install a splitter, see the related description in an open area. Step 2 Ensure that they are affected if radio signals pass through a WLAN connection...
... WLAN radio signals are far from your terminal in the manual. Place your computer. If your terminal, the effects of wireless network connections, do if Web pages often cannot be displayed after the terminal is restarted? For details about how to install a splitter, see the related description in an open area. Step 2 Ensure that they are affected if radio signals pass through a WLAN connection...

Quick Start Guide
Page 5
... that are verified, you can access the Web-based configuration utility. You need to the Web-based configuration utility of your computer obtains an IP address automatically. Select DSL from the Link Type option button. 4. Enter the user name and password that are provided by default), and then click Login. Launch the Internet Explorer on the left, choose Basic > WAN. 2. In this case, the HG536a assigns an IP address to your computer.
... that are verified, you can access the Web-based configuration utility. You need to the Web-based configuration utility of your computer obtains an IP address automatically. Select DSL from the Link Type option button. 4. Enter the user name and password that are provided by default), and then click Login. Launch the Internet Explorer on the left, choose Basic > WAN. 2. In this case, the HG536a assigns an IP address to your computer.
Quick Start Guide
Page 6
... access password of the Computer Management window, right-click Wireless Zero Configuration, and then choose Properties from the WPA encryption drop-down combo box. 5. Enter a wireless network name in the WPA pre-shared key text box. 6. Step 4 Configure the wireless network connection on the left of the Web-based configuration utility, choose Basic > WLAN. 2. In the Network Connections window, right-click Wireless Network Connection to save the settings. 4 Configuring the Wireless Network Connection If a wireless network adapter is Started. Step 3 Enable the wireless configuration...
... access password of the Computer Management window, right-click Wireless Zero Configuration, and then choose Properties from the WPA encryption drop-down combo box. 5. Enter a wireless network name in the WPA pre-shared key text box. 6. Step 4 Configure the wireless network connection on the left of the Web-based configuration utility, choose Basic > WLAN. 2. In the Network Connections window, right-click Wireless Network Connection to save the settings. 4 Configuring the Wireless Network Connection If a wireless network adapter is Started. Step 3 Enable the wireless configuration...


