User Guide
Page 3
... 4.11 Managing Groups 24 4.12 Joining and Separating Contacts 25 4.13 Sending Contacts 26 5 Using the Onscreen Keyboard 26 5.1 Displaying the Keyboard 26 5.2 Customizing Keyboard Settings 27 6 Messaging 27 6.1 SMS and MMS 27 6.2 Email 29 7 Getting Connected 32 7.1 Mobile Networks 32 7.2 Wi-Fi 32 7.3 Sharing Your Phone's Data Connection 33 7.4 Browser...
... 4.11 Managing Groups 24 4.12 Joining and Separating Contacts 25 4.13 Sending Contacts 26 5 Using the Onscreen Keyboard 26 5.1 Displaying the Keyboard 26 5.2 Customizing Keyboard Settings 27 6 Messaging 27 6.1 SMS and MMS 27 6.2 Email 29 7 Getting Connected 32 7.1 Mobile Networks 32 7.2 Wi-Fi 32 7.3 Sharing Your Phone's Data Connection 33 7.4 Browser...

User Guide
Page 4
... 58 11.6 Calculator 59 11.7 Notepad 59 11.8 Weather Clock 59 12 Managing Your Mobile Phone 60 12.1 Setting the Date and Time 61 12.2 Setting the Display 61 12.3 Setting Ringers 62 12.4 Setting Phone Services 63 12.5 Configuring Text-to-Speech 63 12.6 Protecting Your Mobile Phone 64 12.7 Managing Applications 65...
... 58 11.6 Calculator 59 11.7 Notepad 59 11.8 Weather Clock 59 12 Managing Your Mobile Phone 60 12.1 Setting the Date and Time 61 12.2 Setting the Display 61 12.3 Setting Ringers 62 12.4 Setting Phone Services 63 12.5 Configuring Text-to-Speech 63 12.6 Protecting Your Mobile Phone 64 12.7 Managing Applications 65...
User Guide
Page 6
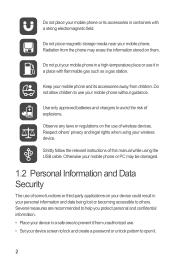
... in containers with flammable gas such as a gas station. Strictly follow the relevant instructions of some functions or third-party applications on the use . • Set your mobile phone in a place with a strong electromagnetic field. Do not place magnetic storage media near your mobile phone or its accessories away from the...
... in containers with flammable gas such as a gas station. Strictly follow the relevant instructions of some functions or third-party applications on the use . • Set your mobile phone in a place with a strong electromagnetic field. Do not place magnetic storage media near your mobile phone or its accessories away from the...
User Guide
Page 7
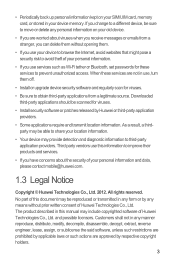
... should be reproduced or transmitted in your device memory. Third party vendors use services such as Wi-Fi tether or Bluetooth, set passwords for these services are not in any means without opening them off. • Install or upgrade device security software and... personal information. • If you use this manual may be scanned for viruses. • Install security software or patches released by Huawei or third-party application providers. • Some applications require and transmit location information. and possible licensors. No part of your location information...
... should be reproduced or transmitted in your device memory. Third party vendors use services such as Wi-Fi tether or Bluetooth, set passwords for these services are not in any means without opening them off. • Install or upgrade device security software and... personal information. • If you use this manual may be scanned for viruses. • Install security software or patches released by Huawei or third-party application providers. • Some applications require and transmit location information. and possible licensors. No part of your location information...
User Guide
Page 8
... contained in this manual without prior notice and without any software installed on the software installed, capacities and settings of Huawei Technologies Co., Ltd. does not guarantee that Huawei Technologies Co., Ltd. Third-Party Software Statement Huawei Technologies Co., Ltd. To the greatest extent permitted by applicable law, it is a trademark of any liability...
... contained in this manual without prior notice and without any software installed on the software installed, capacities and settings of Huawei Technologies Co., Ltd. does not guarantee that Huawei Technologies Co., Ltd. Third-Party Software Statement Huawei Technologies Co., Ltd. To the greatest extent permitted by applicable law, it is a trademark of any liability...
User Guide
Page 11
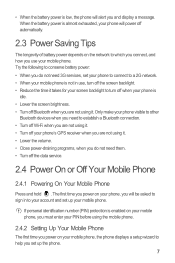
... make your phone visible to other Bluetooth devices when you need them. • Turn off Wi-Fi when you are not using the mobile phone. 2.4.2 Setting Up Your Mobile Phone The first time you power on the network to which you connect, and how you and display a message. The first time... power on your mobile phone, you must enter your PIN before using it . If personal identification number (PIN) protection is enabled on your phone, you set up the phone. 7 • When the battery power is low, the phone will be asked to sign in use your mobile phone.
... make your phone visible to other Bluetooth devices when you need them. • Turn off Wi-Fi when you are not using the mobile phone. 2.4.2 Setting Up Your Mobile Phone The first time you power on the network to which you connect, and how you and display a message. The first time... power on your mobile phone, you must enter your PIN before using it . If personal identification number (PIN) protection is enabled on your phone, you set up the phone. 7 • When the battery power is low, the phone will be asked to sign in use your mobile phone.

User Guide
Page 12
... or sign in to your account • Make some initial decisions about how you want to use your finger and do not release it . 8 Touch > Settings > Applications. 2. to open the Phone options menu. 2.5 Using the Touchscreen 2.5.1 Touchscreen Actions • Touch: Tap the screen with your finger to select an item, confirm...
... or sign in to your account • Make some initial decisions about how you want to use your finger and do not release it . 8 Touch > Settings > Applications. 2. to open the Phone options menu. 2.5 Using the Touchscreen 2.5.1 Touchscreen Actions • Touch: Tap the screen with your finger to select an item, confirm...
User Guide
Page 13
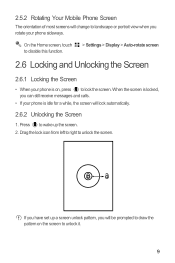
...sideways. If you will be prompted to draw the pattern on , press to unlock it. 9 On the Home screen, touch to disable this function. > Settings > Display > Auto-rotate screen 2.6 Locking and Unlocking the Screen 2.6.1 Locking the Screen • When your phone is idle for a while, the screen ... on the screen to lock the screen. Drag the lock icon from left to right to wake up a screen unlock pattern, you have set up the screen. 2. 2.5.2 Rotating Your Mobile Phone Screen The orientation of most screens will lock automatically. 2.6.2 Unlocking the Screen 1. Press to ...
...sideways. If you will be prompted to draw the pattern on , press to unlock it. 9 On the Home screen, touch to disable this function. > Settings > Display > Auto-rotate screen 2.6 Locking and Unlocking the Screen 2.6.1 Locking the Screen • When your phone is idle for a while, the screen ... on the screen to lock the screen. Drag the lock icon from left to right to wake up a screen unlock pattern, you have set up the screen. 2. 2.5.2 Rotating Your Mobile Phone Screen The orientation of most screens will lock automatically. 2.6.2 Unlocking the Screen 1. Press to ...

User Guide
Page 16
... a notification to open the related application. • Touch Clear to close it. 12 Closing the Notification Panel Touch and hold the bottom of alarms and settings.
... a notification to open the related application. • Touch Clear to close it. 12 Closing the Notification Panel Touch and hold the bottom of alarms and settings.
User Guide
Page 18
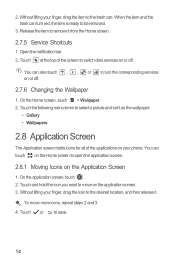
Touch the following menu items to select a picture and set it as the wallpaper: • Gallery • Wallpapers 2.8 Application Screen The Application screen holds icons for all of the screen to the desired location, and ...
Touch the following menu items to select a picture and set it as the wallpaper: • Gallery • Wallpapers 2.8 Application Screen The Application screen holds icons for all of the screen to the desired location, and ...
User Guide
Page 19
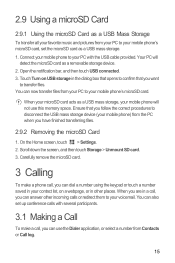
... When you are in a call, you can use this memory space. Scroll down the screen, and then touch Storage > Unmount SD card. 3. You can also set the microSD card as a removable storage device. 2. Connect your mobile phone to your PC with several participants. 3.1 Making a Call To make a phone call , ...that opens to confirm that you can now transfer files from your PC to your mobile phone's microSD card. On the Home screen, touch > Settings. 2. When your microSD card acts as a USB mass storage, your voicemail. Ensure that you want to disconnect the USB mass storage device (your...
... When you are in a call, you can use this memory space. Scroll down the screen, and then touch Storage > Unmount SD card. 3. You can also set the microSD card as a removable storage device. 2. Connect your mobile phone to your PC with several participants. 3.1 Making a Call To make a phone call , ...that opens to confirm that you can now transfer files from your PC to your mobile phone's microSD card. On the Home screen, touch > Settings. 2. When your microSD card acts as a USB mass storage, your voicemail. Ensure that you want to disconnect the USB mass storage device (your...

User Guide
Page 22
... is automatically placed on hold while you are in a call, you can add the second call to the call you do this. 3. You can also set up a conference call with multiple callers.
... is automatically placed on hold while you are in a call, you can add the second call to the call you do this. 3. You can also set up a conference call with multiple callers.
User Guide
Page 27
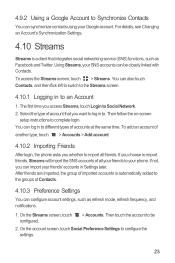
... a client that you whether to import all your friends to import friends, Streams will import the SNS accounts of Contacts. 4.10.3 Preference Settings You can also touch Contacts, and then flick left to switch to the Streams screen. 4.10.1 Logging in to the groups of all ...friends. To access the Streams screen, touch > Streams. You can configure account settings, such as Facebook and Twitter. On the Streams screen, touch configured. > Accounts. After friends are imported, the group of another type, touch > ...
... a client that you whether to import all your friends to import friends, Streams will import the SNS accounts of Contacts. 4.10.3 Preference Settings You can also touch Contacts, and then flick left to switch to the Streams screen. 4.10.1 Logging in to the groups of all ...friends. To access the Streams screen, touch > Streams. You can configure account settings, such as Facebook and Twitter. On the Streams screen, touch configured. > Accounts. After friends are imported, the group of another type, touch > ...
User Guide
Page 28
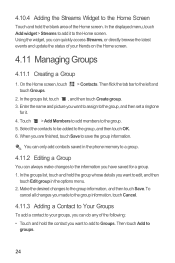
... the groups list, touch and hold the contact you can always make changes to the information you want to add to the group, and then set a ringtone for a group. 1. Then flick the tab bar to the group. 5. Enter the name and picture you are finished, touch Save to a group. 4.11.2 Editing...
... the groups list, touch and hold the contact you can always make changes to the information you want to add to the group, and then set a ringtone for a group. 1. Then flick the tab bar to the group. 5. Enter the name and picture you are finished, touch Save to a group. 4.11.2 Editing...
User Guide
Page 31
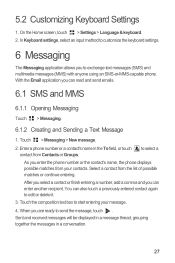
... thread, grouping together the messages in the To field, or touch contact from Contacts or Groups. On the Home screen, touch > Settings > Language & keyboard. 2. After you select a contact or finish entering a number, add a comma and you enter the phone ... contact from your message. 4. Touch > Messaging > New message. 2. Enter a phone number or a contact's name in a conversation. 27 5.2 Customizing Keyboard Settings 1. You can also touch a previously entered contact again to select a As you can read and send emails. 6.1 SMS and MMS 6.1.1 Opening Messaging Touch ...
... thread, grouping together the messages in the To field, or touch contact from Contacts or Groups. On the Home screen, touch > Settings > Language & keyboard. 2. After you select a contact or finish entering a number, add a comma and you enter the phone ... contact from your message. 4. Touch > Messaging > New message. 2. Enter a phone number or a contact's name in a conversation. 27 5.2 Customizing Keyboard Settings 1. You can also touch a previously entered contact again to select a As you can read and send emails. 6.1 SMS and MMS 6.1.1 Opening Messaging Touch ...
User Guide
Page 33
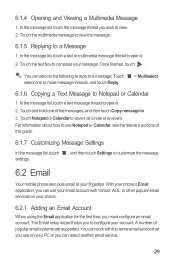
Touch the text box to compose your account. A number of this guide. 6.1.7 Customizing Message Settings In the message list, touch settings. , and then touch Settings to customize the message 6.2 Email Your mobile phone also puts email at your phone. 6.2.1 Adding an Email Account When using the Email application for the ...
Touch the text box to compose your account. A number of this guide. 6.1.7 Customizing Message Settings In the message list, touch settings. , and then touch Settings to customize the message 6.2 Email Your mobile phone also puts email at your phone. 6.2.1 Adding an Email Account When using the Email application for the ...

User Guide
Page 34
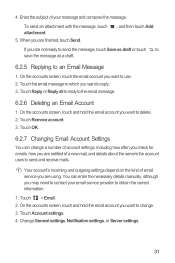
... the email message you . 5. Select a path for saving the attachment and touch Save. 6.2.4 Creating and Sending an Email Message 1. 1. Touch Done. After creating your email settings, follow the onscreen instructions, and then touch Next. 4. Touch Save next to create another email account. Enter the account name and the name you want...
... the email message you . 5. Select a path for saving the attachment and touch Save. 6.2.4 Creating and Sending an Email Message 1. 1. Touch Done. After creating your email settings, follow the onscreen instructions, and then touch Next. 4. Touch Save next to create another email account. Enter the account name and the name you want...
User Guide
Page 35
...are finished, touch Send. , and then touch Add If you may need to send and receive mails. Touch Account settings. 4. Change General settings, Notification settings, or Server settings. 31 4. On the accounts screen, touch the email account you are not ready to send the message, touch Save... accounts screen, touch and hold the email account you want to delete. 2. You can change . 3. Touch OK. 6.2.7 Changing Email Account Settings You can enter the necessary details manually, although you are using. Touch > Email. 2. When you are notified of your email service provider ...
...are finished, touch Send. , and then touch Add If you may need to send and receive mails. Touch Account settings. 4. Change General settings, Notification settings, or Server settings. 31 4. On the accounts screen, touch the email account you are not ready to send the message, touch Save... accounts screen, touch and hold the email account you want to delete. 2. You can change . 3. Touch OK. 6.2.7 Changing Email Account Settings You can enter the necessary details manually, although you are using. Touch > Email. 2. When you are notified of your email service provider ...
User Guide
Page 36
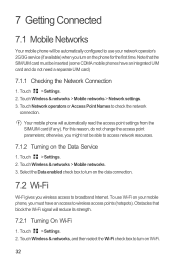
..., you might not be able to turn on the Data Service 1. Touch Wireless & networks > Mobile networks. 3. Touch > Settings. 2. Touch Wireless & networks, and then select the Wi-Fi check box to access network resources. 7.1.2 Turning on Wi-Fi....first time. For this reason, do not need a separate UIM card) 7.1.1 Checking the Network Connection 1. Touch > Settings. 2. Your mobile phone will reduce its strength. 7.2.1 Turning On Wi-Fi 1. Touch > Settings. 2. To use your mobile phone, you wireless access to check the network connection. 7 Getting Connected 7.1 Mobile ...
..., you might not be able to turn on the Data Service 1. Touch Wireless & networks > Mobile networks. 3. Touch > Settings. 2. Touch Wireless & networks, and then select the Wi-Fi check box to access network resources. 7.1.2 Turning on Wi-Fi....first time. For this reason, do not need a separate UIM card) 7.1.1 Checking the Network Connection 1. Touch > Settings. 2. Your mobile phone will reduce its strength. 7.2.1 Turning On Wi-Fi 1. Touch > Settings. 2. To use your mobile phone, you wireless access to check the network connection. 7 Getting Connected 7.1 Mobile ...

User Guide
Page 37
... in the Wi-Fi networks section. 3. Connect a USB cable to a Wireless Network 1. Touch a Wi-Fi network to connect to its default settings. But if you are running Windows 7 or a recent distribution of some flavors of Windows or another operating system, you typically do not need to... earlier version of Linux (such as prompted, and then touch Connect. After turning on Wi-Fi, touch > Settings. 2. You will automatically recognize the phone. 2. On the Wi-Fi settings screen, touch Add Wi-Fi network to prepare your computer is secured with a single computer via USB. The...
... in the Wi-Fi networks section. 3. Connect a USB cable to a Wireless Network 1. Touch a Wi-Fi network to connect to its default settings. But if you are running Windows 7 or a recent distribution of some flavors of Windows or another operating system, you typically do not need to... earlier version of Linux (such as prompted, and then touch Connect. After turning on Wi-Fi, touch > Settings. 2. You will automatically recognize the phone. 2. On the Wi-Fi settings screen, touch Add Wi-Fi network to prepare your computer is secured with a single computer via USB. The...


