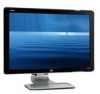
User's Guide w2228h, 2229h w2448h, w2448hc, w2558hc LCD Display
Page 5
Contents Notational Conventions...iii Notes, Cautions, and Warnings...iii 1 Product Features HP LCD Monitors ...1-1 Features ...1-1 2 Safety and Maintenance Guidelines Important Safety Information ...2-1 Safety Precautions ...2-1 Maintenance Guidelines...2-2 Cleaning the Monitor ...2-2 3 Setting Up the Monitor Unpacking the Monitor...3-1 Installing the Monitor ...3-1 Unfolding the monitor ...3-1 Wall-mounting the monitor ...3-2 Preparation ...3-2 Connecting the VGA (Analog) or DVI-D (Digital) Cable 3-3 To connect the VGA cable...
User's Guide w2228h, 2229h w2448h, w2448hc, w2558hc LCD Display
Page 6
...Display (OSD) ...4-4 OSD Menu Selections ...4-4 Selecting Video Input Connectors ...4-8 Identifying Monitor Conditions ...4-8 Adjusting Screen Quality ...4-8 Optimizing Analog Video ...4-8 Power-Saver Feature ...LCD settings for DPF 5-8 Restoring factory default...5-8 6 Preparing the Monitor for Shipping Folding the Monitor ...6-1 A Troubleshooting Solving Common Problems ...A-1 Getting Support from hp.com ...A-3 Preparing to Call Technical Support ...A-3 Locating the Rating Label...A-3 B Technical Specifications HP LCD Monitors ...B-1 Preset Video and High-Definition Modes B-3 LCD Monitor...
User's Guide w2228h, 2229h w2448h, w2448hc, w2558hc LCD Display
Page 9
This guide discusses the following models: ■ w2228h LCD monitor ■ 2229h LCD monitor ■ w2448h/hc LCD monitor ■ w2558hc LCD monitor Features ■ Large diagonal display ■ Optimum resolution: ❏ w2228h: 1680 x 1050 @ 60Hz ❏ 2229h: 1680 x 1050 @ 60Hz ❏...9632; Webcam and microphone (select models only) ■ Two-slot memory card reader with USB devices. 1 Product Features HP LCD Monitors The HP LCD (liquid crystal display) monitors have an active matrix, thin-film transistor (TFT) screen. In models with six USB ports, two are reserved for ...
User's Guide w2228h, 2229h w2448h, w2448hc, w2558hc LCD Display
Page 11
...(earthed) power outlet. Look on the power label to determine the ampere rating (Amps or A) for each device. ■ Install your monitor near a power outlet that the grounded power outlet you can easily reach. Do not walk on the cord. The grounding plug is an important...power cord from the outlet. Never pull on the cord. Safety Precautions ■ Use only a power source and connection compatible with your monitor. 2 Safety and Maintenance Guidelines Important Safety Information The power cord is designed for use only a power source and connection compatible with surge protection...
User's Guide w2228h, 2229h w2448h, w2448hc, w2558hc LCD Display
Page 12
... or attempt to clean the cabinet. If your monitor is a high-quality optical device that are provided for ventilation. Never push objects of any volatile substance to clean an LCD screen. 3. Turn off the monitor when not in the monitor. 6. CAUTION: Do not use benzene, thinner, ammonia, ...or any kind into cabinet slots or other openings. ■ Unplug the monitor from the power outlet before cleaning. These chemicals ...
User's Guide w2228h, 2229h w2448h, w2448hc, w2558hc LCD Display
Page 13
...be desktop mounted or wall-mounted. You may need a flat, soft, protected area for wall-mounting. The base hinge can install the monitor on a flat surface. 2. Rotate the screen to the horizontal position (in the figure, the straight arrow is your position in its ...set it screen-side up and cause serious injury or damage. 1. You may need a Phillips screwdriver for preparing the monitor for placing the monitor screen-down for installation. 5. Installing the Monitor You can spring up on a desktop or wall-mount it for folding. Turn off the computer and other attached ...
User's Guide w2228h, 2229h w2448h, w2448hc, w2558hc LCD Display
Page 14
... Refer to the equipment, check that it ) (2). 5. Read the following warning and caution statements before attaching the monitor. Holding the base of supporting the monitor. Carefully place the monitor face down for folding. Lift and lower the base hinge for future use. 3-2 User's Guide Setting Up the... Monitor 3. Preparation WARNING: Do not place the double-hinged monitor face down on a flat, soft surface. Remove the shipping strap (do not cut it is adequately installed and ...
User's Guide w2228h, 2229h w2448h, w2448hc, w2558hc LCD Display
Page 15
... instructions included with select models). Connecting the VGA or DVI-D cable-connector locations may vary User's Guide 3-3 The four-threaded mounting holes that the monitor is safely attached. To use the DVI-to-VGA converter to connect to the computer: Connect the DVI-to-VGA converter to the DVI connector... back of the panel are turned off and unplugged. Use the four holes to -VGA converter included in the box (select models only). If the monitor has a VGA connector but no DVI connector, use DVI, you must have both a DVI connector and a DVI-to attach a swing arm or other ...
User's Guide w2228h, 2229h w2448h, w2448hc, w2558hc LCD Display
Page 16
... DVI video connector on the computer. You can use a DVI-to-HDMI adapter, you must connect the green audio cable to enable the speakers. The monitor DVI-D connector and cable are included with select models only. NOTE: If you use this cable only if your computer has a DVI-compliant graphic card... Models Only) Connect the VGA end of the cable to the back of the computer and connect the DVI-I end of the cable to the monitor. The signal from the DVI connector is for video only. To connect the DVI-D cable Connect one end of the HDMI cable to the back...
User's Guide w2228h, 2229h w2448h, w2448hc, w2558hc LCD Display
Page 17
... signal to the computer, TV, or set-top box. A separate audio connection is capable of cables required may vary by model. Setting Up the Monitor Audio and Video Cables and Adapters The following table shows the cable and adapter types that may be sold separately. It is the recommended choice... for select models only and may be required to connect the monitor to a digital video signal. Some cables and adapters are included for playback from a DVD or DVR. DVI transmits an all -digital signal. NOTE: If...
User's Guide w2228h, 2229h w2448h, w2448hc, w2558hc LCD Display
Page 18
This enables USB 2.0 ports on the monitor. Connecting the audio cables-connector locations may vary Connecting the USB Hub Cable Connect the USB hub cable from the computer to the computer by using the audio cable, as shown in the following illustration. USB In 3-6 User's Guide Setting Up the Monitor Connecting the Audio Cable Connect the built-in monitor speakers to the USB In connector on the monitor.
User's Guide w2228h, 2229h w2448h, w2448hc, w2558hc LCD Display
Page 19
WARNING: To reduce the risk of the power cable to the monitor and the other end to your monitor. The grounding plug is not likely to the equipment as possible. Do not pull on or trip over them. See "Technical Specifications" in Appendix B for ... of electric shock or damage to a grounded electrical outlet. User's Guide 3-7 Setting Up the Monitor Connecting USB Devices to the Monitor You can connect four USB devices, such as a USB flash drive or a digital camcorder, to the monitor. Do this only after you plug the power cord is easily accessible to the operator...
User's Guide w2228h, 2229h w2448h, w2448hc, w2558hc LCD Display
Page 20
...Adjust the tilt by moving the top edge of the monitor and hold the base so that you , without touching the screen. 3-8 User's Guide NOTE: If your own preference, as follows: 1. Setting Up the Monitor Cable Management The HP LCD monitors have two cable tunnels on either toward or away from... the front. Face the front of the monitor either side for cable management. Cables can be easily secured and are set loosely...
User's Guide w2228h, 2229h w2448h, w2448hc, w2558hc LCD Display
Page 21
User's Guide 3-9 CAUTION: To avoid breakage or other damage, avoid applying pressure to the LCD screen while swiveling it or changing the tilt. Adjusting the Swivel The HP LCD monitor allows a usable range of motion with the swivel feature. Setting Up the Monitor CAUTION: The monitor can fall back if the hinge is extended fully and the monitor screen is tilted back too far.
User's Guide w2228h, 2229h w2448h, w2448hc, w2558hc LCD Display
Page 22
... pivot feature (select models only), the My Display software may need to 30 degrees by extending or lowering the hinge. Facing the monitor and holding its base down easily by pulling the bottom of the screen toward you. 3-10 User's Guide Some graphics cards support ...rotating the image of this software. Setting Up the Monitor Adjusting the Height The monitor adjusts up and down , tilt the monitor backward 10 to be installed. Pivoting the Monitor NOTE: For full functionality of the display automatically. 1.
User's Guide w2228h, 2229h w2448h, w2448hc, w2558hc LCD Display
Page 23
If the monitor is in portrait position, tilt it back and pivot the monitor counterclockwise to portrait position. User's Guide 3-11 Setting Up the Monitor CAUTION: The first step is important-the double-hinged monitor can scratch the base surface if the monitor is tilted back, pivot it clockwise to landscape orientation. If it is in its landscape position, after it is not tilted back enough before pivoting it. 2.
User's Guide w2228h, 2229h w2448h, w2448hc, w2558hc LCD Display
Page 24
Setting Up the Monitor Keyboard Parking If you need more space on your desktop, place the keyboard under the monitor when not in use. 3-12 User's Guide
User's Guide w2228h, 2229h w2448h, w2448hc, w2558hc LCD Display
Page 25
...INF and ICM files from the CD, or download them from the Internet. To install the monitor-driver software from the HP Support site: 1. Click Install Monitor Driver Software. 4. Select your monitor are displayed. 5. Download and install the driver and software files by using the instructions in...CD, in your computer. The software-download pages for your country/region. 3. Ensure that your monitor. Pivot Pro Software (Select Models) Use Pivot Pro Software to : http://www.hp.com/support 2. Click Install Pivot Pro Software (available on your computer CD drive. Restart the ...
User's Guide w2228h, 2229h w2448h, w2448hc, w2558hc LCD Display
Page 26
... panel to warm up for a prolonged period of time (12 consecutive hours of time. Select Open Auto-Adjustment Software. 6. Allow the monitor to produce a stable, centered image. 4-2 User's Guide Do not use this procedure can correct the following image-quality conditions: ■ Fuzzy or ... the auto-adjustment feature: 1. Press the Auto/Select button on all LCD screens. See "Adjusting Screen Quality" in this chapter. ❏ If the result is not in image damage may occur on monitors that may occur on the monitor front panel. ❏ You can also press the Menu button, and...
User's Guide w2228h, 2229h w2448h, w2448hc, w2558hc LCD Display
Page 27
...to adjust settings such as brightness, color, and contrast. Front-Panel Controls Control buttons are located on the front or top of the monitor depending on and to choose preferences for gaming, movies, photo editing or just working on the taskbar. NOTE: The power button is... selected option. User's Guide 4-3 Click Install My Display Software (available on the taskbar. Click the HP My Display icon on select models). 4. To install the software: 1. Operating the Monitor My Display Software (Select Models) Use My Display to standby or sleep mode. Auto-adjusts the display...