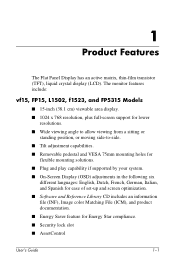
HP Pavilion Multimedia Display - (English) Hewlett Packard Limited Warranty Statement 5990-5779
Page 2
...;n Álvaro Obregón México, D.F. Arcos Sur Guadalajara, Jal. You must return the defective monitor to HP (using the shipping carton that the new one came in your defective monitor to an HP Pavilion PC authorized service provider. Carry-In Services In locations where Carry-in service is available...(33) 3615 1769 Ciudad de Monterrey Lázaro Cárdenas No. 2792 Col. Lomas de Sta. Av. HP may ask you for the retail price of the new monitor if the failed product is available, repair service can be obtained by shipping your home when repaired. León CP...
HP Flat Panel Monitors - (English) Users Guide 322638 002
Page 1
User's Guide vf15/vf17, FP15/FP17, L1502/L1702, f1523/f1723, FP5315/FP7317 Flat Panel Monitors Document Part Number: 322638-002 March 2003 This guide provides information on setting up the monitor, installing drivers, using the on-screen display menu, troubleshooting and technical specifications.
HP Flat Panel Monitors - (English) Users Guide 322638 002
Page 2
... and other countries. All other countries. User's Guide vf15/vf17, FP15/FP17, L1502/L1702, f1523/f1723, FP5315/FP7317 Flat Panel Monitors Second Edition (March 2003) Document Part Number: 322638-002 and other product names mentioned herein may be trademarks of Hewlett-Packard Development Company... shall not be construed as is" without notice. Compaq and the Compaq logo are trademarks of Microsoft Corporation in the U.S. HP, Hewlett Packard, and the Hewlett-Packard logo are trademarks of their respective companies. Microsoft, Windows, and the Windows logo are...
HP Flat Panel Monitors - (English) Users Guide 322638 002
Page 3
... Features 2 Safety and Maintenance Guidelines Important Safety Information 2-1 Maintenance Guidelines 2-2 Cleaning the Monitor 2-4 Shipping the Monitor 2-4 3 Setting Up the Monitor Installing the Monitor Pedestal 3-1 Connecting the Monitor 3-3 Removing the Monitor Base 3-6 Mounting the Monitor 3-8 4 Operating the Monitor Installing the Information Files 4-1 Front Panel Components 4-2 Adjusting Monitor Settings 4-4 Using the On-Screen Display 4-5 Adjusting Screen Quality 4-7 Optimizing Digital Conversion 4-8 Identifying...
HP Flat Panel Monitors - (English) Users Guide 322638 002
Page 4
... Marked with FCC Logo, United States Only C-2 Canadian Notice C-3 Avis Canadien C-3 European Notice C-3 Japanese Notice C-3 Korean Notice C-4 EPA Energy Star Compliance C-4 Power Cord Set Requirements C-4 D LCD Monitor Quality and Pixel Policy User's Guide iv
HP Flat Panel Monitors - (English) Users Guide 322638 002
Page 5
The monitor features include: vf15, FP15, L1502, f1523, and FP5315 Models ■ 15-inch (38.1 cm) viewable area display. ■ 1024 x 768 resolution, plus full-screen support for lower resolutions. ■ Wide viewing angle to allow viewing from a .... ■ Security lock slot ■ AssetControl User's Guide 1-1 1 Product Features The Flat Panel Display has an active matrix, thin-film transistor (TFT), liquid crystal display (LCD).
HP Flat Panel Monitors - (English) Users Guide 322638 002
Page 8
...is easily accessible to the operator. Never pull on the correct power cord set to use only a power source and connection appropriate for this monitor. The grounding plug is an important safety feature. Å WARNING: For your safety, be connected to a grounded (earthed) power outlet that... accessible and located as close to the equipment as possible. 2 Safety and Maintenance Guidelines Important Safety Information A power cord is included with your monitor, refer to the "Power Cord Set Requirements" section in Appendix C. Å WARNING: To reduce the risk of electric shock or damage to...
HP Flat Panel Monitors - (English) Users Guide 322638 002
Page 9
... replace your equipment if surge protection fails. If your monitor is not operating properly or has been dropped or damaged, contact your HP authorized dealer, reseller, or service provider. ■ Use only a power source and connection appropriate for each device. ■ Install your monitor near an outlet that are covered in the operating...
HP Flat Panel Monitors - (English) Users Guide 322638 002
Page 10
...well-ventilated area, away from excessive light, heat or moisture. ■ When removing the monitor base, you must not be blocked or covered. Do not walk on the cord. ■ Keep your monitor in the cabinet are provided for cleaning. If the screen requires additional cleaning, use an antistatic... screen cleaner. Ä CAUTION: Do not use liquid cleaners or aerosol cleaners. These openings must lay the monitor face down on the power cord. Do not use benzene, thinner, ammonia, or any kind into cabinet slots or other volatile substances to ...
HP Flat Panel Monitors - (English) Users Guide 322638 002
Page 11
... with a soft, clean cloth. Turn off the monitor and the computer. 2. Shipping the Monitor Keep the original packing box in a storage area. Never use benzene, thinner, ammonia, or any volatile substance to clean an LCD screen. Dust the monitor by wiping the screen and the cabinet with isopropyl ...alcohol. Ä CAUTION: Do not use water to clean the monitor screen or cabinet. Safety and Maintenance Guidelines Cleaning the...
HP Flat Panel Monitors - (English) Users Guide 322638 002
Page 12
instead see the section on the underside of the plate is turned off to be used on a wall, swing arm, or other attached devices, then follow the steps below. Installing the Monitor Pedestal To install the monitor pedestal: 1. Place the pedestal plate on your desktop or table and check to the monitor, computer system, and other mounting fixture; 3 Setting Up the Monitor To set up the monitor, ensure that the power is facing forward. Do not install the base if the monitor will be sure the arrow on "Mounting the Monitor" in this chapter. User's Guide 3-1
HP Flat Panel Monitors - (English) Users Guide 322638 002
Page 13
Make sure the pedestal base is securely locked before continuing with the setup. When the base locks, it will make a clicking sound. Using both hands, position the monitor over the pedestal base and press down firmly to lock the pedestal base in place. Inserting the Monitor into the Pedestal Base 3-2 User's Guide Setting Up the Monitor 2.
HP Flat Panel Monitors - (English) Users Guide 322638 002
Page 14
Setting Up the Monitor Connecting the Monitor 1. Place the monitor in a convenient, well-ventilated location near your computer. 2. Connecting the VGA and Power Cables User's Guide 3-3 Connect one end of the power cable to the back of the monitor, and the other end to the video connector on the back of the computer. 3. Connect the monitor signal cable on the rear panel of the monitor to an electrical wall outlet.
HP Flat Panel Monitors - (English) Users Guide 322638 002
Page 15
Setting Up the Monitor 4. Connecting the Audio Cable 3-4 User's Guide If your monitor is a multimedia model, connect one end of the audio cable to the back of the monitor, and the other end to the audio connector on the back of the computer.
HP Flat Panel Monitors - (English) Users Guide 322638 002
Page 16
Adjust the monitor as needed for your monitor screen, you should always activate a screen saver application or turn off the monitor when it is a condition that may occur on monitors that display the same static image on your comfort using the monitor's tilt adjustment capability. To avoid burn-in image damage may occur on all LCD screens. User's Guide 3-5 Tilting the Monitor Ä CAUTION: Burn-in image damage on screen for a prolonged period of time. Image retention is not in use for a prolonged period of time. Setting Up the Monitor 5.
HP Flat Panel Monitors - (English) Users Guide 322638 002
Page 17
...your equipment: ■ Do not disable the power cord grounding plug. Removing the Monitor Base You can remove the monitor base to remove the monitor from getting scratched, defaced, or broken. Before removing the monitor from the monitor by the plug. Do not pull on a wall, a swing arm, or other...not place anything on a soft area to prevent it . Å WARNING: Do not remove the base from the monitor while the monitor is in injury to your monitor has a connected audio cable, disconnect it from the base while upright in the minimum base extension may accidentally step on ...
HP Flat Panel Monitors - (English) Users Guide 322638 002
Page 18
Remove the two screws 1 as shown in the following illustration. Remove the monitor base from the back of the monitor base is positioned over a table or desktop before removing the base from the monitor. 3. User's Guide 3-7 Disconnect and remove the signal and power cables from the monitor. Removing the Monitor Base Ä CAUTION: Ensure that the bottom of the monitor. 2. Setting Up the Monitor 1.
HP Flat Panel Monitors - (English) Users Guide 322638 002
Page 19
... mounting holes are compliant with the mounting fixture to "Removing the Monior Base" steps in the previous section. Mount the monitor to a swing arm or other mounting fixture by following the instructions included with the Video Electronics Standards Association (VESA) standard...Refer to be used . 3-8 User's Guide The 75mm VESA hole pattern supports the 15" monitors only, and the 100mm hole pattern supports the 17" monitors only. 2. Remove the monitor base. Setting Up the Monitor Mounting the Monitor 1. These mounting holes are spaced 75 or 100mm apart and are exposed on the...
HP Flat Panel Monitors - (English) Users Guide 322638 002
Page 20
... .ICM file. ■ The .INF file defines monitor resources and provides specifications used by clicking on: http://www.hp.com/go/support and selecting the desired monitor. ■ The .ICM file provides color matching consistency from monitor screen to printer and is activated from within graphics programs... that have this monitor contains two information files to install ...
HP Flat Panel Monitors - (English) Users Guide 322638 002
Page 21
Operating the Monitor Front Panel Components f1523, f1723, FP5315, and FP7317 Monitors ' No. When the OSD is active, navigates in reverse through the OSD and adjusts OSD scale settings. 4-2 User's Guide Control Function 1 Speakers Audio feature for music, alarms, etc. (multimedia models only) 2 Menu button 3 - (Minus button) 4 + (Plus button) Launches the On-Screen Display (OSD) menu and selects functions. • When OSD is inactive, auto-adjusts the screen image. • When OSD is active, navigates through the OSD and adjusts OSD scale settings.