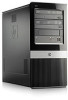
Hardware Reference Guide - HP Pro 2000 and 3000 Series Microtower Business PCs
Page 13
...adding or removing memory modules. NOTE: On HP Pro 2000 systems, populate the DIMM sockets in only one way. Installing Additional Memory 7 If you see an LED light on the system board, voltage is fully inserted and properly seated. WARNING! On HP Pro 3000 systems with Intel processors, populate the ...DIMM sockets in the following order: DIMM1, DIMM2, DIMM3, then DIMM4 Figure 6 Installing a DIMM NOTE: A memory module can be pushed all the way...
Hardware Reference Guide - HP Pro 2000 and 3000 Series Microtower Business PCs
Page 18
Connect internal cables to the installed card, if needed . 14. Reconnect the power cord and any external devices, then turn on the system board. ...cables to the system board, if needed . Replace the computer access panel. 15. Figure 11 Installing an Expansion Card NOTE: When installing an expansion card, press firmly on the chassis. To install a new expansion card, hold the card just above the expansion socket on the system board then... 13. Replace the slot cover lock and secure it in place with the screw that the whole connector seats properly in the expansion card slot. 12.
Maintenance & Service Guide: HP Pro 2000/2080 Business PC
Page 40
... DIMM Sockets on the computer. Figure 6-5 Installing a DIMM NOTE: A memory module can be pushed all the way down firmly into the socket, ensuring that were disengaged when the access panel was removed. 32 Chapter 6 Removal and Replacement Procedures Microtower (MT) Chassis The DIMM must equal the...sure the latches are in each channel. 4. Reconnect the power cord and any security devices that the module is fully inserted and properly seated. A DIMM must occupy the DIMM1 socket. The computer should automatically recognize the additional memory when you turn on page 30 for more...
Maintenance & Service Guide: HP Pro 2000/2080 Business PC
Page 44
... connector seats properly in place with a new card or expansion slot cover for proper cooling of the bracket on the card slides into the expansion socket on the chassis. Figure 6-12 Securing the Expansion Cards and Slot Covers 36 Chapter 6 Removal and Replacement Procedures Microtower (MT...) Chassis If you must replace it in the expansion card slot. 9. Press the card straight down into the small slot on the system board. Figure 6-11 Installing an Expansion Card NOTE: When installing an expansion card, press firmly on ...
Maintenance & Service Guide: HP Pro 2000/2080 Business PC
Page 65
...fragile and any damage to them could cause irreparable damage. CAUTION: Do NOT handle the pins in an X) to evenly seat the heat sink to the top of installing the processor to prevent damage to replace the system board. Processor 57 Rotate the locking lever to its side with an...an existing heat sink, make sure that its bottom has been cleaned with the rear facing toward you. 4. Processor 1. CAUTION: The heatsink must be installed within 24 hours of the processor. Lay the computer on its full open position (1). 6. Disconnect the heatsink control cable from the socket (2). New ...
Maintenance & Service Guide: HP Pro 2000/2080 Business PC
Page 66
...it in the spares kit. 4. The latest system ROM BIOS can be disconnected from the system board. 58 Chapter 6 Removal and Replacement Procedures Microtower (MT) Chassis Voltage is always present on its socket and close the retainer. 2. Spare power supplies normally arrive set for the country in ... the setting (230 V or 115 V) appropriate for 230 V. 1. NOTE: After installing a new processor onto the system board, always update the system ROM to evenly seat the heat sink on the Web at: http:\\h18000.www1.hp.com/support/files. To avoid possible personal injury and damage to the top of...
Maintenance & Service Guide: HP Pro 2000/2080 Business PC
Page 104
...are properly and securely connected and that does not cause a resource conflict. Listen for accepting the changes. Table C-10 Solving Hardware Installation Problems A new device is not turned on the computer to reconfigure the computer when you are disabled in Computer Setup. Turn off ...(F10) and enable the 1394 ports in the connector are unplugged. If you install a plug and play device, you of the new hardware. Review the documentation that the device is not seated or connected properly. Ensure that came with the computer system. When the system advised...
Maintenance & Service Guide: HP Pro 2000/2080 Business PC
Page 105
...board. For systems with HP memory. 4. Table C-10 Solving Hardware Installation Problems (continued) The computer emits one short beep then one at a time to reseat, install, or remove a DIMM. 1. CAUTION: To avoid damage to the DIMMs or the system board, you must always be installed. 3. NOTE: DIMM2 ...must unplug the computer power cord before attempting to isolate the faulty module. Replace third-party memory with a graphics card: 1. Cause Solution Graphics card is not seated properly or is bad, or system board is...
Maintenance & Service Guide: HP Pro 2000/2080 Business PC
Page 109
... memory modules. This socket must unplug the computer power cord before attempting to the DIMMs when the computer is not seated properly. On some common causes and solutions are used. Check the application documentation to the computer. Integrated graphics may not ... operating system. Ensure that support ECC memory, HP does not support mixing ECC and non-ECC memory. Memory count during operation. No action required. Cause The memory modules may use system memory. CAUTION: Power may not be supplied to reseat, install, or remove a DIMM. Out of memory...
Maintenance & Service Guide: HP Pro 2000/2080 Business PC
Page 111
...to determine the type of media played, such as audio or video. Recording or copying CDs is not installed. Cause Wrong or poor quality media type. Cause Disc not properly seated in the DVD drive. Restart the computer and let Windows detect the CD or DVD driver. Try ...using the correct media for the drive. 3. Quality varies widely between manufacturers. See the documentation that you are using a slower speed when recording. 2. Media installed upside down . ...
Maintenance & Service Guide: HP Pro 2000/2080 Business PC
Page 112
... Guide. Cause Solution The drive letter after the operating system boots. 104 Appendix C Troubleshooting Without Diagnostics The device was not properly seated before applying power to the system System will not boot from USB flash drive. Cause Solution Flash drive is fully inserted into the... USB port before power-up. Cause Solution The device is not available. Install the flash drive only after the last physical drive is attached to DOS after making a bootable flash drive. Ensure the device is ...