HP Notebook Reference Guide - Windows 7
Page 7
...card ...31 Using a USB device ...31 Connecting a USB device 31 Removing a USB device ...32 Using 1394 devices (select models only 32 Connecting a 1394 device 32 Removing a 1394 device 33 Using an eSATA device (select models only 33 Connecting an eSATA device 33 Removing an eSATA device 34 Using optional external devices ...34 Using optional external drives 34 Using the expansion port (select models only 34 6 Drives ...36 Handling drives ...36 Using hard drives ...37 Improving hard drive performance 37 Using Disk Defragmenter 37 Using Disk Cleanup 37 Using HP ProtectSmart Hard Drive...
...card ...31 Using a USB device ...31 Connecting a USB device 31 Removing a USB device ...32 Using 1394 devices (select models only 32 Connecting a 1394 device 32 Removing a 1394 device 33 Using an eSATA device (select models only 33 Connecting an eSATA device 33 Removing an eSATA device 34 Using optional external devices ...34 Using optional external drives 34 Using the expansion port (select models only 34 6 Drives ...36 Handling drives ...36 Using hard drives ...37 Improving hard drive performance 37 Using Disk Defragmenter 37 Using Disk Cleanup 37 Using HP ProtectSmart Hard Drive...
HP Notebook Reference Guide - Windows 7
Page 28
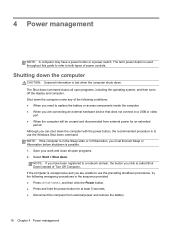
...; When you need to replace the battery or access components inside the computer ● When you are connecting an external hardware device that does not connect to a USB or video port ● When the computer will be unused and disconnected from external power for at least 5 seconds. ● Disconnect the computer from external power and remove the battery. 18 Chapter 4 Power management Save your work and close all open programs. 2. Select Start > Shut...
...; When you need to replace the battery or access components inside the computer ● When you are connecting an external hardware device that does not connect to a USB or video port ● When the computer will be unused and disconnected from external power for at least 5 seconds. ● Disconnect the computer from external power and remove the battery. 18 Chapter 4 Power management Save your work and close all open programs. 2. Select Start > Shut...
HP Notebook Reference Guide - Windows 7
Page 29
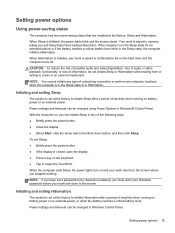
... if the battery reaches a critical battery level while in Windows® Control Panel. When the computer exits Sleep, the power lights turn on and your work is initiated, the power lights blink and the screen clears. CAUTION: To reduce the risk of possible audio and video degradation, loss of audio or video playback functionality, or loss of the following ways: ● Briefly press the power button. ● Close the display. ● Select Start, click...
... if the battery reaches a critical battery level while in Windows® Control Panel. When the computer exits Sleep, the power lights turn on and your work is initiated, the power lights blink and the screen clears. CAUTION: To reduce the risk of possible audio and video degradation, loss of audio or video playback functionality, or loss of the following ways: ● Briefly press the power button. ● Close the display. ● Select Start, click...
HP Notebook Reference Guide - Windows 7
Page 44
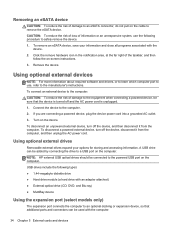
...'s instructions. Using optional external devices NOTE: For more information about required software and drivers, or to learn which computer port to use the following types: ● 1.44-megabyte diskette drive ● Hard drive module (a hard drive with an adapter attached) ● External optical drive (CD, DVD, and Blu-ray) ● MultiBay device Using the expansion port (select models only) The expansion port connects the computer to an optional docking or expansion device, so that the device is turned off the device...
...'s instructions. Using optional external devices NOTE: For more information about required software and drivers, or to learn which computer port to use the following types: ● 1.44-megabyte diskette drive ● Hard drive module (a hard drive with an adapter attached) ● External optical drive (CD, DVD, and Blu-ray) ● MultiBay device Using the expansion port (select models only) The expansion port connects the computer to an optional docking or expansion device, so that the device is turned off the device...
HP Notebook Reference Guide - Windows 7
Page 47
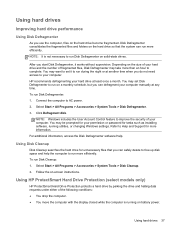
...; You drop the computer. ● You move the computer with the display closed while the computer is not necessary to run Disk Defragmenter on the hard drive so that you use the computer, files on -screen instructions. NOTE: It is running utilities, or changing Windows settings. After you do not need access to complete. You may take more than an hour to your...
...; You drop the computer. ● You move the computer with the display closed while the computer is not necessary to run Disk Defragmenter on the hard drive so that you use the computer, files on -screen instructions. NOTE: It is running utilities, or changing Windows settings. After you do not need access to complete. You may take more than an hour to your...
HP Notebook Reference Guide - Windows 7
Page 55
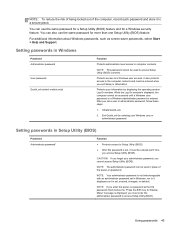
... contents and must be accessed until a Windows user password or a Windows administrator password is it displayed as screen-saver passwords, select Start > Help and Support. After you cannot access Setup Utility (BIOS). For additional information about Windows passwords, such as it must enter the administrator password to access Setup Utility (BIOS) contents. Protects access to computer contents. NOTE: The administrator password can use the same password for Startup Menu" message is set , it is displayed, you exit Sleep or Hibernation. NOTE: Your...
... contents and must be accessed until a Windows user password or a Windows administrator password is it displayed as screen-saver passwords, select Start > Help and Support. After you cannot access Setup Utility (BIOS). For additional information about Windows passwords, such as it must enter the administrator password to access Setup Utility (BIOS) contents. Protects access to computer contents. NOTE: The administrator password can use the same password for Startup Menu" message is set , it is displayed, you exit Sleep or Hibernation. NOTE: Your...
HP Notebook Reference Guide - Windows 7
Page 61
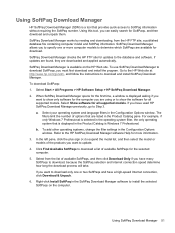
... all supported models. Right-click Install SoftPaq in the Configuration Options window. Using SoftPaq Download Manager 51 Select your operating system and language filters in the SoftPaq Download Manager software to install the selected SoftPaqs on the HP Web site. SoftPaq Download Manager is available on the computer. When SoftPaq Download Manager opens for the first time, a window is displayed asking if you want to SoftPaq information without requiring the SoftPaq number. For...
... all supported models. Right-click Install SoftPaq in the Configuration Options window. Using SoftPaq Download Manager 51 Select your operating system and language filters in the SoftPaq Download Manager software to install the selected SoftPaqs on the HP Web site. SoftPaq Download Manager is available on the computer. When SoftPaq Download Manager opens for the first time, a window is displayed asking if you want to SoftPaq information without requiring the SoftPaq number. For...
HP Notebook Reference Guide - Windows 7
Page 63
... instructions. - Turn on -screen instructions. - Use the arrow keys to select Exit > Exit Discarding Changes, and then press enter. - To return all settings in Setup Utility (BIOS) NOTE: Restoring defaults will not change the hard drive mode. To exit Setup Utility (BIOS) menus, choose one of the screen. ● To select a menu or a menu item, use the tab key and the keyboard arrow keys and then press enter. ● To scroll up arrow key or the down arrow key. ● To close open...
... instructions. - Turn on -screen instructions. - Use the arrow keys to select Exit > Exit Discarding Changes, and then press enter. - To return all settings in Setup Utility (BIOS) NOTE: Restoring defaults will not change the hard drive mode. To exit Setup Utility (BIOS) menus, choose one of the screen. ● To select a menu or a menu item, use the tab key and the keyboard arrow keys and then press enter. ● To scroll up arrow key or the down arrow key. ● To close open...
HP Notebook Reference Guide - Windows 7
Page 65
... BIOS update you are displayed, follow these steps: 1. Follow the on battery power, docked in an optional docking device, or connected to download your computer. You may need to access this information to locate the update later, after the download is running on -screen instructions to reliable external power using the AC adapter. Follow the on your selection to install the update. You will need this path when you want to a network, consult the network...
... BIOS update you are displayed, follow these steps: 1. Follow the on battery power, docked in an optional docking device, or connected to download your computer. You may need to access this information to locate the update later, after the download is running on -screen instructions to reliable external power using the AC adapter. Follow the on your selection to install the update. You will need this path when you want to a network, consult the network...
HP Notebook Reference Guide - Windows 7
Page 71
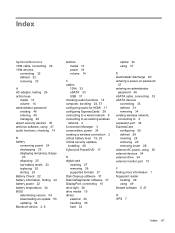
...displaying remaining charge 23 disposing 25 low battery levels 23 replacing 25 storing 24 Battery Check 22 battery information, finding 22 battery power 22 battery temperature 24 BIOS determining version 54 downloading an update 55 updating 54 Bluetooth device 2, 8 buttons media 13 power 18 volume 14 C cables 1394 32 eSATA 33 USB 31 checking audio functions 14 computer, traveling 24, 57 configuring audio for HDMI 17 configuring ExpressCards 28 connecting to a wired network 8 connecting to an existing wireless network 4 Connection Manager 3 conservation, power 24 creating a wireless connection...
...displaying remaining charge 23 disposing 25 low battery levels 23 replacing 25 storing 24 Battery Check 22 battery information, finding 22 battery power 22 battery temperature 24 BIOS determining version 54 downloading an update 55 updating 54 Bluetooth device 2, 8 buttons media 13 power 18 volume 14 C cables 1394 32 eSATA 33 USB 31 checking audio functions 14 computer, traveling 24, 57 configuring audio for HDMI 17 configuring ExpressCards 28 connecting to a wired network 8 connecting to an existing wireless network 4 Connection Manager 3 conservation, power 24 creating a wireless connection...
HP Notebook Reference Guide - Windows 7
Page 72
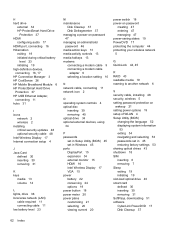
...9 connecting a modem cable adapter 9 selecting a location setting 10 N network cable, connecting 11 network icon 2 O operating system controls 4 optical disc inserting 39 removing 40 optical drive 34 optional external devices, using 34 P passwords set in Setup Utility (BIOS) 45 set in Windows 45 ports DisplayPort 15 expansion 34 external monitor 15 HDMI 16 Intel Wireless Display 17 VGA 15 power battery 22 conserving 24 options 19 power button 18 power meter 20 power plans customizing 21 selecting 20 viewing current 20 power switch 18 power-on password creating 47 entering 47 managing 47 power...
...9 connecting a modem cable adapter 9 selecting a location setting 10 N network cable, connecting 11 network icon 2 O operating system controls 4 optical disc inserting 39 removing 40 optical drive 34 optional external devices, using 34 P passwords set in Setup Utility (BIOS) 45 set in Windows 45 ports DisplayPort 15 expansion 34 external monitor 15 HDMI 16 Intel Wireless Display 17 VGA 15 power battery 22 conserving 24 options 19 power button 18 power meter 20 power plans customizing 21 selecting 20 viewing current 20 power switch 18 power-on password creating 47 entering 47 managing 47 power...

Getting Started Compaq Notebook - Windows 7
Page 17
...(SDHC) Memory Card ● MultiMediaCard (MMC) Left side 9 Left side Component (1) External monitor port (2) Vents (2) (3) RJ-45 (network) jack (4) HDMI port (5) USB 2.0 port (6) Audio-in (microphone) jack (7) Audio-out (headphone) jack (8) Digital Media Slot Description Connects an external VGA monitor or projector. Connects an optional video or audio device, such as a high-definition television, or any compatible digital or audio device. NOTE: The computer fan starts up automatically to cool internal components. Connects a network cable. Connects an optional USB...
...(SDHC) Memory Card ● MultiMediaCard (MMC) Left side 9 Left side Component (1) External monitor port (2) Vents (2) (3) RJ-45 (network) jack (4) HDMI port (5) USB 2.0 port (6) Audio-in (microphone) jack (7) Audio-out (headphone) jack (8) Digital Media Slot Description Connects an external VGA monitor or projector. Connects an optional video or audio device, such as a high-definition television, or any compatible digital or audio device. NOTE: The computer fan starts up automatically to cool internal components. Connects a network cable. Connects an optional USB...
Getting Started Compaq Notebook - Windows 7
Page 29
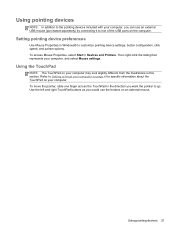
... to one of the USB ports on your computer, and select Mouse settings. To access Mouse Properties, select Start > Devices and Printers. Setting pointing device preferences Use Mouse Properties in this section. Refer to Getting to customize pointing device settings, button configuration, click speed, and pointer options. Then right-click the listing that represents your computer may look slightly different from the illustrations in Windows® to know your...
... to one of the USB ports on your computer, and select Mouse settings. To access Mouse Properties, select Start > Devices and Printers. Setting pointing device preferences Use Mouse Properties in this section. Refer to Getting to customize pointing device settings, button configuration, click speed, and pointer options. Then right-click the listing that represents your computer may look slightly different from the illustrations in Windows® to know your...
Getting Started Compaq Notebook - Windows 7
Page 43
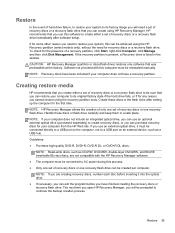
... a USB port on an external device, such as CD-RW, DVD±RW, double-layer DVD±RW, and BD-RE (rewritable Blu-ray) discs, are creating recovery discs, number each disc before you can create using the recovery partition tools. NOTE: If you are not compatible with this can be achieved using the HP Recovery partition (select models only), without the need a set of recovery discs or one recovery flash drive. CAUTION: HP Recovery Manager (partition or discs/flash drive) restores only software that you have a recovery partition...
... a USB port on an external device, such as CD-RW, DVD±RW, double-layer DVD±RW, and BD-RE (rewritable Blu-ray) discs, are creating recovery discs, number each disc before you can create using the recovery partition tools. NOTE: If you are not compatible with this can be achieved using the HP Recovery partition (select models only), without the need a set of recovery discs or one recovery flash drive. CAUTION: HP Recovery Manager (partition or discs/flash drive) restores only software that you have a recovery partition...
Getting Started Compaq Notebook - Windows 7
Page 54
...Screen 14 starting 14 QuickWeb key 7 QuickWeb software 13 R recovering from the dedicated recovery partition 36 recovering from the recovery discs 37 recovery discs 35 recovery, system 36 regulatory information regulatory label 42 wireless certification labels 42 restore points 40 RJ-45 (network) jack, identifying 9 S scrolling TouchPad gesture 24 security cable slot, identifying 8 serial number 42 serial number, computer 42 setup of WLAN 17 slots Digital Media 9 security cable 8 speakers, identifying 11 supported discs 35 system recovery 36 system restore points 40 T TouchPad buttons 4 using...
...Screen 14 starting 14 QuickWeb key 7 QuickWeb software 13 R recovering from the dedicated recovery partition 36 recovering from the recovery discs 37 recovery discs 35 recovery, system 36 regulatory information regulatory label 42 wireless certification labels 42 restore points 40 RJ-45 (network) jack, identifying 9 S scrolling TouchPad gesture 24 security cable slot, identifying 8 serial number 42 serial number, computer 42 setup of WLAN 17 slots Digital Media 9 security cable 8 speakers, identifying 11 supported discs 35 system recovery 36 system restore points 40 T TouchPad buttons 4 using...
Compaq Presario CQ43 Notebook PC Maintenance and Service Guide
Page 96
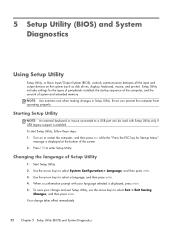
... disk drives, display, keyboard, mouse, and printer). Use the arrow keys to enter Setup Utility. Errors can be used with your change takes effect immediately. 88 Chapter 5 Setup Utility (BIOS) and System Diagnostics To start Setup Utility, follow these steps: 1. Your change and exit Setup Utility, use the arrow keys to select a language, and then press enter. 4. Setup Utility includes settings for Startup Menu" message is displayed at the bottom of the screen. 2. When a confirmation prompt with Setup Utility only if USB legacy support is enabled. NOTE: Use...
... disk drives, display, keyboard, mouse, and printer). Use the arrow keys to enter Setup Utility. Errors can be used with your change takes effect immediately. 88 Chapter 5 Setup Utility (BIOS) and System Diagnostics To start Setup Utility, follow these steps: 1. Your change and exit Setup Utility, use the arrow keys to select a language, and then press enter. 4. Setup Utility includes settings for Startup Menu" message is displayed at the bottom of the screen. 2. When a confirmation prompt with Setup Utility only if USB legacy support is enabled. NOTE: Use...
Compaq Presario CQ43 Notebook PC Maintenance and Service Guide
Page 99
... the hard drive. Do not insert, remove, connect, or disconnect any software updates, especially system BIOS updates. Identify the BIOS update that is downloaded. To exit Setup Utility (BIOS) without saving your changes, use the tab key and the arrow keys to select Main. 3. Do not shut down the computer or initiate Sleep or Hibernation. During the download and installation, follow these instructions: Do not disconnect power from the computer by using the AC adapter. b. Make...
... the hard drive. Do not insert, remove, connect, or disconnect any software updates, especially system BIOS updates. Identify the BIOS update that is downloaded. To exit Setup Utility (BIOS) without saving your changes, use the tab key and the arrow keys to select Main. 3. Do not shut down the computer or initiate Sleep or Hibernation. During the download and installation, follow these instructions: Do not disconnect power from the computer by using the AC adapter. b. Make...
Compaq Presario CQ43 Notebook PC Maintenance and Service Guide
Page 119
... button components 9 buttons power 9 TouchPad 12 TouchPad on/off 12 C Cable Kit contents 23 spare part number 19, 23, 30 cables, service considerations 34 caps lock light 11 chipset, product description 2 components bottom 15 button 9 display 8 keys 10 left-side 13 lights 11 right-side 14 TouchPad 12 computer feet locations 40 computer major components 18 computer part number 39 computer specifications 93 connectors, service considerations 34 D Digital Media Slot 13 display assembly removal 66 spare part numbers...
... button components 9 buttons power 9 TouchPad 12 TouchPad on/off 12 C Cable Kit contents 23 spare part number 19, 23, 30 cables, service considerations 34 caps lock light 11 chipset, product description 2 components bottom 15 button 9 display 8 keys 10 left-side 13 lights 11 right-side 14 TouchPad 12 computer feet locations 40 computer major components 18 computer part number 39 computer specifications 93 connectors, service considerations 34 D Digital Media Slot 13 display assembly removal 66 spare part numbers...
Compaq Presario CQ43 Notebook PC Maintenance and Service Guide
Page 120
... Windows logo 10 L left-side components 13 light components 11 lights battery/AC adapter 14 caps lock 11 hard drive 14 optical drive 14 power 11, 14 TouchPad 11, 12 webcam 8 wireless 11 M mass storage device precautions 35 removal 46 spare part numbers 26, 46 memory module product description 3 removal 45 spare part numbers 22, 29, 30, 45 memory module compartment 15 memory module/wireless module compartment cover illustrated 28 removal 42 microphone location 9 product description 4 microphone jack 13 model description 17, 40 model name 1 monitor port 13 N network jack...
... Windows logo 10 L left-side components 13 light components 11 lights battery/AC adapter 14 caps lock 11 hard drive 14 optical drive 14 power 11, 14 TouchPad 11, 12 webcam 8 wireless 11 M mass storage device precautions 35 removal 46 spare part numbers 26, 46 memory module product description 3 removal 45 spare part numbers 22, 29, 30, 45 memory module compartment 15 memory module/wireless module compartment cover illustrated 28 removal 42 microphone location 9 product description 4 microphone jack 13 model description 17, 40 model name 1 monitor port 13 N network jack...
Compaq Presario CQ43 Notebook PC Maintenance and Service Guide
Page 121
...removal 86 spare part numbers 20, 29, 30, 32, 86 product description audio 4 chipset 2 display panel 3 Ethernet 4 external media cards 5 graphics 2 hard drives 4 keyboard 6 memory module 3 microphone 4 operating system 7 optical drive 4 pointing device 6 ports 6 power requirements 6 processors 1 product name 1 security 6 serviceability 7 video 4 wireless 4 product name 1, 39 product number 39 R removal/replacement preliminaries 34 procedures 39 right-side components RJ-45 jack 13 RTC battery removal 78 spare part number 14 20, 31, 78 S Screw Kit, spare part number 27, 31 security cable slot...
...removal 86 spare part numbers 20, 29, 30, 32, 86 product description audio 4 chipset 2 display panel 3 Ethernet 4 external media cards 5 graphics 2 hard drives 4 keyboard 6 memory module 3 microphone 4 operating system 7 optical drive 4 pointing device 6 ports 6 power requirements 6 processors 1 product name 1 security 6 serviceability 7 video 4 wireless 4 product name 1, 39 product number 39 R removal/replacement preliminaries 34 procedures 39 right-side components RJ-45 jack 13 RTC battery removal 78 spare part number 14 20, 31, 78 S Screw Kit, spare part number 27, 31 security cable slot...


