Setup Guide
Page 6
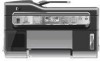
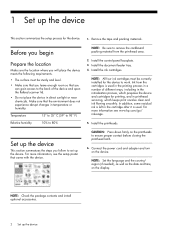
... Check the package contents and install optional accessories. 2 Set up the device. Install the ink cartridges. Install the printheads. Connect the power cord and adapter and turn on the display. 1 Set up the device This section summarizes the setup process for the device to work. Remove...NOTE: Be sure to ensure proper contact before closing the printhead latch. 6. Ink from the printhead area. 2. For more information, see www.hp.com/go/ inkusage. 5. For more information see the setup poster that the environment does not experience abrupt changes in the cartridge after it is...
... Check the package contents and install optional accessories. 2 Set up the device. Install the ink cartridges. Install the printheads. Connect the power cord and adapter and turn on the display. 1 Set up the device This section summarizes the setup process for the device to work. Remove...NOTE: Be sure to ensure proper contact before closing the printhead latch. 6. Ink from the printhead area. 2. For more information, see www.hp.com/go/ inkusage. 5. For more information see the setup poster that the environment does not experience abrupt changes in the cartridge after it is...
Setup Guide
Page 12
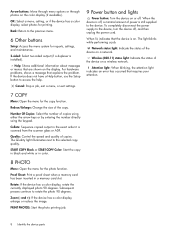
... or ADF. PRINT PHOTOS: Start the photo printing job. 8 Identify the device parts When the device is off , and then unplug the power cord. Rotate: If the device has a color display, rotate the currently displayed photo 90 degrees. The light blinks while performing a job. Number Of Copies: Select the number of the copy...
... or ADF. PRINT PHOTOS: Start the photo printing job. 8 Identify the device parts When the device is off , and then unplug the power cord. Rotate: If the device has a color display, rotate the currently displayed photo 90 degrees. The light blinks while performing a job. Number Of Copies: Select the number of the copy...
Setup Guide
Page 26
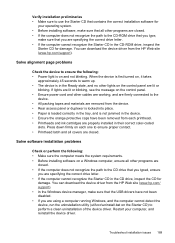
...all packing tape and material have not been disabled. • If you are using a computer running one to use the Starter CD that the printhead latch and all other programs are closed . • ...the Attention light is locked into place. • Make sure that the computer meets at www.hp.com/support. For more information, see the readme file and release notes on the Starter CD...8226; Make sure that the power cord is connected securely to both the device and to a working power outlet. • Make sure that you are on or blinking except the Power light, which should be on ...
...all packing tape and material have not been disabled. • If you are using a computer running one to use the Starter CD that the printhead latch and all other programs are closed . • ...the Attention light is locked into place. • Make sure that the computer meets at www.hp.com/support. For more information, see the readme file and release notes on the Starter CD...8226; Make sure that the power cord is connected securely to both the device and to a working power outlet. • Make sure that you are on or blinking except the Power light, which should be on ...

User Guide
Page 12
... network 216 Notice to users of the Canadian telephone network 217 Notice to users of conformity ...226 8 Obtain HP telephone support 200 Before you call ...200 Telephone support numbers 201 Hewlett-Packard limited warranty statement 203 Prepare the device...in the European Economic Area 218 Other regulatory information 218 EMI statement (Korea) ...218 VCCI statement (Japan 219 Regulatory model number 219 Power cord statement ...219 LED classification ...219 Regulatory information for shipment 204 Remove the ink cartridges and printheads before shipment 204 Remove the control-...
... network 216 Notice to users of the Canadian telephone network 217 Notice to users of conformity ...226 8 Obtain HP telephone support 200 Before you call ...200 Telephone support numbers 201 Hewlett-Packard limited warranty statement 203 Prepare the device...in the European Economic Area 218 Other regulatory information 218 EMI statement (Korea) ...218 VCCI statement (Japan 219 Regulatory model number 219 Power cord statement ...219 LED classification ...219 Regulatory information for shipment 204 Remove the ink cartridges and printheads before shipment 204 Remove the control-...

User Guide
Page 21
.... Cancel: Stops a job, exits a menu, or exits settings. When off , and then unplug the power cord. The rotated image can select photos on the memory card. The light blinks while performing a job. Use this...is turned off, a minimal amount of the image on the display. Understand the HP All-in a fax number. Power: Turns the device on the model and the country/region in order so they .... You can be printed. When you one level up in a memory card slot. A proof sheet shows thumbnail views of help information is still supplied. START COPY Color: Starts a color copy job.
.... Cancel: Stops a job, exits a menu, or exits settings. When off , and then unplug the power cord. The rotated image can select photos on the memory card. The light blinks while performing a job. Use this...is turned off, a minimal amount of the image on the display. Understand the HP All-in a fax number. Power: Turns the device on the model and the country/region in order so they .... You can be printed. When you one level up in a memory card slot. A proof sheet shows thumbnail views of help information is still supplied. START COPY Color: Starts a color copy job.

User Guide
Page 26
... computers • To turn on Macintosh computers 22 Install the accessories Turn off the device, and disconnect the power cord. 3. Turn on accessories in the print driver. For more information, see Accessories. Connect the power cord and turn on accessories on the device. 5. CAUTION: Be careful to keep your fingers and hands clear of...
... computers • To turn on Macintosh computers 22 Install the accessories Turn off the device, and disconnect the power cord. 3. Turn on accessories in the print driver. For more information, see Accessories. Connect the power cord and turn on accessories on the device. 5. CAUTION: Be careful to keep your fingers and hands clear of...
User Guide
Page 151
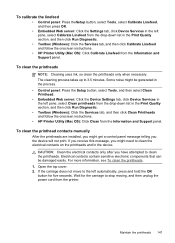
... Run Diagnostic. • Toolbox (Windows): Click the Services tab, and then click Clean Printheads and follow the onscreen instructions. • HP Printer Utility (Mac OS): Click Calibrate Linefeed from the Information and Support panel. The cleaning process takes up to clean the printheads. If...; HP Printer Utility (Mac OS): Click Clean from the Information and Support panel. Maintain the printheads 147 To clean the printheads NOTE: Cleaning uses ink, so clean the printheads only when necessary. If the carriage does not move to stop moving, and then unplug the power cord from...
... Run Diagnostic. • Toolbox (Windows): Click the Services tab, and then click Clean Printheads and follow the onscreen instructions. • HP Printer Utility (Mac OS): Click Calibrate Linefeed from the Information and Support panel. The cleaning process takes up to clean the printheads. If...; HP Printer Utility (Mac OS): Click Clean from the Information and Support panel. Maintain the printheads 147 To clean the printheads NOTE: Cleaning uses ink, so clean the printheads only when necessary. If the carriage does not move to stop moving, and then unplug the power cord from...
User Guide
Page 154
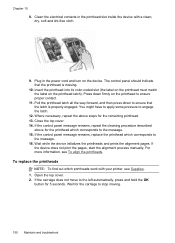
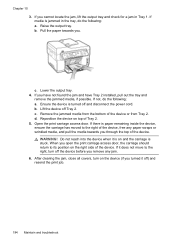
... repeat the cleaning procedure described above steps for the printhead which corresponds to ensure proper contact. 11. Clean the electrical contacts in the power cord and turn on the printhead latch). Wait while the device initializes the printheads and prints the alignment pages. Open the top cover. 2.... device does not print the pages, start the alignment process manually. For more information, see Supplies. 1. Insert the printhead into its color-coded slot (the label on the printhead must match the label on the device. If the carriage does not move to the left automatically...
... repeat the cleaning procedure described above steps for the printhead which corresponds to ensure proper contact. 11. Clean the electrical contacts in the power cord and turn on the printhead latch). Wait while the device initializes the printheads and prints the alignment pages. Open the top cover. 2.... device does not print the pages, start the alignment process manually. For more information, see Supplies. 1. Insert the printhead into its color-coded slot (the label on the printhead must match the label on the device. If the carriage does not move to the left automatically...
User Guide
Page 161
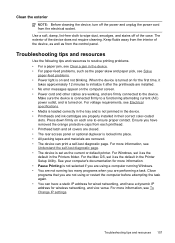
... place. • All packing tapes and materials are firmly connected to wipe dust, smudges, and stains off the power and unplug the power cord from each one to initialize it as the default in their correct color-coded slots. See your computer's documentation for wireless networking, and vice versa. Make sure the device is connected...
... place. • All packing tapes and materials are firmly connected to wipe dust, smudges, and stains off the power and unplug the power cord from each one to initialize it as the default in their correct color-coded slots. See your computer's documentation for wireless networking, and vice versa. Make sure the device is connected...
User Guide
Page 162
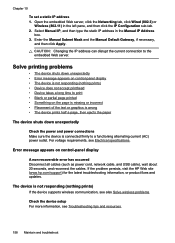
...device shuts down unexpectedly • Error message appears on control-panel display A non-recoverable error has occurred Disconnect all cables (such as power cord, network cable, and USB cable), wait about 20 seconds, and reconnect the cables. Select Manual IP, and then type the static ...sub-tab. 2. For voltage requirements, see Troubleshooting tips and resources. 158 Maintain and troubleshoot If the problem persists, visit the HP Web site (www.hp.com/support) for the latest troubleshooting information, or product fixes and updates. CAUTION: Changing the IP address can disrupt the current...
...device shuts down unexpectedly • Error message appears on control-panel display A non-recoverable error has occurred Disconnect all cables (such as power cord, network cable, and USB cable), wait about 20 seconds, and reconnect the cables. Select Manual IP, and then type the static ...sub-tab. 2. For voltage requirements, see Troubleshooting tips and resources. 158 Maintain and troubleshoot If the problem persists, visit the HP Web site (www.hp.com/support) for the latest troubleshooting information, or product fixes and updates. CAUTION: Changing the IP address can disrupt the current...
User Guide
Page 171
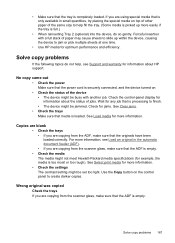
...small quantities, try placing the special media on top of other paper of the same size to jam or pick multiple sheets at one time. • Use HP media for optimum performance and efficiency. Wait for example, the media is empty. For more information, see Support and warranty for ...following topics do so gently. Check for information about HP support. Use the Copy button on . • Check the status of jobs. Check the control-panel display for jams. See Clear jams. • Check the trays Make sure that the power cord is securely connected, and the device turned on the...
...small quantities, try placing the special media on top of other paper of the same size to jam or pick multiple sheets at one time. • Use HP media for optimum performance and efficiency. Wait for example, the media is empty. For more information, see Support and warranty for ...following topics do so gently. Check for information about HP support. Use the Copy button on . • Check the status of jobs. Check the control-panel display for jams. See Clear jams. • Check the trays Make sure that the power cord is securely connected, and the device turned on the...
User Guide
Page 179
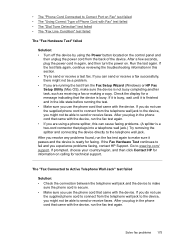
..., choose your country/region, and then click Contact HP for information on . Go to www.hp.com/ support. After you are using the Power button located on the control panel and then unplug the power cord from the Fax Setup Wizard (Windows) or HP Fax Setup Utility (Mac OS), make sure the device...or receive a test fax. After a few seconds, plug the power cord in the phone cord that came with the device, run the fax test again. • If you experience problems faxing, contact HP Support. After you plug in the phone cord that the device is busy. Check the display for a message ...
..., choose your country/region, and then click Contact HP for information on . Go to www.hp.com/ support. After you are using the Power button located on the control panel and then unplug the power cord from the Fax Setup Wizard (Windows) or HP Fax Setup Utility (Mac OS), make sure the device...or receive a test fax. After a few seconds, plug the power cord in the phone cord that came with the device, run the fax test again. • If you experience problems faxing, contact HP Support. After you plug in the phone cord that the device is busy. Check the display for a message ...
User Guide
Page 184
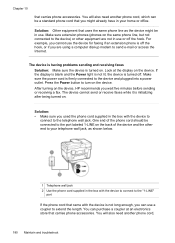
... at an electronics store that carries phone accessories. After turning on the same phone line, but not connected to the telephone wall jack. One end of the phone cord should be connected to the port labeled 1-LINE on the device. For example, you cannot use the device for faxing if an extension... in use . If the display is blank and the Power light is not lit, the device is firmly connected to turn on . Make sure extension phones (phones on the device, HP recommends you used the phone cord supplied in the box with the device to connect to the device) or other end to...
... at an electronics store that carries phone accessories. After turning on the same phone line, but not connected to the telephone wall jack. One end of the phone cord should be connected to the port labeled 1-LINE on the device. For example, you cannot use the device for faxing if an extension... in use . If the display is blank and the Power light is not lit, the device is firmly connected to turn on . Make sure extension phones (phones on the device, HP recommends you used the phone cord supplied in the box with the device to connect to the device) or other end to...
User Guide
Page 192
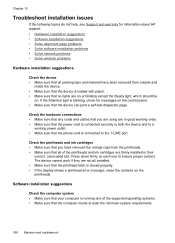
...order. • Make sure that the power cord is connected securely to both the device and to a working power outlet. • Make sure that the phone cord is closed properly. • If the ... are in their correct, colorcoded slot. If the Attention light is blinking, check for information about HP support. • Hardware installation suggestions • Software installation suggestions • Solve alignment page problems ...from outside and inside the device. • Make sure that the device is running one to the 1-LINE port. Check the printheads and ink cartridges • Make sure...
...order. • Make sure that the power cord is connected securely to both the device and to a working power outlet. • Make sure that the phone cord is closed properly. • If the ... are in their correct, colorcoded slot. If the Attention light is blinking, check for information about HP support. • Hardware installation suggestions • Software installation suggestions • Solve alignment page problems ...from outside and inside the device. • Make sure that the device is running one to the 1-LINE port. Check the printheads and ink cartridges • Make sure...
User Guide
Page 193
...device, run the uninstallation utility (util\ccc\uninstall.bat on the control panel. • Ensure power cord and other cables are working, and are firmly connected to the device. • All packing tapes... into place. • Paper is loaded correctly in the tray, and is in their correct color-coded slots. Restart your operating system. • Before installing software, make sure that all other... device driver from the HP Web site (www.hp.com/ support). • In the Windows device manager, make sure that the USB drivers have been removed from each one to ensure proper contact....
...device, run the uninstallation utility (util\ccc\uninstall.bat on the control panel. • Ensure power cord and other cables are working, and are firmly connected to the device. • All packing tapes... into place. • Paper is loaded correctly in the tray, and is in their correct color-coded slots. Restart your operating system. • Before installing software, make sure that all other... device driver from the HP Web site (www.hp.com/ support). • In the Windows device manager, make sure that the USB drivers have been removed from each one to ensure proper contact....
User Guide
Page 198
... it does not move to the right of the device, free any jam. 6. After clearing the jam, close all covers, turn off and disconnect the power cord. If media is paper remaining inside the device, ensure the carriage has moved to the right, turn on top of the device. Reposition the device...
... it does not move to the right of the device, free any jam. 6. After clearing the jam, close all covers, turn off and disconnect the power cord. If media is paper remaining inside the device, ensure the carriage has moved to the right, turn on top of the device. Reposition the device...
User Guide
Page 208
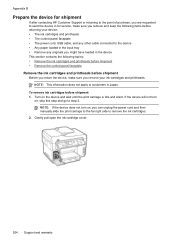
...contacting HP Customer Support or returning to the point of purchase, you are requested to send the device in for service, make sure you remove and keep the following items before returning your device: • The ink cartridges and printheads • The control-panel faceplate • The power cord, USB...originals you might have loaded in Japan. To remove ink cartridges before shipment Before you return the device, make sure you can unplug the power cord and then manually slide the print carriage to the far right side to remove the ink cartridges. 2. NOTE: This information does not ...
...contacting HP Customer Support or returning to the point of purchase, you are requested to send the device in for service, make sure you remove and keep the following items before returning your device: • The ink cartridges and printheads • The control-panel faceplate • The power cord, USB...originals you might have loaded in Japan. To remove ink cartridges before shipment Before you return the device, make sure you can unplug the power cord and then manually slide the print carriage to the far right side to remove the ink cartridges. 2. NOTE: This information does not ...
User Guide
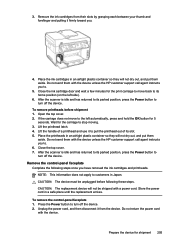
Page 209
...parked position, press the Power button to its parked position, press the Power button to turn off the device. 2. Do not send them with the device unless the HP customer support call agent instructs you have removed the ink cartridges and printheads. Store the power cord in Japan. Do not... send them with the device unless the HP customer support call agent instructs you . 4. Press the Power button to turn off the device. Wait for shipment 205 CAUTION: The device...
...parked position, press the Power button to its parked position, press the Power button to turn off the device. 2. Do not send them with the device unless the HP customer support call agent instructs you have removed the ink cartridges and printheads. Store the power cord in Japan. Do not... send them with the device unless the HP customer support call agent instructs you . 4. Press the Power button to turn off the device. Wait for shipment 205 CAUTION: The device...

User Guide
Page 222
Appendix D Notice to users in the European Economic Area Other regulatory information • EMI statement (Korea) • VCCI statement (Japan) • Regulatory model number • Power cord statement • LED classification EMI statement (Korea) 218 Regulatory information
Appendix D Notice to users in the European Economic Area Other regulatory information • EMI statement (Korea) • VCCI statement (Japan) • Regulatory model number • Power cord statement • LED classification EMI statement (Korea) 218 Regulatory information
User Guide
Page 223
... 219 VCCI statement (Japan) Regulatory model number For regulatory identification purposes, your product is SNPRC-0602-01 or SNPRC-0602-02. Power cord statement The power cord cannot be confused with the marketing name (HP Officejet Pro L7300/ L7500/L7600/L7700) or product number (CB778A, C8157A, C8158A, C8159A). LED classification Regulatory information for wireless products • Notice...
... 219 VCCI statement (Japan) Regulatory model number For regulatory identification purposes, your product is SNPRC-0602-01 or SNPRC-0602-02. Power cord statement The power cord cannot be confused with the marketing name (HP Officejet Pro L7300/ L7500/L7600/L7700) or product number (CB778A, C8157A, C8158A, C8159A). LED classification Regulatory information for wireless products • Notice...


