
User Guide
Page 3
... in loss of the main text. TIP: Provides helpful hints for example, messages related to complete a task. About This Guide This guide provides information on monitor features, setting up the monitor, using the software and technical specifications. WARNING!
... in loss of the main text. TIP: Provides helpful hints for example, messages related to complete a task. About This Guide This guide provides information on monitor features, setting up the monitor, using the software and technical specifications. WARNING!
User Guide
Page 5
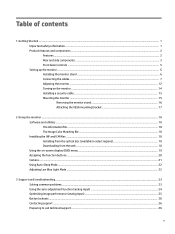
... and side components ...3 Front bezel controls ...5 Setting up the monitor ...6 Installing the monitor stand ...6 Connecting the cables ...7 Adjusting the monitor ...12 Turning on the monitor ...14 Installing a security cable ...15 Mounting the monitor ...15 Removing the monitor stand 16 Attaching the VESA mounting bracket 17 2 Using the monitor ...18 Software and utilities ...18 The Information file ...18...
... and side components ...3 Front bezel controls ...5 Setting up the monitor ...6 Installing the monitor stand ...6 Connecting the cables ...7 Adjusting the monitor ...12 Turning on the monitor ...14 Installing a security cable ...15 Mounting the monitor ...15 Removing the monitor stand 16 Attaching the VESA mounting bracket 17 2 Using the monitor ...18 Software and utilities ...18 The Information file ...18...
User Guide
Page 6
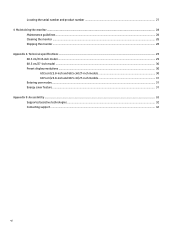
Locating the serial number and product number 27 4 Maintaining the monitor ...28 Maintenance guidelines ...28 Cleaning the monitor ...28 Shipping the monitor ...28 Appendix A Technical specifications ...29 60.5 cm/23.8-inch model ...29 68.5 cm/27-inch model ...30 Preset display resolutions ...30 60.5 cm/23.8-inch and 68.5 cm/27-inch models 30 60.5 cm/23.8-inch and 68.5 cm/27-inch models 31 Entering user modes ...31 Energy saver feature ...31 Appendix B Accessibility ...32 Supported assistive technologies ...32 Contacting support ...32 vi
Locating the serial number and product number 27 4 Maintaining the monitor ...28 Maintenance guidelines ...28 Cleaning the monitor ...28 Shipping the monitor ...28 Appendix A Technical specifications ...29 60.5 cm/23.8-inch model ...29 68.5 cm/27-inch model ...30 Preset display resolutions ...30 60.5 cm/23.8-inch and 68.5 cm/27-inch models 30 60.5 cm/23.8-inch and 68.5 cm/27-inch models 31 Entering user modes ...31 Energy saver feature ...31 Appendix B Accessibility ...32 Supported assistive technologies ...32 Contacting support ...32 vi
User Guide
Page 7
...: • Plug the power cord into a grounded (earthed) 3-pin outlet. The grounding pin is available on an unstable surface. For your HP LCD monitor. To reduce the risk of the outlet, and that may cause disturbing reflections from the AC outlet. • If provided with the...Look on power cords or cables. NOTE: This product is suitable for this capability. Consider placing the monitor in your documentation kit. If another cord is easily accessible at http://www.hp.com/ergo. It describes proper workstation setup, and proper posture, health, and work habits for the ...
...: • Plug the power cord into a grounded (earthed) 3-pin outlet. The grounding pin is available on an unstable surface. For your HP LCD monitor. To reduce the risk of the outlet, and that may cause disturbing reflections from the AC outlet. • If provided with the...Look on power cords or cables. NOTE: This product is suitable for this capability. Consider placing the monitor in your documentation kit. If another cord is easily accessible at http://www.hp.com/ergo. It describes proper workstation setup, and proper posture, health, and work habits for the ...
User Guide
Page 8
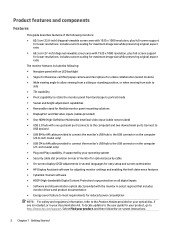
... security cable ● On-screen display (OSD) adjustments in several languages for easy setup and screen optimization ● HP Display Assistant software for adjusting monitor settings and enabling the theft deterrence features ● Cyberlink YouCam software ● HDCP (High-bandwidth Digital Content Protection) copy... protection on all digital inputs ● Software and documentation optical disc (provided with the monitor in your product, go to http://www.hp.com/support. To locate updates to the user guide for lower resolutions;
... security cable ● On-screen display (OSD) adjustments in several languages for easy setup and screen optimization ● HP Display Assistant software for adjusting monitor settings and enabling the theft deterrence features ● Cyberlink YouCam software ● HDCP (High-bandwidth Digital Content Protection) copy... protection on all digital inputs ● Software and documentation optical disc (provided with the monitor in your product, go to http://www.hp.com/support. To locate updates to the user guide for lower resolutions;

User Guide
Page 9
...using headphones, earbuds, or a headset. Connects the audio cable to the source device. Connects the DisplayPort cable to the monitor. Connects the HDMI cable to the monitor. Connects the USB Type-B cable from the source device to the source device. Connects the VGA cable to the headphone jack..., the monitor speakers are disabled. Connects the power cord. NOTE: When a device is included with your product. Rear and side components 23.8-inch model Component...
...using headphones, earbuds, or a headset. Connects the audio cable to the source device. Connects the DisplayPort cable to the monitor. Connects the HDMI cable to the monitor. Connects the USB Type-B cable from the source device to the source device. Connects the VGA cable to the headphone jack..., the monitor speakers are disabled. Connects the power cord. NOTE: When a device is included with your product. Rear and side components 23.8-inch model Component...

User Guide
Page 10
... device. For additional safety information, see the Product Notices provided on the optical disc, if one is connected to the headphone jack, the monitor speakers are disabled. NOTE: When a device is included with your product. Connects the USB CM-CM or CM-AM cable from the source... device to the source device. Connects the HDMI cable to the monitor. Connects the audio cable to the monitor. 27-inch model Component 1 USB ports (2) 2 Audio-out (headphone) jack 3 Master power switch 4 Power connector 5 USB Type-C port 6 ...
... device. For additional safety information, see the Product Notices provided on the optical disc, if one is connected to the headphone jack, the monitor speakers are disabled. NOTE: When a device is included with your product. Connects the USB CM-CM or CM-AM cable from the source... device to the source device. Connects the HDMI cable to the monitor. Connects the audio cable to the monitor. 27-inch model Component 1 USB ports (2) 2 Audio-out (headphone) jack 3 Master power switch 4 Power connector 5 USB Type-C port 6 ...
User Guide
Page 12
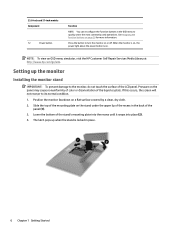
NOTE: To view an OSD menu simulator, visit the HP Customer Self Repair Services Media Library at http://www.hp.com/go/sml. Lower the bottom of the liquid crystals. See Assigning the function buttons on . Setting up when the stand is on page 20 ... this occurs, the screen will not recover to quickly select the most commonly used operations. The latch pops up the monitor Installing the monitor stand IMPORTANT: To prevent damage to turn the monitor on a flat surface covered by a clean, dry cloth. 2. 23.8-inch and 27-inch models Component 12 Power button Function NOTE...
NOTE: To view an OSD menu simulator, visit the HP Customer Self Repair Services Media Library at http://www.hp.com/go/sml. Lower the bottom of the liquid crystals. See Assigning the function buttons on . Setting up when the stand is on page 20 ... this occurs, the screen will not recover to quickly select the most commonly used operations. The latch pops up the monitor Installing the monitor stand IMPORTANT: To prevent damage to turn the monitor on a flat surface covered by a clean, dry cloth. 2. 23.8-inch and 27-inch models Component 12 Power button Function NOTE...

User Guide
Page 13
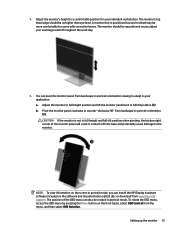
... Control. ● Connect one end of a VGA cable to the VGA connector on the rear of the stand. 3. Setting up the monitor 7 Place the monitor in the center of the monitor and the other end to the VGA connector on the source device. Not all cables shown in this section are included with... select cables. Before connecting the cables, route the cables through the cable routing hole in a convenient, well-ventilated location near the computer. 2. NOTE: The monitor will automatically determine which inputs have valid video signals. Connecting the cables NOTE: The...
... Control. ● Connect one end of a VGA cable to the VGA connector on the rear of the stand. 3. Setting up the monitor 7 Place the monitor in the center of the monitor and the other end to the VGA connector on the source device. Not all cables shown in this section are included with... select cables. Before connecting the cables, route the cables through the cable routing hole in a convenient, well-ventilated location near the computer. 2. NOTE: The monitor will automatically determine which inputs have valid video signals. Connecting the cables NOTE: The...

User Guide
Page 14
● Connect one end of a DisplayPort cable to the DisplayPort IN port on the rear of the monitor and the other end to the DisplayPort port on the source device. ● Connect one end of an HDMI cable (not provided) to the HDMI port on the rear of the monitor and the other end to the HDMI port on the source device. 8 Chapter 1 Getting Started
● Connect one end of a DisplayPort cable to the DisplayPort IN port on the rear of the monitor and the other end to the DisplayPort port on the source device. ● Connect one end of an HDMI cable (not provided) to the HDMI port on the rear of the monitor and the other end to the HDMI port on the source device. 8 Chapter 1 Getting Started

User Guide
Page 15
... port on the source device. Connect a cable to the USB upstream port on the rear of the monitor (provides data transaction to display USB Type-A ports). ● Connect the Type-C connector of the monitor. Setting up to the USB downstream port on the rear of the USB upstream cable to CM cable... provides power delivery up the monitor 9 Then connect the Type M-connector to 15 W (5 V, 3 A). 5. Connect a USB CM to CM cable (not provided) to the USB downstream port on the source device (27-...
... port on the source device. Connect a cable to the USB upstream port on the rear of the monitor (provides data transaction to display USB Type-A ports). ● Connect the Type-C connector of the monitor. Setting up to the USB downstream port on the rear of the USB upstream cable to CM cable... provides power delivery up the monitor 9 Then connect the Type M-connector to 15 W (5 V, 3 A). 5. Connect a USB CM to CM cable (not provided) to the USB downstream port on the source device (27-...

User Guide
Page 16
To enable sound from the monitor's speakers, connect one end of the monitor. Then connect the cable's Type A-connector to the audio-out jack on the source device. (23.8-inch model only) 7. Connect the Type-B connector of the USB upstream cable to the USB upstream port on the rear of an audio cable (not included with the monitor) to the audio-in jack on the monitor and the other end to the USB downstream port on the source device. 10 Chapter 1 Getting Started 6.
To enable sound from the monitor's speakers, connect one end of the monitor. Then connect the cable's Type A-connector to the audio-out jack on the source device. (23.8-inch model only) 7. Connect the Type-B connector of the USB upstream cable to the USB upstream port on the rear of an audio cable (not included with the monitor) to the audio-in jack on the monitor and the other end to the USB downstream port on the source device. 10 Chapter 1 Getting Started 6.

User Guide
Page 17
... risk of electric shock or damage to an AC outlet. Plug the power cord into a grounded (earthed) AC outlet that no one end of the monitor and the other end to the equipment: Do not disable the power cord grounding plug. Do not pull on power cords or cables. Setting up... the monitor 11 Disconnect power from the equipment by unplugging the power cord from the AC outlet, grasp the cord by the plug. 8. WARNING! Arrange them . Connect...
... risk of electric shock or damage to an AC outlet. Plug the power cord into a grounded (earthed) AC outlet that no one end of the monitor and the other end to the equipment: Do not disable the power cord grounding plug. Do not pull on power cords or cables. Setting up... the monitor 11 Disconnect power from the equipment by unplugging the power cord from the AC outlet, grasp the cord by the plug. 8. WARNING! Arrange them . Connect...

User Guide
Page 18
Swivel the monitor panel to a comfortable eye level. 2. Adjusting the monitor 1. Tilt the monitor panel forward or backward to set it to the left or right for the best viewing angle. 12 Chapter 1 Getting Started
Swivel the monitor panel to a comfortable eye level. 2. Adjusting the monitor 1. Tilt the monitor panel forward or backward to set it to the left or right for the best viewing angle. 12 Chapter 1 Getting Started
User Guide
Page 19
... mode, you adjust your individual workstation. Setting up the monitor 13 3. A monitor that is not in full-height and full-tilt position when pivoting, the bottom right corner of the OSD menu can install the HP Display Assistant software included on the software and documentation optical ...disc or download from the menu, and then select OSD Rotation. a. CAUTION: If the monitor is positioned low and reclined may be rotated to the monitor. Adjust the monitor to full height position...
... mode, you adjust your individual workstation. Setting up the monitor 13 3. A monitor that is not in full-height and full-tilt position when pivoting, the bottom right corner of the OSD menu can install the HP Display Assistant software included on the software and documentation optical ...disc or download from the menu, and then select OSD Rotation. a. CAUTION: If the monitor is positioned low and reclined may be rotated to the monitor. Adjust the monitor to full height position...

User Guide
Page 20
...warranty. NOTE: You can disable the power light in image damage may be enabled. Press the power button on the computer to turn off the monitor when it is On), the current preset screen resolution, and the recommended preset screen resolution. Press the power button on the bottom of time. ..., you should always activate a screen saver application or turn it on . To avoid burn-in use for 12 or more consecutive hours of the monitor, and then select Power Control > Power LED > Off. CAUTION: Burn-in the OSD menu. Image retention is a condition that input for 10 seconds. Press ...
...warranty. NOTE: You can disable the power light in image damage may be enabled. Press the power button on the computer to turn off the monitor when it is On), the current preset screen resolution, and the recommended preset screen resolution. Press the power button on the bottom of time. ..., you should always activate a screen saver application or turn it on . To avoid burn-in use for 12 or more consecutive hours of the monitor, and then select Power Control > Power LED > Off. CAUTION: Burn-in the OSD menu. Image retention is a condition that input for 10 seconds. Press ...
User Guide
Page 21
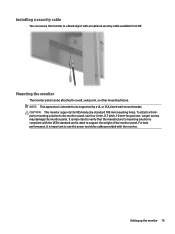
... provided with an optional security cable available from HP. For best performance, it is rated to a fixed object with the monitor. Mounting the monitor The monitor panel can secure the monitor to support the weight of the monitor panel. Longer screws may damage the monitor panel. Setting up the monitor 15 Installing a security cable You can be supported...
... provided with an optional security cable available from HP. For best performance, it is rated to a fixed object with the monitor. Mounting the monitor The monitor panel can secure the monitor to support the weight of the monitor panel. Longer screws may damage the monitor panel. Setting up the monitor 15 Installing a security cable You can be supported...

User Guide
Page 22
... flat surface covered by a clean, dry cloth. 3. Removing the monitor stand You can remove the monitor panel from the monitor. 2. Disconnect and remove all cables from the stand to disassemble the monitor, be sure that the monitor is turned off and all cables are disconnected. 1. Slide the stand ...out of the monitor (1). 4. Position the monitor facedown on the latch ...
... flat surface covered by a clean, dry cloth. 3. Removing the monitor stand You can remove the monitor panel from the monitor. 2. Disconnect and remove all cables from the stand to disassemble the monitor, be sure that the monitor is turned off and all cables are disconnected. 1. Slide the stand ...out of the monitor (1). 4. Position the monitor facedown on the latch ...

User Guide
Page 23
Setting up the monitor 17 Remove the four screws from the VESA holes on the rear of the monitor panel. Install the mounting plate to the wall or swing arm of your choice using the four screws that were removed from the VESA holes located on the rear of the monitor panel. 2. Attaching the VESA mounting bracket 1.
Setting up the monitor 17 Remove the four screws from the VESA holes on the rear of the monitor panel. Install the mounting plate to the wall or swing arm of your choice using the four screws that were removed from the VESA holes located on the rear of the monitor panel. 2. Attaching the VESA mounting bracket 1.
User Guide
Page 24
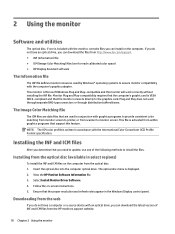
...the computer. Installing from the optical disc (available in accordance with the International Color Consortium (ICC) Profile Format specification. View the HP Monitor Software Information file. 3. Downloading from the web If you do not have a computer or a source device with an optical drive,...Image Color Matching) files (one of INF and ICM files from the HP monitors support website. 18 Chapter 2 Using the monitor 2 Using the monitor Software and utilities The optical disc, if one is included with the monitor, contains files you can install on the computer from the optical disc: ...
...the computer. Installing from the optical disc (available in accordance with the International Color Consortium (ICC) Profile Format specification. View the HP Monitor Software Information file. 3. Downloading from the web If you do not have a computer or a source device with an optical drive,...Image Color Matching) files (one of INF and ICM files from the HP monitors support website. 18 Chapter 2 Using the monitor 2 Using the monitor Software and utilities The optical disc, if one is included with the monitor, contains files you can install on the computer from the optical disc: ...


