User Guide
Page 5
... Software and utilities ...18 The Information file ...18 The Image Color Matching file ...18 Installing the INF and ICM files ...18 Installing from the optical disc (available in select regions 18 Downloading from the web ...18 Using the on-screen display (OSD) menu ...19 Assigning the function buttons ...20 Camera ...21 Using Auto-Sleep Mode ...22 Adjusting Low Blue Light Mode ...22 3 Support and troubleshooting ...23 Solving common problems ...23 Using the auto-adjustment function (analog input 24 Optimizing image...
... Software and utilities ...18 The Information file ...18 The Image Color Matching file ...18 Installing the INF and ICM files ...18 Installing from the optical disc (available in select regions 18 Downloading from the web ...18 Using the on-screen display (OSD) menu ...19 Assigning the function buttons ...20 Camera ...21 Using Auto-Sleep Mode ...22 Adjusting Low Blue Light Mode ...22 3 Support and troubleshooting ...23 Solving common problems ...23 Using the auto-adjustment function (analog input 24 Optimizing image...
User Guide
Page 6
Locating the serial number and product number 27 4 Maintaining the monitor ...28 Maintenance guidelines ...28 Cleaning the monitor ...28 Shipping the monitor ...28 Appendix A Technical specifications ...29 60.5 cm/23.8-inch model ...29 68.5 cm/27-inch model ...30 Preset display resolutions ...30 60.5 cm/23.8-inch and 68.5 cm/27-inch models 30 60.5 cm/23.8-inch and 68.5 cm/27-inch models 31 Entering user modes ...31 Energy saver feature ...31 Appendix B Accessibility ...32 Supported assistive technologies ...32 Contacting support ...32 vi
Locating the serial number and product number 27 4 Maintaining the monitor ...28 Maintenance guidelines ...28 Cleaning the monitor ...28 Shipping the monitor ...28 Appendix A Technical specifications ...29 60.5 cm/23.8-inch model ...29 68.5 cm/27-inch model ...30 Preset display resolutions ...30 60.5 cm/23.8-inch and 68.5 cm/27-inch models 30 60.5 cm/23.8-inch and 68.5 cm/27-inch models 31 Entering user modes ...31 Energy saver feature ...31 Appendix B Accessibility ...32 Supported assistive technologies ...32 Contacting support ...32 vi
User Guide
Page 7
... 1 1 Getting Started Important safety information An AC power adapter and cord may accidentally step on or trip over them so that the total ampere rating of the products connected to the equipment: • Plug the power cord into a grounded (earthed) 3-pin outlet. For information on the correct power cord set to properly support your safety, do not place anything on a cord or cable. Use the appropriate...
... 1 1 Getting Started Important safety information An AC power adapter and cord may accidentally step on or trip over them so that the total ampere rating of the products connected to the equipment: • Plug the power cord into a grounded (earthed) 3-pin outlet. For information on the correct power cord set to properly support your safety, do not place anything on a cord or cable. Use the appropriate...
User Guide
Page 8
... online collaboration (select models) ● Wide viewing angle to allow viewing from a sitting or standing position, or when moving from side to side ● Tilt capability ● Pivot capability to rotate the monitor panel from landscape to portrait mode ● Swivel and height adjustment capabilities ● Removable stand for flexible monitor panel mounting solutions ● DisplayPort and VGA video inputs (cables provided) ● One HDMI (High-Definition Multimedia Interface) video input (cable not provided) ●...
... online collaboration (select models) ● Wide viewing angle to allow viewing from a sitting or standing position, or when moving from side to side ● Tilt capability ● Pivot capability to rotate the monitor panel from landscape to portrait mode ● Swivel and height adjustment capabilities ● Removable stand for flexible monitor panel mounting solutions ● DisplayPort and VGA video inputs (cables provided) ● One HDMI (High-Definition Multimedia Interface) video input (cable not provided) ●...

User Guide
Page 9
..., or a television audio cable. NOTE: When a device is included with your product. Connects the VGA cable to the monitor. Connects the USB Type-B cable from the source device to the source device. Connects the HDMI cable to the source device. Connects the DisplayPort cable to the source device. Connects the audio cable to the headphone jack, the monitor speakers are disabled. WARNING! To reduce the risk of personal injury, reduce the volume before using headphones, earbuds...
..., or a television audio cable. NOTE: When a device is included with your product. Connects the VGA cable to the monitor. Connects the USB Type-B cable from the source device to the source device. Connects the HDMI cable to the source device. Connects the DisplayPort cable to the source device. Connects the audio cable to the headphone jack, the monitor speakers are disabled. WARNING! To reduce the risk of personal injury, reduce the volume before using headphones, earbuds...

User Guide
Page 10
... Connects the USB CM-CM or CM-AM cable from the source device to the source device. WARNING! Connects the DisplayPort cable to the headphone jack, the monitor speakers are disabled. NOTE: Putting the switch in the Off position will yield the lowest power state for the monitor when not in port Function Connect USB devices. 27-inch model Component 1 USB ports (2) 2 Audio-out (headphone) jack 3 Master power switch 4 Power connector 5 USB Type-C port 6 DisplayPort port 7 HDMI port 8 VGA port 9 Audio line in use. Connects the power cord. Connects optional powered...
... Connects the USB CM-CM or CM-AM cable from the source device to the source device. WARNING! Connects the DisplayPort cable to the headphone jack, the monitor speakers are disabled. NOTE: Putting the switch in the Off position will yield the lowest power state for the monitor when not in port Function Connect USB devices. 27-inch model Component 1 USB ports (2) 2 Audio-out (headphone) jack 3 Master power switch 4 Power connector 5 USB Type-C port 6 DisplayPort port 7 HDMI port 8 VGA port 9 Audio line in use. Connects the power cord. Connects optional powered...
User Guide
Page 12
When the monitor is on, the power light above the power button is locked in the back of the mounting plate on a flat surface covered by a clean, dry cloth. 2. If this occurs, the screen will not recover to quickly select the most commonly used operations. 23.8-inch and 27-inch models Component 12 Power button Function NOTE: You can reconfigure the Function buttons in the OSD menu to its normal condition. 1. Pressure...
When the monitor is on, the power light above the power button is locked in the back of the mounting plate on a flat surface covered by a clean, dry cloth. 2. If this occurs, the screen will not recover to quickly select the most commonly used operations. 23.8-inch and 27-inch models Component 12 Power button Function NOTE: You can reconfigure the Function buttons in the OSD menu to its normal condition. 1. Pressure...
User Guide
Page 19
... repositioned as you can install the HP Display Assistant software included on the front bezel, select OSD Control from www.hp.com/ support. To rotate the OSD menu, access the OSD menu by pressing the Menu button on the software and documentation optical disc or download from the menu, and then select OSD Rotation. Adjust the monitor to full height position and tilt the monitor panel back to a comfortable position for users with the base and potentially cause...
... repositioned as you can install the HP Display Assistant software included on the front bezel, select OSD Control from www.hp.com/ support. To rotate the OSD menu, access the OSD menu by pressing the Menu button on the software and documentation optical disc or download from the menu, and then select OSD Rotation. Adjust the monitor to full height position and tilt the monitor panel back to a comfortable position for users with the base and potentially cause...

User Guide
Page 20
... the monitor power button for the screen. 14 Chapter 1 Getting Started NOTE: You can disable the power light in image damage on the front of the auto-switch source setting (On or Off; Press the Menu button on the monitor isn't covered by the warranty. default setting is a condition that may occur on . Press the power button on the bottom of the monitor to turn it on all LCD screens. NOTE: If pressing the power button has...
... the monitor power button for the screen. 14 Chapter 1 Getting Started NOTE: You can disable the power light in image damage on the front of the auto-switch source setting (On or Off; Press the Menu button on the monitor isn't covered by the warranty. default setting is a condition that may occur on . Press the power button on the bottom of the monitor to turn it on all LCD screens. NOTE: If pressing the power button has...
User Guide
Page 21
... HP. To attach a thirdparty mounting solution to a wall, swing arm, or other mounting fixture. Setting up the monitor 15 NOTE: This apparatus is intended to be attached to the monitor panel, use the power and video cables provided with the VESA standard and is important to support the weight of the monitor panel. CAUTION: This monitor supports the VESA industry-standard 100 mm mounting holes. For best performance, it is rated to use...
... HP. To attach a thirdparty mounting solution to a wall, swing arm, or other mounting fixture. Setting up the monitor 15 NOTE: This apparatus is intended to be attached to the monitor panel, use the power and video cables provided with the VESA standard and is important to support the weight of the monitor panel. CAUTION: This monitor supports the VESA industry-standard 100 mm mounting holes. For best performance, it is rated to use...
User Guide
Page 24
... need to update, use one for each calibrated color space) ● HP Display Assistant software The Information file The INF file defines monitor resources used in accordance with the computer's graphics adapter. This monitor is displayed. 2. View the HP Monitor Software Information file. 3. Downloading from the web If you can download the files from the HP monitors support website. 18 Chapter 2 Using the monitor The optical disc menu is Microsoft Windows Plug and Play-compatible and the monitor will work...
... need to update, use one for each calibrated color space) ● HP Display Assistant software The Information file The INF file defines monitor resources used in accordance with the computer's graphics adapter. This monitor is displayed. 2. View the HP Monitor Software Information file. 3. Downloading from the web If you can download the files from the HP monitors support website. 18 Chapter 2 Using the monitor The optical disc menu is Microsoft Windows Plug and Play-compatible and the monitor will work...

User Guide
Page 25
... the screen. The factory default is not already on, press the power button to turn on -screen instructions to adjust the monitor screen image based on your monitor and download the software. The factory default is active. Adjusts the contrast level of the screen. Selects and displays important information about the monitor. Select Get software and drivers. 3. Then press the Menu button to the factory default settings. Adjusts the DDC/CI settings, selects the language,and returns all OSD menu settings to open the OSD. 3. Selects the video input signal. Follow...
... the screen. The factory default is not already on, press the power button to turn on -screen instructions to adjust the monitor screen image based on your monitor and download the software. The factory default is active. Adjusts the contrast level of the screen. Selects and displays important information about the monitor. Select Get software and drivers. 3. Then press the Menu button to the factory default settings. Adjusts the DDC/CI settings, selects the language,and returns all OSD menu settings to open the OSD. 3. Selects the video input signal. Follow...

User Guide
Page 28
... Viewing Modes. 3. Adjusting Low Blue Light Mode Decreasing the blue light emitting from the sleep mode when the host PC sends an active signal to the monitor (for improved eye comfort ● Night: Adjusts to open the OSD. 1. To reduce the risk of either horizontal or vertical sync signal). When Auto-Sleep Mode is enabled (enabled by default), the monitor will wake from the display reduces the blue light exposure to your monitor to save your desired setting: ● Low Blue Light...
... Viewing Modes. 3. Adjusting Low Blue Light Mode Decreasing the blue light emitting from the sleep mode when the host PC sends an active signal to the monitor (for improved eye comfort ● Night: Adjusts to open the OSD. 1. To reduce the risk of either horizontal or vertical sync signal). When Auto-Sleep Mode is enabled (enabled by default), the monitor will wake from the display reduces the blue light exposure to your monitor to save your desired setting: ● Low Blue Light...
User Guide
Page 29
.... Power cord is flashing. Connect the video cable properly. Set Auto-Switch Input to exit sleep mode. Open the OSD menu and select Brightness to disable the OSD Lockout function. Video resolution and/or refresh rate are set auto-sleep to disable the function is enabled. seconds to adjust the brightness scale as needed. Press the front bezel power button. Adjust the volume control on page 30 for 10 seconds to enter into sleep mode. Volume is Open the OSD menu and select Power Control > Auto-Sleep disabled. Connect the appropriate video signal cable...
.... Power cord is flashing. Connect the video cable properly. Set Auto-Switch Input to exit sleep mode. Open the OSD menu and select Brightness to disable the OSD Lockout function. Video resolution and/or refresh rate are set auto-sleep to disable the function is enabled. seconds to adjust the brightness scale as needed. Press the front bezel power button. Adjust the volume control on page 30 for 10 seconds to enter into sleep mode. Volume is Open the OSD menu and select Power Control > Auto-Sleep disabled. Connect the appropriate video signal cable...
User Guide
Page 30
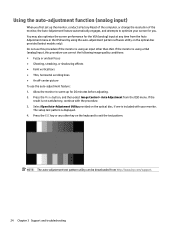
..., horizontal scrolling lines ● An off-center picture To use this procedure can be downloaded from http://www.hp.com/support. 24 Chapter 3 Support and troubleshooting Select Open Auto-Adjustment Utility provided on the keyboard to exit the test pattern. You may also optimize the screen performance for 20 minutes before adjusting. 2. Press the Menu button, and then select Image Control > Auto Adjustment from the Auto Adjustment menu in the OSD and by using an input...
..., horizontal scrolling lines ● An off-center picture To use this procedure can be downloaded from http://www.hp.com/support. 24 Chapter 3 Support and troubleshooting Select Open Auto-Adjustment Utility provided on the keyboard to exit the test pattern. You may also optimize the screen performance for 20 minutes before adjusting. 2. Press the Menu button, and then select Image Control > Auto Adjustment from the Auto Adjustment menu in the OSD and by using an input...

User Guide
Page 31
... will obtain the best results by using an analog (VGA) input. To remove flickering or blurring (Phase): 1. To correct screen position (Horizontal Position or Vertical Position): Optimizing image performance (analog input) 25 NOTE: The Clock and Phase controls are adjustable only when using the auto-adjustment pattern software utility provided on the optical disc. The Clock must first be eliminated, depending on the computer or graphics controller card installed. Use the function buttons on the monitor front bezel that...
... will obtain the best results by using an analog (VGA) input. To remove flickering or blurring (Phase): 1. To correct screen position (Horizontal Position or Vertical Position): Optimizing image performance (analog input) 25 NOTE: The Clock and Phase controls are adjustable only when using the auto-adjustment pattern software utility provided on the optical disc. The Clock must first be eliminated, depending on the computer or graphics controller card installed. Use the function buttons on the monitor front bezel that...

User Guide
Page 32
... and software you may need to contact HP and open the OSD menu, and then select Image Position. 2. This functionality is only available when the monitor is not open. NOTE: The monitor user guide, reference material, and drivers are using 26 Chapter 3 Support and troubleshooting Have the following information available when you call: ● Monitor model number ● Monitor serial number ● Purchase date on using the troubleshooting tips in the display area of the monitor. You...
... and software you may need to contact HP and open the OSD menu, and then select Image Position. 2. This functionality is only available when the monitor is not open. NOTE: The monitor user guide, reference material, and drivers are using 26 Chapter 3 Support and troubleshooting Have the following information available when you call: ● Monitor model number ● Monitor serial number ● Purchase date on using the troubleshooting tips in the display area of the monitor. You...

User Guide
Page 34
... an authorized HP dealer, reseller, or service provider. ● Use only a power source and connection appropriate for ventilation. Never disconnect the monitor by wiping the screen and the cabinet with a "burned-in image" are not covered under the HP warranty. ● Slots and openings in the cabinet are covered in use. Dust the monitor by pulling the cord. ● Turn the monitor off the monitor and unplug the power cord from...
... an authorized HP dealer, reseller, or service provider. ● Use only a power source and connection appropriate for ventilation. Never disconnect the monitor by wiping the screen and the cabinet with a "burned-in image" are not covered under the HP warranty. ● Slots and openings in the cabinet are covered in use. Dust the monitor by pulling the cord. ● Turn the monitor off the monitor and unplug the power cord from...

User Guide
Page 36
....317 60.004 60.000 59.810 30 Appendix A Technical specifications 68.5 cm/27-inch model Display, wide-screen Type Viewable image size Maximum weight (unpacked) Dimensions (include base) Height (highest position) Height (lowest position) Depth Width Tilt Swivel Maximum graphic resolution Optimum graphic resolution Environmental requirements temperature Operating temperature Storage temperature Storage humidity Operating humidity Power source Input terminal 68.5 cm IPS 68.5 cm diagonal 7.9 kg 53.39...
....317 60.004 60.000 59.810 30 Appendix A Technical specifications 68.5 cm/27-inch model Display, wide-screen Type Viewable image size Maximum weight (unpacked) Dimensions (include base) Height (highest position) Height (lowest position) Depth Width Tilt Swivel Maximum graphic resolution Optimum graphic resolution Environmental requirements temperature Operating temperature Storage temperature Storage humidity Operating humidity Power source Input terminal 68.5 cm IPS 68.5 cm diagonal 7.9 kg 53.39...

User Guide
Page 37
... or all of these signals, the monitor screen is blanked, the backlight is turned off, and the power light is not preset under the following circumstances: ● You are not using a standard graphics adapter. ● You are at a predetermined time. When the monitor is in the monitor's Energy Saver utility, you may occasionally call for instructions on -screen display. Your changes can also program the...
... or all of these signals, the monitor screen is blanked, the backlight is turned off, and the power light is not preset under the following circumstances: ● You are not using a standard graphics adapter. ● You are at a predetermined time. When the monitor is in the monitor's Energy Saver utility, you may occasionally call for instructions on -screen display. Your changes can also program the...


