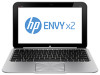
HP Envy x2 Maintenance and Service Guide IMPORTANT! This document is intended for HP authorized service providers only.
Page 72
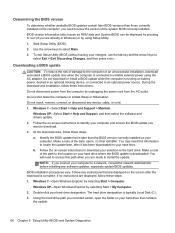
... typically Local Disk (C:). 3. You will need to access this information to locate the update later, after the download is running on the computer, you are displayed on your changes, use the tab key and the arrow keys to select Exit > Exit Discarding Changes, and then press enter. If no instructions are ready to install the update. Windows XP-Open Windows Explorer by selecting Start > Computer. Start Setup Utility (BIOS). 2. During the download and installation, follow these...
... typically Local Disk (C:). 3. You will need to access this information to locate the update later, after the download is running on the computer, you are displayed on your changes, use the tab key and the arrow keys to select Exit > Exit Discarding Changes, and then press enter. If no instructions are ready to install the update. Windows XP-Open Windows Explorer by selecting Start > Computer. Start Setup Utility (BIOS). 2. During the download and installation, follow these...

HP Envy x2 Maintenance and Service Guide IMPORTANT! This document is intended for HP authorized service providers only.
Page 77
... Recovering using a minimized image, you can choose the System Recovery option from the HP Recovery media. System Restore allows you to restore without losing any personal information, Windows System Restore is an option. Other applications included in HP Recovery Manager. If you need to correct a problem with a preinstalled application or driver, use the Drivers and Applications Reinstall option of HP Recovery Manager to reinstall the individual application or driver. ● From the Start screen on the keyboard dock, type recovery...
... Recovering using a minimized image, you can choose the System Recovery option from the HP Recovery media. System Restore allows you to restore without losing any personal information, Windows System Restore is an option. Other applications included in HP Recovery Manager. If you need to correct a problem with a preinstalled application or driver, use the Drivers and Applications Reinstall option of HP Recovery Manager to reinstall the individual application or driver. ● From the Start screen on the keyboard dock, type recovery...
HP Envy x2 Maintenance and Service Guide IMPORTANT! This document is intended for HP authorized service providers only.
Page 78
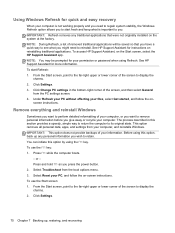
..., the Windows Refresh option allows you have a quick way to see what is important to reinstall. Click Change PC settings in this option, back up , restoring, and recovering Before using the f11 key. To use the f11 key: 1. To access HP Support Assistant, on - Select Troubleshoot from your computer, or you want to perform detailed reformatting of the screen to remove personal information before you want to display the...
..., the Windows Refresh option allows you have a quick way to see what is important to reinstall. Click Change PC settings in this option, back up , restoring, and recovering Before using the f11 key. To use the f11 key: 1. To access HP Support Assistant, on - Select Troubleshoot from your computer, or you want to perform detailed reformatting of the screen to remove personal information before you want to display the...
HP Envy x2 Maintenance and Service Guide IMPORTANT! This document is intended for HP authorized service providers only.
Page 79
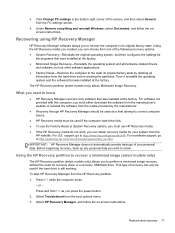
... Factory Reset or System Recovery options, you must be used if the hard drive is still working. For worldwide support, go /contactHP. Select HP Recovery Manager, and follow the onscreen instructions. The HP Recovery partition (select models only) allows Minimized Image Recovery. Using the HP Recovery media you created, you to perform a minimized image recovery without the need to retain. This type of the screen, and then select General from the HP website. Press f11 while the computer boots. - 3. Restore...
... Factory Reset or System Recovery options, you must be used if the hard drive is still working. For worldwide support, go /contactHP. Select HP Recovery Manager, and follow the onscreen instructions. The HP Recovery partition (select models only) allows Minimized Image Recovery. Using the HP Recovery media you created, you to perform a minimized image recovery without the need to retain. This type of the screen, and then select General from the HP website. Press f11 while the computer boots. - 3. Restore...
HP Envy x2 Maintenance and Service Guide IMPORTANT! This document is intended for HP authorized service providers only.
Page 85
... description 2 USB 2.0 11, 12 power button, identifying 4 power cord set requirements 73 spare part numbers 19 power requirements, product description 2 processor, product description 1 product description audio 1 display panel 1 external media cards 1 graphics 1 hard drives 1 keyboard 2 memory module 1 microphone 1 operating system 2 pointing device 2 ports 2 power requirements 2 processors 1 product name 1 serviceability 2 video 1 wireless 1 product name 1 product name and number, computer 14 R recovery 69, 70 HP Recovery Manager 71 starting 71 system 71 recovery partition 71 removing 72...
... description 2 USB 2.0 11, 12 power button, identifying 4 power cord set requirements 73 spare part numbers 19 power requirements, product description 2 processor, product description 1 product description audio 1 display panel 1 external media cards 1 graphics 1 hard drives 1 keyboard 2 memory module 1 microphone 1 operating system 2 pointing device 2 ports 2 power requirements 2 processors 1 product name 1 serviceability 2 video 1 wireless 1 product name 1 product name and number, computer 14 R recovery 69, 70 HP Recovery Manager 71 starting 71 system 71 recovery partition 71 removing 72...
User Guide - Windows 8
Page 6
... the wireless controls 30 Using the wireless key 30 Using operating system controls 31 Using a WLAN ...31 Using an Internet service provider 31 Setting up a WLAN 32 Configuring a wireless router 32 Protecting your WLAN 32 Connecting to a WLAN 33 Using Bluetooth wireless devices 33 4 Enjoying entertainment features ...34 Multimedia features ...35 Using the webcams ...38 Using audio ...39 Connecting speakers ...40 Using Beats Audio ...40 Accessing Beats Audio Control Panel 40 Enabling and disabling Beats Audio 40 Checking the sound ...40 Using video ...42 Connecting an HDMI device 42...
... the wireless controls 30 Using the wireless key 30 Using operating system controls 31 Using a WLAN ...31 Using an Internet service provider 31 Setting up a WLAN 32 Configuring a wireless router 32 Protecting your WLAN 32 Connecting to a WLAN 33 Using Bluetooth wireless devices 33 4 Enjoying entertainment features ...34 Multimedia features ...35 Using the webcams ...38 Using audio ...39 Connecting speakers ...40 Using Beats Audio ...40 Accessing Beats Audio Control Panel 40 Enabling and disabling Beats Audio 40 Checking the sound ...40 Using video ...42 Connecting an HDMI device 42...

User Guide - Windows 8
Page 8
... Setup Utility (BIOS) ...69 Updating the BIOS ...69 Determining the BIOS version 69 Downloading a BIOS update 70 Using System Diagnostics ...71 11 Backing up, restoring, and recovering ...72 Creating recovery media and backups 73 Restore and recovery ...74 Using Windows Refresh for quick and easy recovery 75 Remove everything and reinstall Windows 75 Recovering using HP Recovery Manager 76 What you need to know 76 Using the HP Recovery partition to recover a minimized image (select models only) ...76 Changing the boot order 77 Removing the HP Recovery partition 77 12 Specifications...
... Setup Utility (BIOS) ...69 Updating the BIOS ...69 Determining the BIOS version 69 Downloading a BIOS update 70 Using System Diagnostics ...71 11 Backing up, restoring, and recovering ...72 Creating recovery media and backups 73 Restore and recovery ...74 Using Windows Refresh for quick and easy recovery 75 Remove everything and reinstall Windows 75 Recovering using HP Recovery Manager 76 What you need to know 76 Using the HP Recovery partition to recover a minimized image (select models only) ...76 Changing the boot order 77 Removing the HP Recovery partition 77 12 Specifications...
User Guide - Windows 8
Page 60
... any type of networking connection or perform any computer functions while the computer is saved to memory, allowing you must enable Hibernation using Power Options. NOTE: If you have set a password to be required on wakeup, you to resume your work very quickly. In the Hibernation state, your work is connected to the screen where you must enter your Windows password before the computer will return to a disc or an external media card...
... any type of networking connection or perform any computer functions while the computer is saved to memory, allowing you must enable Hibernation using Power Options. NOTE: If you have set a password to be required on wakeup, you to resume your work very quickly. In the Hibernation state, your work is connected to the screen where you must enter your Windows password before the computer will return to a disc or an external media card...
User Guide - Windows 8
Page 76
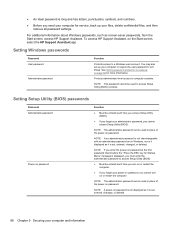
... then remove all password settings. For additional information about Windows passwords, such as it is set up your computer and information Protects administrator-level access to exit Sleep. NOTE: The administrator password can be used to a Windows user account. NOTE: If you enter the power-on password at the first password check before the "Press the ESC key for Startup Menu" message is not displayed as screen-saver passwords, from the Start screen, access HP Support Assistant...
... then remove all password settings. For additional information about Windows passwords, such as it is set up your computer and information Protects administrator-level access to exit Sleep. NOTE: The administrator password can be used to a Windows user account. NOTE: If you enter the power-on password at the first password check before the "Press the ESC key for Startup Menu" message is not displayed as screen-saver passwords, from the Start screen, access HP Support Assistant...
User Guide - Windows 8
Page 80
... BIOS update is downloaded. Follow the on -screen instructions. 4. From the Start screen, select the HP Support Assistant app. 2. Downloading a BIOS update CAUTION: To reduce the risk of damage to the computer or an unsuccessful installation, download and install a BIOS update only when the computer is connected to a network, consult the network administrator before installing any software updates, especially system BIOS updates. Do not download or install a BIOS update while the computer is running on your hard drive. 70 Chapter 10 Using Setup Utility (BIOS...
... BIOS update is downloaded. Follow the on -screen instructions. 4. From the Start screen, select the HP Support Assistant app. 2. Downloading a BIOS update CAUTION: To reduce the risk of damage to the computer or an unsuccessful installation, download and install a BIOS update only when the computer is connected to a network, consult the network administrator before installing any software updates, especially system BIOS updates. Do not download or install a BIOS update while the computer is running on your hard drive. 70 Chapter 10 Using Setup Utility (BIOS...
User Guide - Windows 8
Page 84
... Start screen on the keyboard dock, type recovery, select HP Recovery Manager, and then select Drivers and Applications Reinstall, and follow the on page 75. ● If you want to reset your information from the HP Recovery partition (select models only). For more information, see Recovering using HP Recovery Manager on page 76. ● If you want to remove all personal data, apps, and settings, and reinstall Windows. Windows creates system restore points automatically during a Windows update...
... Start screen on the keyboard dock, type recovery, select HP Recovery Manager, and then select Drivers and Applications Reinstall, and follow the on page 75. ● If you want to reset your information from the HP Recovery partition (select models only). For more information, see Recovering using HP Recovery Manager on page 76. ● If you want to remove all personal data, apps, and settings, and reinstall Windows. Windows creates system restore points automatically during a Windows update...
User Guide - Windows 8
Page 85
... installed on -screen instructions. Press f11 while the computer boots. - Select Troubleshoot from the boot options menu. 3. Click Settings. Press and hold f11 as you press the power button. 2. IMPORTANT: This option does not provide backups of removed traditional applications will be prompted for your computer. From the Start screen, point to the far-right upper or lower corner of the screen to display the charms. 2. Using Windows Refresh for quick...
... installed on -screen instructions. Press f11 while the computer boots. - Select Troubleshoot from the boot options menu. 3. Click Settings. Press and hold f11 as you press the power button. 2. IMPORTANT: This option does not provide backups of removed traditional applications will be prompted for your computer. From the Start screen, point to the far-right upper or lower corner of the screen to display the charms. 2. Using Windows Refresh for quick...
User Guide - Windows 8
Page 91
... battery power 54 Beats Audio 40, 48 Beats Audio Control Panel 40 Beats Audio hot key 40 Beats Audio hotkey 10 best practices 1 BIOS determining version 69 downloading an update 70 updating 69 Bluetooth device 30, 33 boot order changing HP Recovery Manager 77 buttons left TouchPad 9 power 4 right TouchPad 9 TouchPad on/off 8 C cables USB 60 caps lock light, identifying 9 caring for your computer 62 checking audio functions 40 cleaning your computer 62 components display 6 left-side 12 right-side 11 top 8 computer reset 75 configuring audio for HDMI 43 connecting...
... battery power 54 Beats Audio 40, 48 Beats Audio Control Panel 40 Beats Audio hot key 40 Beats Audio hotkey 10 best practices 1 BIOS determining version 69 downloading an update 70 updating 69 Bluetooth device 30, 33 boot order changing HP Recovery Manager 77 buttons left TouchPad 9 power 4 right TouchPad 9 TouchPad on/off 8 C cables USB 60 caps lock light, identifying 9 caring for your computer 62 checking audio functions 40 cleaning your computer 62 components display 6 left-side 12 right-side 11 top 8 computer reset 75 configuring audio for HDMI 43 connecting...
User Guide - Windows 8
Page 92
... M maintenance Disk Cleanup 62 minimized image creating 76 minimized image recovery 76 mouse, external setting preferences 45 mute light, identifying 9 O operating environment 79 optional external devices, using 60 original system recovery 76 P passwords Setup Utility (BIOS) 66 Windows 66 pinching touch screen gesture 22 pinching TouchPad gesture 17 ports HDMI 12, 37, 42 USB 2.0 11, 12, 36 power battery 54 power button, identifying 4 product name and number, computer 14 public WLAN connection 33 R recovery 74, 75 HP Recovery Manager 76 starting 77 system 76 recovery partition 76 removing 77...
... M maintenance Disk Cleanup 62 minimized image creating 76 minimized image recovery 76 mouse, external setting preferences 45 mute light, identifying 9 O operating environment 79 optional external devices, using 60 original system recovery 76 P passwords Setup Utility (BIOS) 66 Windows 66 pinching touch screen gesture 22 pinching TouchPad gesture 17 ports HDMI 12, 37, 42 USB 2.0 11, 12, 36 power battery 54 power button, identifying 4 product name and number, computer 14 public WLAN connection 33 R recovery 74, 75 HP Recovery Manager 76 starting 77 system 76 recovery partition 76 removing 77...
User Guide
Page 6
... key 27 Using operating system controls 27 Using a WLAN ...28 Using an Internet service provider 28 Setting up a WLAN 29 Configuring a wireless router 29 Protecting your WLAN 29 Connecting to a WLAN 30 Using Bluetooth wireless devices 30 4 Enjoying entertainment features ...31 Multimedia features ...31 Using the webcams ...34 Using audio ...34 Connecting speakers ...34 Using Beats Audio ...34 Accessing Beats Audio Control Panel 34 Enabling and disabling Beats Audio 35 Checking the sound ...35 Using video ...36 Connecting an HDMI device 36 Configuring HDMI audio settings 38 Cameras...
... key 27 Using operating system controls 27 Using a WLAN ...28 Using an Internet service provider 28 Setting up a WLAN 29 Configuring a wireless router 29 Protecting your WLAN 29 Connecting to a WLAN 30 Using Bluetooth wireless devices 30 4 Enjoying entertainment features ...31 Multimedia features ...31 Using the webcams ...34 Using audio ...34 Connecting speakers ...34 Using Beats Audio ...34 Accessing Beats Audio Control Panel 34 Enabling and disabling Beats Audio 35 Checking the sound ...35 Using video ...36 Connecting an HDMI device 36 Configuring HDMI audio settings 38 Cameras...

User Guide
Page 8
... (BIOS) ...59 Updating the BIOS ...59 Determining the BIOS version 59 Downloading a BIOS update 60 Using System Diagnostics ...61 11 Backing up, restoring, and recovering ...62 Creating recovery media and backups 62 Restore and recovery ...62 Using Windows Refresh for quick and easy recovery 64 Remove everything and reinstall Windows 64 Recovering using HP Recovery Manager 65 What you need to know 65 Using the HP Recovery partition to recover (select models only 65 Changing the boot order 66 Removing the HP Recovery partition 66 12 Specifications ...67 Input power ...67 Operating...
... (BIOS) ...59 Updating the BIOS ...59 Determining the BIOS version 59 Downloading a BIOS update 60 Using System Diagnostics ...61 11 Backing up, restoring, and recovering ...62 Creating recovery media and backups 62 Restore and recovery ...62 Using Windows Refresh for quick and easy recovery 64 Remove everything and reinstall Windows 64 Recovering using HP Recovery Manager 65 What you need to know 65 Using the HP Recovery partition to recover (select models only 65 Changing the boot order 66 Removing the HP Recovery partition 66 12 Specifications ...67 Input power ...67 Operating...
User Guide
Page 51
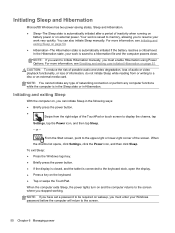
... the Windows button. ● Briefly press the power button. ● If the display is closed, and the tablet is saved to the keyboard dock, open the display. Your computer supports an optimal power plan to manage how your work is connected to memory, allowing you can initiate Sleep in Hibernation. For more information, see Enabling and exiting user-initiated hibernation (select models only) on , you can enable Hibernation using Power Options. or...
... the Windows button. ● Briefly press the power button. ● If the display is closed, and the tablet is saved to the keyboard dock, open the display. Your computer supports an optimal power plan to manage how your work is connected to memory, allowing you can initiate Sleep in Hibernation. For more information, see Enabling and exiting user-initiated hibernation (select models only) on , you can enable Hibernation using Power Options. or...

User Guide
Page 71
... you can choose to restore to remove all personal data, apps, and settings, and reinstall Windows. Restore and recovery 63 For more information, see Recovering using Windows System Restore, access HP Support Assistant. Windows creates system restore points automatically during a Windows update and other system maintenance events. Minimized Image Recovery installs only drivers and hardware-enabling applications. Even if you did not manually create a restore point, you want a quick and easy way to recover the system without losing your...
... you can choose to restore to remove all personal data, apps, and settings, and reinstall Windows. Restore and recovery 63 For more information, see Recovering using Windows System Restore, access HP Support Assistant. Windows creates system restore points automatically during a Windows update and other system maintenance events. Minimized Image Recovery installs only drivers and hardware-enabling applications. Even if you did not manually create a restore point, you want a quick and easy way to recover the system without losing your...
User Guide
Page 77
... HDMI configuring audio 38 HDMI port, connecting 36 HDMI port, identifying 13, 33 Hibernation exiting 44 initiated during critical battery level 46 initiating 44 high-definition devices, connecting 36 hot keys description 42 display system information 42 using 42 HP and third-party software updates, installing 58 HP Recovery Manager 65 correcting boot problems 66 starting 65 HP Recovery partition 65 recovery 65 removing 66 hubs 49 I input power 67 installing critical updates 57 integrated front webcam, identifying 33 integrated rear webcam, identifying 4, 6, 31 internal microphone, identifying...
... HDMI configuring audio 38 HDMI port, connecting 36 HDMI port, identifying 13, 33 Hibernation exiting 44 initiated during critical battery level 46 initiating 44 high-definition devices, connecting 36 hot keys description 42 display system information 42 using 42 HP and third-party software updates, installing 58 HP Recovery Manager 65 correcting boot problems 66 starting 65 HP Recovery partition 65 recovery 65 removing 66 hubs 49 I input power 67 installing critical updates 57 integrated front webcam, identifying 33 integrated rear webcam, identifying 4, 6, 31 internal microphone, identifying...
User Guide
Page 78
... M maintenance Disk Cleanup 52 minimized image creating 65 minimized image recovery 65 mouse, external setting preferences 39 mute light, identifying 10 O operating environment 67 optional external devices, using 50 original system recovery 65 P passwords Setup Utility (BIOS) 56 Windows 56 pinching touch screen gesture 21 pinching TouchPad gesture 16 ports HDMI 13, 33, 36 USB 2.0 12, 13, 33 power battery 45 power button, identifying 4 product name and number, computer 14 public WLAN connection 30 R recovery 63, 64 HP Recovery Manager 65 starting 65 system 65 recovery partition 65 removing...
... M maintenance Disk Cleanup 52 minimized image creating 65 minimized image recovery 65 mouse, external setting preferences 39 mute light, identifying 10 O operating environment 67 optional external devices, using 50 original system recovery 65 P passwords Setup Utility (BIOS) 56 Windows 56 pinching touch screen gesture 21 pinching TouchPad gesture 16 ports HDMI 13, 33, 36 USB 2.0 12, 13, 33 power battery 45 power button, identifying 4 product name and number, computer 14 public WLAN connection 30 R recovery 63, 64 HP Recovery Manager 65 starting 65 system 65 recovery partition 65 removing...


