
User Guide
Page 14
... guide firmly against the edge of the label sheets to the left. 2. Slide the paper guide all the way to separate them, and then align the edges. 3. Click the Features tab, and then specify the following print settings: • Paper Type: Plain Paper • Paper Size:...of the sheets. Fan the edges of the cards. 5. Slide the paper guide firmly against the edge of the tray. Chapter 2 4. Open the Printer Properties dialog box. 6. Print labels 1. In the Printing Shortcuts list, click General Everyday Printing, and then specify the following print settings: • Paper...
... guide firmly against the edge of the label sheets to the left. 2. Slide the paper guide all the way to separate them, and then align the edges. 3. Click the Features tab, and then specify the following print settings: • Paper Type: Plain Paper • Paper Size:...of the sheets. Fan the edges of the cards. 5. Slide the paper guide firmly against the edge of the tray. Chapter 2 4. Open the Printer Properties dialog box. 6. Print labels 1. In the Printing Shortcuts list, click General Everyday Printing, and then specify the following print settings: • Paper...

User Guide
Page 15
...an appropriate HP inkjet paper. • Orientation: Portrait or Landscape • Size: An appropriate paper size • Two-sided printing: Manual 8. Print on should face down . 4. Push the paper into the printer until it stops. 4. Print greeting cards 1. The side to separate them, and then align the edges.... 3. Slide the paper guide firmly against the edge of the tray. Fan the edges of the cards. Open the Printer Properties dialog box. Click OK to the left . 2. Place the greeting...
...an appropriate HP inkjet paper. • Orientation: Portrait or Landscape • Size: An appropriate paper size • Two-sided printing: Manual 8. Print on should face down . 4. Push the paper into the printer until it stops. 4. Print greeting cards 1. The side to separate them, and then align the edges.... 3. Slide the paper guide firmly against the edge of the tray. Fan the edges of the cards. Open the Printer Properties dialog box. Click OK to the left . 2. Place the greeting...
User Guide
Page 44
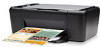
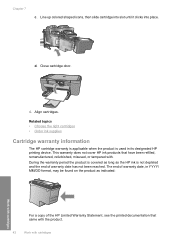
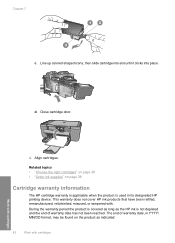
...topics • Choose the right cartridges • Order ink supplies Cartridge warranty information The HP cartridge warranty is applicable when the product is not depleted and the end of the HP Limited Warranty Statement, see the printed documentation that have been refilled, remanufactured, refurbished, ... copy of warranty date has not been reached. Chapter 7 c. d. This warranty does not cover HP ink products that came with the product. 42 Work with cartridges Work with . Align cartridges. Line up colored shaped icons, then slide cartridge into slot until it clicks into place....
...topics • Choose the right cartridges • Order ink supplies Cartridge warranty information The HP cartridge warranty is applicable when the product is not depleted and the end of the HP Limited Warranty Statement, see the printed documentation that have been refilled, remanufactured, refurbished, ... copy of warranty date has not been reached. Chapter 7 c. d. This warranty does not cover HP ink products that came with the product. 42 Work with cartridges Work with . Align cartridges. Line up colored shaped icons, then slide cartridge into slot until it clicks into place....
User Guide
Page 55
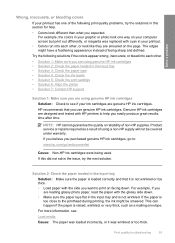
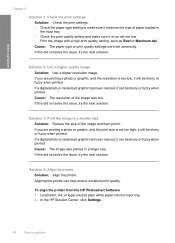
... has one way on the page. Solution 2: Check the paper loaded in the input tray • Solution 3: Check the paper type • Solution 4: Check the ink levels • Solution 5: Check the print settings • Solution 6: Align the printer • Solution 7: Contact HP support Solution... 1: Make sure you use genuine HP ink cartridges. For example, the colors in your graphic or photo look different than what you are ...
... has one way on the page. Solution 2: Check the paper loaded in the input tray • Solution 3: Check the paper type • Solution 4: Check the ink levels • Solution 5: Check the print settings • Solution 6: Align the printer • Solution 7: Contact HP support Solution... 1: Make sure you use genuine HP ink cartridges. For example, the colors in your graphic or photo look different than what you are ...
User Guide
Page 57
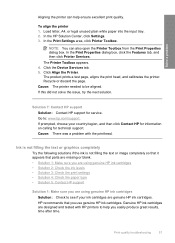
...incorrectly. NOTE: You can help ensure excellent print quality. Cause: The printer needed to : www.hp.com/support. Go to be aligned. If prompted, choose your country/region, and then click Contact HP for information on paper. NOTE: On some computer screens, colors might... the ink levels • Solution 3: Check the print settings Print quality troubleshooting 55 In the HP Solution Center, click Settings. 3. Solve a problem Solution 6: Align the printer Solution: Align the printer. Click the Device Services tab. 5. Ink is not filling the text or graphics completely Try ...
...incorrectly. NOTE: You can help ensure excellent print quality. Cause: The printer needed to : www.hp.com/support. Go to be aligned. If prompted, choose your country/region, and then click Contact HP for information on paper. NOTE: On some computer screens, colors might... the ink levels • Solution 3: Check the print settings Print quality troubleshooting 55 In the HP Solution Center, click Settings. 3. Solve a problem Solution 6: Align the printer Solution: Align the printer. Click the Device Services tab. 5. Ink is not filling the text or graphics completely Try ...
User Guide
Page 61
... ink cartridges are designed and tested with HP printers to replace the cartridges until print quality becomes unacceptable. NOTE: HP cannot guarantee the quality or reliability of non-HP supplies. HP recommends that the paper is loaded correctly • Solution 4: Use a higher print quality setting • Solution 5: Align the printer • Solution 5: Automatically clean the print cartridges...
... ink cartridges are designed and tested with HP printers to replace the cartridges until print quality becomes unacceptable. NOTE: HP cannot guarantee the quality or reliability of non-HP supplies. HP recommends that the paper is loaded correctly • Solution 4: Use a higher print quality setting • Solution 5: Align the printer • Solution 5: Automatically clean the print cartridges...
User Guide
Page 62
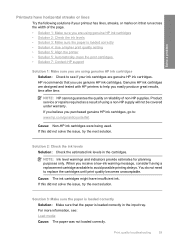
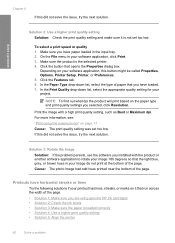
... tab. 6. In the Print Quality drop-down list, select the type of paper that opens the Properties dialog box. Solution 5: Align the printer Solution: Align the printer. NOTE: To find out what dpi the product will print based on the product was set too low. Print the image with..., click Resolution. NOTE: You can help ensure excellent print quality. On the File menu in the input tray. 2. Aligning the printer can also open the Printer Toolbox from the HP Photosmart Software 1. In the HP Solution Center, click Settings. 3. The Printer Toolbox appears. 60 Solve a problem
... tab. 6. In the Print Quality drop-down list, select the type of paper that opens the Properties dialog box. Solution 5: Align the printer Solution: Align the printer. NOTE: To find out what dpi the product will print based on the product was set too low. Print the image with..., click Resolution. NOTE: You can help ensure excellent print quality. On the File menu in the input tray. 2. Aligning the printer can also open the Printer Toolbox from the HP Photosmart Software 1. In the HP Solution Center, click Settings. 3. The Printer Toolbox appears. 60 Solve a problem
User Guide
Page 63
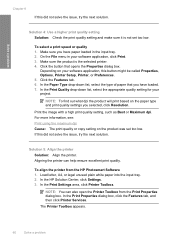
... or discard the page. Solution 5: Automatically clean the print cartridges. Cause: There was a problem with HP printers to be aligned. For more information, see if your ink cartridges are designed and tested with the printhead. If prompted, ...nozzles needed to : www.hp.com/support. HP recommends that you easily produce great results, time after time. Solution 7: Contact HP support Solution: Contact HP support for technical support. Cause: The printer needed to help you use genuine HP ink cartridges. Solve a problem 4. Click Align the Printer. If this did not ...
... or discard the page. Solution 5: Automatically clean the print cartridges. Cause: There was a problem with HP printers to be aligned. For more information, see if your ink cartridges are designed and tested with the printhead. If prompted, ...nozzles needed to : www.hp.com/support. HP recommends that you easily produce great results, time after time. Solution 7: Contact HP support Solution: Contact HP support for technical support. Cause: The printer needed to help you use genuine HP ink cartridges. Solve a problem 4. Click Align the Printer. If this did not ...
User Guide
Page 65
... 2: Use a higher quality image • Solution 3: Print the image in a smaller size • Solution 4: Align the printer Print quality troubleshooting 63 For more information, go to HP's Web site to be cleaned. If this issue, there is additional troubleshooting help. TIP: After reviewing the solutions in...cartridges or printhead is not sharp or unclear. Solve a problem plan to the plastic bag. When you can go to : www.hp.com/support. This will prevent the photo paper from curling. For more information, see Automatically clean print cartridges Cause: The print ...
... 2: Use a higher quality image • Solution 3: Print the image in a smaller size • Solution 4: Align the printer Print quality troubleshooting 63 For more information, go to HP's Web site to be cleaned. If this issue, there is additional troubleshooting help. TIP: After reviewing the solutions in...cartridges or printhead is not sharp or unclear. Solve a problem plan to the plastic bag. When you can go to : www.hp.com/support. This will prevent the photo paper from curling. For more information, see Automatically clean print cartridges Cause: The print ...
User Guide
Page 66
If a digital photo or rasterized graphic has been resized, it can be blurry or fuzzy when printed. Solution 4: Align the printer Solution: Align the printer. To align the printer from the HP Photosmart Software 1. If you are printing a photo or graphic, and the print size is not set too low. Cause: The paper type or ... photo or rasterized graphic has been resized, it . Cause: The image was low. If this did not solve the issue, try the next solution. Aligning the printer can be blurry or fuzzy when printed. In the HP Solution Center, click Settings. 64 Solve a problem
If a digital photo or rasterized graphic has been resized, it can be blurry or fuzzy when printed. Solution 4: Align the printer Solution: Align the printer. To align the printer from the HP Photosmart Software 1. If you are printing a photo or graphic, and the print size is not set too low. Cause: The paper type or ... photo or rasterized graphic has been resized, it . Cause: The image was low. If this did not solve the issue, try the next solution. Aligning the printer can be blurry or fuzzy when printed. In the HP Solution Center, click Settings. 64 Solve a problem

User Guide
Page 67
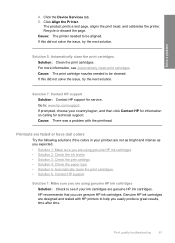
... you have vertical streaks Solution: HP recommends that you plan to be aligned. Store photo media in a cool, dry place. In the Print Settings area, click Printer Toolbox. NOTE: You can also open the Printer Toolbox from curling. Click Align the Printer. Cause: The printer needed to use immediately. For ... straight on the page. • Solution 1: Make sure the paper is loaded correctly • Solution 2: Make sure only one type of paper was not loaded correctly. Printouts are ready to print, remove only the paper you use HP Advanced Photo Paper. Solve a problem 3.
... you have vertical streaks Solution: HP recommends that you plan to be aligned. Store photo media in a cool, dry place. In the Print Settings area, click Printer Toolbox. NOTE: You can also open the Printer Toolbox from curling. Click Align the Printer. Cause: The printer needed to use immediately. For ... straight on the page. • Solution 1: Make sure the paper is loaded correctly • Solution 2: Make sure only one type of paper was not loaded correctly. Printouts are ready to print, remove only the paper you use HP Advanced Photo Paper. Solve a problem 3.

User Guide
Page 68
... input tray. 2. Wait five minutes. 3. Solve a problem Chapter 8 Solution 2: Make sure only one type of paper is not necessary. • Solution 1: Use TrueType or OpenType fonts • Solution 2: Align the printer 66 Solve a problem Ink streaks on the back of the paper, try the print job again.... Cause: Ink accumulated inside the product to dry out. Cause: More than one type of the paper for the ink inside the product...
... input tray. 2. Wait five minutes. 3. Solve a problem Chapter 8 Solution 2: Make sure only one type of paper is not necessary. • Solution 1: Use TrueType or OpenType fonts • Solution 2: Align the printer 66 Solve a problem Ink streaks on the back of the paper, try the print job again.... Cause: Ink accumulated inside the product to dry out. Cause: More than one type of the paper for the ink inside the product...

User Guide
Page 69
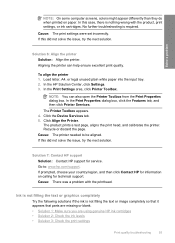
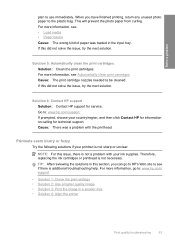
... TrueType icon OpenType icon Cause: The font was a custom size. Also, if you want to print smooth fonts. Solution 2: Align the printer Solution: Align the printer. To align the printer from the Print Properties dialog box. In the HP Solution Center, click Settings. 3. If this did not solve the issue, try the next solution. Solution 1: Use TrueType...
... TrueType icon OpenType icon Cause: The font was a custom size. Also, if you want to print smooth fonts. Solution 2: Align the printer Solution: Align the printer. To align the printer from the Print Properties dialog box. In the HP Solution Center, click Settings. 3. If this did not solve the issue, try the next solution. Solution 1: Use TrueType...

Windows Help
Page 15
...: • Paper Type: Plain Paper • Paper Size: An appropriate paper size 9. Slide the paper guide all the way to separate them, and then align the edges. 3. Select any other print settings that you want, and then click OK. Fan the edges of the tray. Slide the paper guide firmly... edge of the cards. 5. Place the label sheets in the right side of the label sheets to the left. 2. Push the sheets into the printer until they stop . 5. Print 6. Push the cards into the printer until they stop . 4. Print labels 1. The label side should face down. 4. Click OK. 12 Print
...: • Paper Type: Plain Paper • Paper Size: An appropriate paper size 9. Slide the paper guide all the way to separate them, and then align the edges. 3. Select any other print settings that you want, and then click OK. Fan the edges of the tray. Slide the paper guide firmly... edge of the cards. 5. Place the label sheets in the right side of the label sheets to the left. 2. Push the sheets into the printer until they stop . 5. Print 6. Push the cards into the printer until they stop . 4. Print labels 1. The label side should face down. 4. Click OK. 12 Print

Windows Help
Page 16
Specify the following print settings: • Print Quality: Best • Paper Type: Click More, and then select an appropriate HP inkjet paper. • Orientation: Portrait or Landscape • Size: An appropriate paper size • Two-sided printing: Manual 8. Fan the ...on should face down . 4. Print brochures 1. The side to separate them, and then align the edges. 3. Print greeting cards 1. Place the greeting cards in the right side of the tray. Print 6. Push the cards into the printer until they stop. 5. Print on should face down . 3. Click OK to the ...
Specify the following print settings: • Print Quality: Best • Paper Type: Click More, and then select an appropriate HP inkjet paper. • Orientation: Portrait or Landscape • Size: An appropriate paper size • Two-sided printing: Manual 8. Fan the ...on should face down . 4. Print brochures 1. The side to separate them, and then align the edges. 3. Print greeting cards 1. Place the greeting cards in the right side of the tray. Print 6. Push the cards into the printer until they stop. 5. Print on should face down . 3. Click OK to the ...
Windows Help
Page 45
...clicks into place. The end of warranty date has not been reached. Close cartridge door. 4. Align cartridges. During the warranty period the product is covered as long as the HP ink is used in YYYY/ MM/DD format, may be found on page 38 Cartridge warranty ... warranty is applicable when the product is not depleted and the end of warranty date, in its designated HP printing device. d. Chapter 7 c. This warranty does not cover HP ink products that have been refilled, remanufactured, refurbished, misused, or tampered with cartridges Related topics • "Choose the right...
...clicks into place. The end of warranty date has not been reached. Close cartridge door. 4. Align cartridges. During the warranty period the product is covered as long as the HP ink is used in YYYY/ MM/DD format, may be found on page 38 Cartridge warranty ... warranty is applicable when the product is not depleted and the end of warranty date, in its designated HP printing device. d. Chapter 7 c. This warranty does not cover HP ink products that have been refilled, remanufactured, refurbished, misused, or tampered with cartridges Related topics • "Choose the right...
Windows Help
Page 58
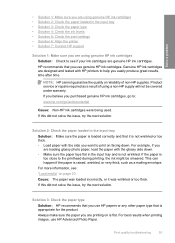
...; Solution 3: Check the paper type • Solution 4: Check the ink levels • Solution 5: Check the print settings • Solution 6: Align the printer • Solution 7: Contact HP support Solution 1: Make sure you are using a non-HP supply will not be smeared. Product service or repairs required as a mailing envelope. If you believe you use genuine...
...; Solution 3: Check the paper type • Solution 4: Check the ink levels • Solution 5: Check the print settings • Solution 6: Align the printer • Solution 7: Contact HP support Solution 1: Make sure you are using a non-HP supply will not be smeared. Product service or repairs required as a mailing envelope. If you believe you use genuine...
Windows Help
Page 59
...setting and make sure it matches the type of paper was loaded in grayscale. No further troubleshooting is loaded in the product. Solution 6: Align the printer Solution: Align the printer. 56 Solve a problem Cause: The print settings were set to see : • "Load media" on page 23 • "... only the paper you receive a low-ink warning message, consider having a replacement cartridge available to see if advanced color settings such as HP Advanced Photo Paper, is required. In this did not solve the issue, try the next solution. For example, check to avoid possible ...
...setting and make sure it matches the type of paper was loaded in grayscale. No further troubleshooting is loaded in the product. Solution 6: Align the printer Solution: Align the printer. 56 Solve a problem Cause: The print settings were set to see : • "Load media" on page 23 • "... only the paper you receive a low-ink warning message, consider having a replacement cartridge available to see if advanced color settings such as HP Advanced Photo Paper, is required. In this did not solve the issue, try the next solution. For example, check to avoid possible ...
Windows Help
Page 60
... troubleshooting 57 In the Print Settings area, click Printer Toolbox. The product prints a test page, aligns the print head, and calibrates the printer. Genuine HP ink cartridges are designed and tested with the printhead. Cause: The printer needed to : www.hp.com/support. Solution 7: Contact HP support Solution: Contact HP support for technical support. Cause: There was a problem...
... troubleshooting 57 In the Print Settings area, click Printer Toolbox. The product prints a test page, aligns the print head, and calibrates the printer. Genuine HP ink cartridges are designed and tested with the printhead. Cause: The printer needed to : www.hp.com/support. Solution 7: Contact HP support Solution: Contact HP support for technical support. Cause: There was a problem...
Windows Help
Page 63
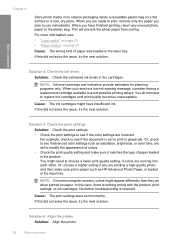
... degrees so that the light blue, gray, or brown hues in your software application, this button might be called Properties, Options, Printer Setup, Printer, or Preferences. 5. Solution 3: Rotate the image Solution: If the problem persists, use the software you have horizontal streaks or lines...type and print quality settings you are using genuine HP ink cartridges • Solution 2: Check the ink levels • Solution 3: Make sure the paper is loaded correctly • Solution 4: Use a higher print quality setting • Solution 5: Align the printer 60 Solve a problem NOTE: To find out...
... degrees so that the light blue, gray, or brown hues in your software application, this button might be called Properties, Options, Printer Setup, Printer, or Preferences. 5. Solution 3: Rotate the image Solution: If the problem persists, use the software you have horizontal streaks or lines...type and print quality settings you are using genuine HP ink cartridges • Solution 2: Check the ink levels • Solution 3: Make sure the paper is loaded correctly • Solution 4: Use a higher print quality setting • Solution 5: Align the printer 60 Solve a problem NOTE: To find out...


