Reference Guide
Page 3
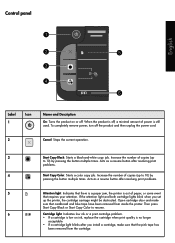
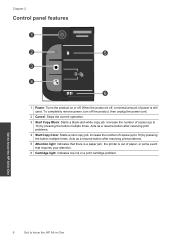
... light and both cartridge lights blink when you install a cartridge, make sure that the pink tape has been removed from inside the printer. Acts as a resume button after resolving print problems. 4 Start Copy Color: Starts a color copy job. English Label Icon 1 Name and Description On: Turns the product on ink, replace the cartridge...
... light and both cartridge lights blink when you install a cartridge, make sure that the pink tape has been removed from inside the printer. Acts as a resume button after resolving print problems. 4 Start Copy Color: Starts a color copy job. English Label Icon 1 Name and Description On: Turns the product on ink, replace the cartridge...
Reference Guide
Page 4
...which is depleted or the "end of warranty" date printed on the cartridge has been reached, whichever occurs first. B. D. Under such local law, certain disclaimers and limitations of this Warranty Statement may have other problems, including those defects that arise as a result of: ...HP product Software Media Printer Print or Ink cartridges Duration of limited warranty 90 days Technical support by phone: 1 year worldwide Parts and labor: 90 days in US and Canada (outside the US and Canada 1 year or as some states in the United States, as well as required by local law) Purchase a one...
...which is depleted or the "end of warranty" date printed on the cartridge has been reached, whichever occurs first. B. D. Under such local law, certain disclaimers and limitations of this Warranty Statement may have other problems, including those defects that arise as a result of: ...HP product Software Media Printer Print or Ink cartridges Duration of limited warranty 90 days Technical support by phone: 1 year worldwide Parts and labor: 90 days in US and Canada (outside the US and Canada 1 year or as some states in the United States, as well as required by local law) Purchase a one...
User Guide
Page 3
Contents Contents 1 How Do I?...3 2 Get to know the HP All-in-One Printer parts...5 Control panel features...6 Status Lights...7 3 Print Print documents...9 Print photos...10 Print envelopes...11 Tips for print success...11 5 Copy and scan Copy documents or photos...23 Scan to a computer...... the cartridges...29 Use single-cartridge mode...31 Cartridge warranty information 31 7 Solve a problem Improve print quality...33 Clear a paper jam...35 Unable to print...37 HP support...40 8 Technical information Notice...43 Specifications...43 Environmental product stewardship program 45 Regulatory ...
Contents Contents 1 How Do I?...3 2 Get to know the HP All-in-One Printer parts...5 Control panel features...6 Status Lights...7 3 Print Print documents...9 Print photos...10 Print envelopes...11 Tips for print success...11 5 Copy and scan Copy documents or photos...23 Scan to a computer...... the cartridges...29 Use single-cartridge mode...31 Cartridge warranty information 31 7 Solve a problem Improve print quality...33 Clear a paper jam...35 Unable to print...37 HP support...40 8 Technical information Notice...43 Specifications...43 Environmental product stewardship program 45 Regulatory ...
User Guide
Page 8
Get to know the HP All-in -One To completely remove power, turn off . Acts as a resume button after resolving print problems. 5 Attention light: Indicates that there is a paper jam, the printer is still used. Chapter 2 Control panel features ! 1 Power: Turns the product on or off the product, then unplug the power cord. 2 Cancel: Stops the...
Get to know the HP All-in -One To completely remove power, turn off . Acts as a resume button after resolving print problems. 5 Attention light: Indicates that there is a paper jam, the printer is still used. Chapter 2 Control panel features ! 1 Power: Turns the product on or off the product, then unplug the power cord. 2 Cancel: Stops the...
User Guide
Page 35
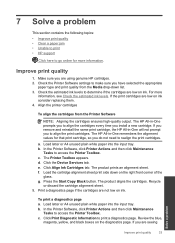
... more information. The HP All-in -One will not prompt you to align the print cartridges. Load letter or A4 unused plain white paper into the input tray. f. Print a diagnostics page if the cartridges are seeing Solve a problem Improve print quality 33 Click Print Diagnostic Information to access the Printer Toolbox. In the Printer Software, click Printer Actions and then...
... more information. The HP All-in -One will not prompt you to align the print cartridges. Load letter or A4 unused plain white paper into the input tray. f. Print a diagnostics page if the cartridges are seeing Solve a problem Improve print quality 33 Click Print Diagnostic Information to access the Printer Toolbox. In the Printer Software, click Printer Actions and then...
User Guide
Page 36
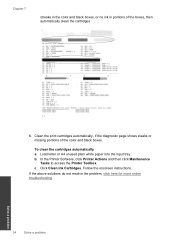
...Printer Toolbox. Chapter 7 streaks in the color and black boxes, or no ink in portions of the color and black boxes. To clean the cartridges automatically a. c. Follow the onscreen instructions. If the above solutions do not resolve the problem, click here for more online troubleshooting. 34 Solve a problem Solve a problem... Load letter or A4 unused plain white paper into the input tray. Clean the print cartridges automatically, if the diagnostic page ...
...Printer Toolbox. Chapter 7 streaks in the color and black boxes, or no ink in portions of the color and black boxes. To clean the cartridges automatically a. c. Follow the onscreen instructions. If the above solutions do not resolve the problem, click here for more online troubleshooting. 34 Solve a problem Solve a problem... Load letter or A4 unused plain white paper into the input tray. Clean the print cartridges automatically, if the diagnostic page ...
User Guide
Page 37
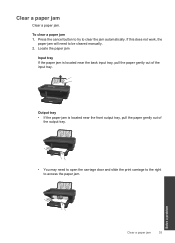
... paper gently out of the input tray. If this does not work, the paper jam will need to open the carriage door and slide the print carriage to the right to clear the jam automatically. Press the cancel button to try to access the paper jam. Locate the paper jam Input... is located near the back input tray, pull the paper gently out of the output tray. • You may need to be cleared manually. 2. Solve a problem Clear a paper jam 35 To clear a paper jam 1.
... paper gently out of the input tray. If this does not work, the paper jam will need to open the carriage door and slide the print carriage to the right to clear the jam automatically. Press the cancel button to try to access the paper jam. Locate the paper jam Input... is located near the back input tray, pull the paper gently out of the output tray. • You may need to be cleared manually. 2. Solve a problem Clear a paper jam 35 To clear a paper jam 1.

User Guide
Page 38
... above solutions do not resolve the problem, click here for more online troubleshooting. Chapter 7 Inside of printer • If the paper jam is located inside the printer, open the cleanout door located on both latches snap into place. 3. Gently push the door towards the printer until both sides of the cleanout door... Do not force paper too far forward in the input tray; Prevent paper jams • Do not overfill the input tray. • Remove printed papers from the output tray frequently. • Ensure that paper loaded in the input tray lays flat and the edges are not bent or torn...
... above solutions do not resolve the problem, click here for more online troubleshooting. Chapter 7 Inside of printer • If the paper jam is located inside the printer, open the cleanout door located on both latches snap into place. 3. Gently push the door towards the printer until both sides of the cleanout door... Do not force paper too far forward in the input tray; Prevent paper jams • Do not overfill the input tray. • Remove printed papers from the output tray frequently. • Ensure that paper loaded in the input tray lays flat and the edges are not bent or torn...
User Guide
Page 39
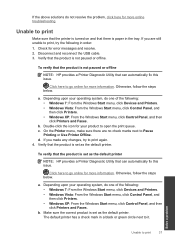
... Control Panel, and then click Printers and Faxes. a. Depending upon your product to print, try to go online for more information. Solve a problem Unable to go online for more online troubleshooting. Double-click the icon for your operating system, do one of the following : •... or green circle next to Pause Printing or Use Printer Offline. Click here to print again. 4. Make sure the correct product is set as the default printer. To verify that the product is set as the default printer NOTE: HP provides a Printer Diagnostic Utility that there is not ...
... Control Panel, and then click Printers and Faxes. a. Depending upon your product to print, try to go online for more information. Solve a problem Unable to go online for more online troubleshooting. Double-click the icon for your operating system, do one of the following : •... or green circle next to Pause Printing or Use Printer Offline. Click here to print again. 4. Make sure the correct product is set as the default printer. To verify that the product is set as the default printer NOTE: HP provides a Printer Diagnostic Utility that there is not ...
User Guide
Page 40
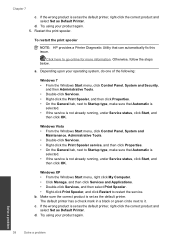
... as the default printer. Solve a problem 38 Solve a problem d. a. Windows XP • From the Windows Start menu, right click My Computer. • Click Manage, and then click Services and Applications. • Double-click Services, and then select Print Spooler. • Right-click Print Spooler, and click...sure that Automatic is selected. • If the service is set as the default printer, right-click the correct product and select Set as Default Printer. Depending upon your operating system, do one of the following: Windows 7 • From the Windows Start menu, click Control ...
... as the default printer. Solve a problem 38 Solve a problem d. a. Windows XP • From the Windows Start menu, right click My Computer. • Click Manage, and then click Services and Applications. • Double-click Services, and then select Print Spooler. • Right-click Print Spooler, and click...sure that Automatic is selected. • If the service is set as the default printer, right-click the correct product and select Set as Default Printer. Depending upon your operating system, do one of the following: Windows 7 • From the Windows Start menu, click Control ...
User Guide
Page 41
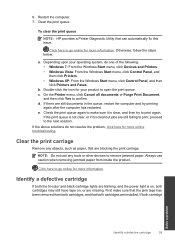
...not resolve the problem, click here for your operating system, do one of the following: • Windows 7: From the Windows Start menu, click Devices and Printers. • Windows Vista: From the Windows Start menu, click Control Panel, and then click Printers. • ... next solution. a. Identify a defective cartridge If both cartridge Solve a problem Identify a defective cartridge 39 Clear the print queue To clear the print queue NOTE: HP provides a Printer Diagnostic Utility that are blocking the print carriage. Double-click the icon for more information. Check the...
...not resolve the problem, click here for your operating system, do one of the following: • Windows 7: From the Windows Start menu, click Devices and Printers. • Windows Vista: From the Windows Start menu, click Control Panel, and then click Printers. • ... next solution. a. Identify a defective cartridge If both cartridge Solve a problem Identify a defective cartridge 39 Clear the print queue To clear the print queue NOTE: HP provides a Printer Diagnostic Utility that are blocking the print carriage. Double-click the icon for more information. Check the...
User Guide
Page 42
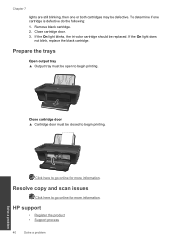
... is defective do the following: 1. Remove black cartridge. 2. Click here to begin printing. HP support • Register the product • Support process 40 Solve a problem Solve a problem To determine if one or both cartridges may be closed to go online for more information. If the On light does not blink, replace the black cartridge. Prepare... open to go online for more information. Close cartridge door ▲ Cartridge door must be replaced. Resolve copy and scan issues Click here to begin printing. Close cartridge door. 3.
... is defective do the following: 1. Remove black cartridge. 2. Click here to begin printing. HP support • Register the product • Support process 40 Solve a problem Solve a problem To determine if one or both cartridges may be closed to go online for more information. If the On light does not blink, replace the black cartridge. Prepare... open to go online for more information. Close cartridge door ▲ Cartridge door must be replaced. Resolve copy and scan issues Click here to begin printing. Close cartridge door. 3.


