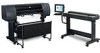
HP Designjet 4020 and 4520 Printer Series - User's Guide: English
Page 207
..., but do not need to follow these instructions to make the printer use refilled or non-HP ink cartridges, you wish to be empty. 1. The printheads are related to each ink cartridge, giving excellent results even if the ink cartridges are automatically tested at least two seconds. 6. To maintain ... report it believes to all printheads of the same color used in the printer subsequently, unless and until the whole ink system (including ink tubes) is replaced. The front panel will tell you replace a printhead, always replace the printhead cleaner at the same time. When you ...
HP Designjet 4520 Printer series - Assembly Instructions: English
Page 10
69 70 71 72 Remove the two foam end packs and the plastic covering the printer. Then remove the two window inserts and the ink tube packing material. Open the printer window. Open the printhead cleaner door (1) and remove the carriage packing material (2). Position the right leg cover on the front of ... rear wheels on the front of the right leg (1), then clip the rear edge (2) into place. Remove the anti-slip material from the printer window and the front panel screen. Position the left leg cover on the stand assembly. 73 74 75 76 Remove the packing tapes 1 to...