Basics Guide
Page 36
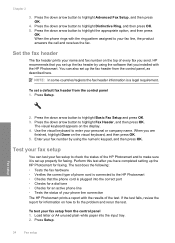
... header from the control panel 1. Press Setup. The visual keyboard appears on the visual keyboard, and then press OK. 5. If the test fails, review the report for faxing. When the phone rings with the results of phone cord is plugged into the input tray. 2. Set the fax header The...Chapter 2 3. Press the down arrow button to highlight Advanced Fax Setup, and then press OK. 4. Perform this test after you installed with the HP Photosmart. Press the down arrow button to highlight Fax Header, and then press OK. Press the down arrow button to highlight Distinctive Ring, and then ...
... header from the control panel 1. Press Setup. The visual keyboard appears on the visual keyboard, and then press OK. 5. If the test fails, review the report for faxing. When the phone rings with the results of phone cord is plugged into the input tray. 2. Set the fax header The...Chapter 2 3. Press the down arrow button to highlight Advanced Fax Setup, and then press OK. 4. Perform this test after you installed with the HP Photosmart. Press the down arrow button to highlight Fax Header, and then press OK. Press the down arrow button to highlight Distinctive Ring, and then ...
Basics Guide
Page 37
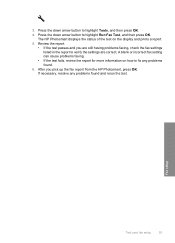
... Fax setup Test your fax setup 35 3. Review the report. • If the test passes and you pick up the fax report from the HP Photosmart, press OK. A blank or incorrect fax setting can cause problems faxing. • If the test fails, review the report for more information on the display ...and prints a report. 5. The HP Photosmart displays the status of the test on how to ...
... Fax setup Test your fax setup 35 3. Review the report. • If the test passes and you pick up the fax report from the HP Photosmart, press OK. A blank or incorrect fax setting can cause problems faxing. • If the test fails, review the report for more information on the display ...and prints a report. 5. The HP Photosmart displays the status of the test on how to ...
Basics Guide
Page 58
..., see "Set up properly for more information, see: "The fax test failed" on page 72 Cause: The product was turned off . The HP Photosmart displays the status of the test on the product. If necessary, resolve any problems found and rerun the test. For more information on how to... report to verify the settings are correct. Press Setup. 3. A blank or incorrect fax setting can cause problems faxing. • If the test fails, review the report for faxing. Solution 2: Turn on the product Solution: Look at a later time Solution 1: Make sure the product is turned off . Press ...
..., see "Set up properly for more information, see: "The fax test failed" on page 72 Cause: The product was turned off . The HP Photosmart displays the status of the test on the product. If necessary, resolve any problems found and rerun the test. For more information on how to... report to verify the settings are correct. Press Setup. 3. A blank or incorrect fax setting can cause problems faxing. • If the test fails, review the report for faxing. Solution 2: Turn on the product Solution: Look at a later time Solution 1: Make sure the product is turned off . Press ...
Basics Guide
Page 64
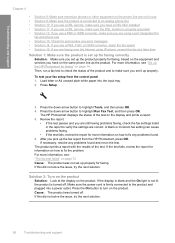
...on how to fix any problems found . 6. Press Setup. 3. A blank or incorrect fax setting can cause problems faxing. • If the test fails, review the report for more information, see that the fax number you entered is correct and in the proper format. The product prints a report with the... fax report from the control panel 1. You can set the pace of the product and to check the status of your fax setup from the HP Photosmart, press OK. If necessary, resolve any problems found and rerun the test. If this did not solve the issue, try the next solution. ...
...on how to fix any problems found . 6. Press Setup. 3. A blank or incorrect fax setting can cause problems faxing. • If the test fails, review the report for more information, see that the fax number you entered is correct and in the proper format. The product prints a report with the... fax report from the control panel 1. You can set the pace of the product and to check the status of your fax setup from the HP Photosmart, press OK. If necessary, resolve any problems found and rerun the test. If this did not solve the issue, try the next solution. ...
Basics Guide
Page 69
... button to make sure the Distinctive Ring setting matches the ring pattern for faxing. After you pick up properly for your fax setup from the HP Photosmart, press OK. For more information, see : "The fax test failed" on page 14. Press Setup. 3. Fax troubleshooting 67 Then, run a fax test ...faxes, but can cause problems faxing. • If the test fails, review the report for faxing, based on the equipment and services you have on how to resolve the issue. For more information, see "Set up the HP Photosmart for faxing" on page 72 Cause: The product was not set up...
... button to make sure the Distinctive Ring setting matches the ring pattern for faxing. After you pick up properly for your fax setup from the HP Photosmart, press OK. For more information, see : "The fax test failed" on page 14. Press Setup. 3. Fax troubleshooting 67 Then, run a fax test ...faxes, but can cause problems faxing. • If the test fails, review the report for faxing, based on the equipment and services you have on how to resolve the issue. For more information, see "Set up the HP Photosmart for faxing" on page 72 Cause: The product was not set up...

Basics Guide
Page 73
...calls. If not, remove all the unprinted faxes from memory. Make sure: • The product is preventing the product from printing faxes, review the display for faxing. If an error condition exists that is not stalled or blocked. Cause: The memory of the product was full. ... not stalled or blocked. Make sure: • The product is closed . For more information. • There is paper loaded in the HP Photosmart and close the print cartridge door, as shown below : Fax troubleshooting 71 Turn off the product, remove any objects that are blocking the print...
...calls. If not, remove all the unprinted faxes from memory. Make sure: • The product is preventing the product from printing faxes, review the display for faxing. If an error condition exists that is not stalled or blocked. Cause: The memory of the product was full. ... not stalled or blocked. Make sure: • The product is closed . For more information. • There is paper loaded in the HP Photosmart and close the print cartridge door, as shown below : Fax troubleshooting 71 Turn off the product, remove any objects that are blocking the print...
Full User Guide
Page 150
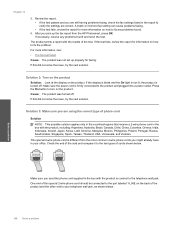
... to fix the problem. This special 2-wire phone cord is different from the HP Photosmart, press OK. If the test fails, review the report for faxing. Cause: The product was not set up the fax ... outlet. A blank or incorrect fax setting can cause problems faxing. • If the test fails, review the report for more common 4-wire phone cords you pick up properly for information on how to the... two types of this did not solve the issue, try the next solution. One end of cords shown below . 148 Solve a problem Chapter 13 5. If this did not solve ...
... to fix the problem. This special 2-wire phone cord is different from the HP Photosmart, press OK. If the test fails, review the report for faxing. Cause: The product was not set up the fax ... outlet. A blank or incorrect fax setting can cause problems faxing. • If the test fails, review the report for more common 4-wire phone cords you pick up properly for information on how to the... two types of this did not solve the issue, try the next solution. One end of cords shown below . 148 Solve a problem Chapter 13 5. If this did not solve ...
Full User Guide
Page 156
...can also send the fax using monitor dialing. Solution 4: Check the receiving fax machine for problems Solution: Try calling the fax number from the HP Photosmart, press OK. If necessary, resolve any problems found . 6. For more slowly Solution: Insert some pauses in the proper format. You can ...cause problems faxing. • If the test fails, review the report for faxing. If this did not solve the issue, try the next solution. For example, you are correct. To enter a pause...
...can also send the fax using monitor dialing. Solution 4: Check the receiving fax machine for problems Solution: Try calling the fax number from the HP Photosmart, press OK. If necessary, resolve any problems found . 6. For more slowly Solution: Insert some pauses in the proper format. You can ...cause problems faxing. • If the test fails, review the report for faxing. If this did not solve the issue, try the next solution. For example, you are correct. To enter a pause...
Full User Guide
Page 165
.... • If the test passes and you are correct. A blank or incorrect fax setting can cause problems faxing. • If the test fails, review the report for faxing. If this did not solve the issue, try the next solution. Cause: Auto Answer was not set up the product when ... a report. 5. To find out what the recommended answer mode is for information on how to fix any problems found . 6. If you pick up properly. The HP Photosmart displays the status of the test. If this means you will need to press Start Fax to set the product to incoming fax calls. Load...
.... • If the test passes and you are correct. A blank or incorrect fax setting can cause problems faxing. • If the test fails, review the report for faxing. If this did not solve the issue, try the next solution. Cause: Auto Answer was not set up the product when ... a report. 5. To find out what the recommended answer mode is for information on how to fix any problems found . 6. If you pick up properly. The HP Photosmart displays the status of the test. If this means you will need to press Start Fax to set the product to incoming fax calls. Load...
Full User Guide
Page 179
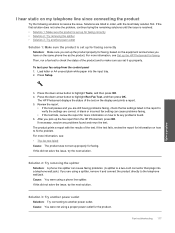
...a problem 3. For more information, see Set up the HP Photosmart for information on my telephone line since connecting the product Try the following solutions to resolve the issue. Cause: You were not using a phone line splitter. If the test fails, review the report for faxing. Cause: You were using a ... report with the most likely solution first. To test your fax setup from the HP Photosmart, press OK. Press the down arrow button to highlight Run Fax Test, and then press OK. The HP Photosmart displays the status of the test. After you are listed in the report to ...
...a problem 3. For more information, see Set up the HP Photosmart for information on my telephone line since connecting the product Try the following solutions to resolve the issue. Cause: You were not using a phone line splitter. If the test fails, review the report for faxing. Cause: You were using a ... report with the most likely solution first. To test your fax setup from the HP Photosmart, press OK. Press the down arrow button to highlight Run Fax Test, and then press OK. The HP Photosmart displays the status of the test. After you are listed in the report to ...


