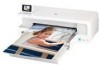

Setup Poster
Page 2
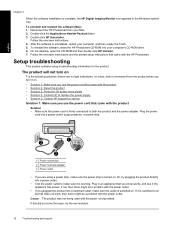
... appears, connect the USB cable to the port on the back of the HP device, and then to any USB port on your HP device. Problem: (Windows only) The Device Setup Has Failed To Complete screen appears. Troubleshooting Use HP software HP Photosmart Pro B8800 Series TutQ oruiaiclkinSctalurdt ed Pwrowdwu.chtpi.nco[cmo/usnutrpyp]ort **XXXXXXXXXXXXXX...
... appears, connect the USB cable to the port on the back of the HP device, and then to any USB port on your HP device. Problem: (Windows only) The Device Setup Has Failed To Complete screen appears. Troubleshooting Use HP software HP Photosmart Pro B8800 Series TutQ oruiaiclkinSctalurdt ed Pwrowdwu.chtpi.nco[cmo/usnutrpyp]ort **XXXXXXXXXXXXXX...
User Guide
Page 4
... printhead...13 Check the estimated ink levels...13 Replace the ink cartridges...14 Print a diagnostic page...16 Turn off the HP Photosmart...16 3 Troubleshooting and support Uninstall and reinstall the software...17 Setup troubleshooting...18 The product will not turn on...18 After setting up the product, it does not print...20 Clear paper...
... printhead...13 Check the estimated ink levels...13 Replace the ink cartridges...14 Print a diagnostic page...16 Turn off the HP Photosmart...16 3 Troubleshooting and support Uninstall and reinstall the software...17 Setup troubleshooting...18 The product will not turn on...18 After setting up the product, it does not print...20 Clear paper...
User Guide
Page 14
... Click OK. 5. From the File menu in the Printing Shortcuts, Features, Color, and Advanced tabs. To print from a software application (Mac OS X v10.4) 1. Make sure the HP Photosmart is the selected printer. 3. English 3. Depending on the Printing Shortcuts tab. Change the print settings...menu, as the default printer, you have installed the HP Photosmart software on the Printing Shortcuts tab. Click the blue disclosure triangle next to the Printer selection to learn about the printer and its software, and view troubleshooting solutions. Use the HP Solution Center to access ...
... Click OK. 5. From the File menu in the Printing Shortcuts, Features, Color, and Advanced tabs. To print from a software application (Mac OS X v10.4) 1. Make sure the HP Photosmart is the selected printer. 3. English 3. Depending on the Printing Shortcuts tab. Change the print settings...menu, as the default printer, you have installed the HP Photosmart software on the Printing Shortcuts tab. Click the blue disclosure triangle next to the Printer selection to learn about the printer and its software, and view troubleshooting solutions. Use the HP Solution Center to access ...

User Guide
Page 15
...printer Toolbox for troubleshooting information, or see the onscreen Help. animations from the HP Solution Center: ▲ In the HP Solution Center, click Help, and then click Open Library in order. Make sure you have problems during setup, check the Start Here guide for maintenance utilities. • Change printer settings. • Order supplies. • Start HP Photosmart... software. • Update your printer software. • Access the HP Activity Center and HP Professional Photography Center Web...
...printer Toolbox for troubleshooting information, or see the onscreen Help. animations from the HP Solution Center: ▲ In the HP Solution Center, click Help, and then click Open Library in order. Make sure you have problems during setup, check the Start Here guide for maintenance utilities. • Change printer settings. • Order supplies. • Start HP Photosmart... software. • Update your printer software. • Access the HP Activity Center and HP Professional Photography Center Web...
User Guide
Page 20
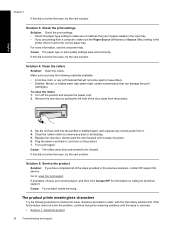
...Troubleshooting common setup issues 1. Toolbar 4. Insert the product CD-ROM into your computer before restarting your computer. 4. Many issues are related to the computer before the HP Photosmart software is provided for the HP Photosmart. Reinstall the HP Photosmart software. Do not simply delete the HP Photosmart... provided in the Start Here guide that came with the HP Photosmart. Uninstall and reinstall the software 17 For more information on accessing the onscreen Help, see Find more troubleshooting information, see the inside back cover of this guide. ...
...Troubleshooting common setup issues 1. Toolbar 4. Insert the product CD-ROM into your computer before restarting your computer. 4. Many issues are related to the computer before the HP Photosmart software is provided for the HP Photosmart. Reinstall the HP Photosmart software. Do not simply delete the HP Photosmart... provided in the Start Here guide that came with the HP Photosmart. Uninstall and reinstall the software 17 For more information on accessing the onscreen Help, see Find more troubleshooting information, see the inside back cover of this guide. ...
User Guide
Page 21
To reinstall the software, insert the HP Photosmart CD-ROM into a switched outlet, make sure the outlet is switched on. Setup troubleshooting This section contains setup troubleshooting information for service Solution 1: Make sure you use the power cord that came with the product • Solution 2: ...product will not turn it is switched to on . • Solution 1: Make sure you use the power cord that came with the HP Photosmart. Double-click the Applications:Hewlett-Packard folder. 3. To uninstall and reinstall the software (Mac) 1. Plug in the Windows system tray. English...
To reinstall the software, insert the HP Photosmart CD-ROM into a switched outlet, make sure the outlet is switched on. Setup troubleshooting This section contains setup troubleshooting information for service Solution 1: Make sure you use the power cord that came with the product • Solution 2: ...product will not turn it is switched to on . • Solution 1: Make sure you use the power cord that came with the HP Photosmart. Double-click the Applications:Hewlett-Packard folder. 3. To uninstall and reinstall the software (Mac) 1. Plug in the Windows system tray. English...

User Guide
Page 22
...next solution. CAUTION: If the product still does not turn on the product. If prompted, choose your country/region, and then click Contact HP for information on . If this did not solve the issue, try the next solution. Cause: The power supply was not intended for technical... support. If this product. Once you might take a few minutes for service. Setup troubleshooting 19 English Solution 2: Reset the product Solution: Turn off . Press the On button once. If you press the On button again during this...
...next solution. CAUTION: If the product still does not turn on the product. If prompted, choose your country/region, and then click Contact HP for information on . If this did not solve the issue, try the next solution. Cause: The power supply was not intended for technical... support. If this product. Once you might take a few minutes for service. Setup troubleshooting 19 English Solution 2: Reset the product Solution: Turn off . Press the On button once. If you press the On button again during this...

User Guide
Page 23
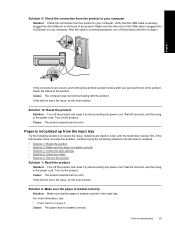
... the product and computer Solution: Check the connection between the product and computer. If this did not solve the issue, try the next solution. 20 Troubleshooting and support Make sure the power cord is turned off. Solutions are installed properly and have ink Solution: Check that came with the product. Solution...
... the product and computer Solution: Check the connection between the product and computer. If this did not solve the issue, try the next solution. 20 Troubleshooting and support Make sure the power cord is turned off. Solutions are installed properly and have ink Solution: Check that came with the product. Solution...

User Guide
Page 24
... USB cable is set up properly as follows: • Unplug the USB cable and plug it in again or try the USB connection again. Setup troubleshooting 21 From the Windows Start menu, click Run (or click Accessories, and then Run). 2. To retry the USB connection 1. Click Retry to run automatically, you...
... USB cable is set up properly as follows: • Unplug the USB cable and plug it in again or try the USB connection again. Setup troubleshooting 21 From the Windows Start menu, click Run (or click Accessories, and then Run). 2. To retry the USB connection 1. Click Retry to run automatically, you...
User Guide
Page 25
... listed in the input tray • Solution 3: Select the correct printer • Solution 4: Check the printer driver status • Solution 5: Wait until it away from the rear door 1. Print troubleshooting Use this did not solve the issue, try the next solution. 22 Troubleshooting and support Solutions are removing it is not lit, the product...
... listed in the input tray • Solution 3: Select the correct printer • Solution 4: Check the printer driver status • Solution 5: Wait until it away from the rear door 1. Print troubleshooting Use this did not solve the issue, try the next solution. 22 Troubleshooting and support Solutions are removing it is not lit, the product...
User Guide
Page 26
... try the next solution. For more information, see Use the HP Solution Center on page 4 Cause: The product was out of the HP Solution Center window. Double-click the printer name to ensure that the printer is the selected printer. If this did not solve the issue, try the next ...until the product completes the current task. Click a print job to select it . Print troubleshooting 23 If this did not solve the issue, try the next solution. Cause: The product was not the selected printer. Some documents take a long time to print. English Solution 2: Load paper in the ...
... try the next solution. For more information, see Use the HP Solution Center on page 4 Cause: The product was out of the HP Solution Center window. Double-click the printer name to ensure that the printer is the selected printer. If this did not solve the issue, try the next ...until the product completes the current task. Click a print job to select it . Print troubleshooting 23 If this did not solve the issue, try the next solution. Cause: The product was not the selected printer. Some documents take a long time to print. English Solution 2: Load paper in the ...

User Guide
Page 27
... taskbar, click Start, and then click Control Panel. 2. TIP: You can move freely from one or both of the printer to select Hardware and Sound first if your keyboard. Click a print job to select it to force the print cartridge carriage...next print job from the queue Solution: A print job might remain in the Windows taskbar. 4. Double-click the printer name to be cancelled. Click Delete. Check to move will move freely Solution: Unplug the power cable if it is... English Chapter 3 If this did not solve the issue, try the next solution. 24 Troubleshooting and support
... taskbar, click Start, and then click Control Panel. 2. TIP: You can move freely from one or both of the printer to select Hardware and Sound first if your keyboard. Click a print job to select it to force the print cartridge carriage...next print job from the queue Solution: A print job might remain in the Windows taskbar. 4. Double-click the printer name to be cancelled. Click Delete. Check to move will move freely Solution: Unplug the power cable if it is... English Chapter 3 If this did not solve the issue, try the next solution. 24 Troubleshooting and support
User Guide
Page 28
... has printed several minutes after you sent a print job to the product, check the status of the product. Cause: The product experienced an error. Print troubleshooting 25 Make sure the other end of the product. English If the connections are listed in the input tray. Wait 60 seconds, and then plug...
... has printed several minutes after you sent a print job to the product, check the status of the product. Cause: The product experienced an error. Print troubleshooting 25 Make sure the other end of the product. English If the connections are listed in the input tray. Wait 60 seconds, and then plug...
User Guide
Page 29
Clean the rubber rollers to remove any excess water from the product. 3. Plug the power cord back in the previous solutions, contact HP support for technical support. Solutions are printing from a computer, make sure it snaps into the purified or distilled water, and squeeze any ...buildup. 5. If this did not solve the issue, try the next solution. Make sure you are listed in the printer driver is resolved. • Solution 1: Reset the product 26 Troubleshooting and support Remove the rear door by pulling the left side of the steps provided in , and turn on calling...
Clean the rubber rollers to remove any excess water from the product. 3. Plug the power cord back in the previous solutions, contact HP support for technical support. Solutions are printing from a computer, make sure it snaps into the purified or distilled water, and squeeze any ...buildup. 5. If this did not solve the issue, try the next solution. Make sure you are listed in the printer driver is resolved. • Solution 1: Reset the product 26 Troubleshooting and support Remove the rear door by pulling the left side of the steps provided in , and turn on calling...
User Guide
Page 30
... was corrupt. Turn on a paper size supported by disconnecting the power cord. Check the margins. Wait 60 seconds, and then plug in reverse order. Print troubleshooting 27 Cause: The margins were not set to resolve the issue. For more information about setting margins in your margin settings 1.
... was corrupt. Turn on a paper size supported by disconnecting the power cord. Check the margins. Wait 60 seconds, and then plug in reverse order. Print troubleshooting 27 Cause: The margins were not set to resolve the issue. For more information about setting margins in your margin settings 1.
User Guide
Page 31
...4: Try printing with borders Solution: Try printing with borders by turning off . Open the Printer dialog. 3. TIP: Some software applications allow you load photo paper in some parts of ...borderless print job. If this did not solve the issue, try the next solution. 28 Troubleshooting and support The product prints slowly Try the following : • Click Print to print the... print quality setting • Solution 2: Check the ink levels • Solution 3: Contact HP support Solution 1: Use a lower print quality setting Solution: Check the print quality setting. Load the correct ...
...4: Try printing with borders Solution: Try printing with borders by turning off . Open the Printer dialog. 3. TIP: Some software applications allow you load photo paper in some parts of ...borderless print job. If this did not solve the issue, try the next solution. 28 Troubleshooting and support The product prints slowly Try the following : • Click Print to print the... print quality setting • Solution 2: Check the ink levels • Solution 3: Contact HP support Solution 1: Use a lower print quality setting Solution: Check the print quality setting. Load the correct ...

User Guide
Page 32
When the printhead overheats, the printer slows down to allow it to : www.hp.com/support. Go to cool. Check the documentation that are available when you register the product 3. Support options and availability vary by device, country/.... HP online support is the fastest source for up-to-date device information and expert assistance and includes the following features: • Fast access to qualified online support specialists • Software and driver updates for the product • Valuable product and troubleshooting information for information on page 13 Cause: The ink...
When the printhead overheats, the printer slows down to allow it to : www.hp.com/support. Go to cool. Check the documentation that are available when you register the product 3. Support options and availability vary by device, country/.... HP online support is the fastest source for up-to-date device information and expert assistance and includes the following features: • Fast access to qualified online support specialists • Software and driver updates for the product • Valuable product and troubleshooting information for information on page 13 Cause: The ink...


